General Information
To install this theme you must have a working version of WordPress. Please refer to WordPress documentation for further instructions. You can download the latest version of WordPress here
System Requirement
Localhost (PC)
If you’re working on localhost (your PC), we recommend you to use XAMPP as the best Apache for WordPress CMS.
Hosting / Server
- WordPress 3.8 or higher
- PHP 5.3.29 or higher
- MySQL 5.0 or higher
- Apache mod_rewrite module must be enabled
This theme is tested under Mac, Windows, and Linux. Compatible Browsers: IE9+, Firefox, Safari, Chrome, Opera
Theme Installation
Theme package installation only (without sample data like the demo)
Before installing the Free Theme Package, you must make sure that you have installed WordPress. You can download the latest version of WordPress here.
If you want to build theme without sample data, or using the theme for existing website, you can use the Theme Install package only (without sample data).
Install Free Template Package: Theme package use for a new website that you want to build content from zero without sample data like demo, or using for your website with existing data. At the Customer Area, please download the file Theme Install Package ([theme-name]-wordpress-theme-install-package-free.zip). Following steps as below to install the Theme package:
Step1: Login to your WordPress admin page (normally it’s http://yourdomain.com/wp-admin/).
Step 2: Navigate to Appearance > Themes.
Step 3: Click “Add New” and browse file “[theme-name]-wordpress-theme-install-package.zip“
Click “Install”, then click “Active” new Theme and it’s ready to show. Go to front-end, you will see changes on your website. If you installed on existing website, just go to Menu, re-pick new menu location, and reput widgets.
You can put Logo, custom widgets, etc via Appearance > Customize. See more on “Theme Customization” part below.
After activating the theme, now the front end may not display the right colour that is used on our live demo. However, you still can choose your favourite colour or reset the colour to default according to the following steps:
Step 1: Go to Admin > Appearance > Customize
Step 2: Navigate to Custom Color Variables and you will see 2 options:
Option 1: You can choose any colour for each position of the demo and save
Option 2: If you want to choose the same colour as our live demo, feel free to select any colour and then click on the Default button and save. Now, the default color should be displayed on the front end.
For layout builder, we recommend you with Elementor Page Builder plugin, just download FREE version and install it via Plugins > Add New, then you can build page layout easily.
For building shopping cart website, you just download WooCommerce plugin and install it via Plugins > Add New.
Install Quickstart Package (All Page Layouts & Dummy Content like demo)
This package only available in PRO version, in case you want to make quick launch with our dummy content, all features and layout like the demo, you can consider going with PRO version to save development time! By going to Elementor WordPress themes, find your theme that you’re using, open it and click to button “Get It Now”, you will see Pricing Table for PRO version. After get PRO version, you just follow this guide to install Quickstart package.
* We have 30 days for product trails as 30 days refund policy. If you don’t happy with PRO version, just request money back!
You also can join WordPress Membership to access PRO version for all WordPress themes, save 90% than PRO single license theme purchase.
This package only available in PRO version, in case you want to make quick launch with our dummy content, all features and layout like the demo, you can consider going with PRO version to save development time! By going to our Onepage WordPress theme listing, find your theme that you’re using, open it and click to button “Get It Now”, you will see Pricing Table for PRO version.
You also can join Onepage WordPress Membership to access PRO version for all Onepage WordPress themes, save 90% than PRO single license theme purchase.
How to Add Navigation Menu in WordPress
For onepage wordpress theme, all content should be placed in single page. So, all link in navigation menu will scroll and move to target content that you defined, that’s anchor links.
A page jump is made of two parts:
- The link: this the link that you put for a menu item.
- The anchor: this is the spot where you want to jump readers to, it’s based on an ID of the content element. ( To create ID you can go to Appearance > Editor > inc/after-header.php)
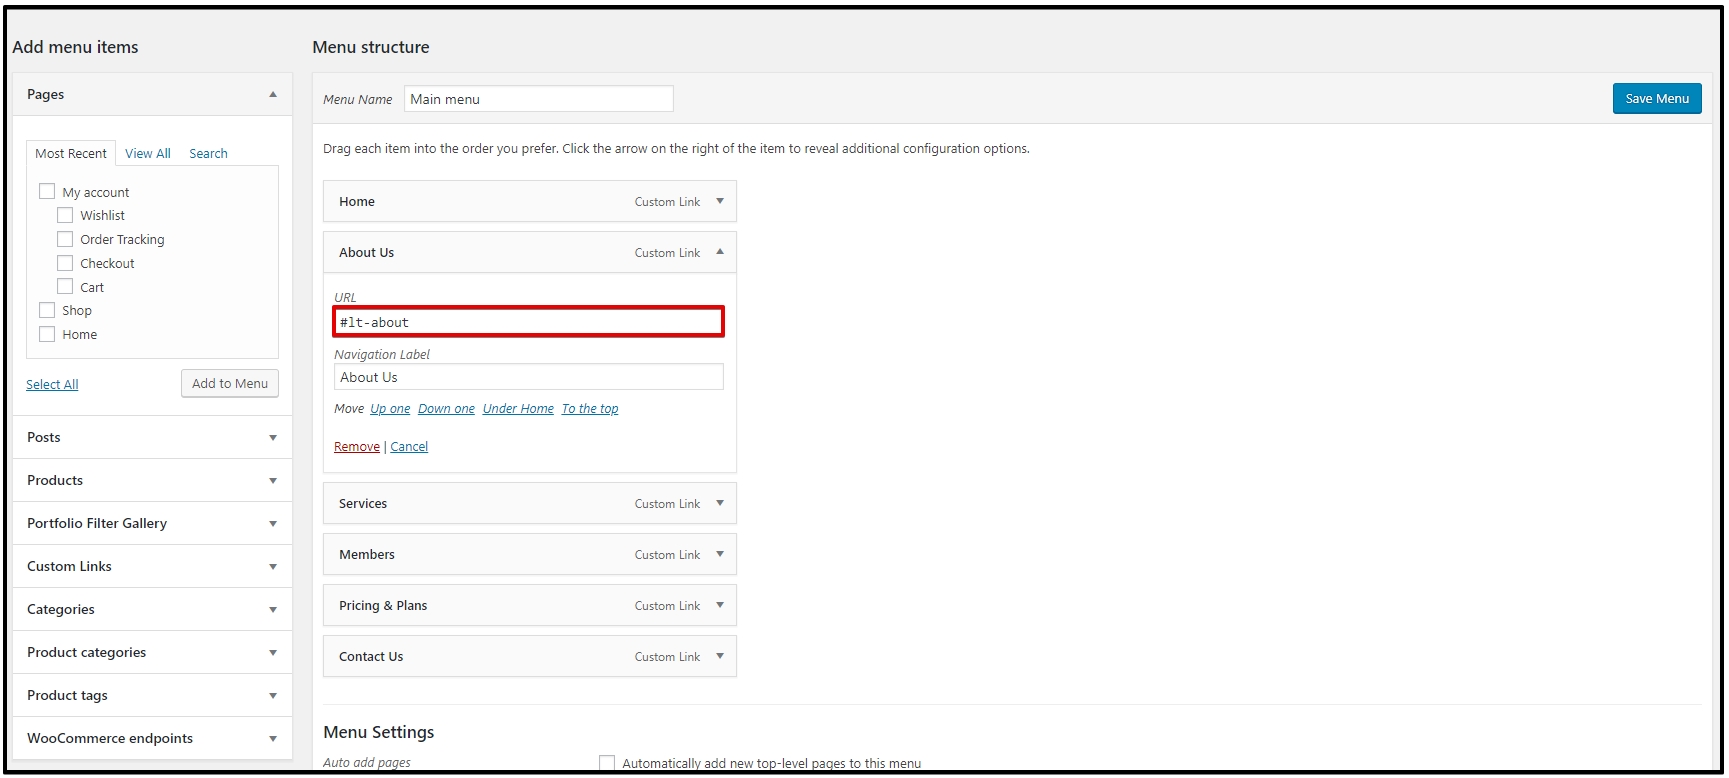
Example: You want to create a new menu item called “About” with the intro about your company, so you just create an anchor (ID) for your part in content, example:
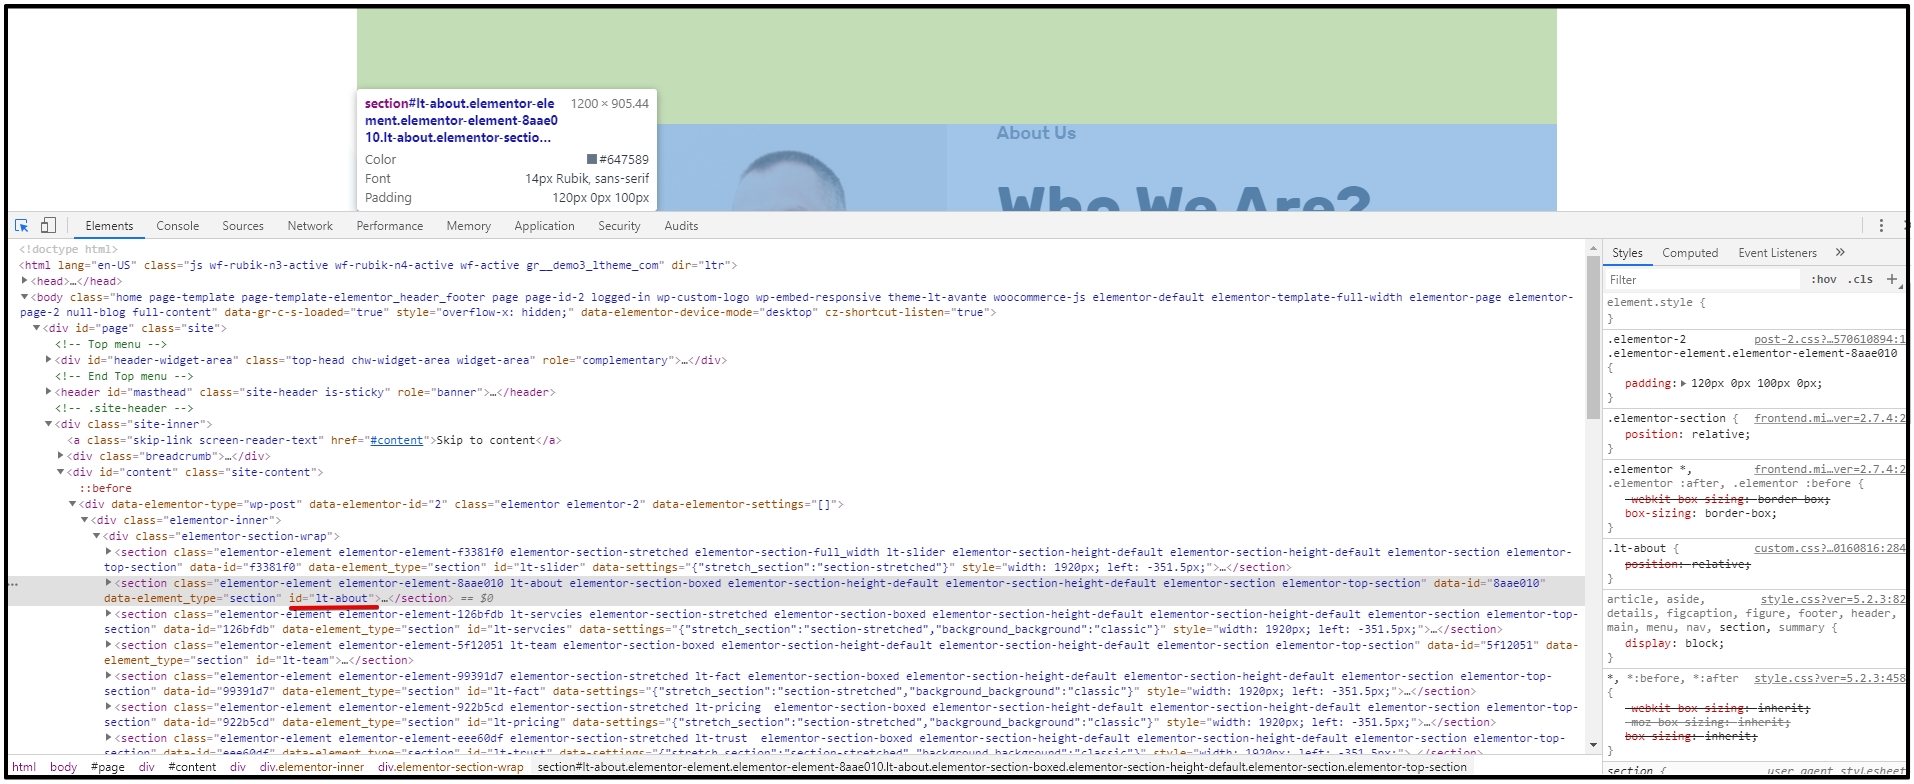
So, via details of menu item “About” in WordPress, you just use “Custom Link” menu item type, and put anchor #lt-about for “URL” attribute.
Theme Customization
Using the WordPress Customizer, you can edit your theme options and preview the changes before publishing them to your live site.
Once you’ve activated a theme, you’ll see several default WordPress settings in the customizer. The available settings will vary depending upon which theme is activated.
To get started, go to Appearance > Customize to access the customizer. Once the customizer is open, you’ll see a menu on the left and a preview of your site on the right:
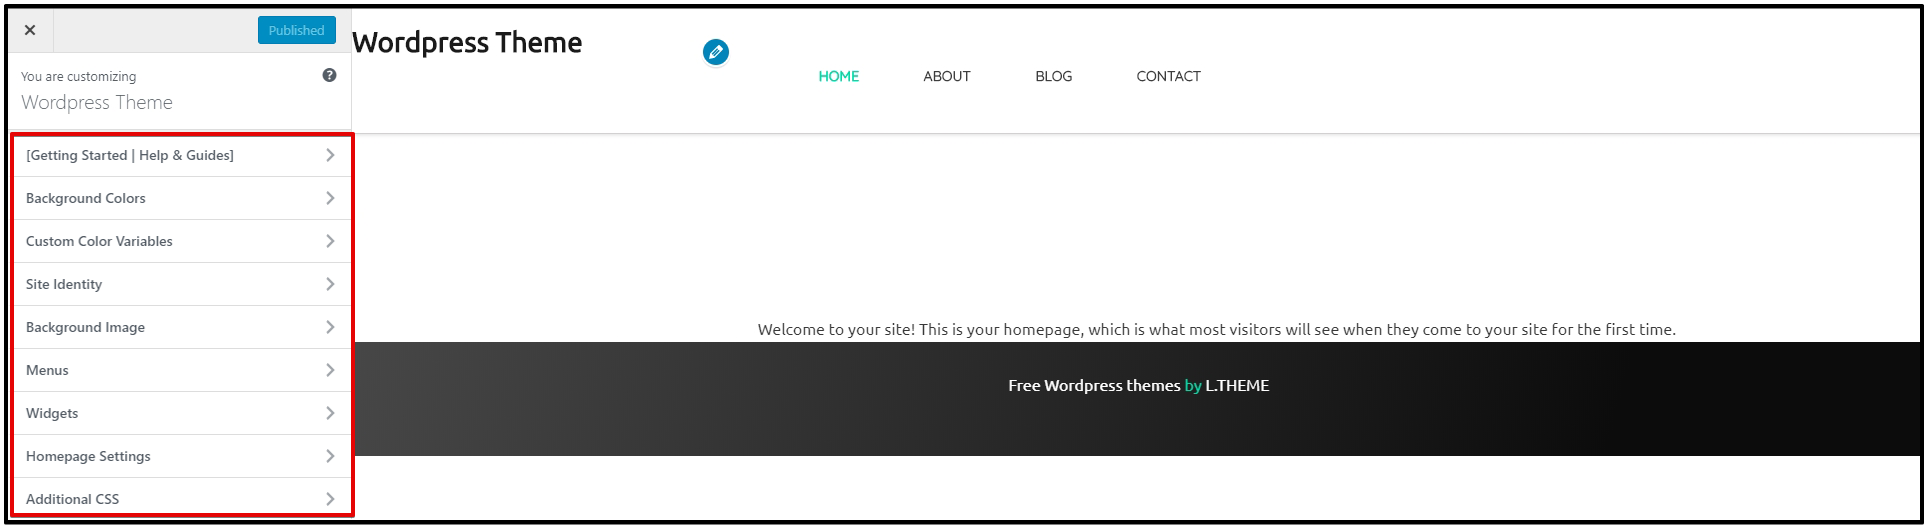
The customizer menu on the left side shows various options that are available for editing in your theme. You can choose from options such as Site Identity, menus, and more. The exact options available depend upon which theme you’ve activated.
On the right side, you’ll see a live, interactive preview so that you can test each option in your theme. All changes will appear as you select them.
To see the settings available within each option, click the title to open the expanded view. Remember, the available settings will be different for each theme.
- To see the interactive preview in full-screen mode, click the Collapse triangle at the bottom of the menu on the left side.
- When you are finished making all your changes, click Save & Publish. If you decide you do not want to save the changes you’ve made, click the X to close the editor and dismiss your changes.
Let’s go over some of the common options available in the customizer.
[Getting Started | Help & Guides]
This section provides some basic steps for getting started. It is recommended that you follow these steps for a better start. Also, don’t forget to check the buttons below the instructions for more information and to make the most out of your new theme.
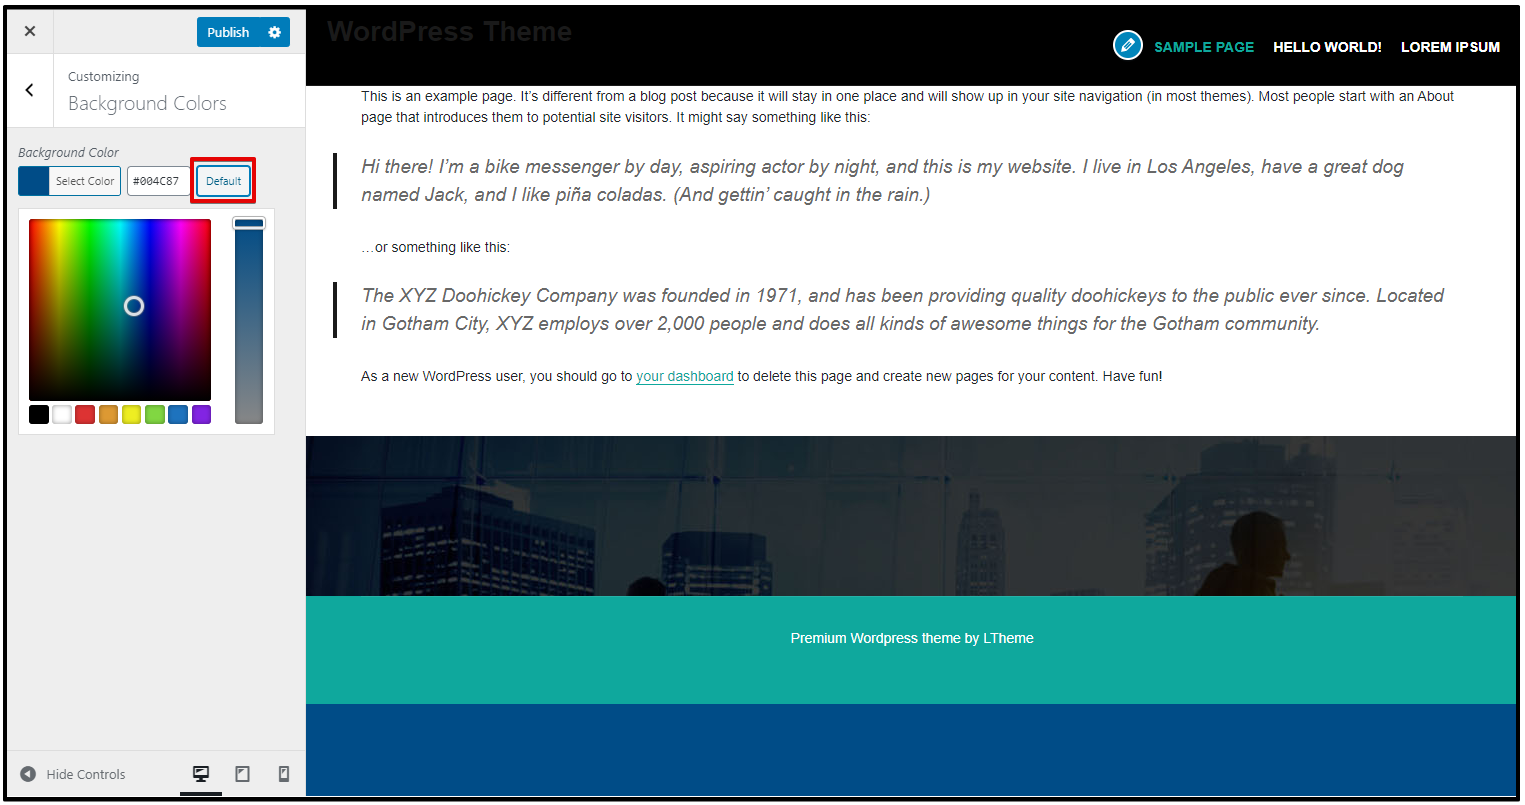
Background Colors
You can change or update your theme background colors right from WordPress Customizer. This option will vary depending on which theme is activated on your website. Just pick the color you want. Use the Default button in case you’d like to revert to the default colors.
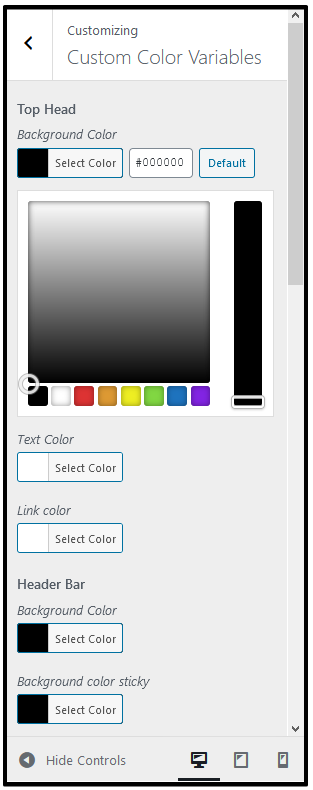
Custom Color Variables
With the Custom Color Variables settings built right into WordPress Customizer, you can now change the default colors used across the entire theme globally and/or in one place. Set the color for the Top Head, Header Bar, Menu Custom, Sub Menu Custom, Footer, and Copyright. Define your project/brand colors in one place and keep everything nice & organized.
Click the Default button next to the color code inside each option if you want to reset it back to the theme’s original color.
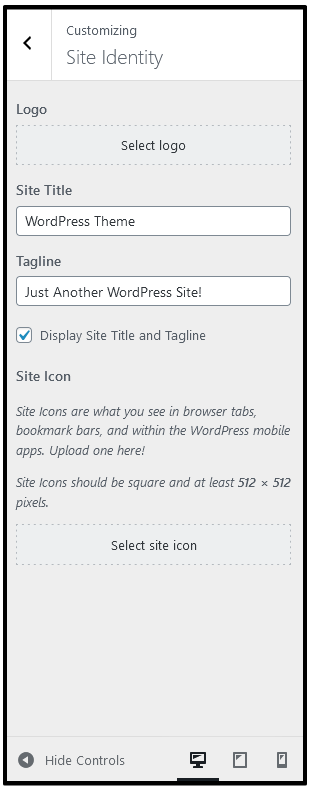
Site Identity & Upload Logo
You can set your site title, tagline, and upload your site icon (favicon) or upload the logo here. If you have activated a theme that doesn’t include the Header Image setting (see below), you can also choose whether you’d like to display an Image logo or Dynamic text for your site title. Almost all our themes, however, do include the Header Image setting. Particularly with this theme, we have upload the logo for the site by the widget.
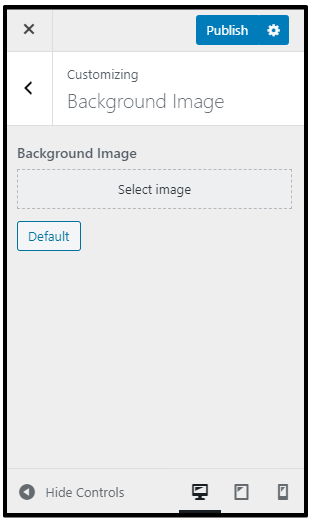
Background Image
Most of our themes come with custom background support via WordPress Customizer that allows you to easily set a background image to your WordPress site.
To add or change a background image, click on the Background Image option. The panel will now slide in and show you the options to upload or select a background image for your website. Select one and hit Publish to apply your image.
Click Default to reset it to the original settings in case you want to undo all your changes.
Menu Location
You can create and edit menus, as well as manage their location, within the Customizer. The available menu locations will depend upon which theme is activated on your site.
Click Menu Locations to see the available locations in your theme.
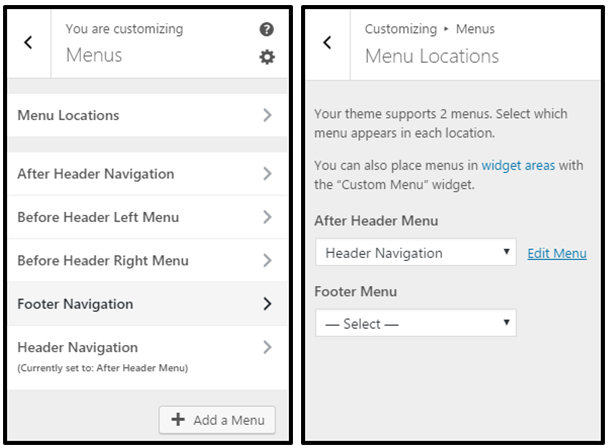
Use the drop downs to select a navigation menu to display in each available location. Or, if you prefer, you can set both locations to “Select” (in other words, turn them off ) and use a Custom Menu widget in a widget area instead.
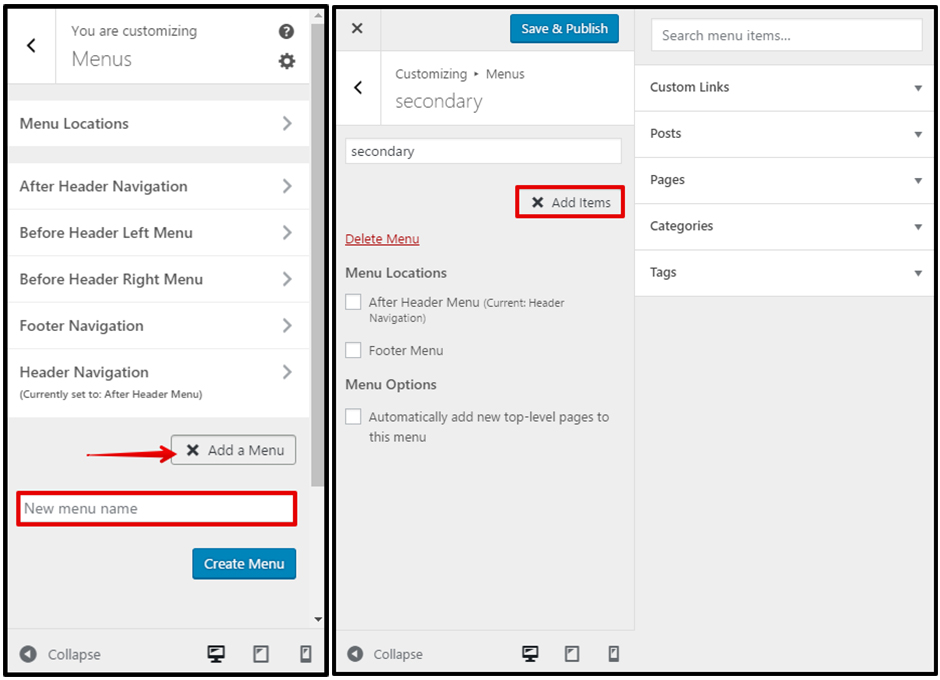
Click Add a Menu to create a new menu. Alternatively, you can click on the name of an existing menu to edit it.
– Give the new menu a name and click Create Menu.
– Click Add Items to begin adding links to the navigation menu.
– Click the titles to open the expanded view of the options or use the search field to locate items for the menu. When you’re finished adding all the menu items, click Save & Publish to preserve your settings.
Widget Manager
Some themes offer unique widget areas where you can add widgets to display important information. The exact widget areas available will depend upon which theme is currently active on your site.
Click on any available widget area to open a new panel where you can add and configure widgets ( Text, Image, Post …)
In the newly open panel, click Add a Widget to display the available widgets you can add.
You’ll see a list of all the available widgets. Click directly on any widget you’d like to add. Scroll down the list or use the Search widgets box at the top to locate the one you’d like to use.
Note: You can click the Collapse link at the bottom corner of the screen to temporarily hide the
Customizer and preview your changes in full-screen mode.
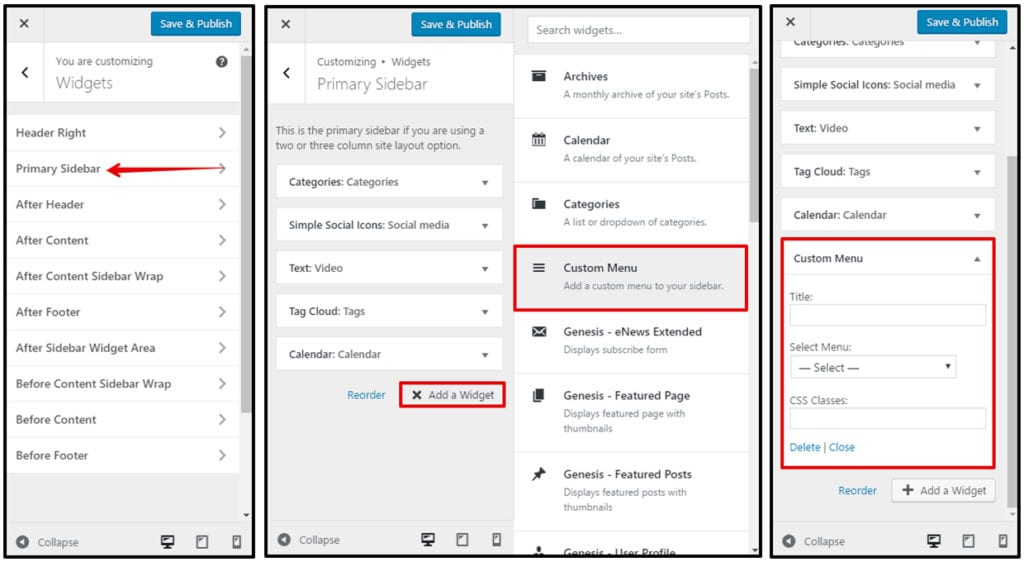
After selecting a widget, you can configure it however you’d like and then click Save & Publish to preserve your changes.
You can also click Reorder to rearrange the widgets into the order you prefer or to select a new widget area to move the widget into.
Click Done when finished and then click Save & Publish to preserve your changes.
Home Page Settings
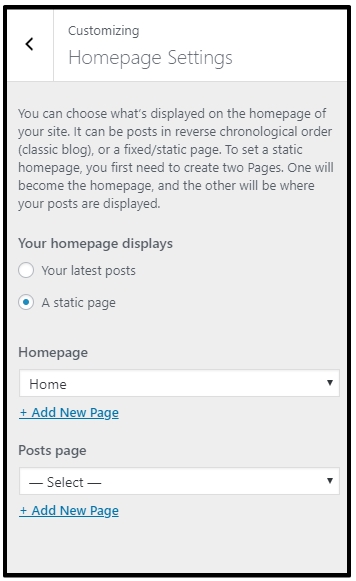
The default setting for the front page is Your latest posts. This setting allows you to display a blog-style front page. You can, however, select any page in your site to be displayed as the front page instead of your latest posts.
If you select A static page, you can select which existing page on your site will be displayed on your front page.
You can also select which page will display your blog posts. This page should be different from the one you’ve selected for the static front page and should not be set to use the Blog Page template.
PLEASE NOTE: If your theme uses the front page to display widgets, the widgets will be displayed regardless of which setting you choose here. If you prefer to display your latest posts or a static page on your front page, you’ll need to remove all widgets from all front page-related widget areas.
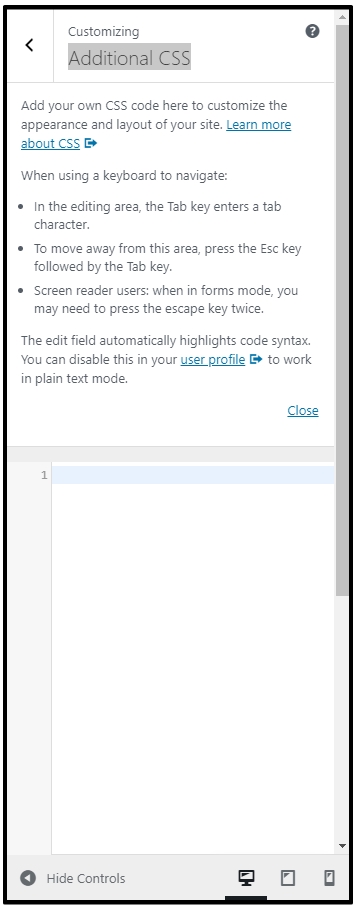
Additional CSS
Add your own CSS code here to customize the appearance and layout of your site. Learn more about CSS(opens in a new window)
When using a keyboard to navigate:
- In the editing area, the Tab key enters a tab character.
- To move away from this area, press the Esc key followed by the Tab key.
- Screen reader users: when in forms mode, you may need to press the escape key twice.
The edit field automatically highlights code syntax. You can disable this in your user profile(opens in a new window) to work in plain text mode.
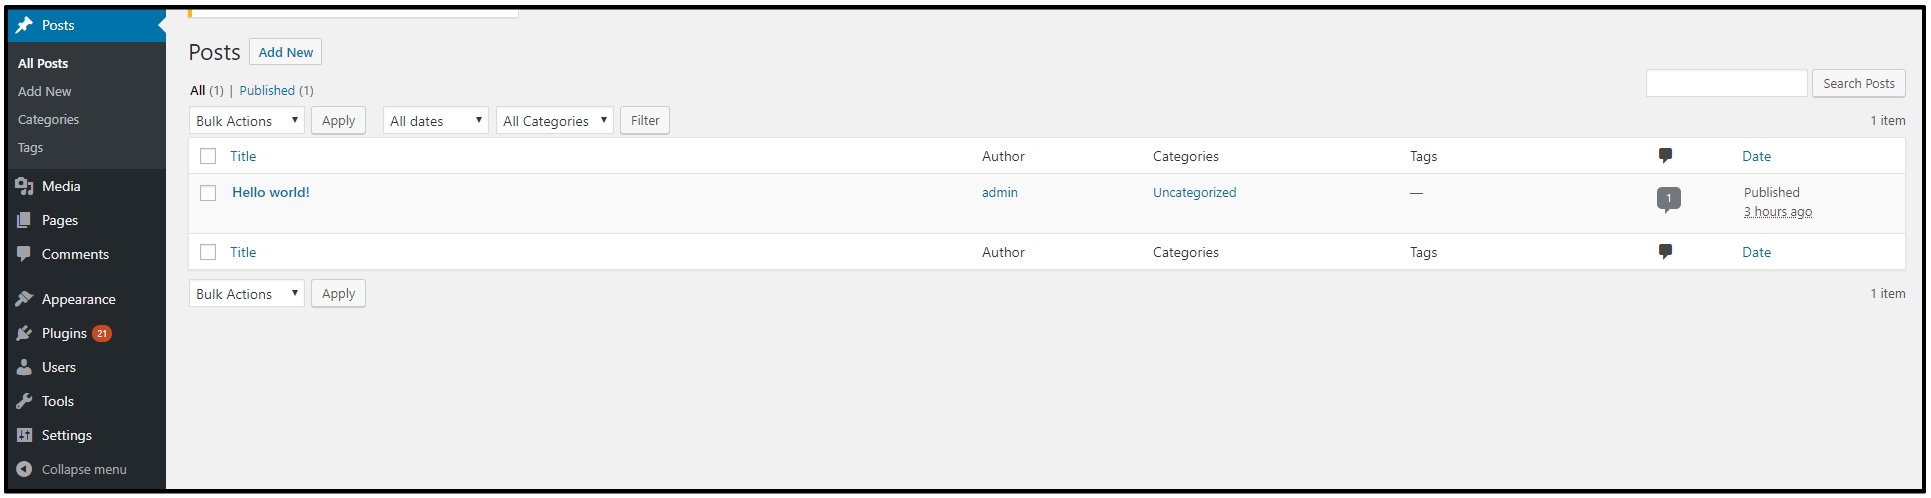
Post Management
This is ‘Posts‘ in WordPress and you can use it to build a blog for your page.
– Go to Posts > Add New to add a new post. You can add various types of item to your post: Video, Audio, Gallery, Quote.
3CX Live Chat
We’re using 3CX Live Chat as FREE Live Chat for our product. This is strongly recommended for any business. You just set up and it’s ready to use. You can see 3CX FREE Live Chat WordPress plugin and features from WordPress.org
In order to activate your live chat you need to sign up with 3CX StartUP to get your web portal and apps to answer live chats.
- Get your free 3CX Account.
- Follow the steps in the wizard.
- Take note of the 3CX Talk URL that you will be given during the live chat step.
- Read our Getting Started Guide.
You also can watch this video to know more
Support system
Pre-Sale Support
If you have any questions with the product before to buy, feel free to contact us via Live-Chat or Contact Form.
Remove Copyright
If you’re using Free version, copyright on footer will be shown. You can’t remove it, it’s copyright information for a template that you must to keep in order to use a template as Free license with us.
If you want to remove this copyright or replace with new content, please go with PRO version. Visit all WordPress Themes, find your template name and purchase PRO version.
Forum & Ticket System
- Forum Support System (Pro Standard & Pro Unlimited Customer)
- Ticket Support System (Pro Unlimited Customer only)
Extra Services
Install Service
If you want to install Quickstart package on your hosting, you can order here.
Customization Task
If you want to hire our developer to the custom template, you can request here.
Development Service
Looking for new template for your project, and only use it for your website, ask our developer here.