Introduction
In fact, not all image editing requires the use of Photoshop or the support of other photo editing tools. If you only want to do some basic edits, such as cropping, flipping, scaling, and rotating your photos, WordPress comes with built-in features for that. Therefore, it is easy for you to edit an image in WordPress to your preference without using any extra image editing software.
How to edit WordPress images
In today’s step-by-step guide, we will share with you how to edit images directly on the WordPress platform. Let’s follow the detailed sections below.
Upload images to the WordPress library
In order to edit an image in WordPress, you first have to upload images to your WordPress website. If you want to edit images that are already in the WordPress library, you can skip this step.
Option 1: Upload images in the WordPress admin area
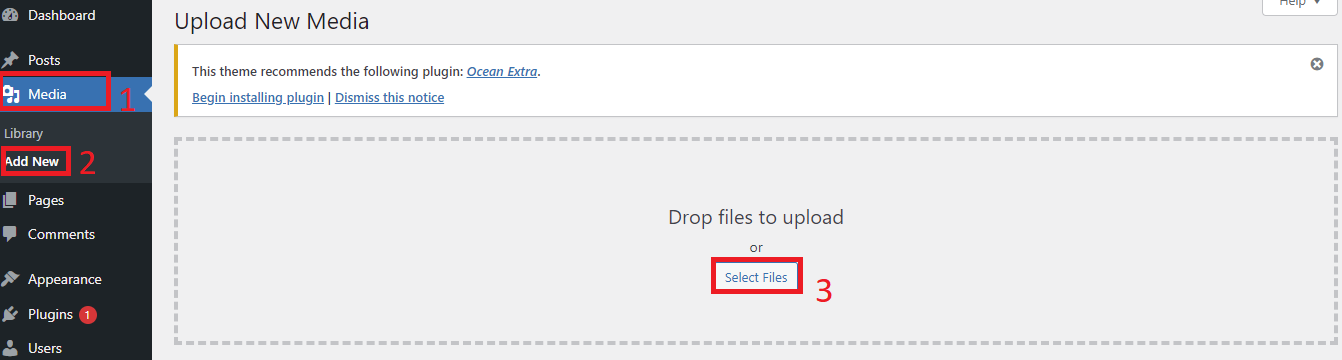
Just go to Media> Add New and click on Select files to upload images from your computer.
Option 2: Upload images in the editing field
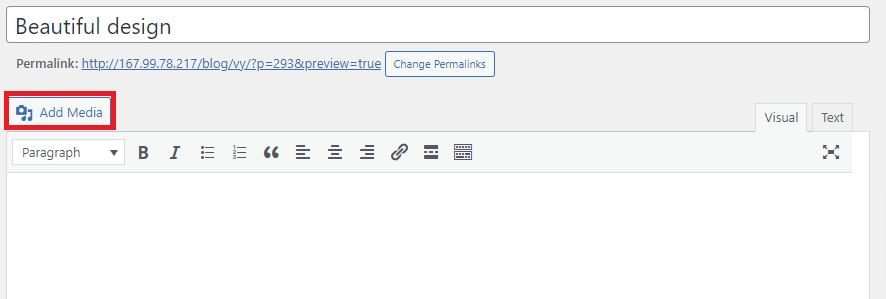
If you want to edit an image directly while you are editing your post, you need to click on the “Add media” option above the editing area. Then click on Upload files to upload new images.
Edit images in WordPress
Next, you need to choose an image to edit.
Option 1: Choose an image in the WordPress admin area
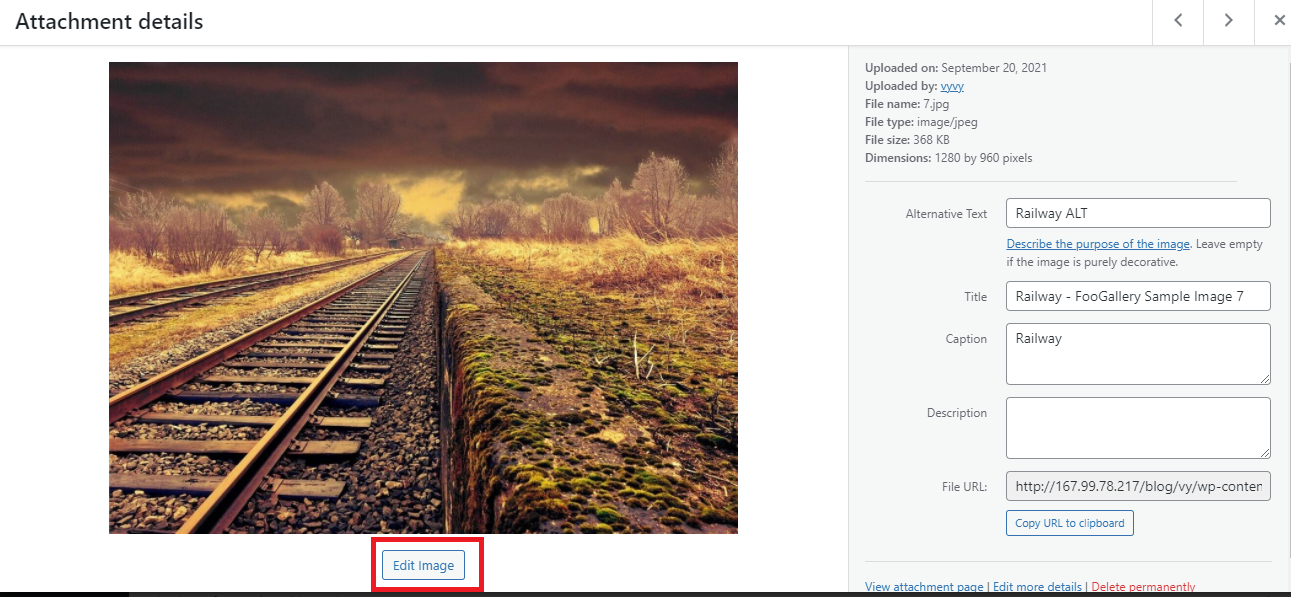
Just navigate to Media>Library and choose the image that you want to edit. It will open a popup window with a lot of image information such as its name, size, file type, and dimensions.
Option 2: Choose an image while editing a post
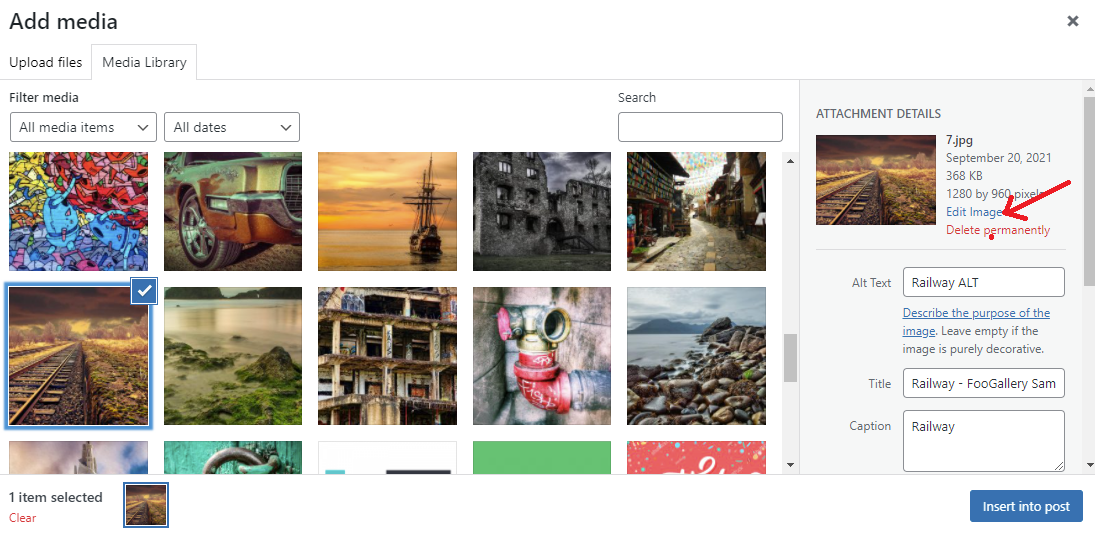
After choosing an image, look at the Attachment Details on the right side of the screen. You can view details about this image; click on the Edit image option to start.
- Crop
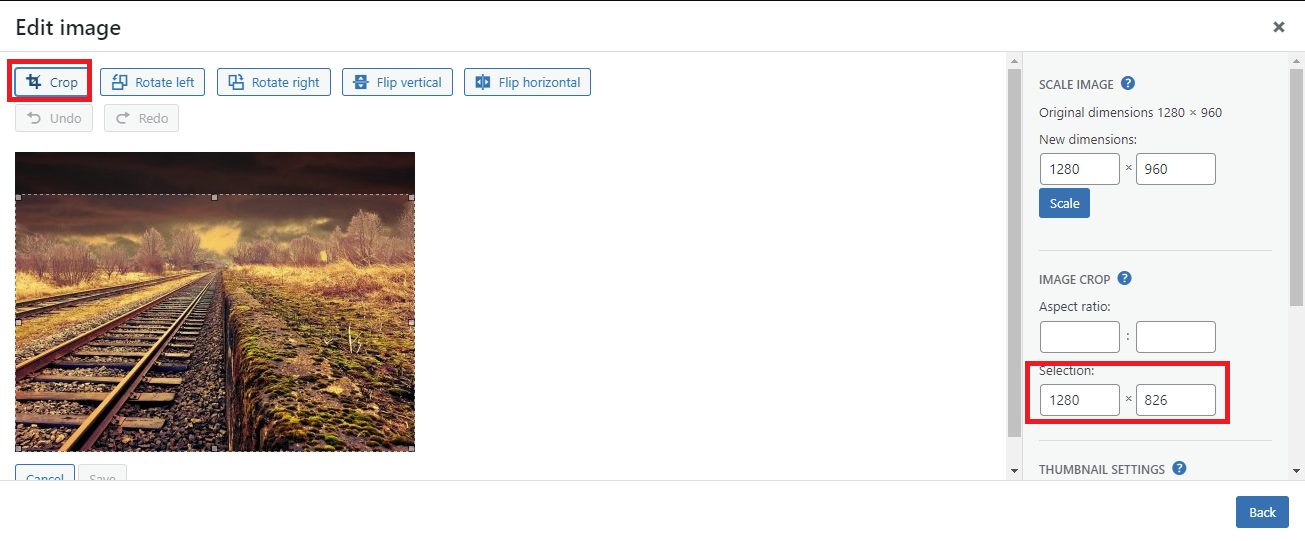
If you want your image to appear perfectly on your website, you need to crop it to a specific size. To do that, simply click on the Crop button and manually drag the frame to select the area you want to crop. Then hit the Crop button again to finish cropping the image. You can view the ratio of the selected area on the right side of the screen. Remember to click on the Save button to save changes.
- Aspect Ratio
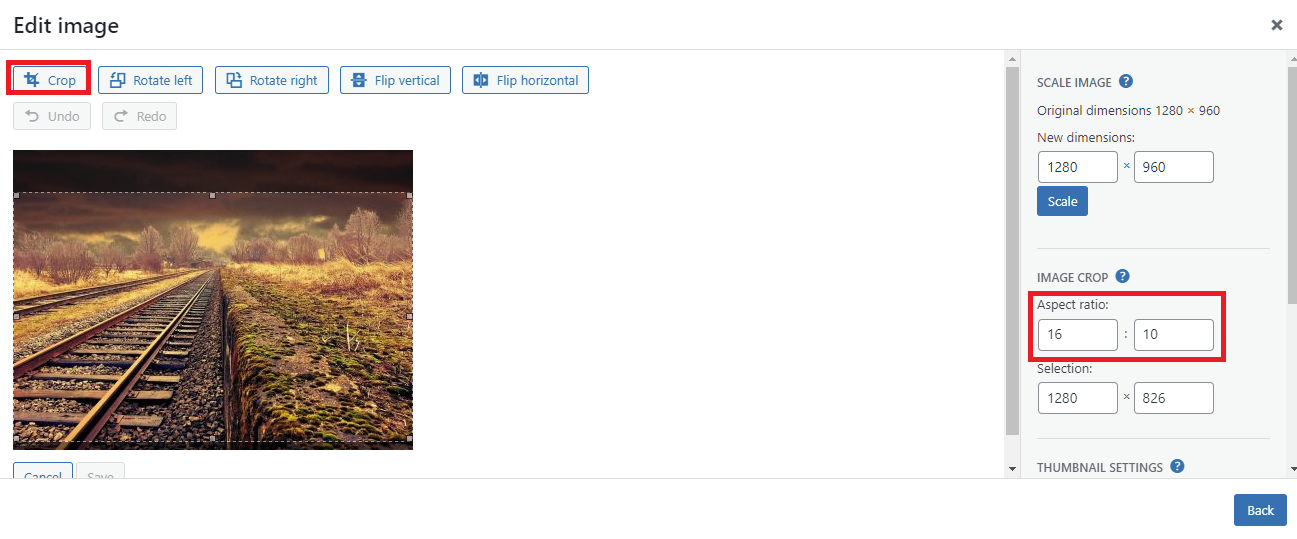
In addition, you can utilize the Aspect Ratio option in WordPress to set a specific aspect ratio for your image. You should set it before cropping the image so that you can maintain the initial proportions of your image.
- Rotate
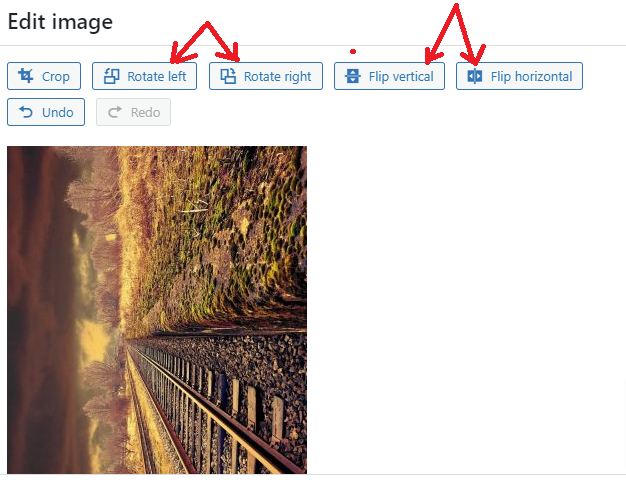
There are two options: Rotate left and Rotate right. You can choose either of them to rotate your image by 90 degrees clockwise or counterclockwise.
- Flip
If you want to flip your image either vertically or horizontally, click on the Flip Vertical and Flip Horizontal options.
- Undo and Redo buttons
These two buttons allow you to Undo or Redo changes that you have just made.
Now let’s take a look at the right side of the screen to discover more useful options.
- Scale image
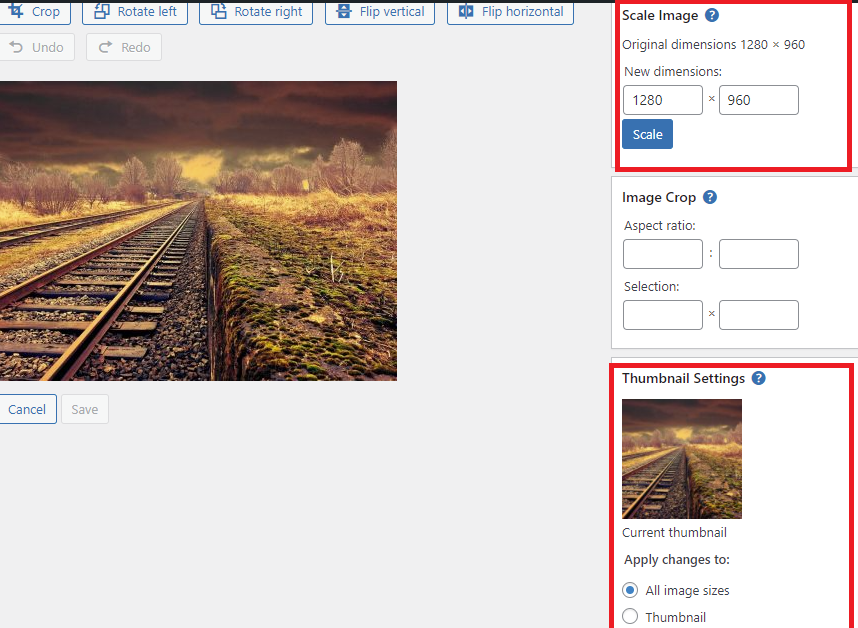
This option enables you to scale images manually; however, you can only make them smaller. You cannot make an image larger this way. In addition, make sure to scale the image before cropping, or else you will not be able to keep its original proportions.
- Thumbnail settings
Here, there are 3 options to choose from. You can apply the changes to all image sizes, just the thumbnail, or all sizes except the thumbnail.
After finishing all editing actions, if you are happy with the changes, click on the Save button and Update this image. Otherwise, you can click on Undo to cancel the action that you have just made.
How to restore the original image after editing
If, for any reason, you are not satisfied with the result, you can go back to the media library and find this image again. Click on the Edit image option. On the right side of the screen, you can view The Restore Original Image option. Click on the “Restore Image” button. This will cancel all changes that you have made previously.

Final words
We have just provided a step-by-step tutorial to edit an image in WordPress. Hopefully, this article helps you perform basic image edits yourself without using extra tools like Photoshop. If you have any questions about this topic or need our assistance, please leave a comment below.
Last but not least, are you planning to build a professional website? Fortunately, there is a wide range of beautiful, responsive designs in our free WordPress Themes. Let’s visit and try one for your website.