Do you know how to use the WordPress Gutenberg Cover Block? If you are looking for a detailed guide on how to use this block, then don’t miss our blog. We will show you the best ways to use it. Now, let’s check it out.
How is the Cover block useful in the Gutenberg editor?
As you know, the release of the Gutenberg Block editor in WordPress 5.0 has brought many advantages for enhancing the design of your website. This new editor allows you to create eye-catching content and build a professional website via a wide range of useful blocks instead of using code as before. And the cover block is one of the most helpful blocks built into the Gutenberg editor. This effective block allows you to add a title over a background image. If you would like to add a hero header section on a post/page or feature a selected quote, then using this block is a perfect solution.
If you have never used this block, in today’s blog we will show you a detailed guide to help you easily use the WordPress Gutenberg Cover Block. Now, let’s get started!
How to add a cover block to your post/page
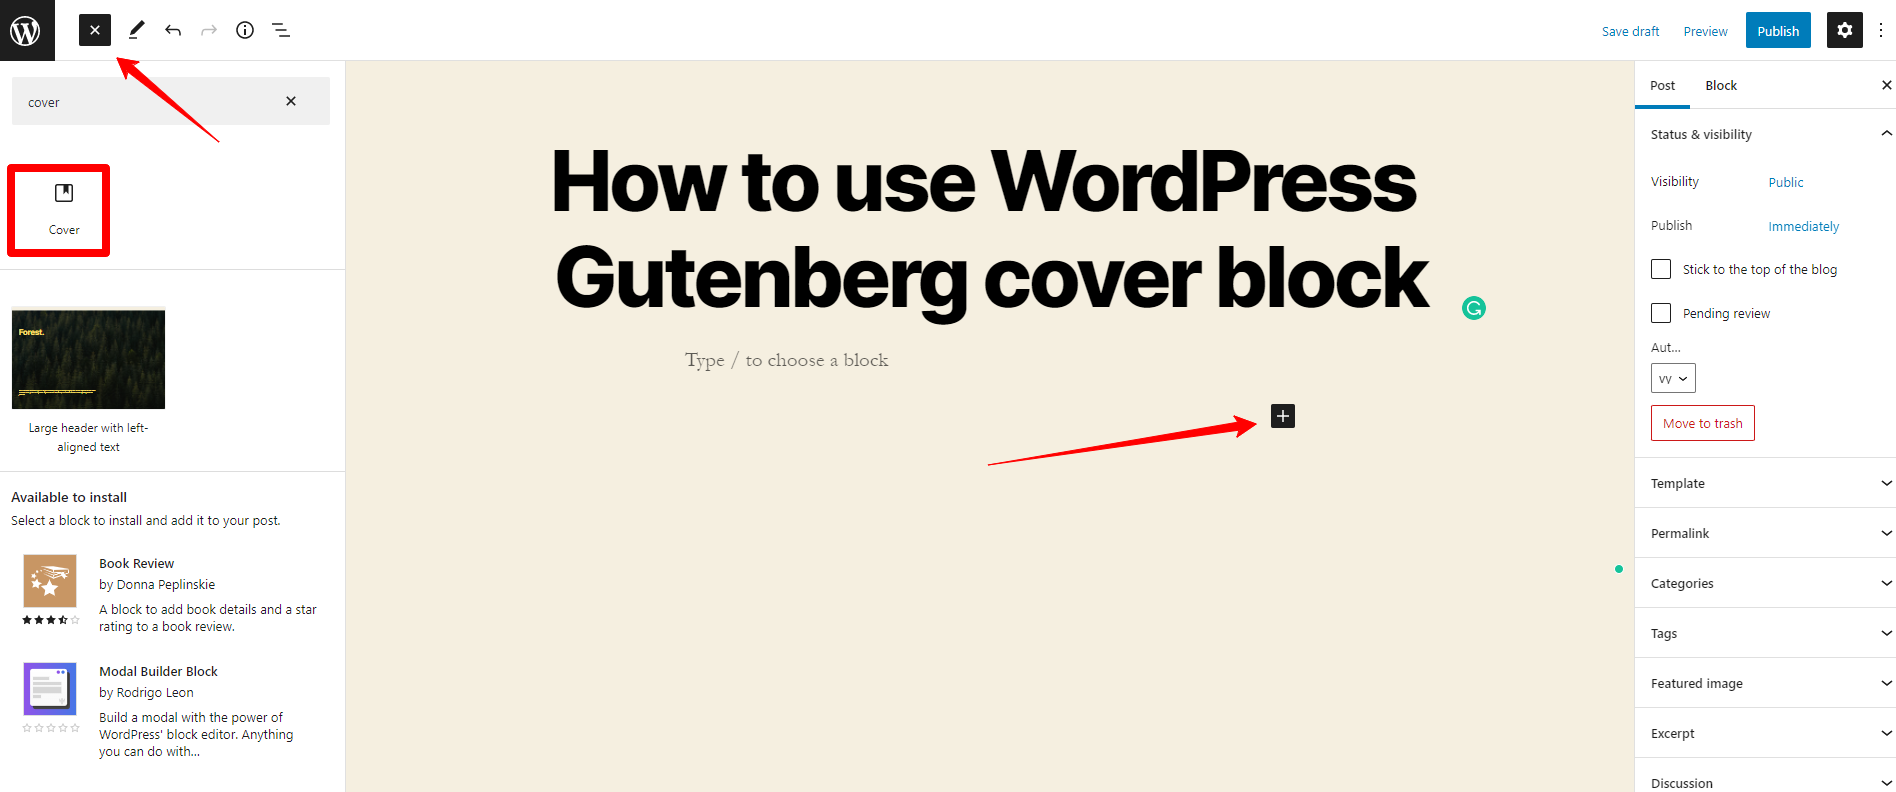
To add a WordPress Gutenberg Cover block to your post/page, first click on the Add block button(+) displayed in the top left corner of the block editor and use the search bar to look for the cover block.
Then, simply click on the Cover block to add it to your content. Alternatively, you can use the Add block button within your content to add a cover block.
How to use a cover block in the Gutenberg editor
Choose a cover block background
There are various options that allow you to choose a background. You can create a background with an image, video, solid color, or gradient. Below, we will cover all the options.
Solid color and gradient color
The cover block comes with some solid colors. You can choose one of them and use it as a background color.
However, if these solid colors are not suitable for your designs, you can use gradient colors. To do that, first of all, you need to choose a solid color and then click on the Cover block.
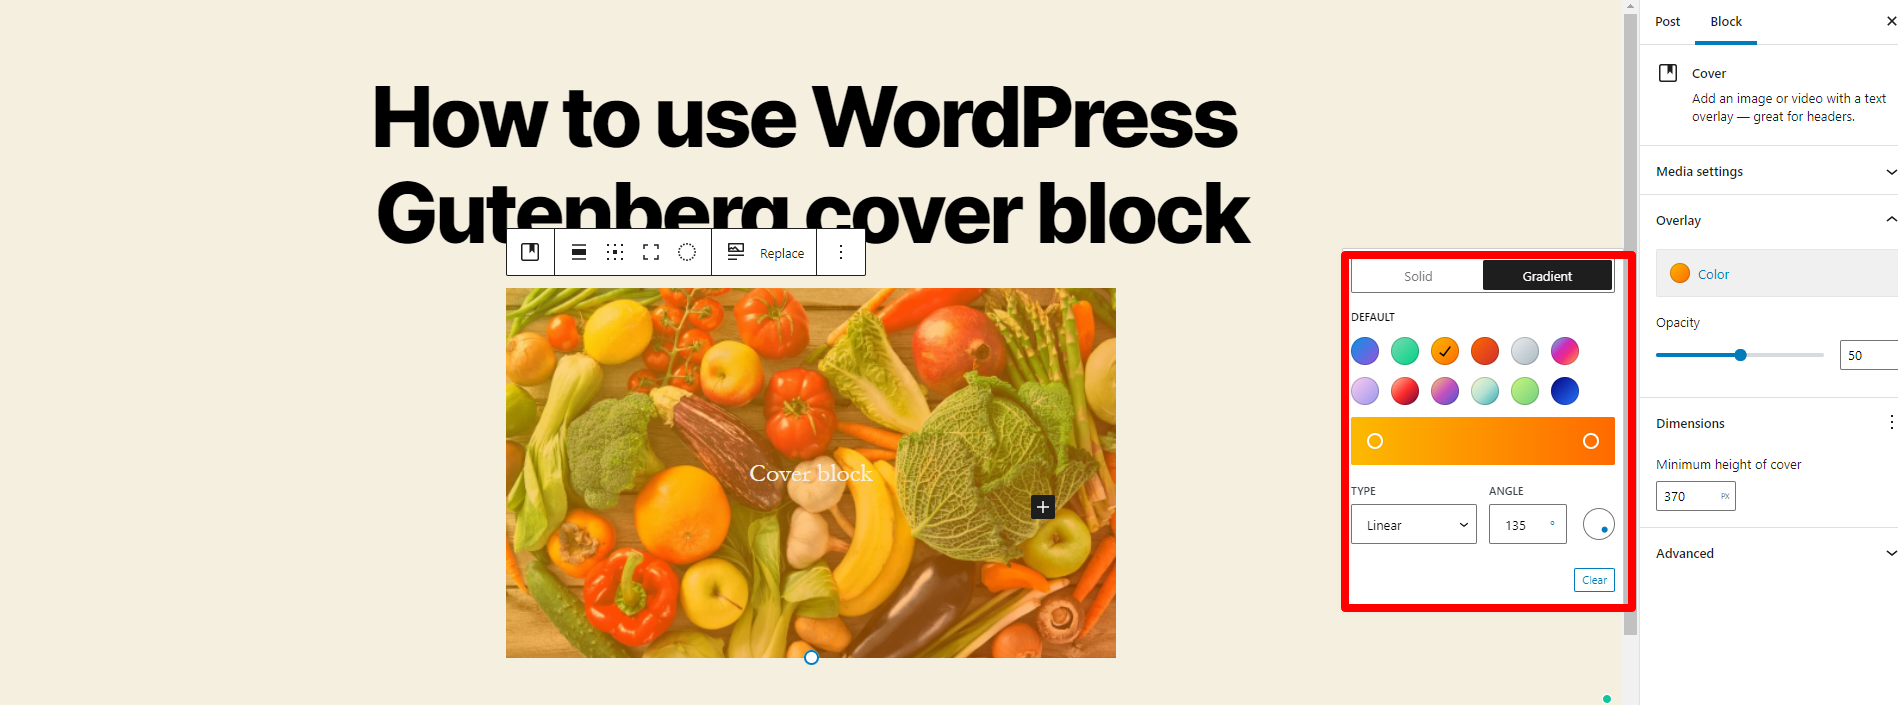
Next, have a look at the color options on the right sidebar and click on the Color option. Then, a popup window with two tabs will open. Simply move to the Gradient tab and customize the background color as you want.
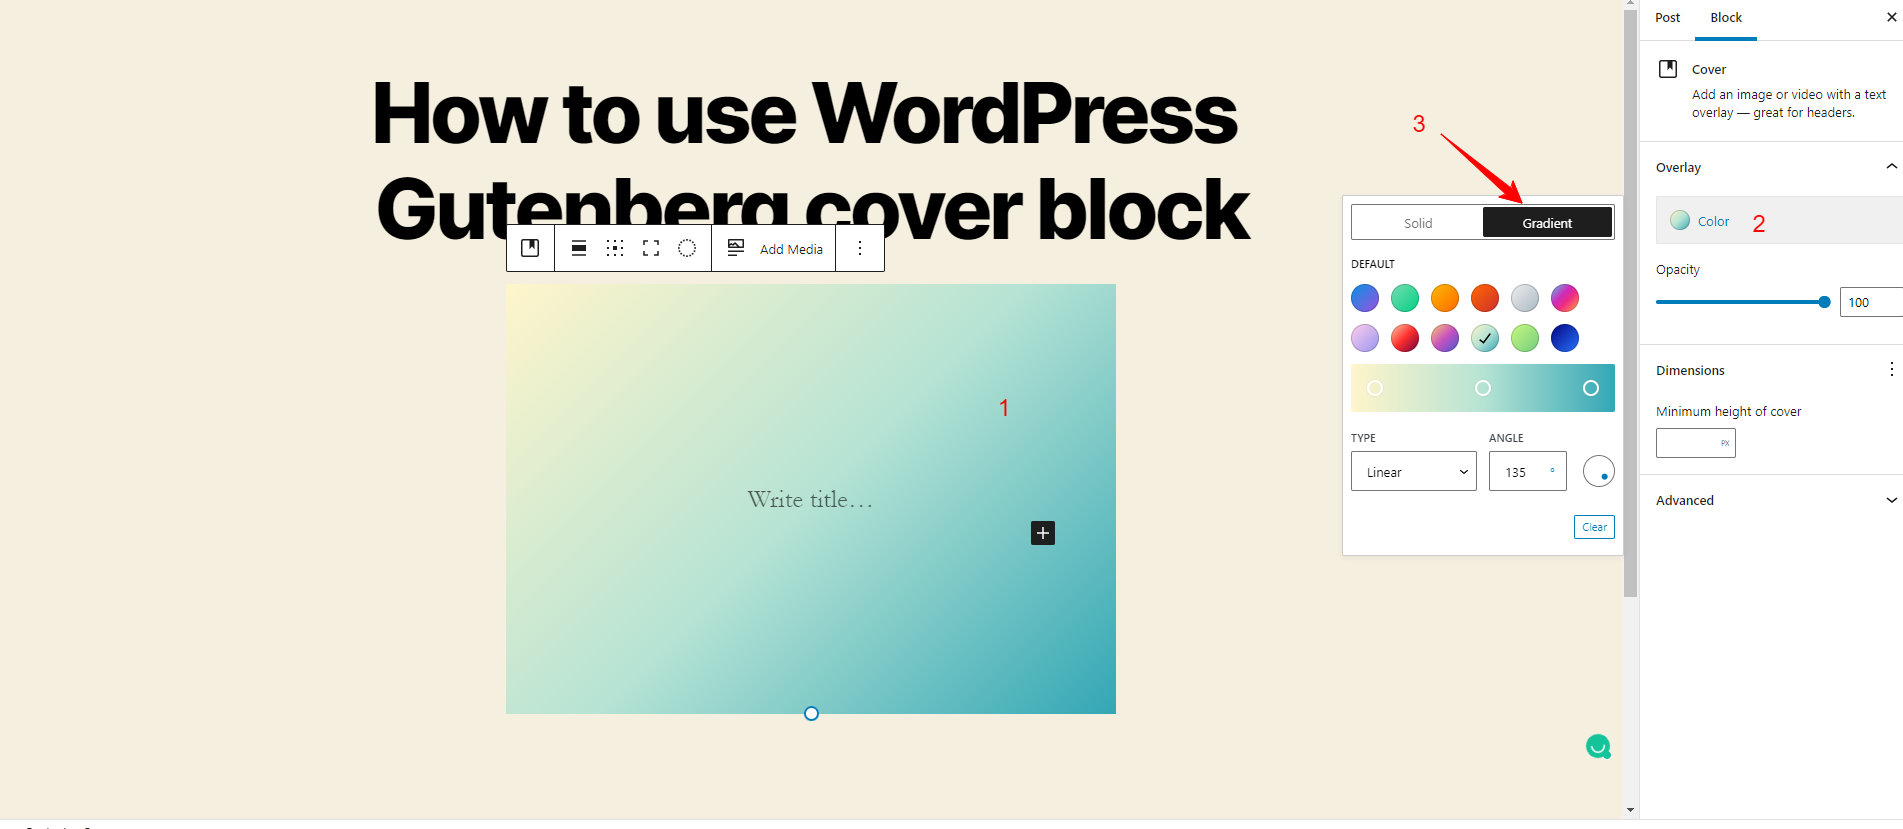
Image or video
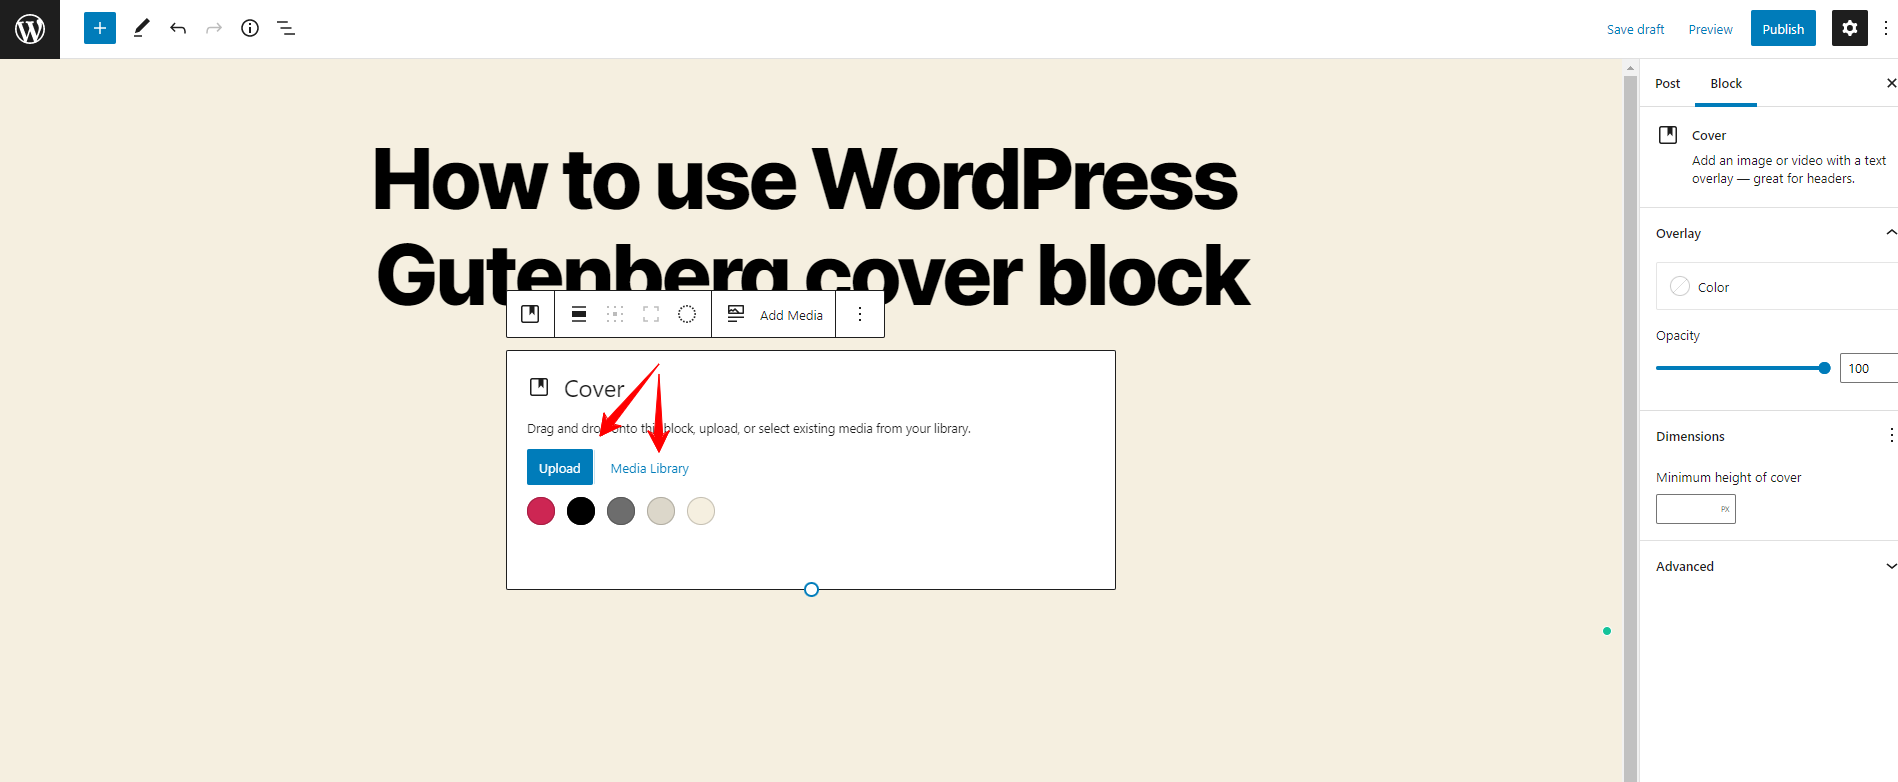
Once the cover block has been added to your content, you will see a placeholder with two buttons that allow you to add a background image or video. You can upload one from your computer or select an available image from your media library.
After adding an image, you can add a caption over the image. By default, the caption is a paragraph block. However, you can still change it to other types of blocks like a video block.
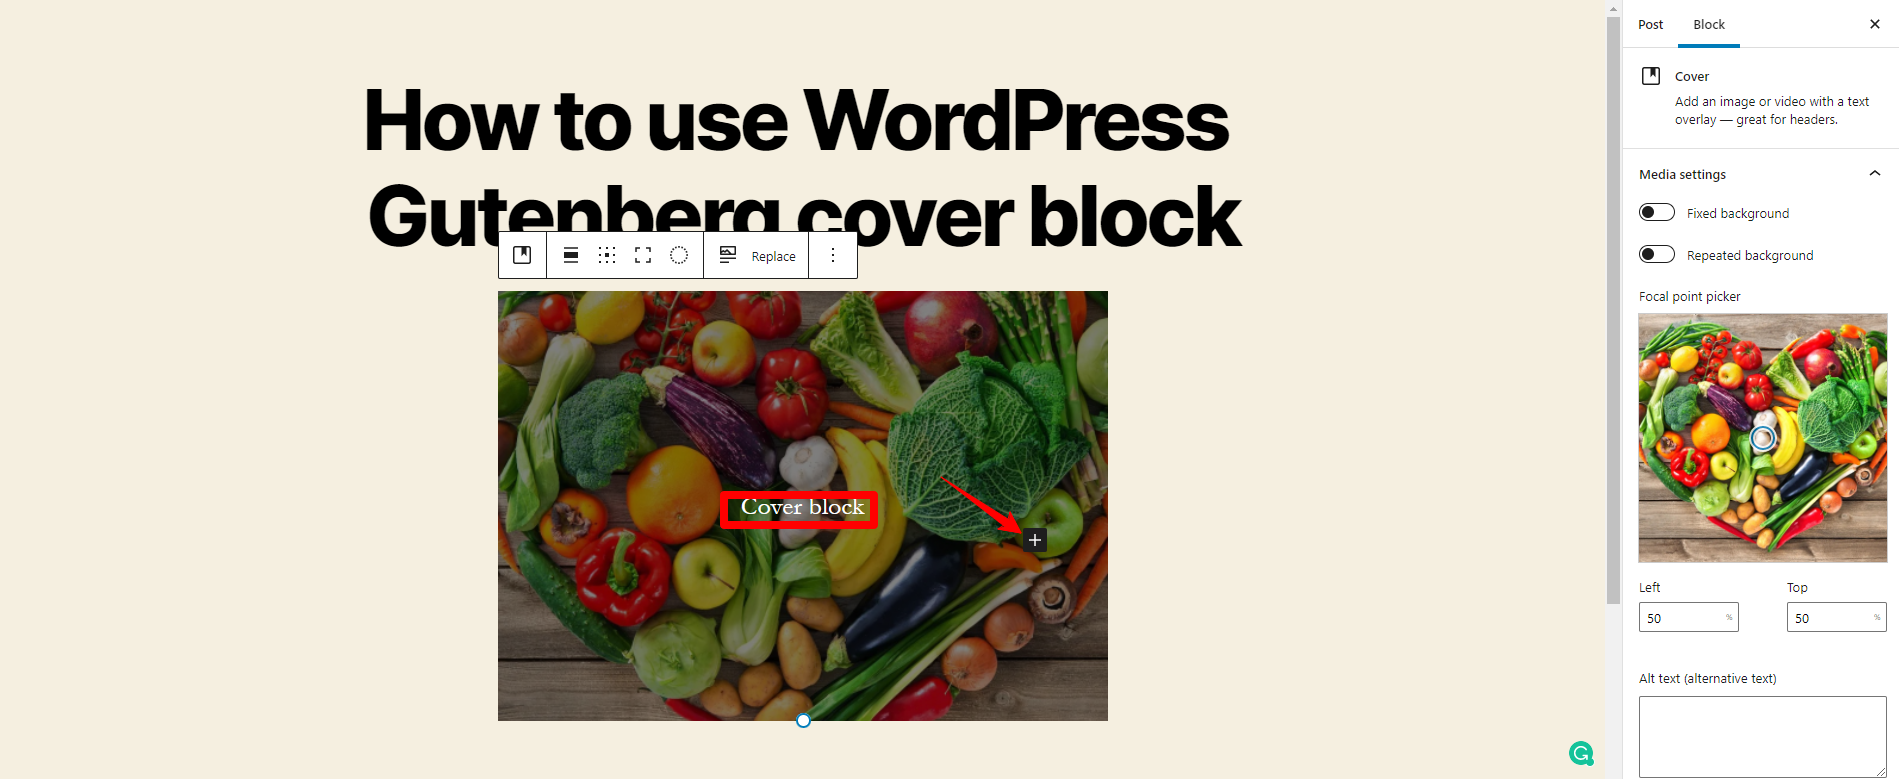
Use cover block toolbar controls
To see the toolbar of the cover block, simply click anywhere on the block.
Change block type or style
The first setting allows you to change the number of columns, group it or even change it into an image. It also provides you with a preview on the right side.
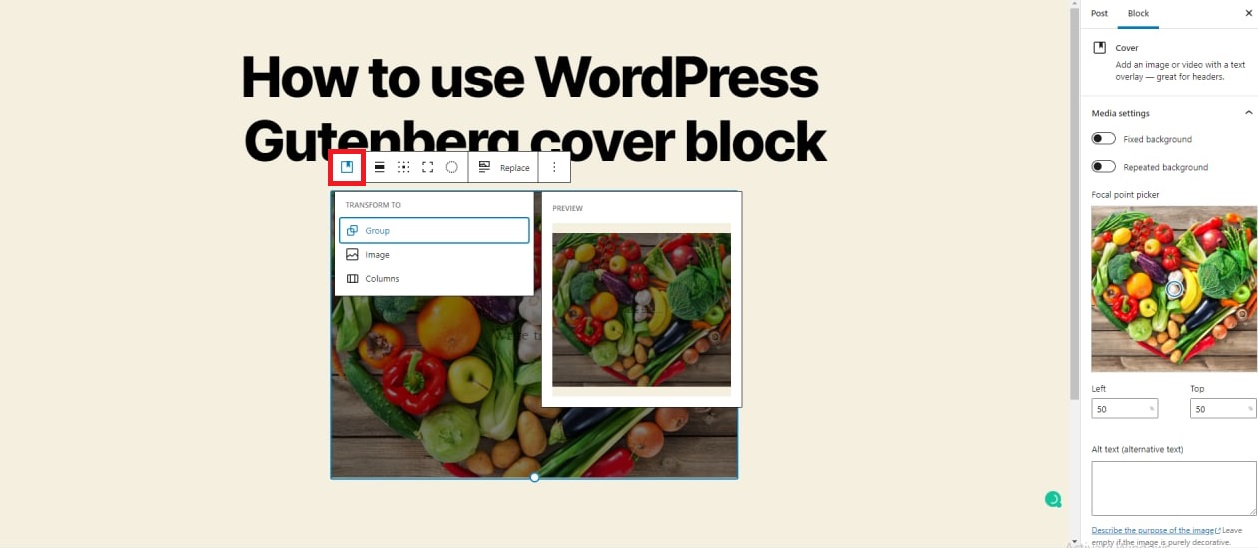
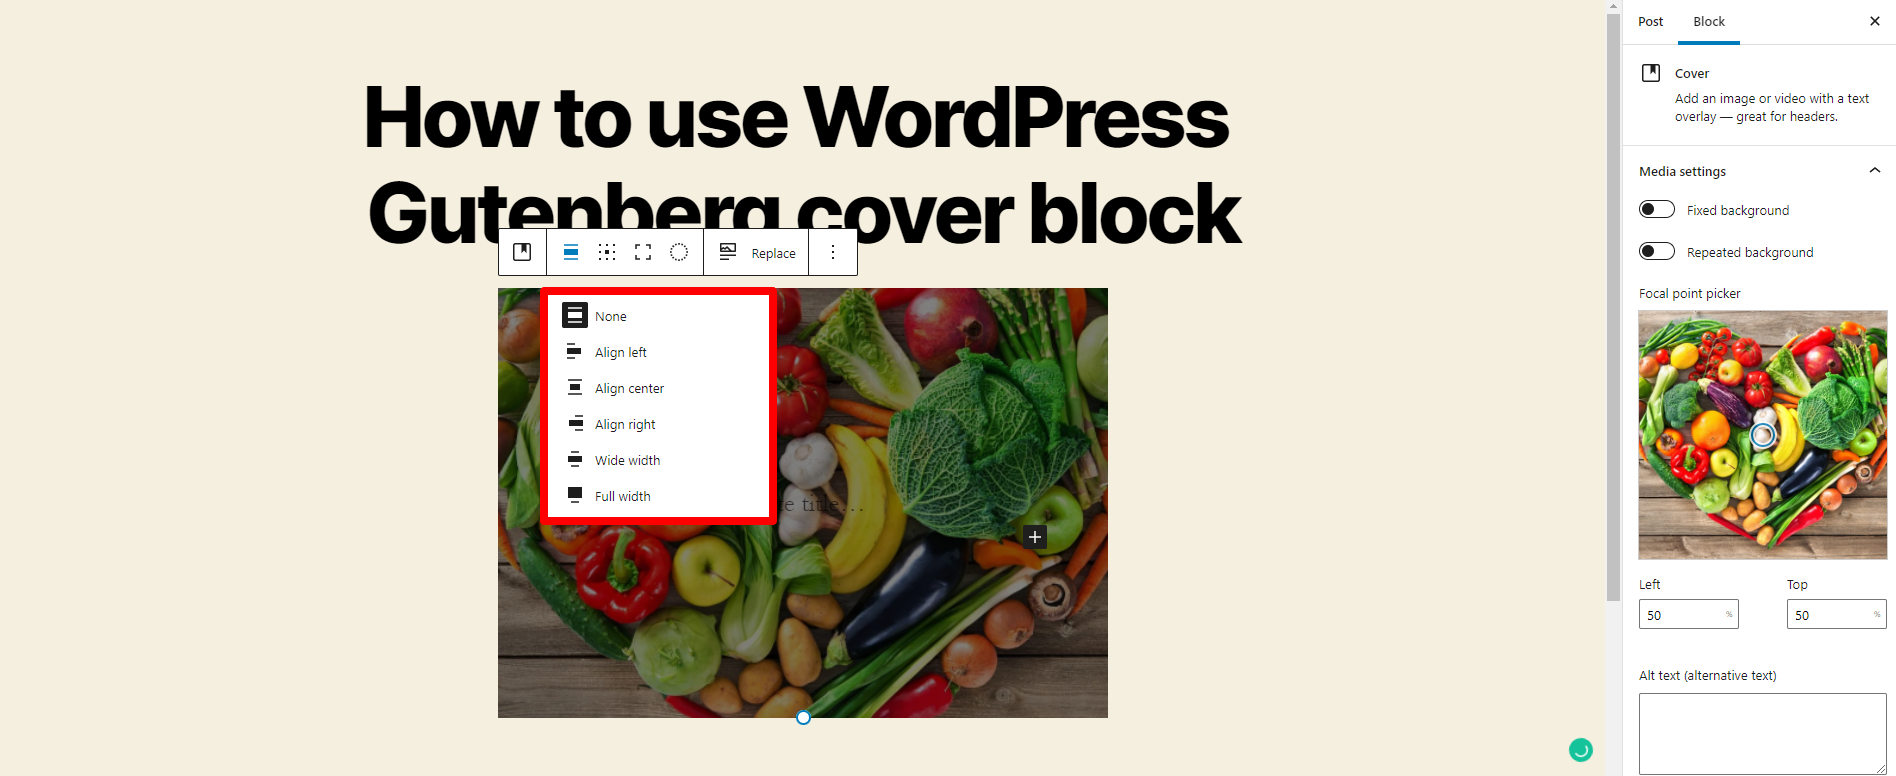
Change alignment
When you click on the second setting option, it will display a list of options in a drop-down menu. These options allow you to simply align your cover block to the left, center, or right. In addition, you can also set wide-width or full-width.
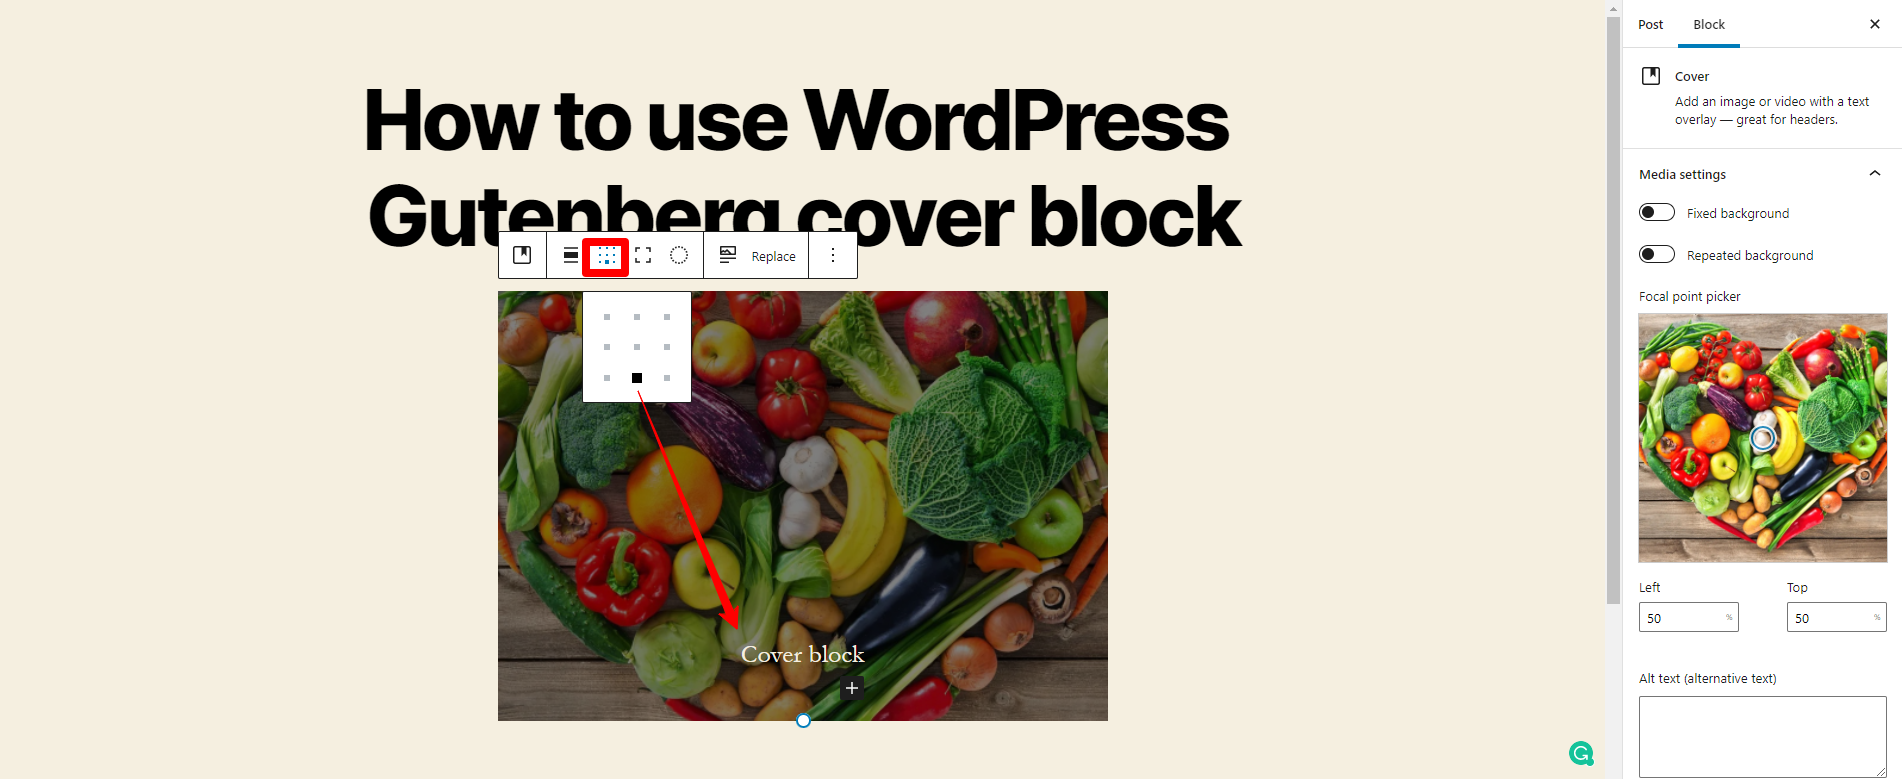
Change content position
This option enables you to move the content within the image by selecting the location of a dot. You can see this in the screenshot below.
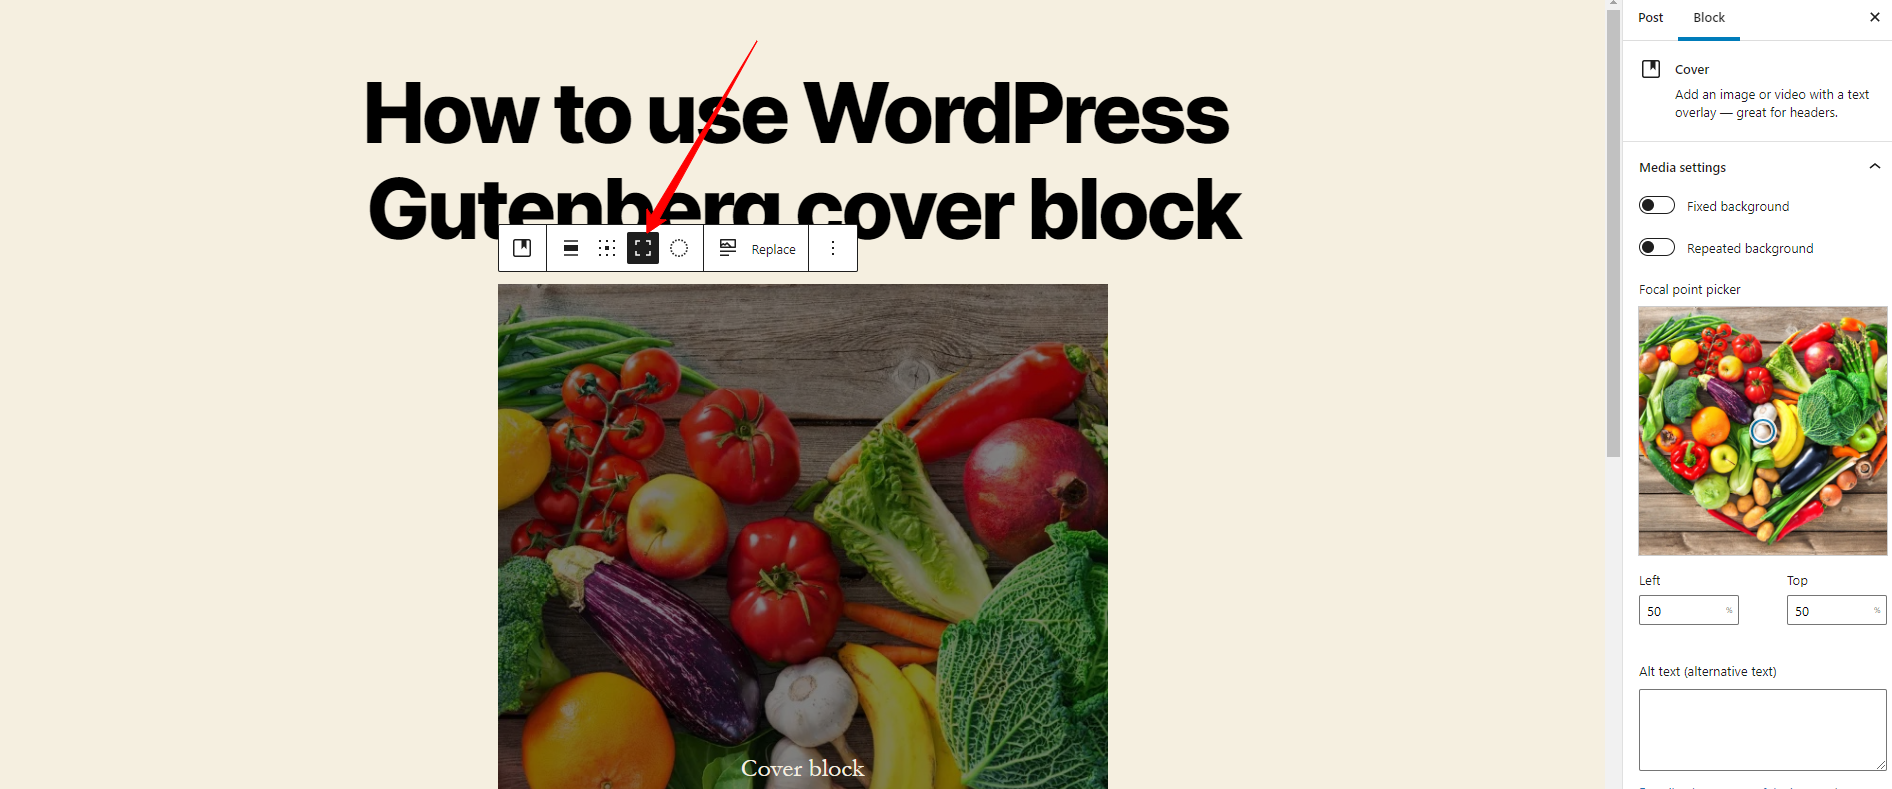
Toggle full height
If you want the image to display at full height instead of resizing it, you can click on the Toggle Full Height option in the block’s toolbar.
Apply duotone filter
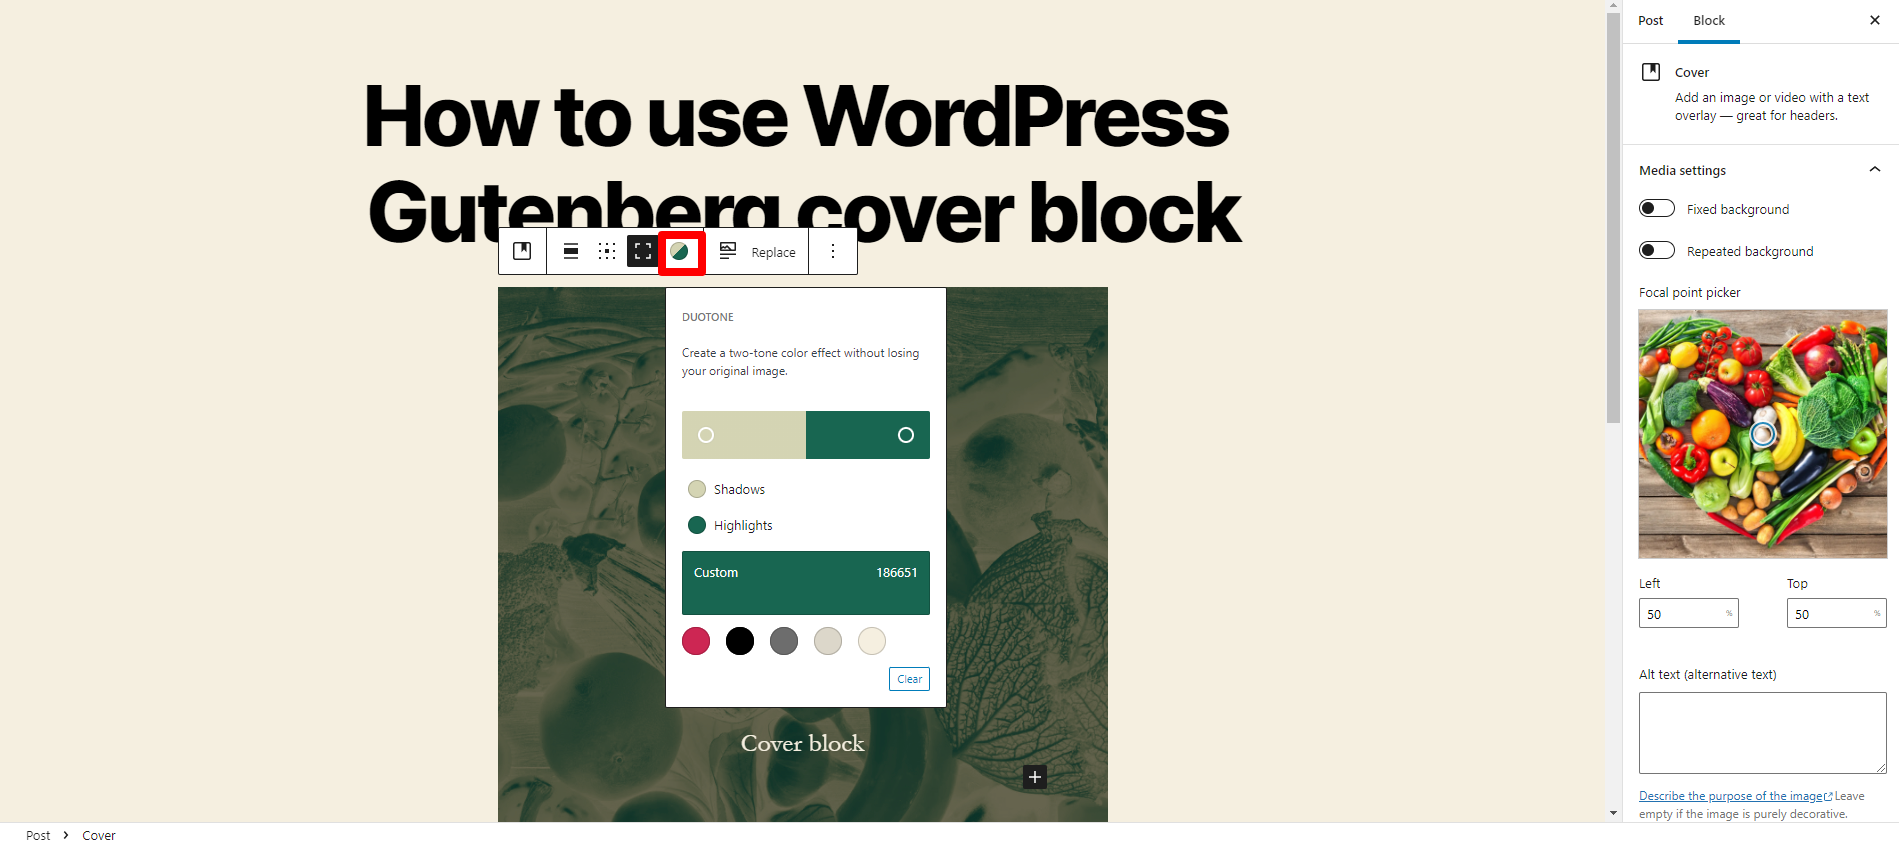
If you want to apply a duotone filter, first of all, you need to choose a duotone from the preset options. Then, adjust one color for the shadows and another for the highlights.
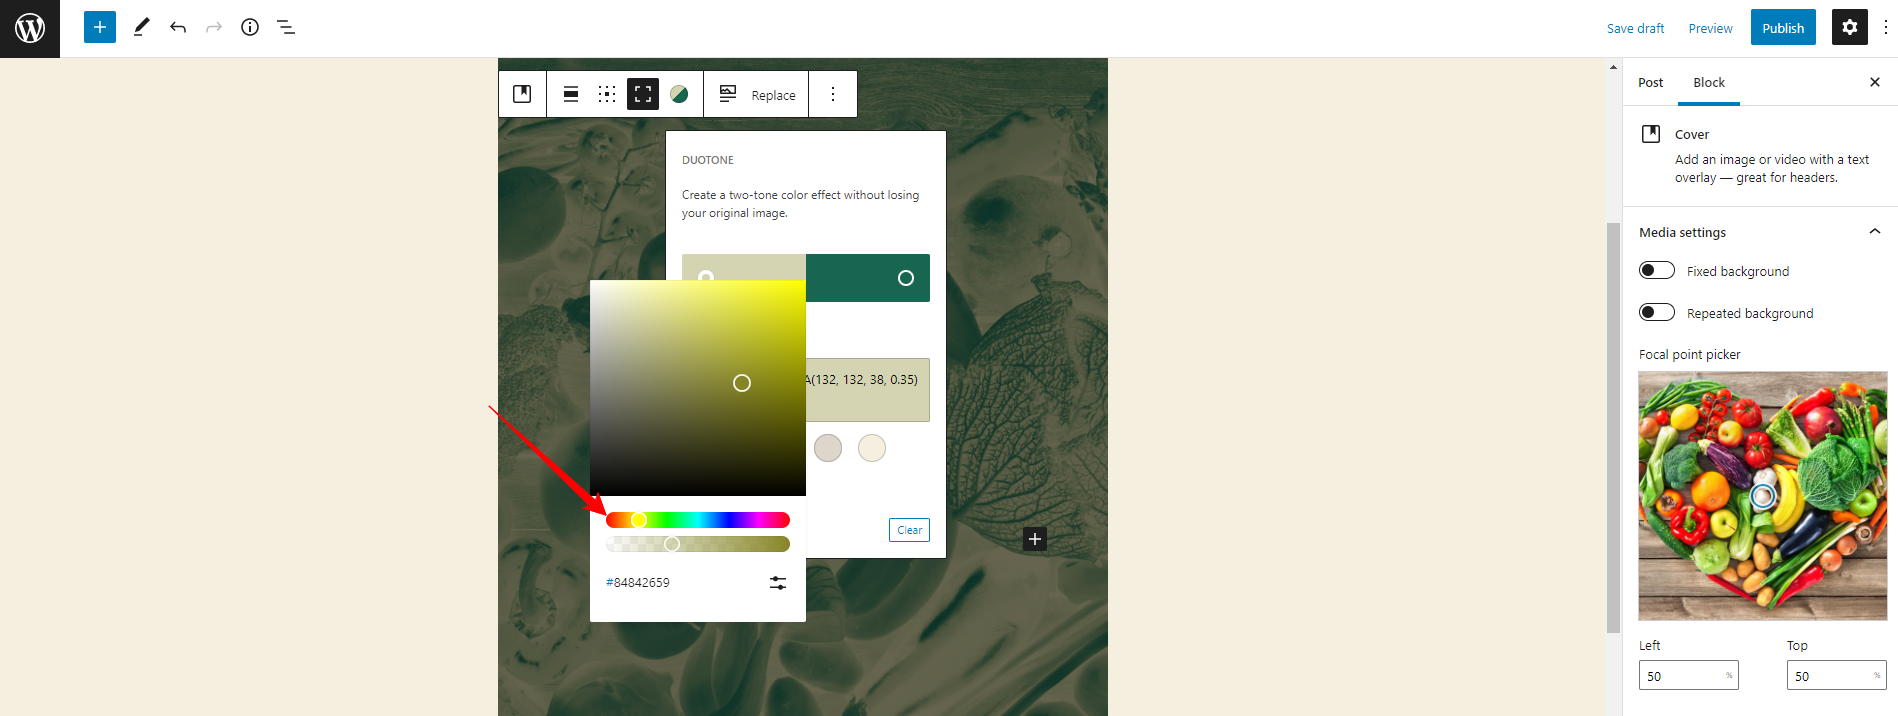
In addition, you can also select a color on the slider by adjusting it.
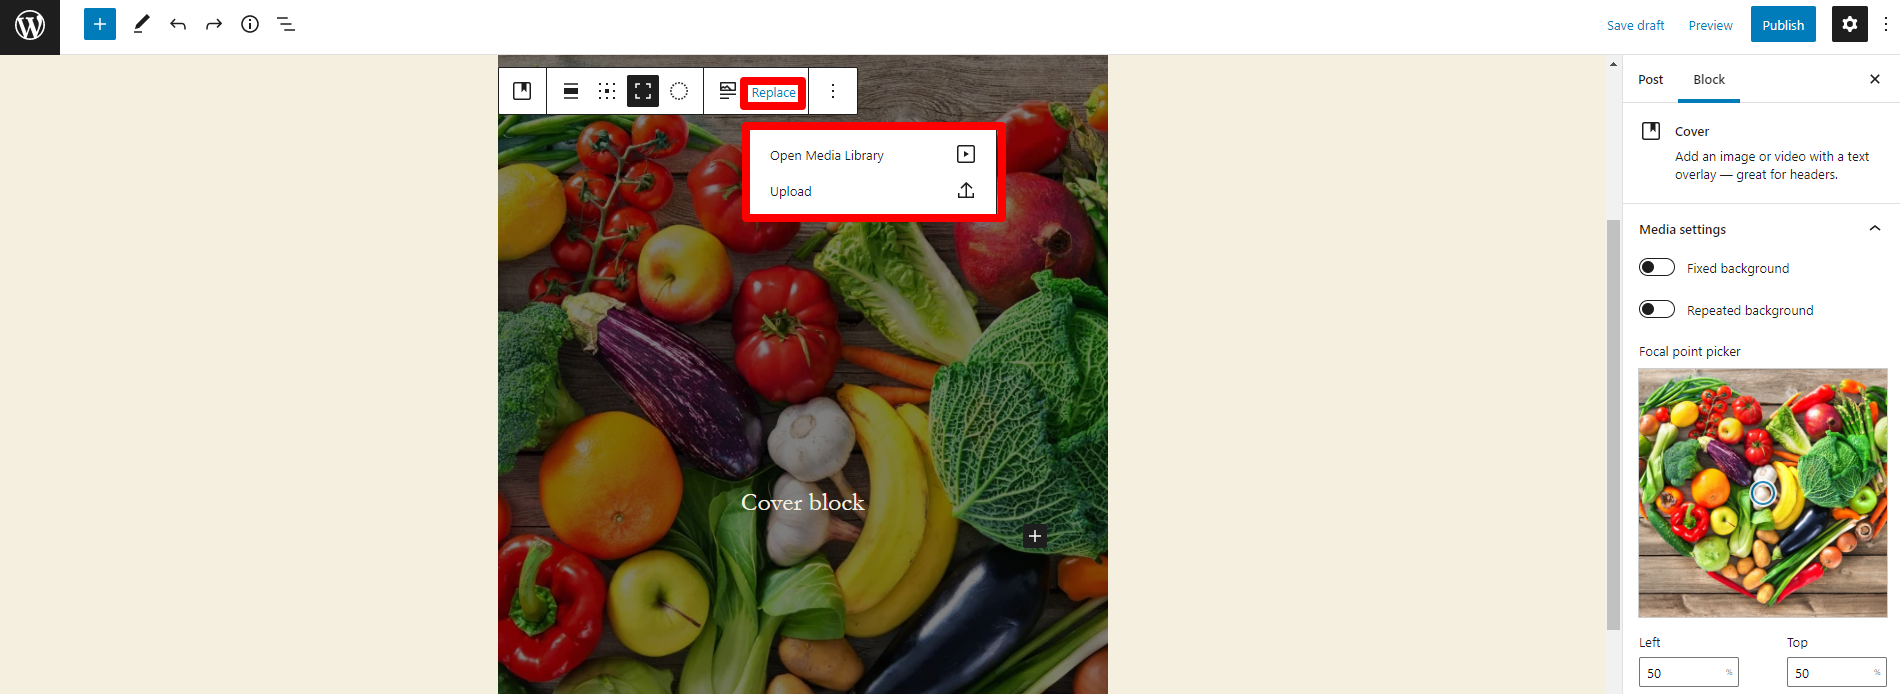
Replace
In addition, you can replace the image by uploading a new one from your computer or choosing another from your media library.
Additional options
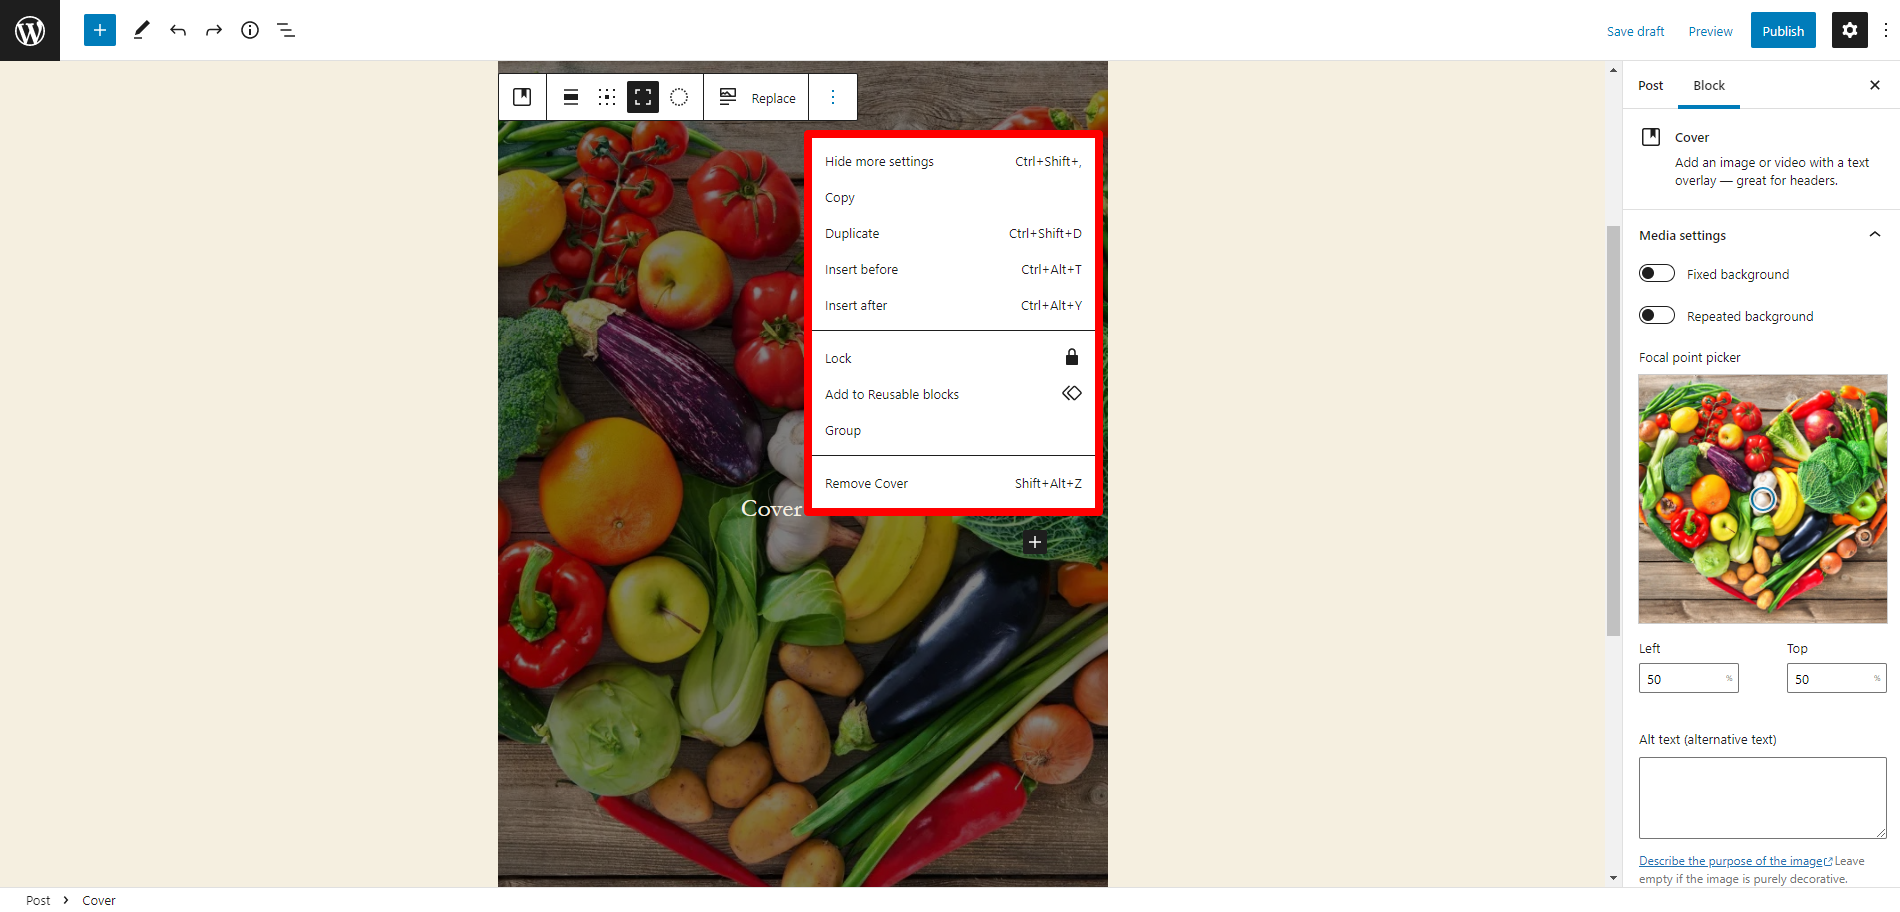
Moreover, on the cover block toolbar, there are many additional options included in the WordPress Gutenberg Cover Block:
- Hide more settings: When clicking on this option, the right sidebar will be hidden
- Copy: This option allows you to copy the cover block and then you can paste it to any position on your post/page
- Duplicate: You can create a duplicate of the cover block and place it under the original by clicking on this option
- Insert after: This option allows you to add space below the Cover Block for another block
- Insert before: This option enables you to add space above the Cover block for another block
- Add to reusable blocks: You can add the block to your reusable blocks so you can quickly use it on any post/page
- Group: You can use this option to add the cover block to a group and adjust them as a single unit
- Lock: This option allows you to disable movement or prevent removal
- Remove cover: This option allows you to delete the cover block
Use cover block resize
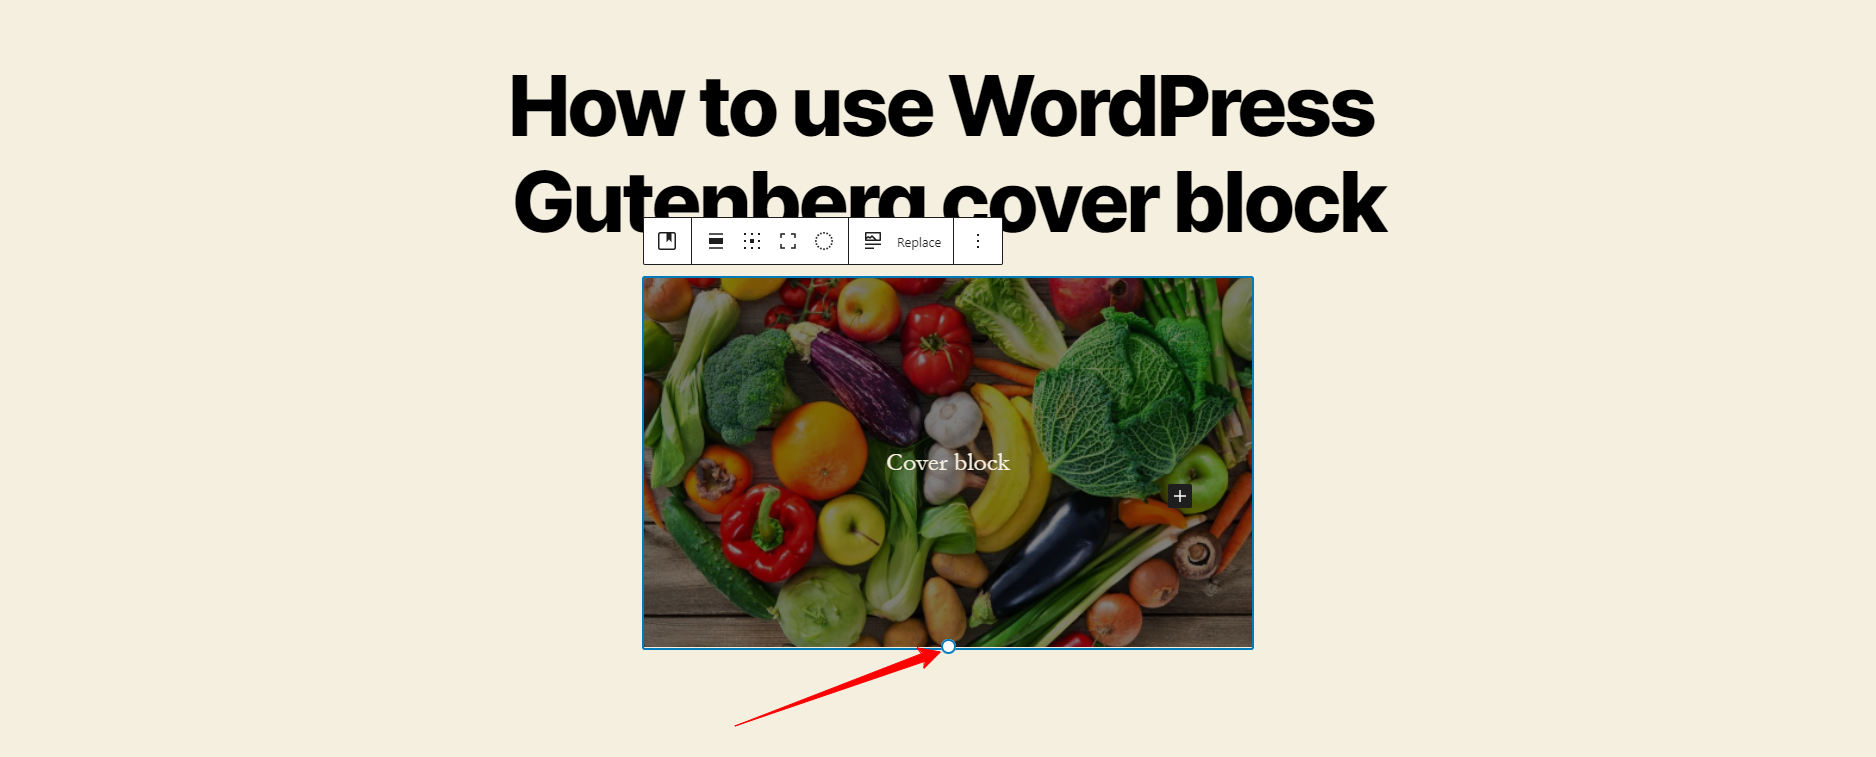
If you want to resize the image, simply drag the circle at the bottom of the image.
Use cover block settings
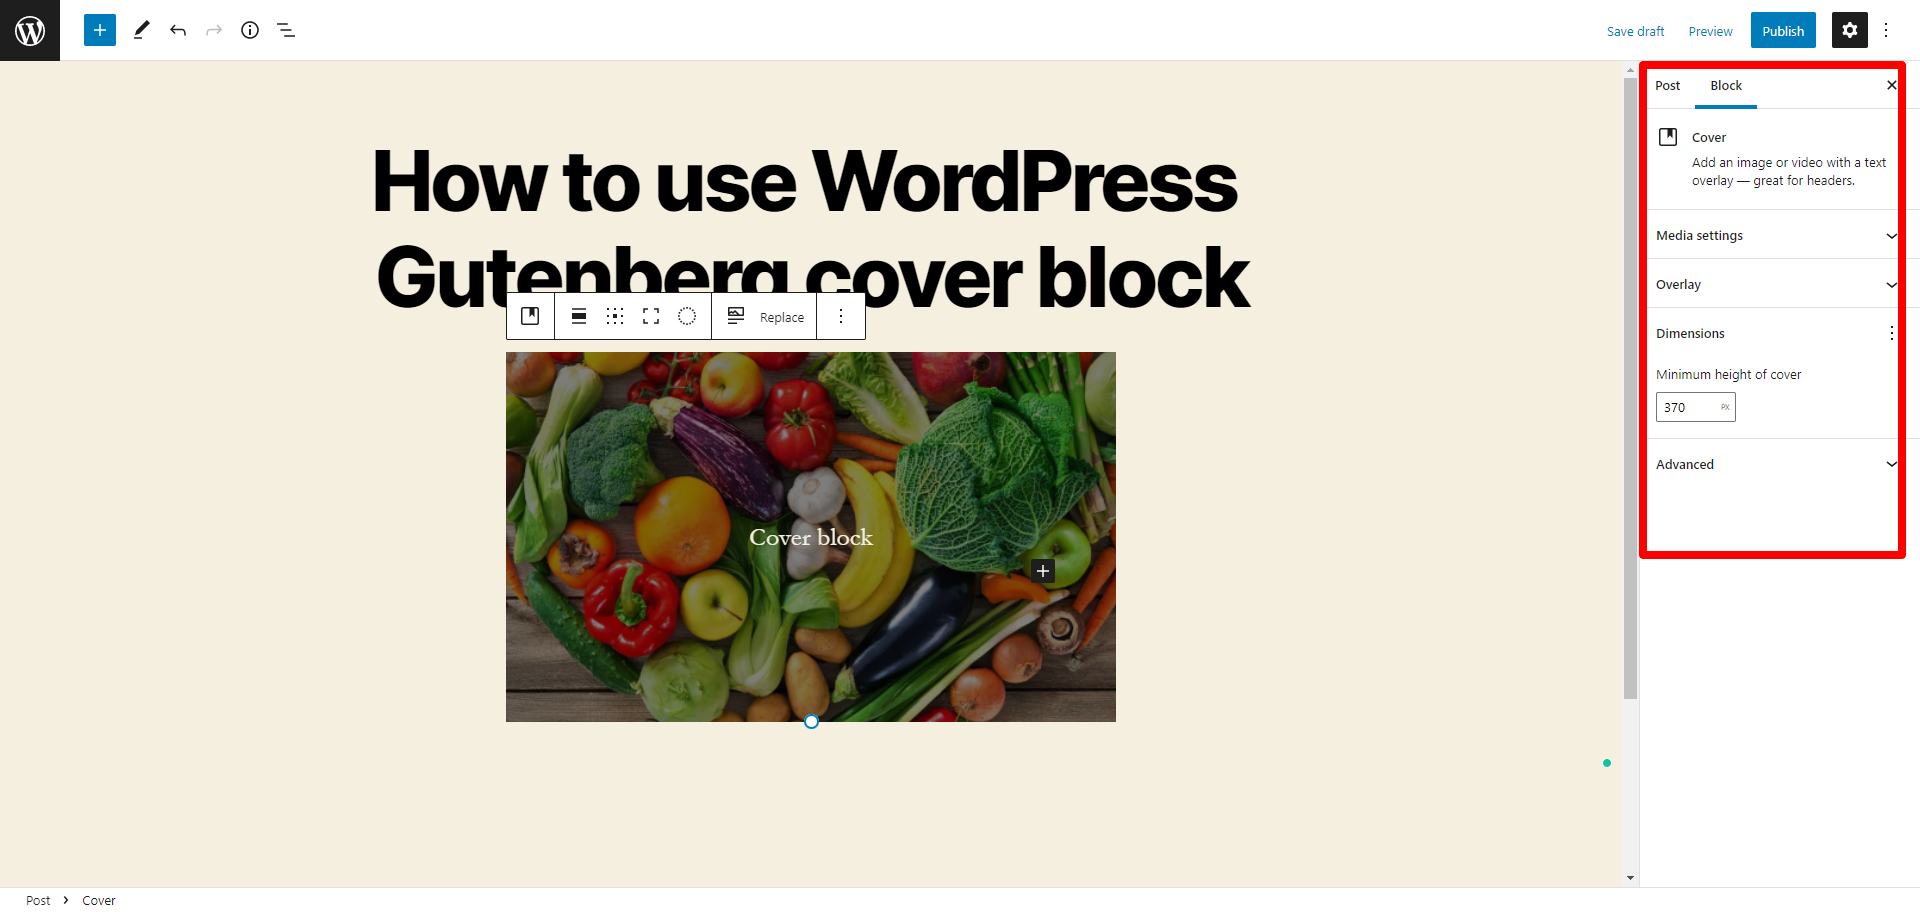
The setting options of the WordPress Gutenberg cover block are displayed in the right sidebar. You simply click on the cover block or the gear icon at the top right corner of the screen.
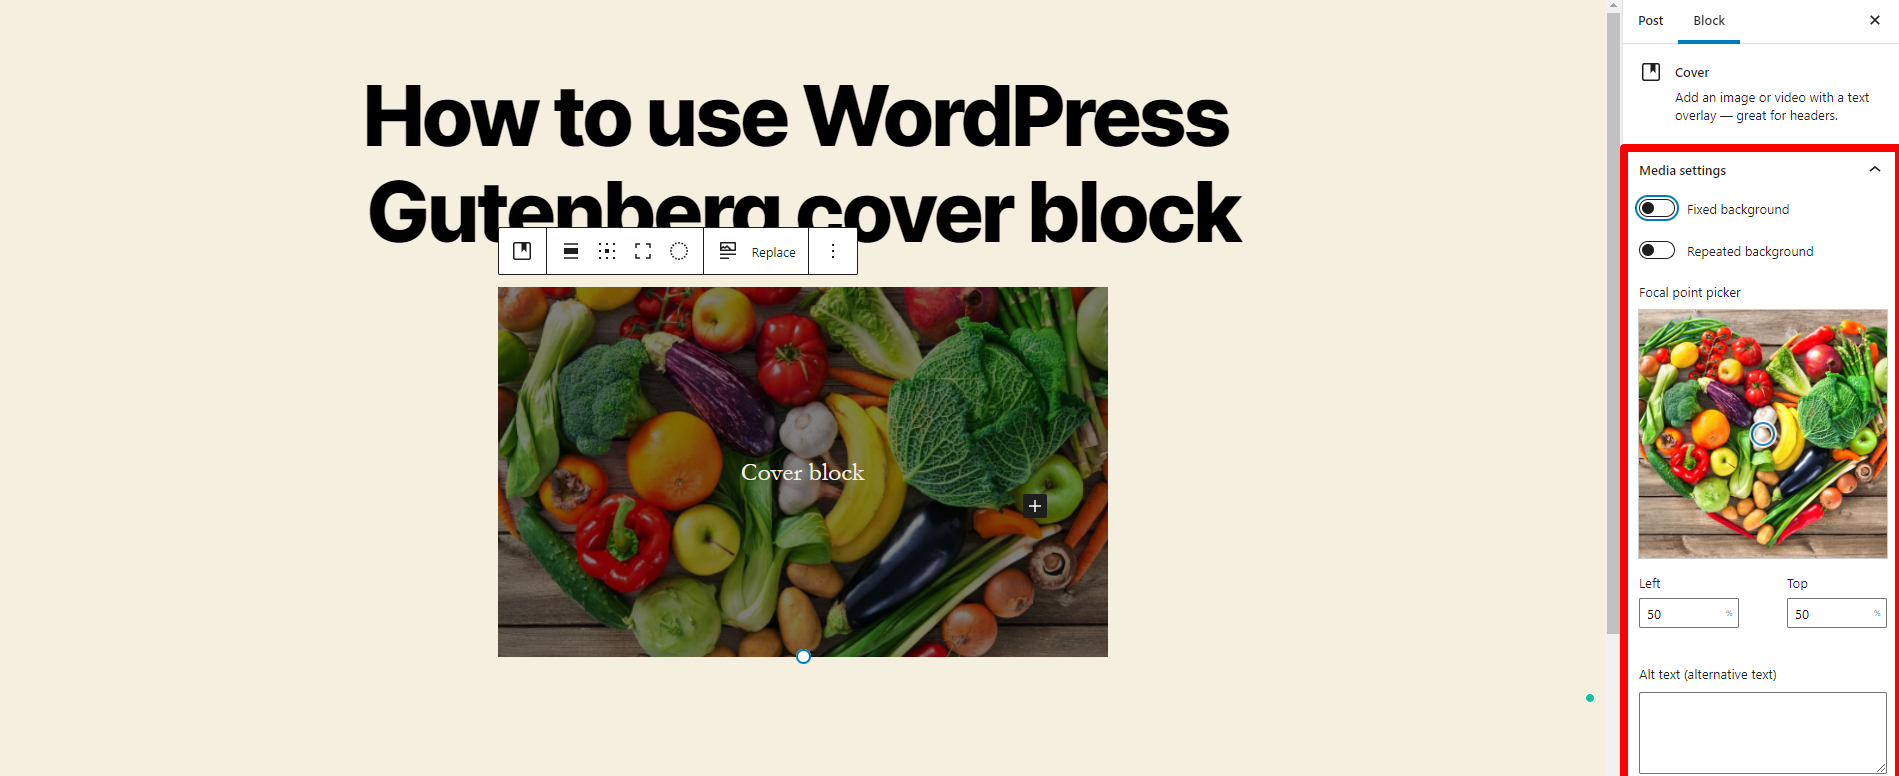
Media settings
The fixed background option lets the image stay in place as the text scrolls, creating a parallax effect. In order to enable this option, you need to move a circle to the right.
The second setting option allows you to create impressive patterns with small images. In addition, from here, you can also clear the media and specify the focal point by moving a circle or specifying the left and top positions.
Overlay
When you click on the Color option displayed below the Overlay section, then it will show a popup window where you can select a solid color or a gradient. You will see the changes in real time.
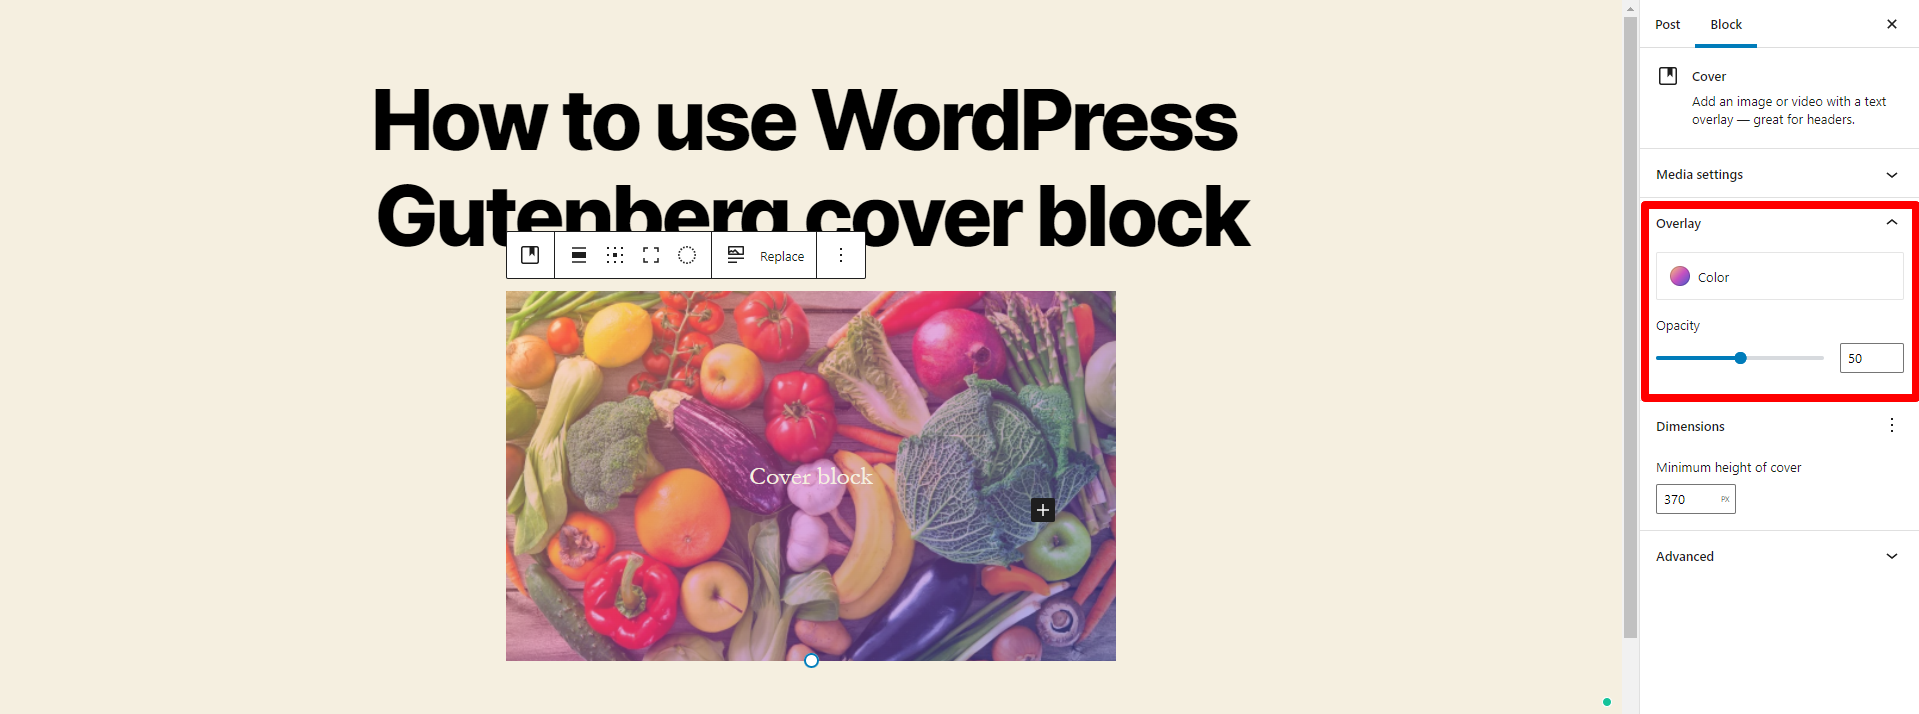
If you choose the gradient option, you can select the two colors that will be shown. Simply choose between linear and radial. Additionally, you are also able to set the opacity of the colors.
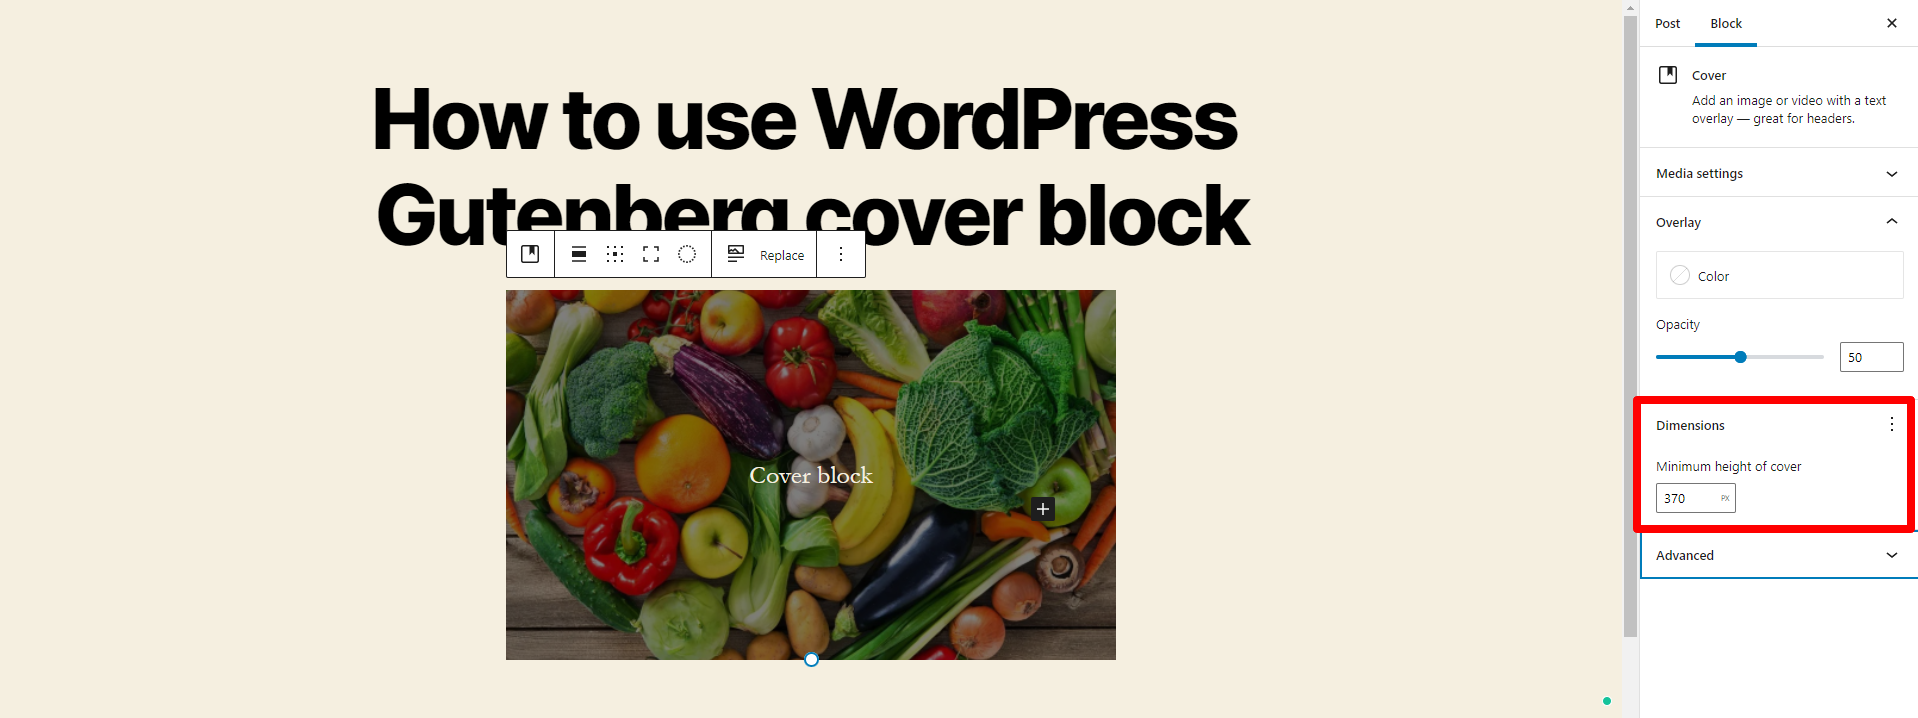
Dimensions
This option allows you to adjust the height in pixels by entering a value in the given field.
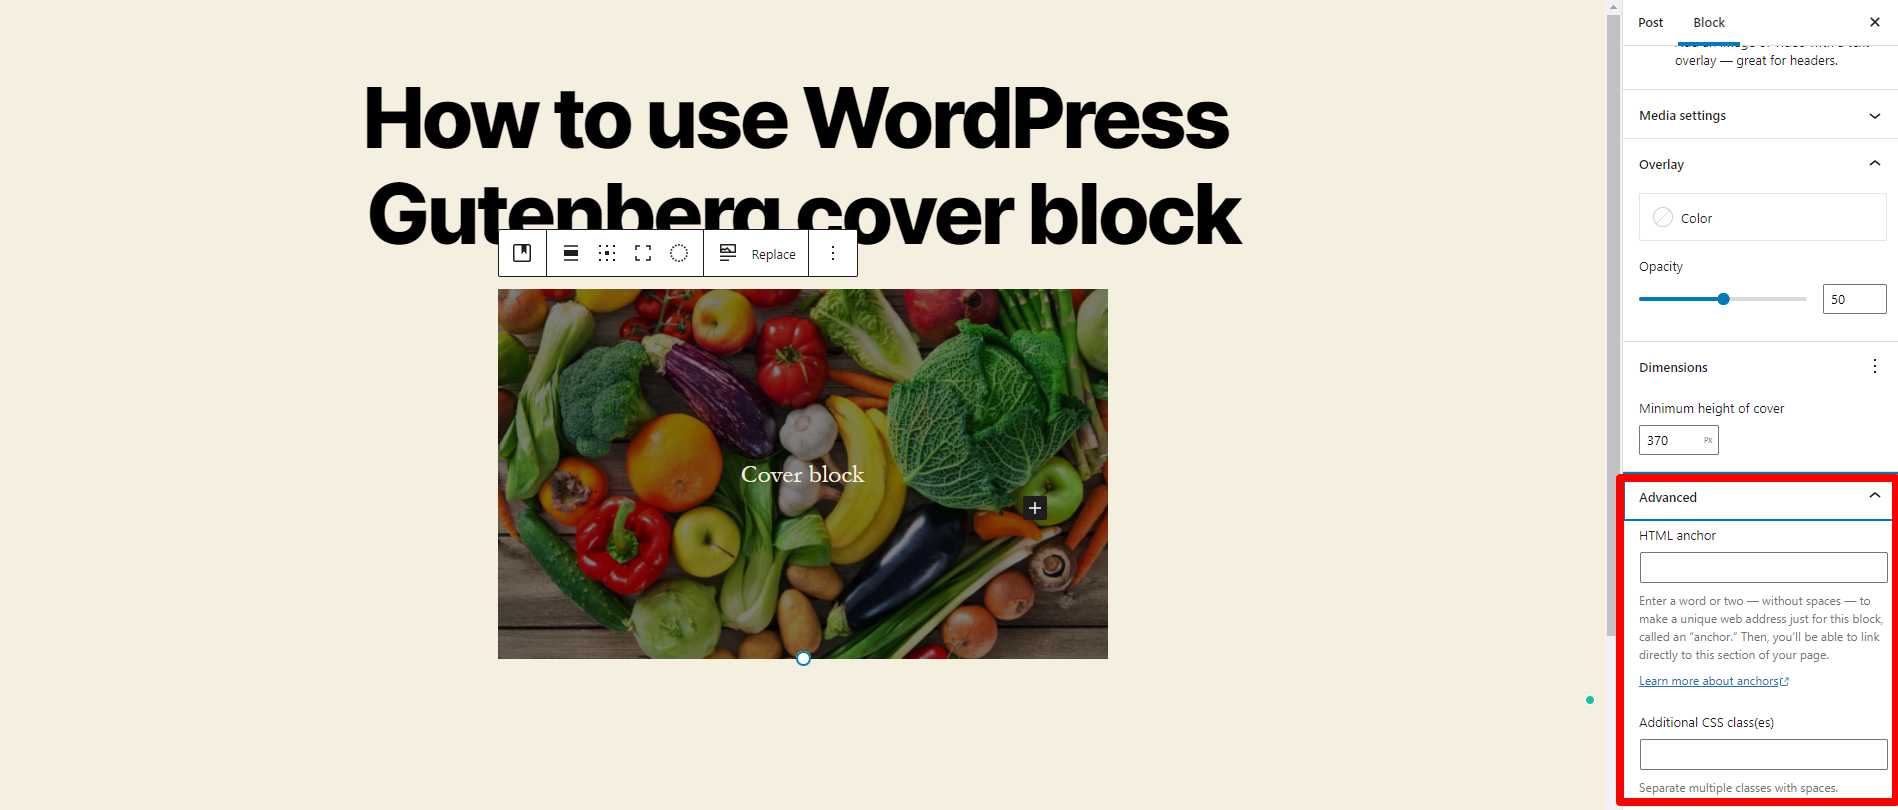
Advanced
This setting option comes with two fields. The first field is where you can add an HTML anchor. In the second field, you can add additional CSS classes. Moreover, this option also allows you to create custom CSS to customize your block.
The bottom line
To conclude, the WordPress Gutenberg cover block is one of the most useful WordPress Gutenberg Blocks. By taking advantage of this block, you can create dynamic and attractive content for your website. In addition, if you want to extend the functionality of the Gutenberg editor, you can refer to our list of top-notch WordPress Gutenberg Plugins.
Hopefully, our blog helps you use this WordPress Gutenberg cover block effectively. If you have any queries, don’t hesitate to contact us by leaving a comment below. Besides that, are you looking for a beautiful design for your Gutenberg editor? Then, don’t miss our list of eye-catching WordPress Gutenberg Themes.
Last but not least, you can spend a little time on our website discovering a wide range of stunning free WordPress themes on our website that are totally compatible with the Gutenberg block editor.