
Do you know how to create a contact form in WordPress sites? If not, read the tutorial below to learn several useful ways right now. But first, here is an overview of a contact form and its benefits.
What is a contact form?
A contact form is a page on your WordPress site. Here, you can allow your users to connect and communicate with you by filling in important information in fields such as name, address, comment, and much more. Most company websites also provide an email address so you can contact them when you need assistance or something else. However, this is considered inconvenient, while a contact form provides an immediate way for users to ask the businesses questions.
Why should you create a contact form on your site?
If you are running a business, creating a contact form in WordPress sites plays a crucial role. It is a bridge that helps your customers contact you easily whenever they want to buy, ask questions, or for any other reason. Moreover, using a contact form instead of providing your email address and phone number brings you a wide range of valuable benefits including:
- Protect your email box from spam: This method can’t protect your site from spam 100%. However, it will reduce spam attacks on your mailbox by adding a ReCaptcha function or using other spam protection features.
- Keep track of your messages: whenever the contact forms are submitted, you will get an email reminder or notification. Thanks to that, you will not miss any messages and can reply to messages quickly, which makes your customers more satisfied.
- Get all the necessary information in one place: Normally, when clients send questions by email, they often forget to provide some key information. With contact forms, you can include boxes with various fields for clients to fill in. Thanks to that, you can receive all the information you want.
How to create a contact form on a WordPress site?
Web developers have built a lot of powerful tools to help you create a contact form in WordPress without touching any single line of code. If you are a beginner, it can be hard to know which tool to start with. In today’s blog, we help you create a contact form with the two simplest plugins: Ninja Forms and Formidable Forms.
Now, let’s dive into the step-by-step guide for each solution below.
Solutions
Method 1: Using Ninja Forms
With over 20.000.000 downloads around the world, Ninja Forms is one of the most popular form builder plugins developed by Saturday Drive. In addition to a user-friendly interface, this plugin also offers you a lot of creative features and other helpful functionality. It comes in two versions: free and Pro. Now, we will help you create a contact form with the free version. Let’s start.
Step 1: Installing and activating Ninja Forms
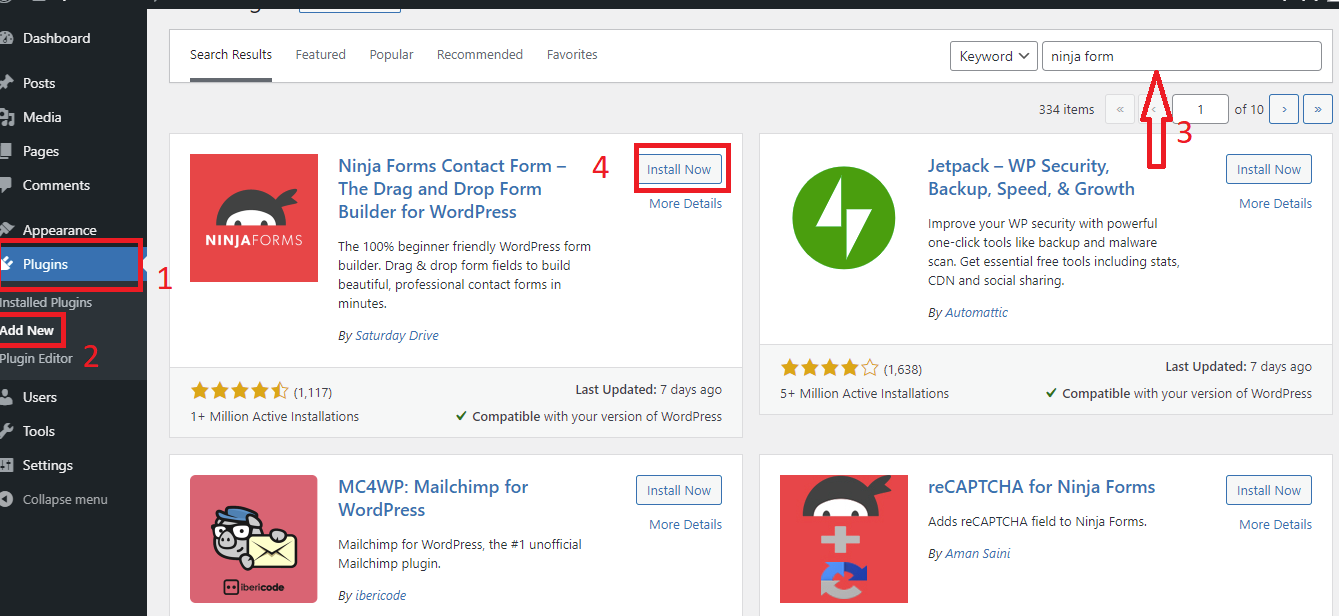
As with other plugins, installing and activating it takes less than a minute. Simply go to Plugins> Add New on your Dashboard. Type Ninja Forms in the search bar, then install and activate it.
Step 2: Building a contact form
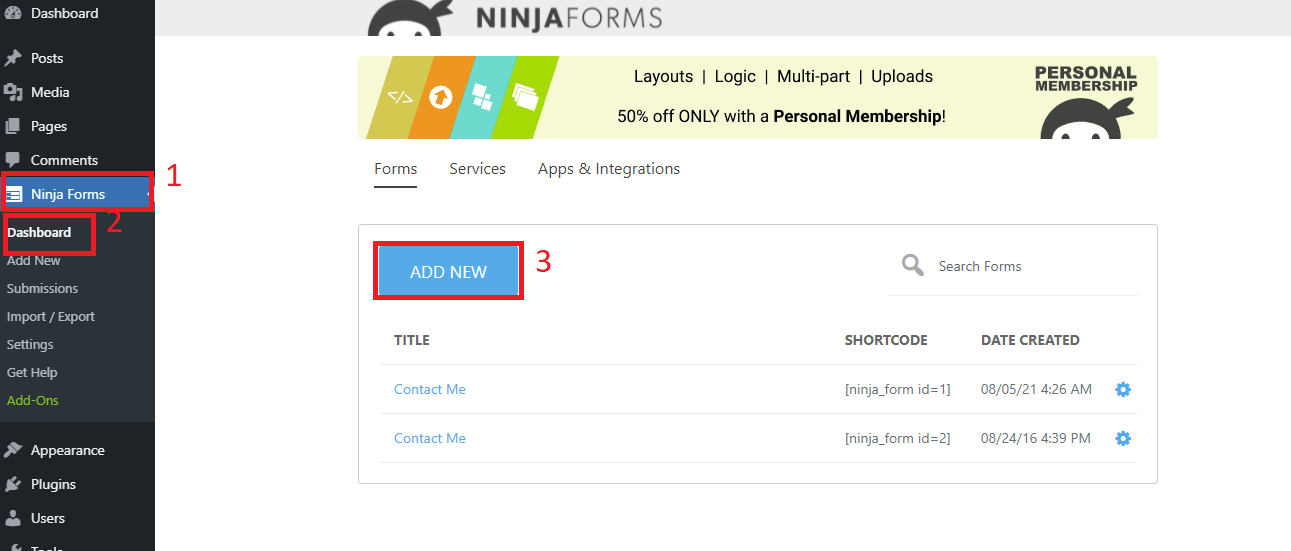
Firstly, switch to Ninja Forms > Dashboard > Add New to choose the type of form you want to create.
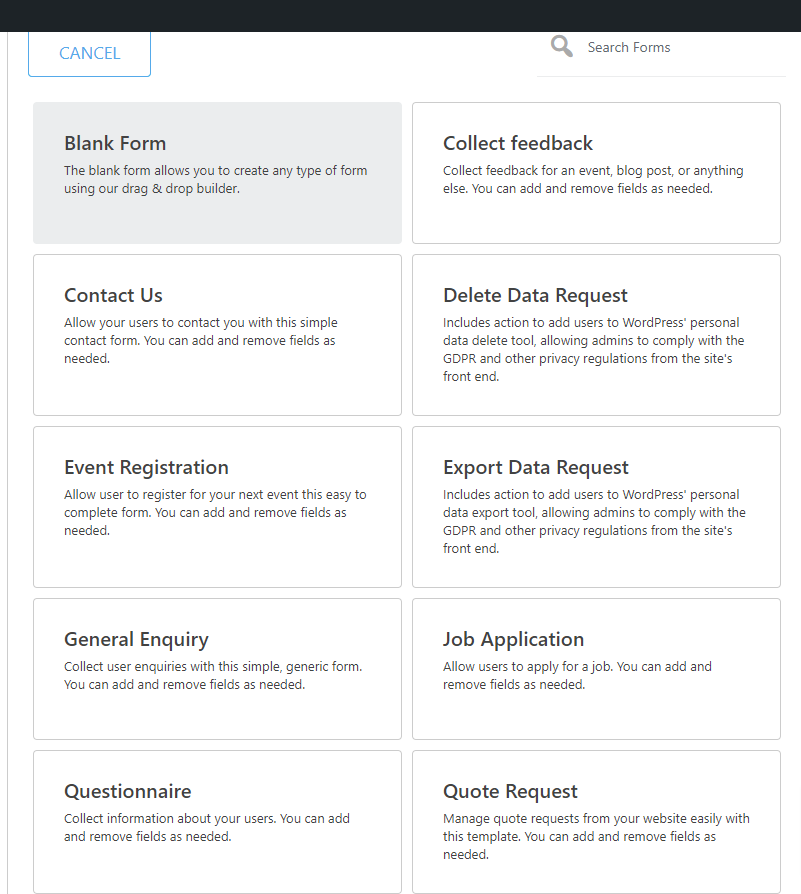
Here, a list of form types is displayed. You can start with a blank form or choose one of the pre-made forms and modify it to suit your demands.
After choosing your favorite form, if it suits your requirements, you can click on Publish immediately to get the shortcode. On the other hand, click on the “+” symbol to modify it.
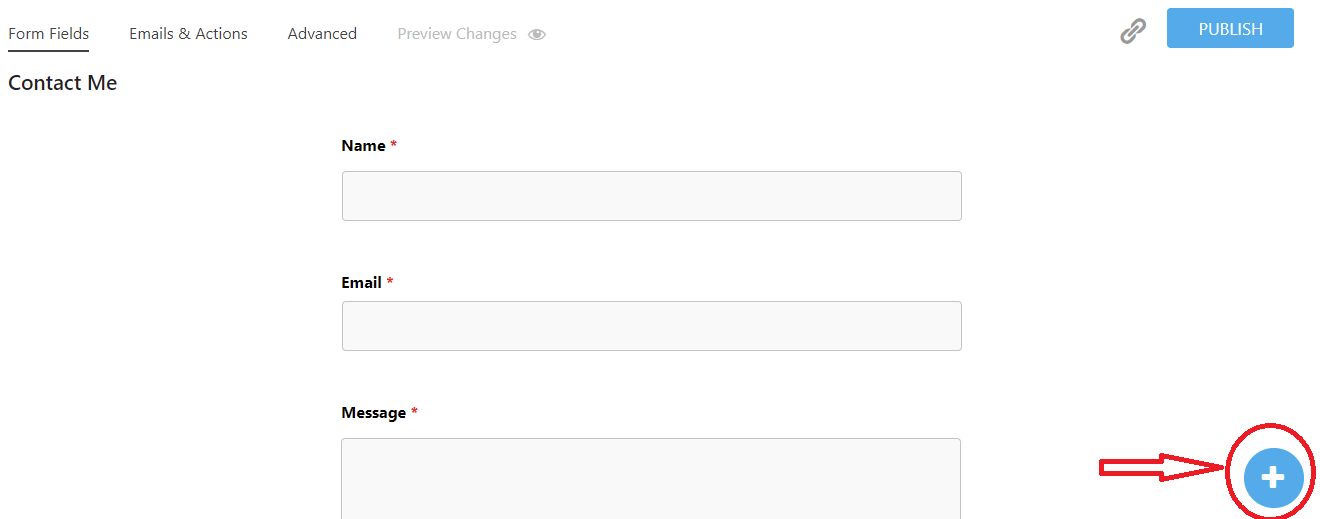
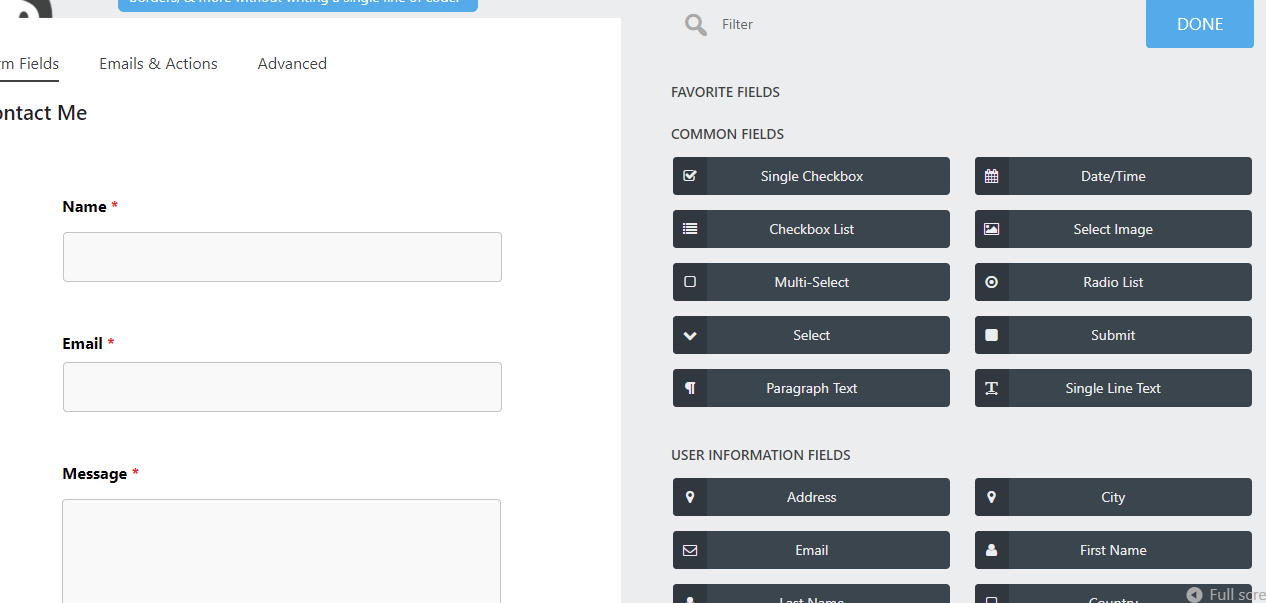
A collection of common fields is shown in the screenshot below. You can easily drag and drop them to any place on the contact form according to your preference.
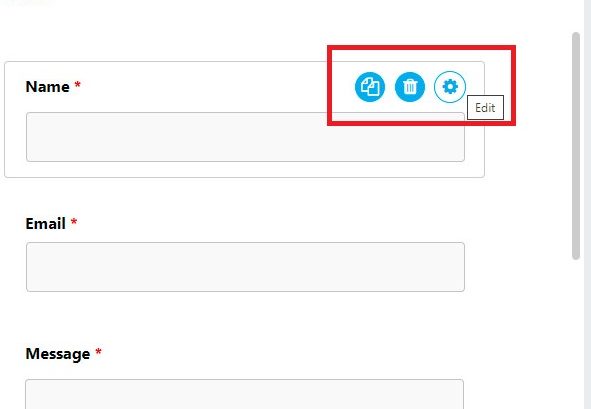
To remove an unnecessary field, hover over the gear to reveal the trash icon and then click on it.
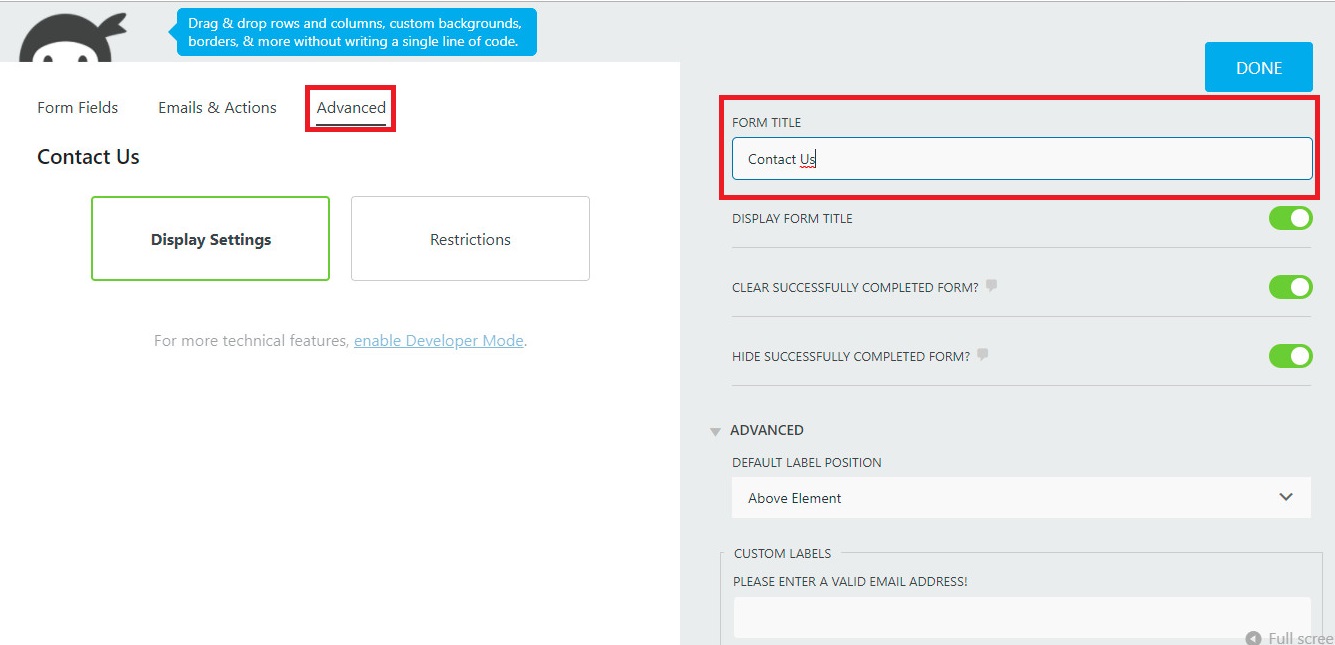
In addition, at the Emails and Actions tab, you can disable email confirmation, email notification, and store submission. Alternatively, you can leave this tab as it is if you want to get all emails and keep all actions. For the Advanced tab, click on the display settings option, which lets you change the form title.
Step 3: Adding your form to a page
- Option 1: Using a shortcode
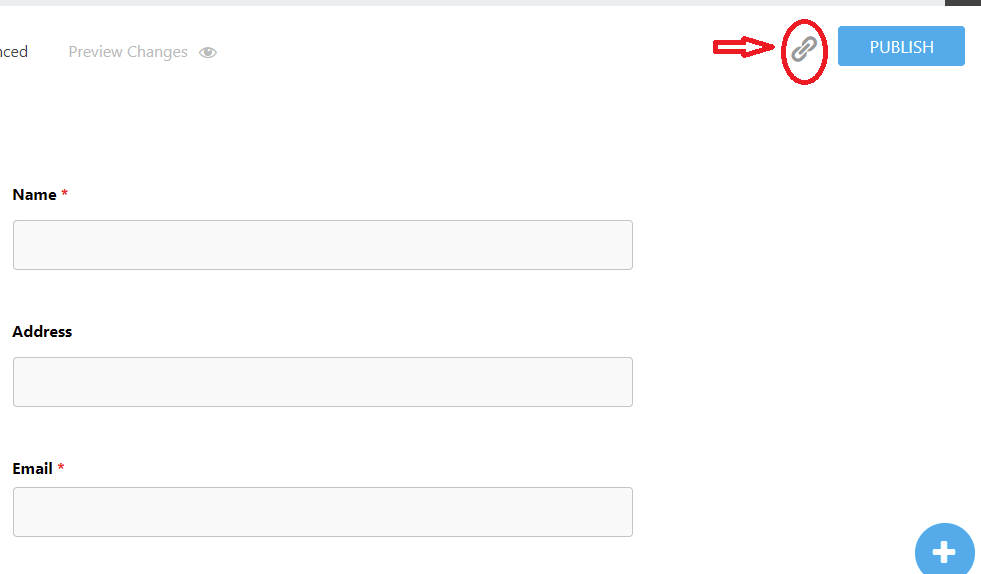
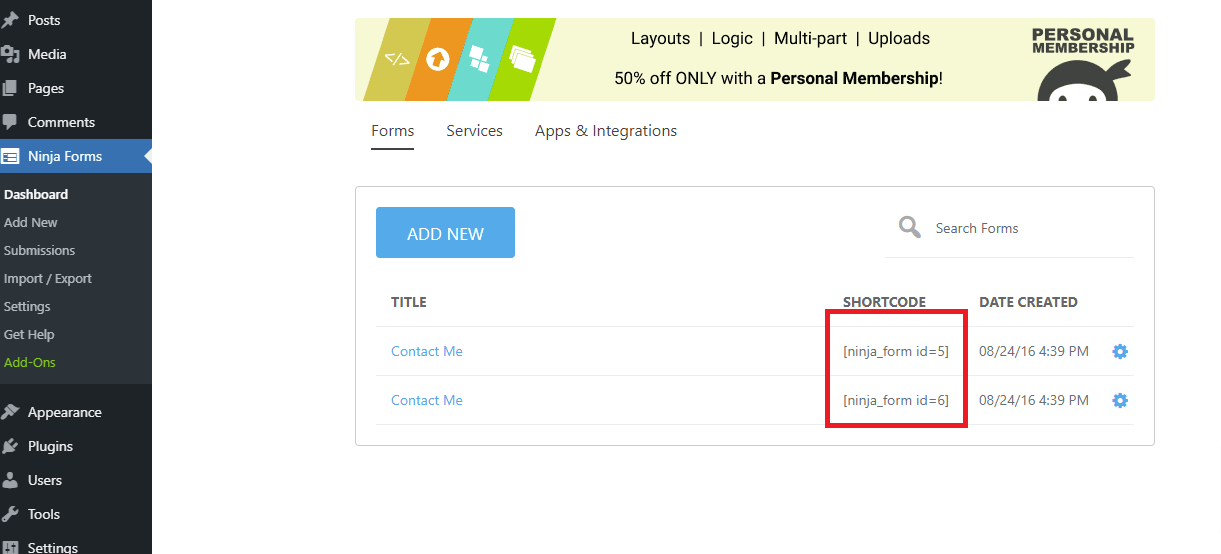
After building an attractive contact form, click on the “Done” button and “Publish” it. Then you can get the shortcode immediately and copy it into your page by clicking on the link symbol.
There is also another way to get a shortcode: close the builder and move to the next step. Now, let’s navigate to Ninja Forms> All Forms, you can see that each form you have made has its own shortcode. You can copy and paste this shortcode to any page on your website.
Option 2: Using the “Append a Ninja Forms” box
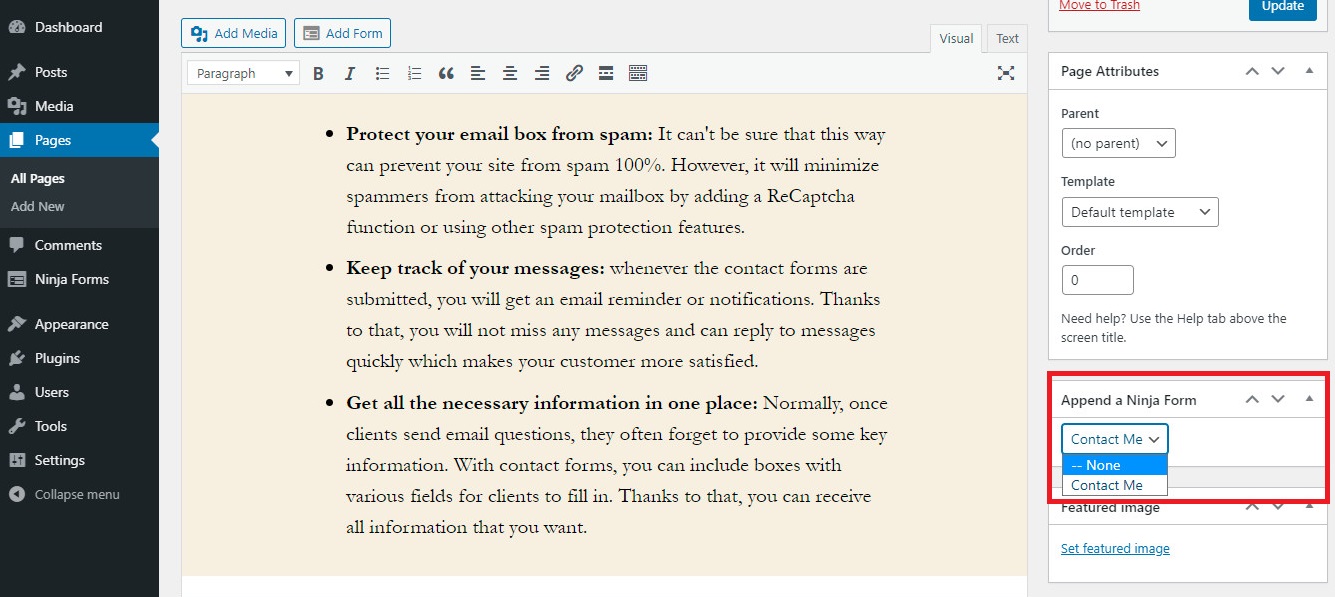
Moreover, Ninja Forms also allows you to display a contact form on your page by choosing your form from the dropdown list in the “Append a Ninja Forms” box in the right sidebar.
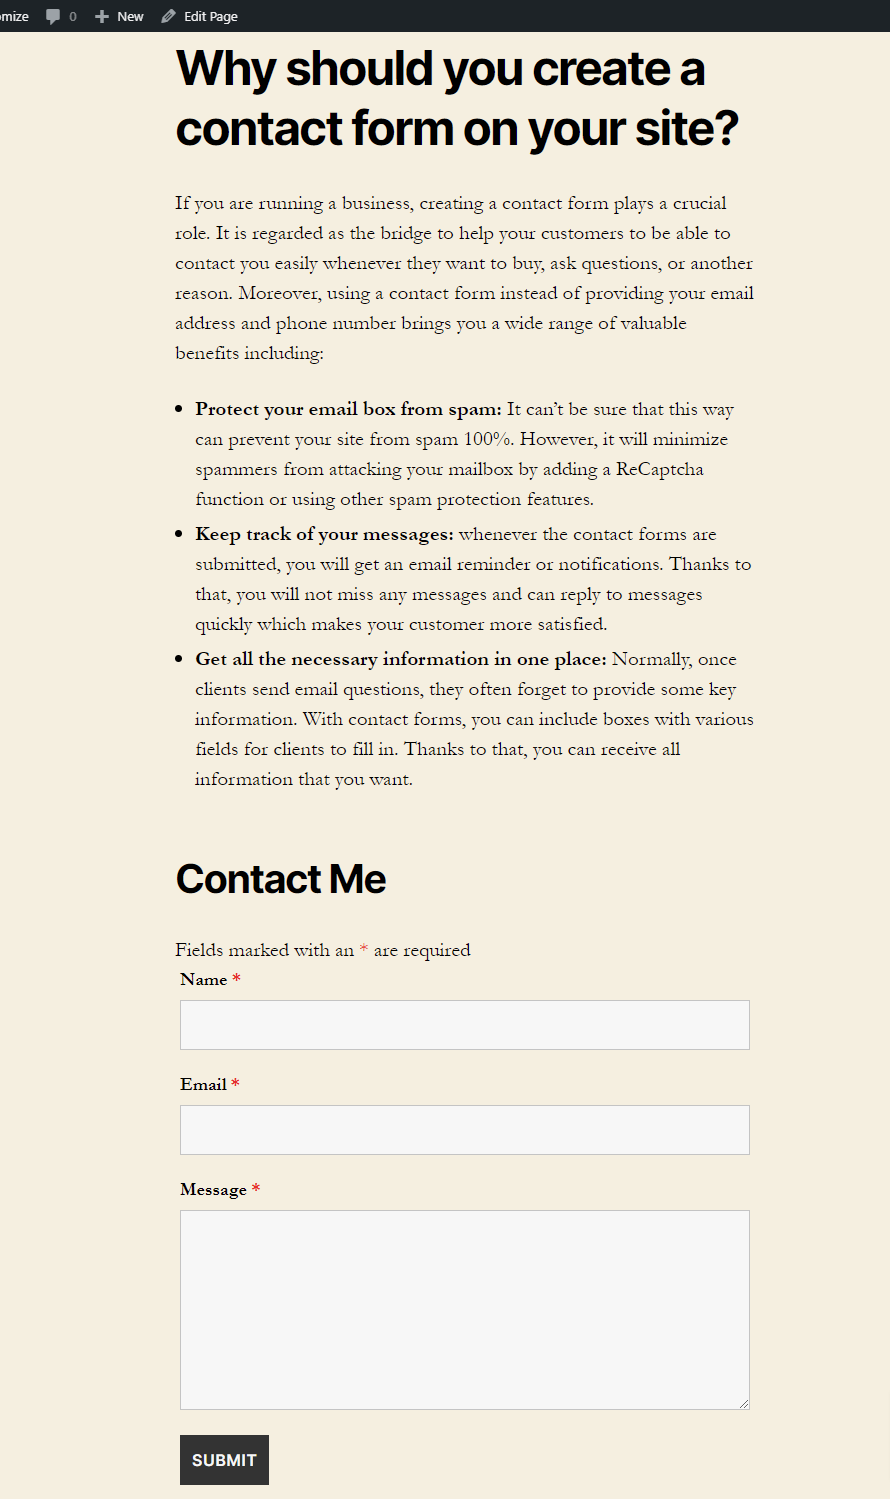
Now let’s see the result.
- Option 3: Displaying the contact form in a widget
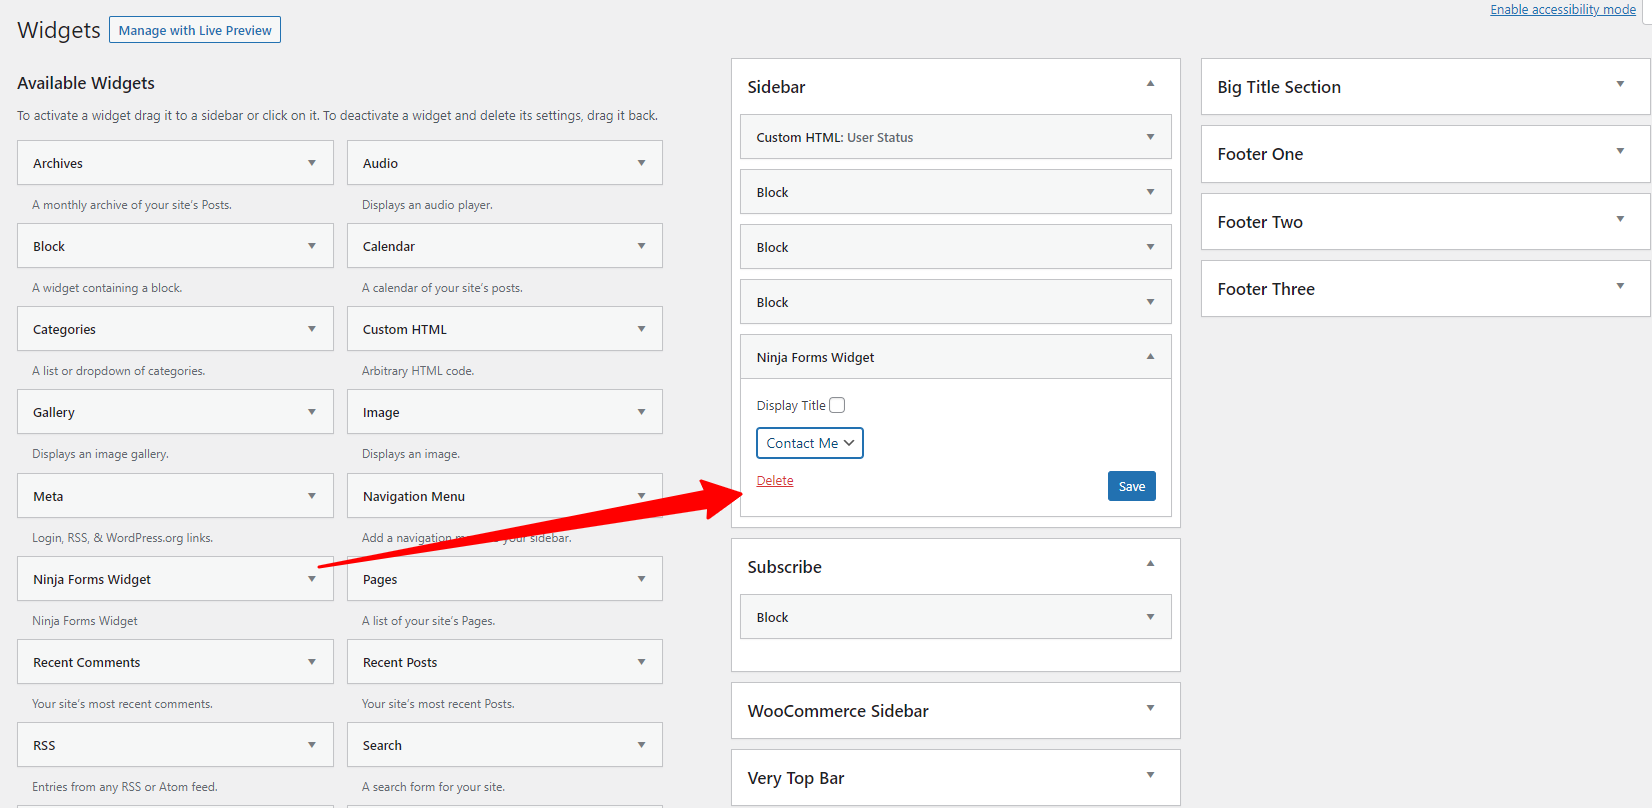
Just switch to Appearance > Widgets. You can view a list of options including the Ninja Forms Widget. You can select it and put the form into the sidebar, content top, or content bottom depending on your purpose. And finally, don’t forget to save your settings.
Method 2: Using Formidable Forms
Formidable Forms is a free form builder WordPress plugin that allows you to create all types of forms, quizzes, surveys, timesheets, and much more. It offers a built-in drag and drop form designer, so you can create feature-rich forms with ease. Moreover, it also has a Premium version. However, we will use the free version as an example for today’s tutorial.
The installation and activation of this plugin are similar to Ninja Forms, so we will skip this step and go on to the next steps.
Now let’s follow the step-by-step guide below to create a contact form in WordPress with the Formidable Forms plugin.
Step 1: Building a contact form
After you have installed and activated the plugin, go to Formidable> Forms(Lite) on your dashboard, and click on “Add new” to open a list of options.
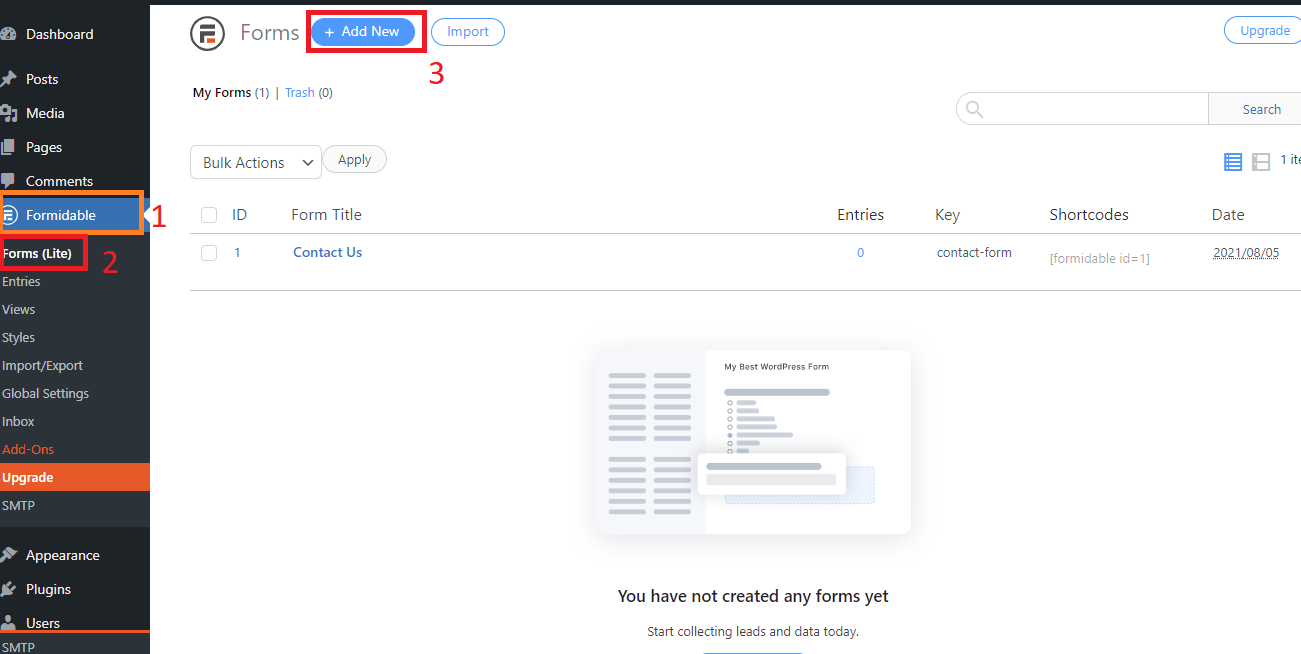
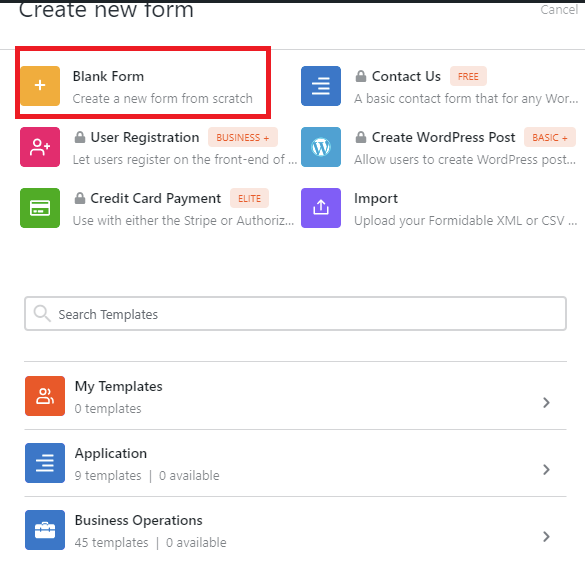
Formidable allows you to create many types of forms. However, the free version of this plugin only enables you to create a form by using the blank form or pre-made templates (you need to provide an email to get a code, then you can get 10 pre-built templates).
In our case, we will click on Blank Form to start.
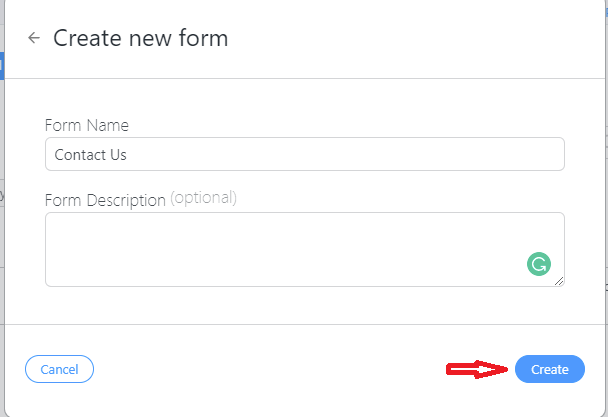
You can fill in the Form name and Form description and click on the “Create” button to move to the next step.
Here, you can see a list of fields. Use the drag and drop feature to add the fields you want. If you want to delete a field, click on it and a trash icon will be displayed.
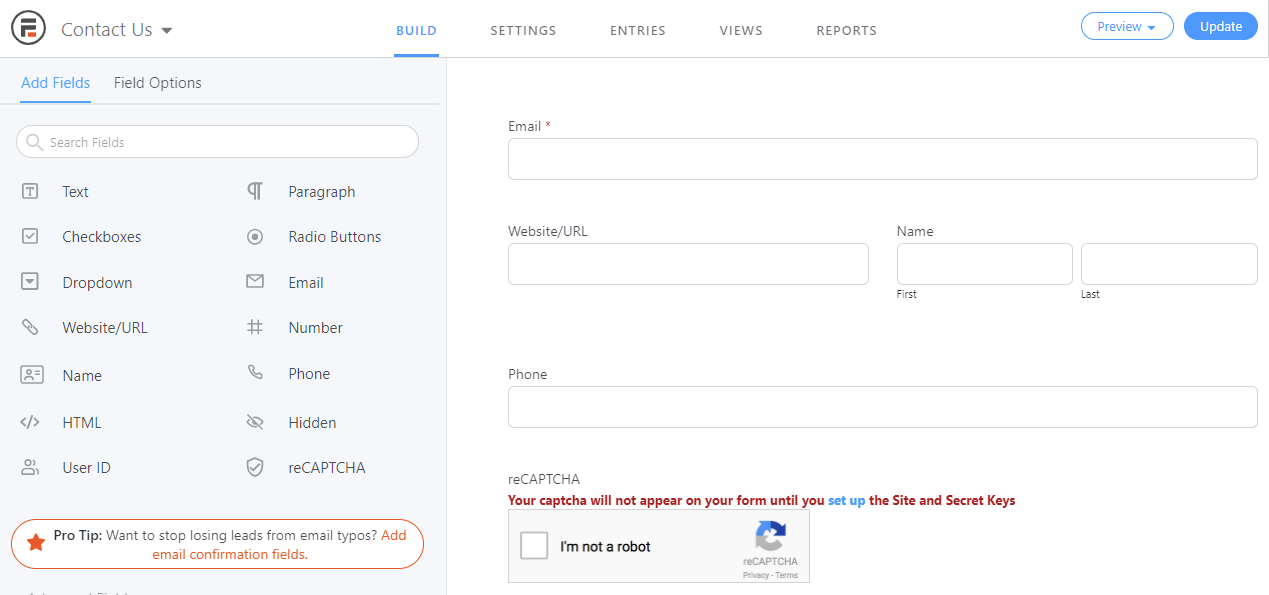
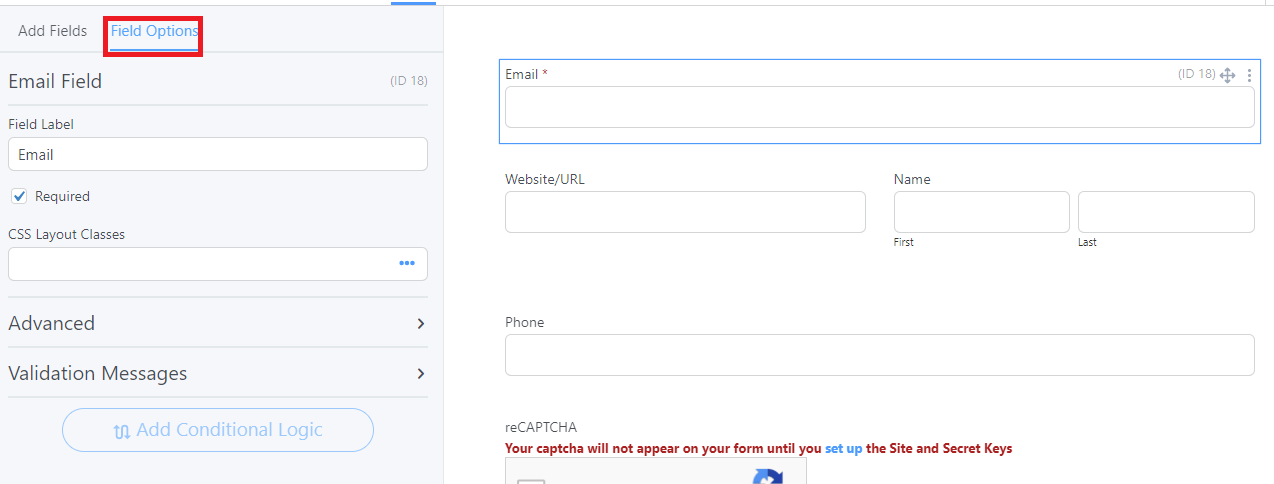
To customize a field, choose the field you want to edit and use its many useful options. Let’s tick on the Required option if you want this to be a required field. Otherwise, you can leave this option unchecked.
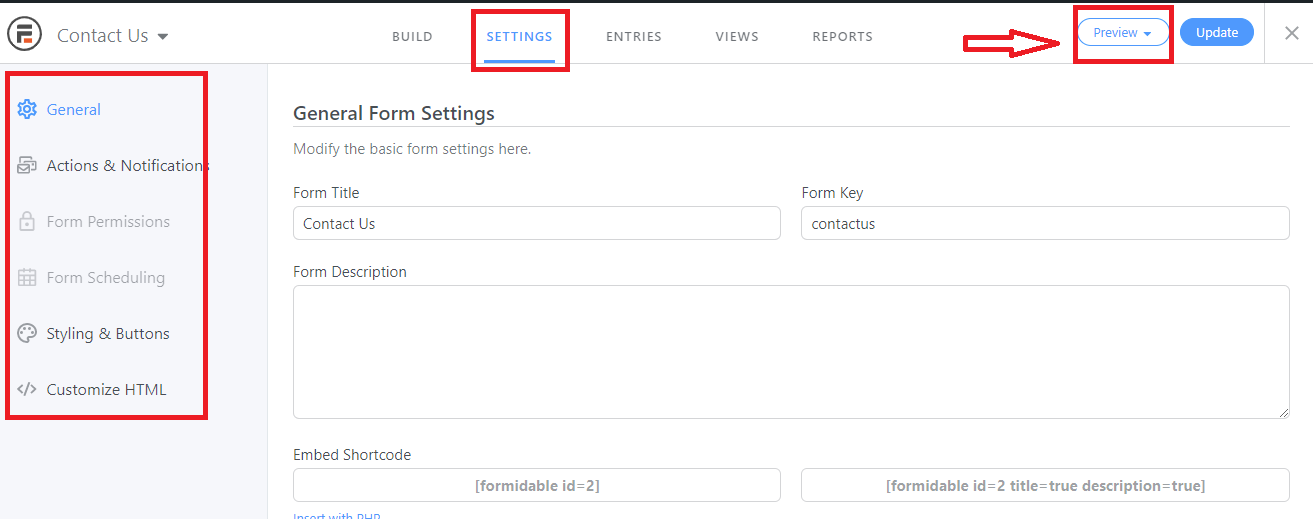
Next, switch to Settings tab. In the General section, you can change the form title, add a message, and much more. The Actions and Notification section allows you to enable/disable email notifications. If you want to get email notifications and mail confirmations, we recommend leaving the default values.
Click on Update to finish your contact form. In particular, this plugin allows you to preview your result on a blank page or in the theme by clicking on the preview button, as in the screenshot below.
Step 2: Adding a Contact Form to your page
Firstly, you need to close the builder to return to the Formidable page. Now, copy the shortcode of your contact form from the shortcodes column.
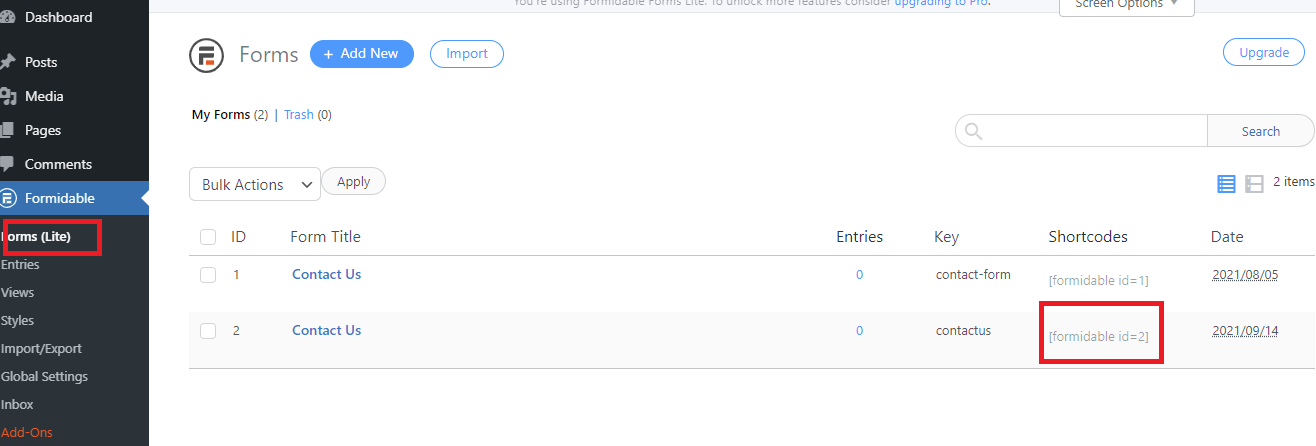
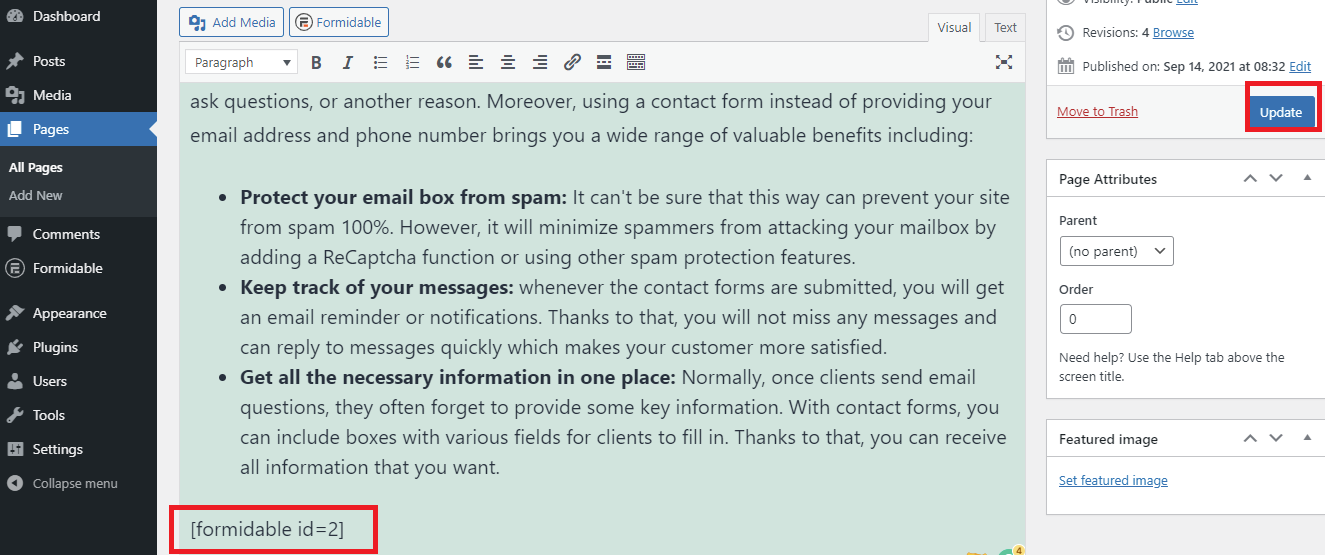
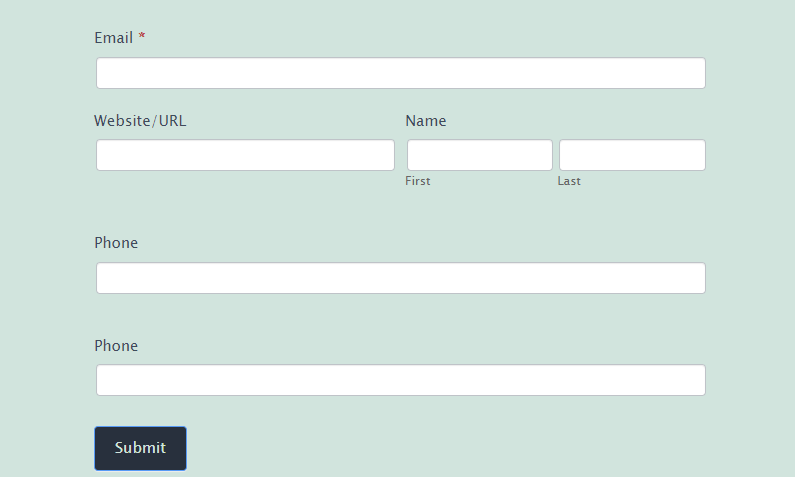
You can paste this shortcode at any position on your page and don’t forget to publish or update your changes.
And this is how it looks!
Summary
We have just provided a step-by-step guide that will help you create a contact form in WordPress sites with 2 easy-to-use plugins. Have you picked your favorite yet? If you are still wondering, let’s access the Ninja Forms vs Formidable Forms comparison blog to see the differences between these plugins.
We hope that this article gave you some useful solutions to display a contact form on your WordPress page without effort. If you encounter any problems while using these plugins, don’t hesitate to mention it in the comment section below. We will give you assistance as soon as possible.
Moreover, there are other valuable options that help you create many types of forms on your site, you can visit WordPress Form Builder Plugin to get more.