A visitor registers on your Joomla site, and the first thing they receive is a plain grey email with a generic subject line, no logo and wording that sounds nothing like your brand. Password resets, contact form copies and approval notices look the same. The good news: you do not need an extension or a hack in core files to fix this. Joomla’s built-in Mail Templates let you rewrite every system email, switch it to HTML, add your logo and give all messages one consistent layout that survives updates.
This guide walks through the whole process on Joomla 5.2 and later (including Joomla 6): where the emails live, how to edit their text, how to turn on HTML mail with a logo, and how to build your own layout with a template override.
How Joomla mail templates work
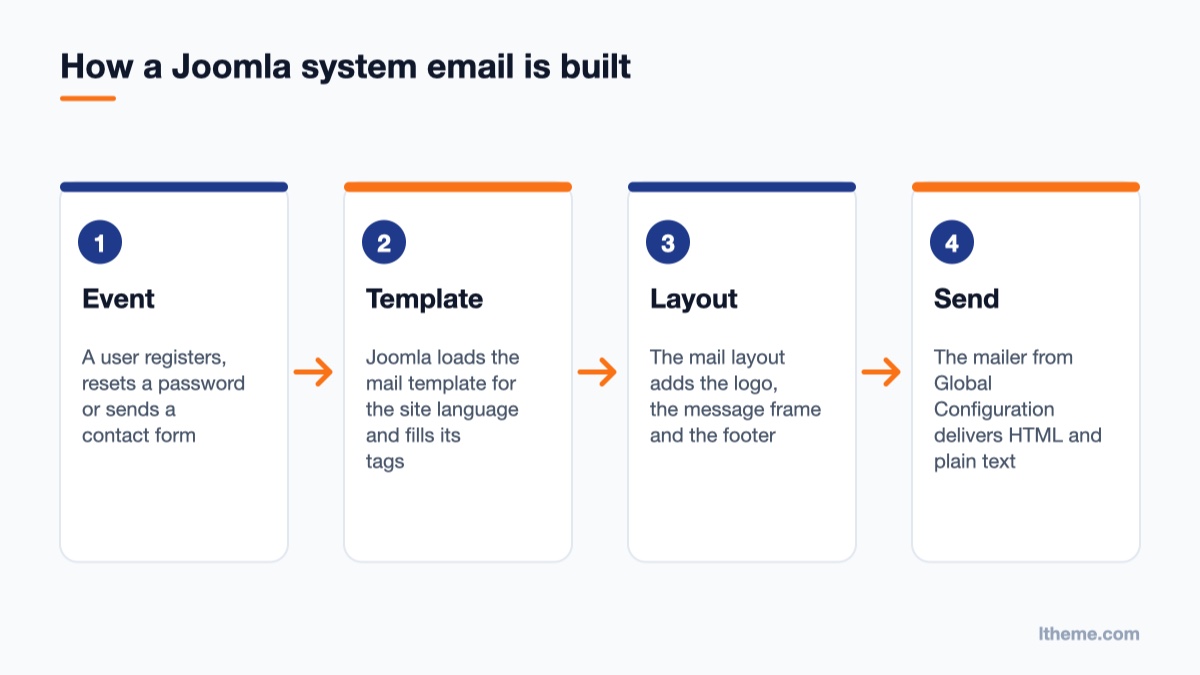
Every email that Joomla core sends (and many emails sent by third-party extensions) starts as a mail template. Each template has a fixed ID, a subject, a plain text body and, when HTML mail is enabled, an HTML body. Inside the text you will find placeholder tags in curly braces, such as {SITENAME}, which Joomla replaces with real values at the moment the email is sent.
Out of the box, the subject and body come from language strings. That is why a fresh template shows a language key instead of readable text in the editor: nothing has been customised yet, so Joomla uses the translation files. As soon as you edit a template for a language, Joomla stores your version in the database (the #__mail_templates table) and uses it instead of the language string for that language only.
Since Joomla 5.2 there is a second layer: the Mail Template Layout. The layout wraps every message in a common frame: the logo (or the site name when there is no logo), the message itself, and a copyright footer with the year, site name and URL. The layout is a PHP file you can override in your site template, just like any other layout.
So there are three places to change, from the simplest to the most flexible:
- Mail template text: what each individual email says (subject, plain text, HTML).
- Mail Templates Options: global settings such as mail format, logo and whether the layout is used.
- Layout override: the HTML frame around every message, under your template’s control.
Before you start: check that mail actually works
Templates only change what an email looks like. If emails are not arriving at all, fix delivery first, or you will spend an hour on design you cannot test. Open System → Global Configuration → Server and look at the Mail section. Make sure Send Mail is on, the From Email is an address on your own domain, and the Mailer is set to SMTP if your host recommends it. Use the Send Test Mail button and confirm the message reaches your inbox, not the spam folder.
If the test fails, our guide to Joomla internal mail and the contact form covers the common causes. Come back once a test email arrives.
Step 1: Find the email you want to change
Go to System → Templates panel → Mail Templates. The list shows every template Joomla knows about, with these columns:
- Title: the name of the email, for example “Users: New User Details”.
- Component: the extension that sends it (Users, Contacts, Privacy, Action Logs and so on).
- Templates: flags for the languages that already have a customised version.
- No Templates: flags for the languages that still use the default language strings.
- Description and ID.
The list can be long. Use the search box (enter id:19 to jump to a template by ID), or open Filter Options and filter by component. On a multilingual site, the Select Language filter helps you work on one language at a time.
The emails most sites customise first are the user emails (registration, activation, password reset, username reminder), the contact form copy, and the notifications sent by Joomla workflows when an article moves between stages.
Step 2: Edit the subject and body
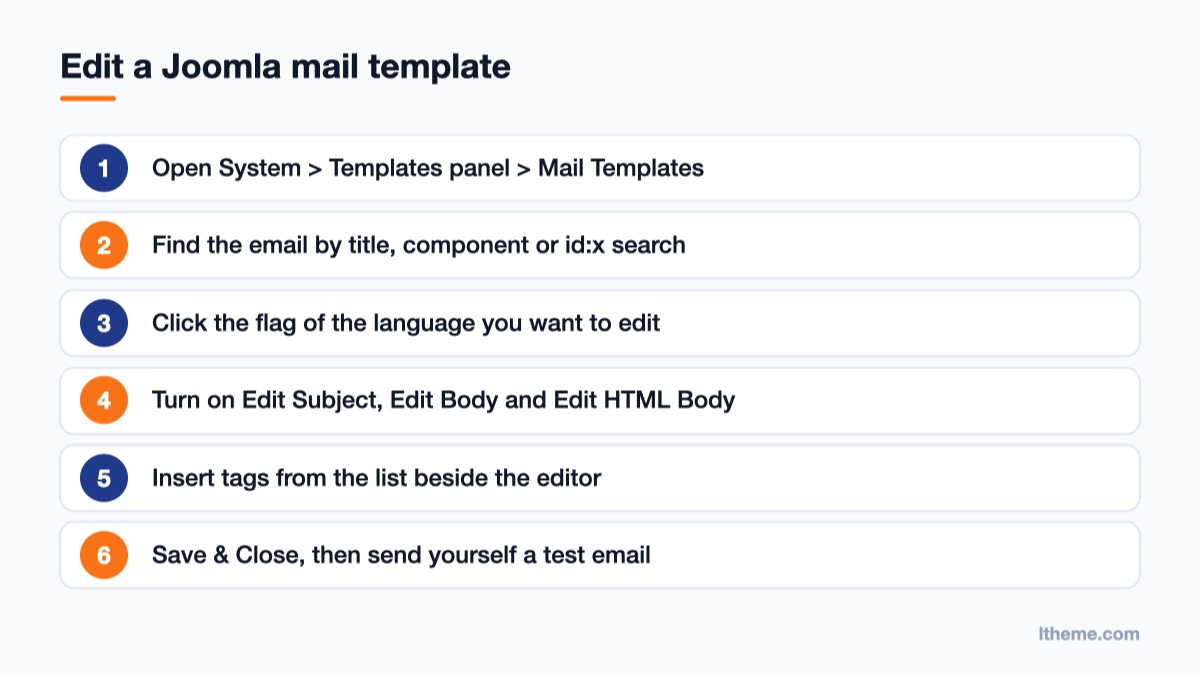
Click the language flag of the template you want to change. The editor opens on the Mail tab with three fields:
- Subject: shows a language key until you set the Edit Subject toggle next to it to Yes.
- Body: set Edit Body to Yes to see and change the default plain text message.
- HTML: set Edit HTML Body to Yes to see and change the HTML message. This field only appears when the mail format includes HTML (see Step 3).
To the right of the editor, Joomla lists the tags this template understands. Click a tag to insert it at the cursor. The list differs per template: a password reset email knows about the reset link, an action log notification knows about {IP_ADDRESS} and the {MESSAGES}...{/MESSAGES} loop. Only use tags from the list beside the editor; a tag the template does not know will be sent as literal text.
Two practical rules for the text itself:
- Write tags in capitals.
{SITENAME}is replaced;{sitename}is not. - Keep the plain text body. Even when you send HTML, some recipients and spam filters read the plain text part. A short, readable plain version is worth keeping.
Click Save to stay in the editor or Save & Close to return to the list. The language flag now moves from No Templates to Templates, which tells you this language uses your version. Repeat for each language your site uses; a customised English template does not change the French one.
A simple HTML body to start from
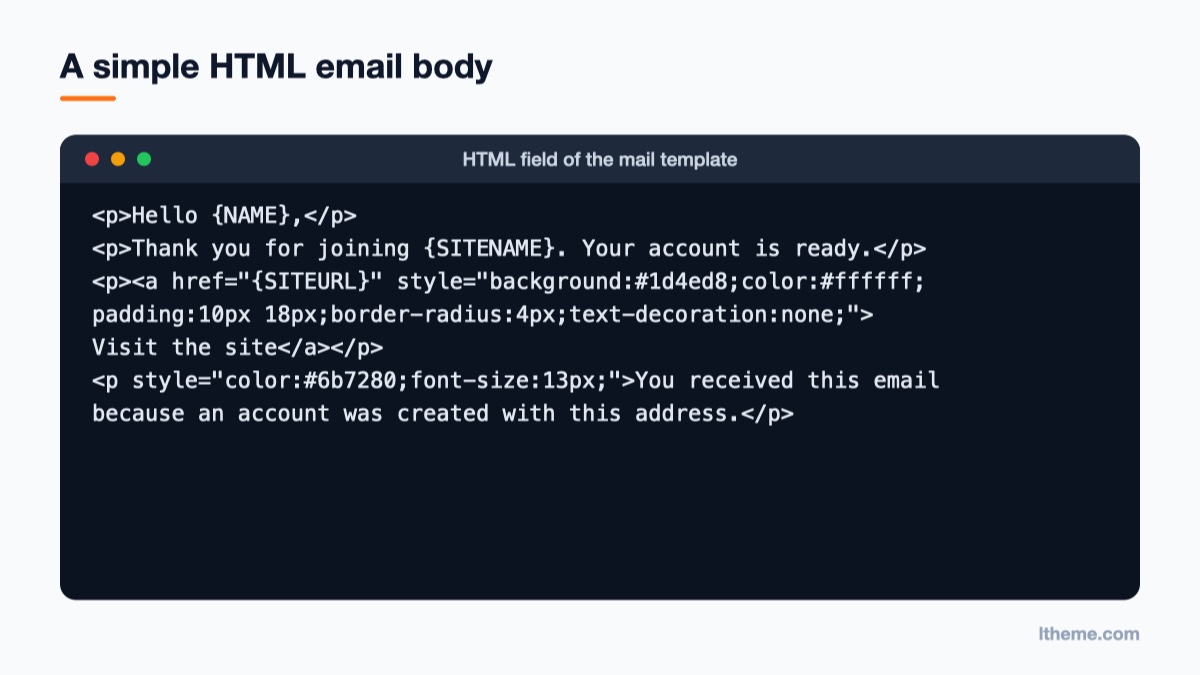
The HTML field accepts normal HTML. Email clients are far less capable than browsers, so keep it simple: short paragraphs, one clear button-style link, and inline styles rather than classes. Here is a short welcome message for a registration email. Replace the tags with the ones listed beside your own template:
<p>Hello {NAME},</p>
<p>Thank you for joining {SITENAME}. Your account is ready.</p>
<p><a href="{SITEURL}" style="background:#1d4ed8;color:#ffffff;
padding:10px 18px;border-radius:4px;text-decoration:none;">
Visit the site</a></p>
<p style="color:#6b7280;font-size:13px;">You received this email
because an account was created with this address.</p>
Do not add your logo or a footer here. The layout (Step 4) adds them to every email, so each template only needs the message itself.
Step 3: Set the global mail options
Open the Options button on the Mail Templates list (or go to System → Global Configuration → Mail Templates). These settings apply to every email unless a template overrides them:
| Option | What it does | Recommended |
|---|---|---|
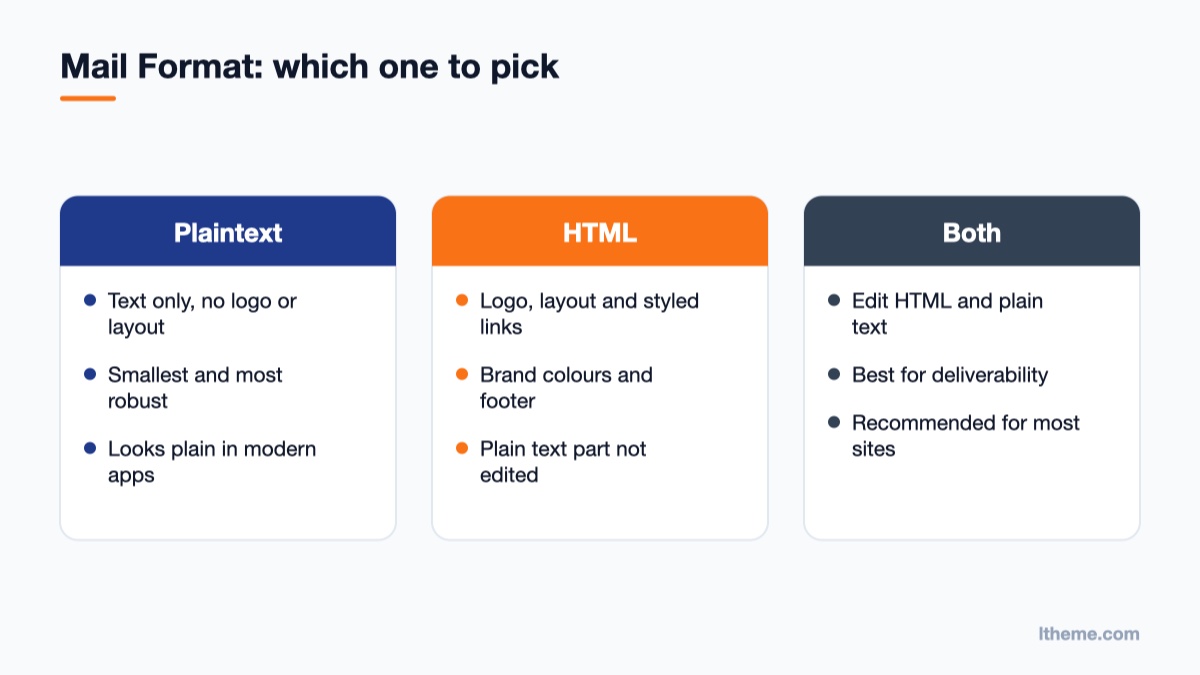
| Mail Format | HTML, Plaintext or Both. Both shows the plain text editor next to the HTML one. | Both, so you control the two versions |
| Per Template Mail Settings | Lets individual templates use their own options instead of these defaults. | No, unless one email needs a different setup |
| Send Copy | Sends a copy of each email to the site’s default address. | Off on busy sites; on while testing |
| Attachments Folder | Folder (relative to the site root) for files that templates supporting attachments can add. | Only if you use attachments |
| Mail Template Layout | Wraps every message in the layout selected below. | Enabled |
| Layout | The layout file to use. Your own overrides appear here. | Use Default, or your override |
| Logo File | Image shown centred at the top of every message, followed by a line. | A small PNG or JPG of your logo |
A few details are easy to miss. The logo is global: you can switch it off for a single template, but you cannot give one template a different logo. Use a raster image (PNG or JPG) around 200 to 300 pixels wide; many email clients do not display SVG. Keep the file small so every email opens quickly, also on a phone connection.
When Per Template Mail Settings is on, each template gets an Options tab in its editor. There you can switch the layout or the logo off for that email, choose a different layout, or set Mail Settings to Yes to send that email through a different mail server account than the site default.
Step 4: Build your own layout with a template override
The default layout is clean but generic. To match your brand (colours, fonts, a footer with your address or social links), override it in your site template. Overrides live in your template folder, so Joomla updates never overwrite them.
- Go to System → Site Templates and open your template’s Details and Files. If you use a commercial template, create a child template first, so a template update does not remove your work.
- Open the Create Overrides tab, then under Layouts choose joomla → mail.
- Joomla copies the core
mailtemplate.phpintohtml/layouts/joomla/mail/inside your template. Open it from the Editor tab. - Change the HTML: background colour, font stack, the width of the content area, the footer text. Keep the PHP parts that print the logo, the message and the site name in place.
- Save, then go back to Mail Templates → Options and pick your layout in the Layout field (or keep the default name if you edited the copy directly).
Every .php file in html/layouts/joomla/mail/ shows up in the Layout drop-down. That means you can keep more than one: for example a branded layout for customer emails and a bare one for admin notifications, selected per template through the Options tab.
When you edit the layout, remember that you are writing HTML for email clients, not for browsers. Use tables for structure, inline styles, web-safe font stacks with a fallback, and a maximum width of about 600 pixels. Test in at least one desktop client and one phone.
Testing your emails
There is no preview button, so test with real emails. A reliable routine:
- Create a test user with an address you control and trigger the emails you changed: register, request a password reset, use Forgot your username?, send a message through a contact form.
- Turn Send Copy on while testing, so every message also lands in the site’s default mailbox.
- Check the email on a phone. A layout that looks fine at 1200 pixels can break at 375.
- Look at the plain text version too (most mail apps have a “view source” or “show original” option).
- Repeat for each site language you customised.
Common mistakes and how to fix them
- “My changes don’t show up.” You edited one language but the email is sent in another. Check the flags in the Templates column. Also check that you edited the right template: several user emails look alike.
- A tag arrives as literal text. The tag is not supported by that template, or it is in lower case. Insert tags by clicking them in the list beside the editor.
- The HTML field is missing. Mail Format is set to Plaintext. Switch it to HTML or Both in the options.
- No logo. Mail Template Layout must be enabled and a Logo File selected; also check that the template’s own Options tab has not switched the logo off.
- Links in the layout point to the wrong address. Joomla 5.2 had a reported problem where the layout prefixed links with the site URL even when they were already absolute. Update to the current Joomla release and re-test before working around it.
- Emails go to spam after the redesign. Heavy images, a missing plain text part and a From address on another domain all hurt deliverability. Keep the HTML light and send from your own domain with SPF and DKIM set up at your host.
- An extension’s emails ignore your templates. Only extensions that use Joomla’s mail template system appear in the list. Older extensions that build their own emails need their own settings.
Give your emails the same polish as your site
A branded email is often the second impression a visitor gets, right after your home page. If your site runs on one of our templates, take the colours and fonts from the template so the two feel like one product. Business templates such as LT Business or booking-heavy designs like LT Carenix send a lot of contact and appointment emails, and a matching email layout makes those messages look trustworthy. You can browse more designs in our Joomla templates collection.
Your next step: open System → Templates panel → Mail Templates, customise the four user emails for your main language, enable HTML with your logo, and send yourself a test registration. Once that looks right, build the layout override and the rest of your emails will follow. For the full list of tags each email supports, see the Joomla user guide on Mail Templates, the Mail Templates Options reference and the guide to managing mail template layouts. If you want to go further with template customisation, our guide to the Joomla Web Asset Manager shows how to add your own CSS and JavaScript the right way.