Joomla 4.1 has been released with many new and useful features. One of them you shouldn’t miss is the ability to create Joomla 4 child templates. So, what does this mean, and why was the feature added in Joomla 4.1? In the blog today, we would like to bring you more detailed information about that as well as show you how to create child templates for your Joomla 4 site. Let’s get started now!
What are Joomla 4 child templates and why do you need them?
Basically, Joomla 4 child templates are templates that depend on their parents. In other words, they are created by loading everything from their parent. However, you can also load some specific files from the child templates. Besides that, you can think of Joomla 4 child templates as templates that have only one file called templateDetails.xml.
Let us give you an example of that. Suppose you have a main template and you want to create a Halloween variation of it. In this case, you are able to do that by creating a child template for Halloween. After that, you just need to load everything from the parent template but use a custom CSS or add a custom position in the index.php file.
So, what is the benefit of using Joomla 4 child templates? In simple words, by utilizing the child templates, you can keep all your changes or modifications through every Joomla update. That is to say, whenever you need to make any change or adjustment in a module or component, you are able to use overrides. However, you can’t do that with templates. In order to save all your adjustments during any update, you have to copy as well as rename the entire template. It’s inconvenient and time-consuming. Therefore, the child template feature appears to help you deal with the issue easily.
Now, let’s have a look at the instructions for generating Joomla 4 child templates with the default template.
How to create Joomla 4 child templates?
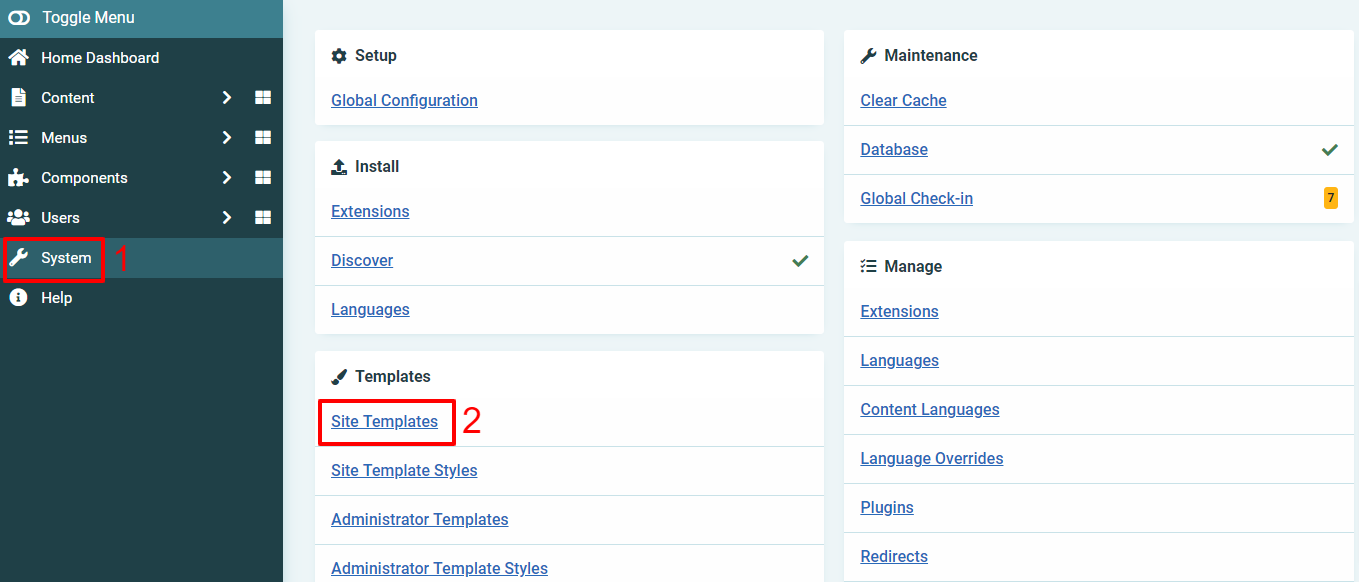
In order to generate a child template, let’s log in to your Joomla 4 admin dashboard. After that, go to System -> Site Templates (in the Templates section).
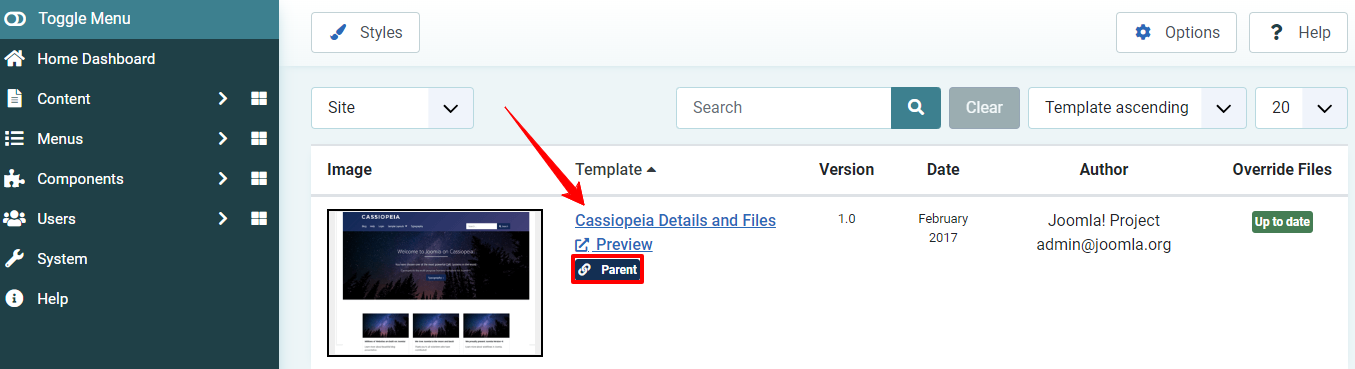
Now, you will notice that Cassiopeia is a parent template. Simply click on the Cassiopeia Details and Files to open the template.
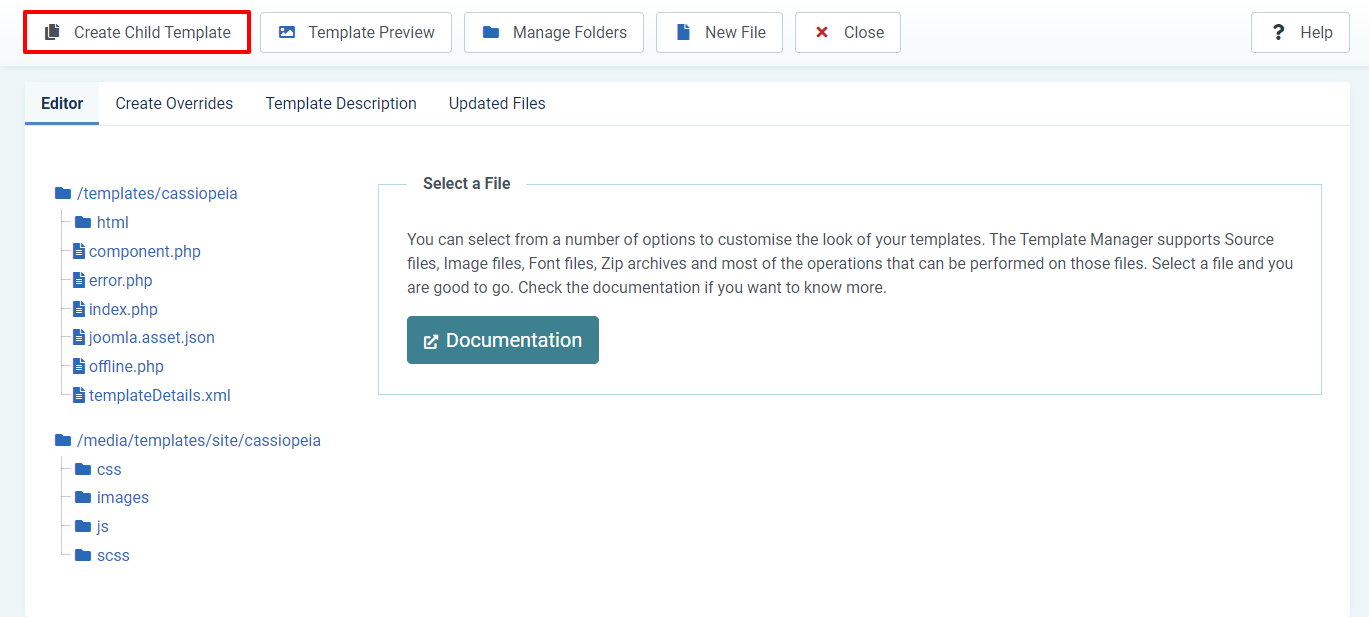
In the next step, all you need to do is press the Create Child Template button to generate a new child template.
A Child Template pop-up will appear for you to fill in the name of the child template. After entering the name, you just need to click on the Create Child Template button. Everything is done, and a new child template is generated.

You will see a template that is a child of Cassiopeia. In order to customize it, you just need to click on Cassiopeia_childern Details and Files.
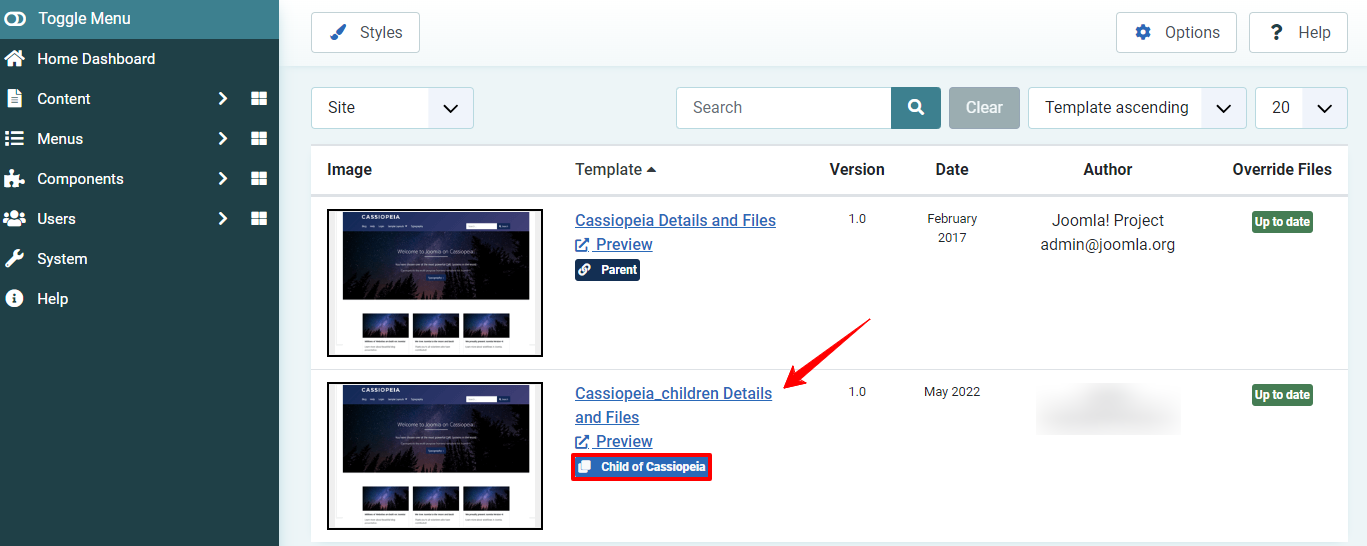
Now, you can make any adjustments to the XML file as well as copy the files you need to edit from the parent template to the child template. Besides, don’t forget that all the files which don’t exist in the child template will be loaded automatically from the parent template.
If you want to know how overrides work exactly the same as they did before, let’s follow some simple steps below.
First of all, you just need to click on the Create Overrides tab.
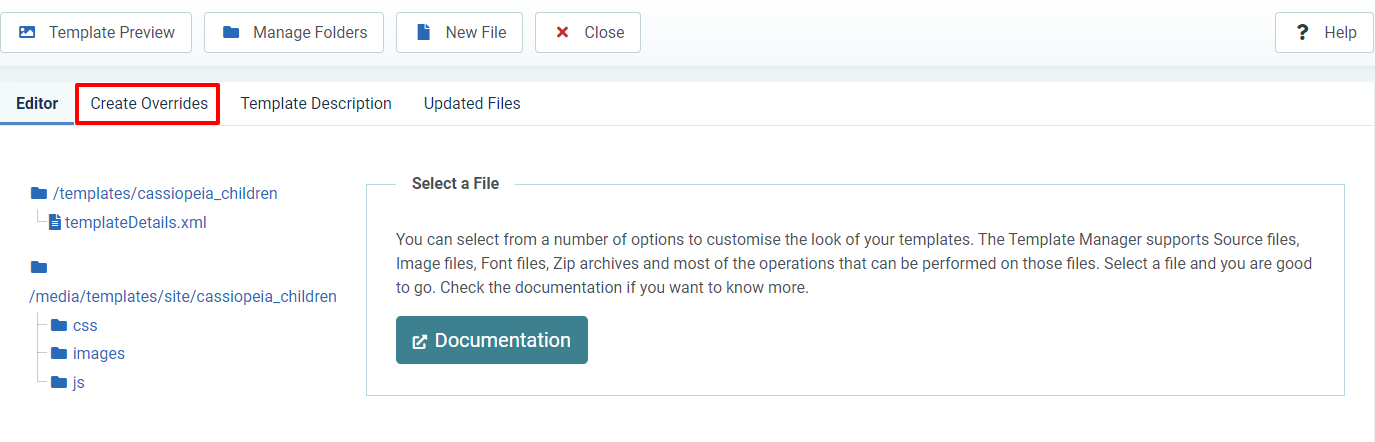
After that, simply select any module, component, etc. you want to have in the child template.
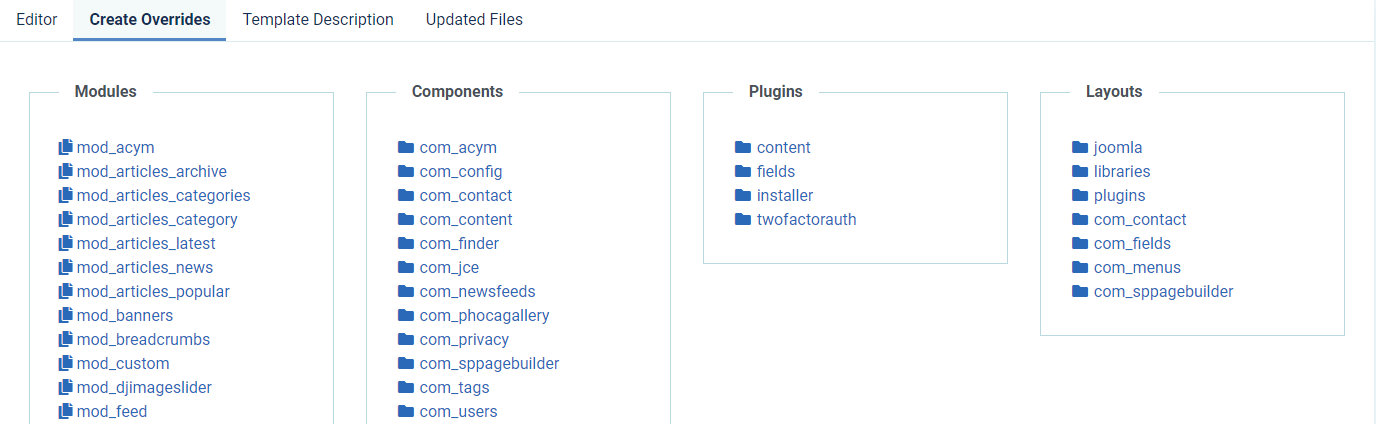
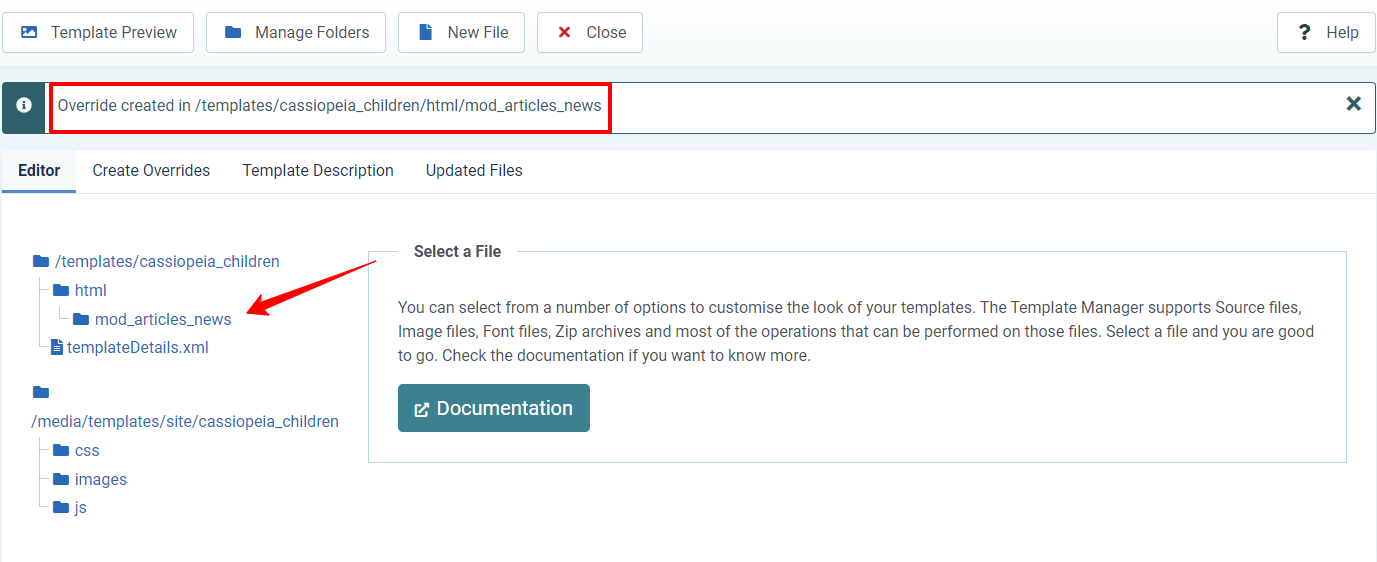
Once you click on the element you want to override in your child template, a notification will confirm it.
Now, in the Editor tab, you will see that the override, such as mod_articles_news, appears in the /templates/cassiopeia_children/html.
Final thoughts
All in all, Joomla 4 child templates play an important role in saving all the changes or modifications you made during Joomla updates. Therefore, it’s a good idea for you to create a child template for your Joomla 4 site. If you have any queries related to the issue, don’t hesitate to send your message by leaving your comment below. We will try to reply to you as soon as possible.
Besides that, in case you are planning to give your site a new appearance, why don’t you take a look at many responsive and SEO-friendly Joomla 4 Templates? Thanks for reading and see you in the next blogs.