Are you dealing with how to add a navigation menu in WordPress? This blog will show you a step-by-step guide to help you tackle this problem by yourself.
What is a Navigation Menu?
A Navigation Menu is a customize menu in your theme. It will display a list of links navigating to major sections or pages of your website. In addition, it enables you to add pages, posts, categories, or even URLs to the menu. Normally, they will be shown as a horizontal bar on the top of each page. However, you can optionally create a new menu and display it in various positions depending on your WordPress themes. For example, you can generate a footer menu or a mobile navigation menu.
.Moreover, there are some prevalent types of navigation menus including:
- Drop-down menu
- Flyout menu
- Mega menu
How to add a navigation menu in WordPress?
In today’s tutorial, we will show you a step-by-step guide to creating a beautiful and well-organized navigation menu. It is a great way to help you optimize the structure of your site as well as links to the internal pages of your website effectively. Now, let’s dive into the detailed sections below.
Creating a custom navigation menu first
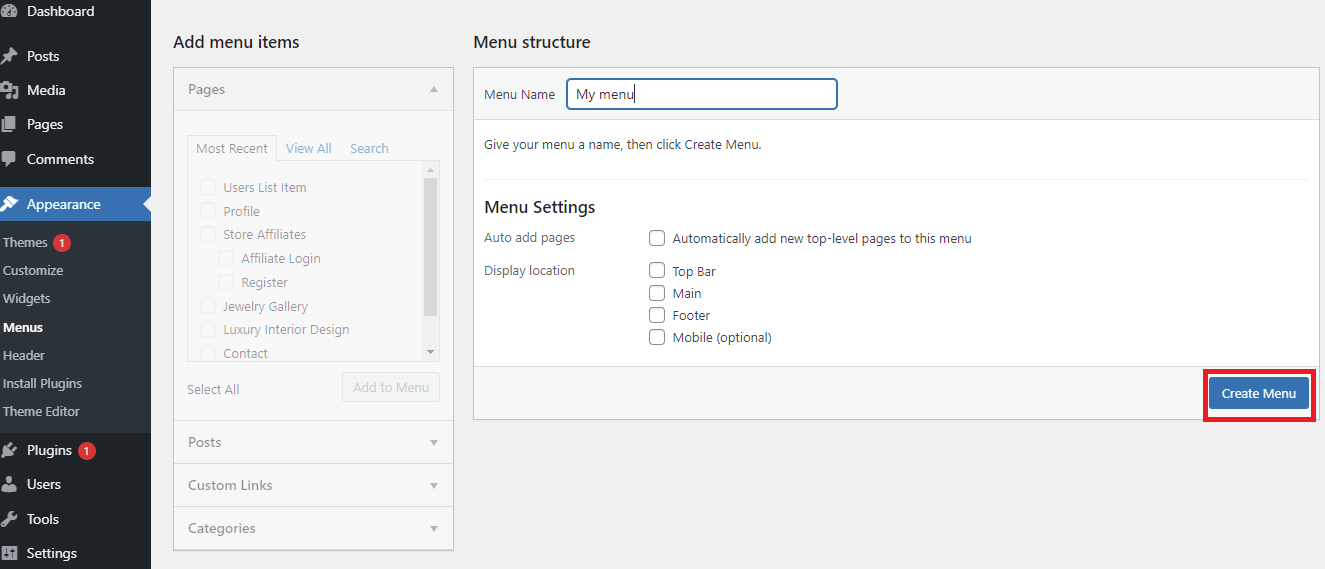
First, go to Appearance > Menus on your dashboard. On the Menus page, type the name of your menu in the menu box depending on your preference. And then click on the “Create Menu” button.
At here, first, click on the “View All” tab, you will see your sites’ available pages. You freely select which pages that you would like to add to your menu by tick on them. After that, click on the “Add to Menu” button.
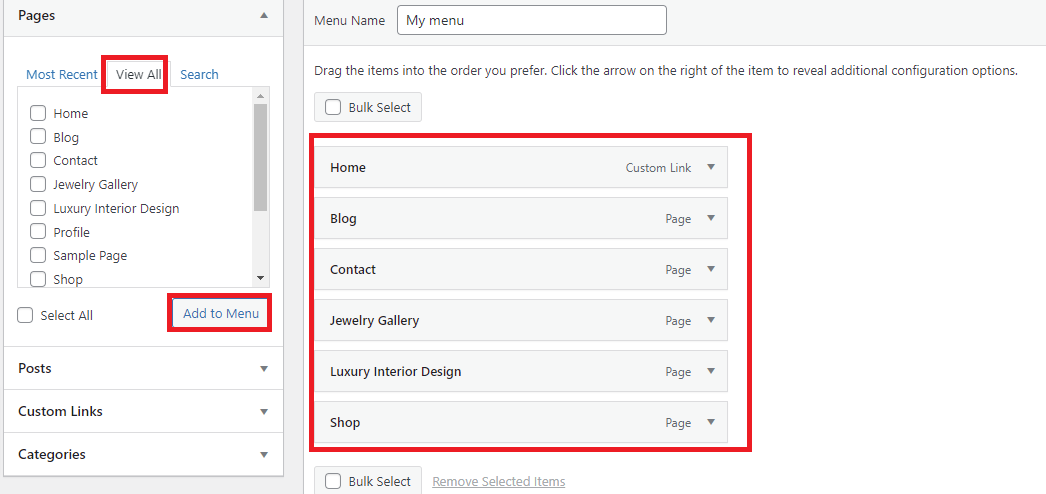
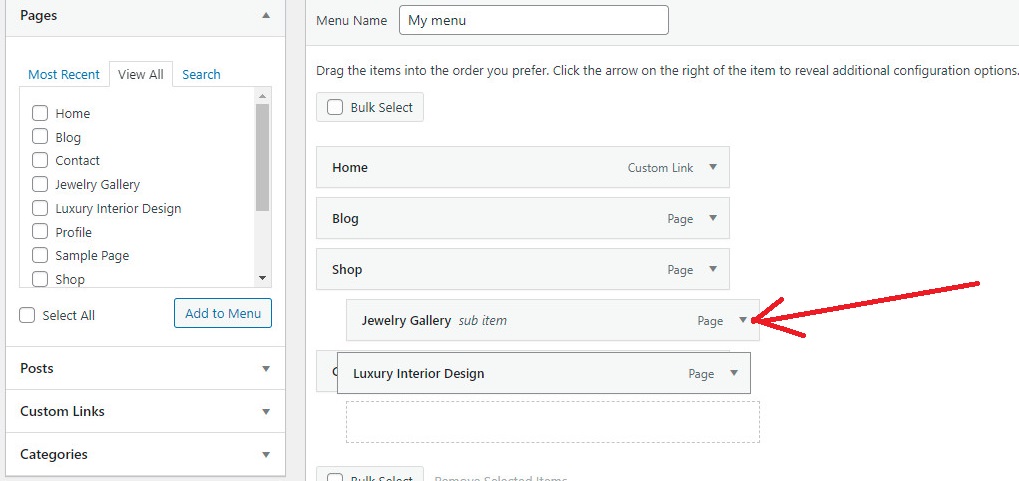
After you have added all pages yet, you can rearrange all menu items by dragging and dropping them.
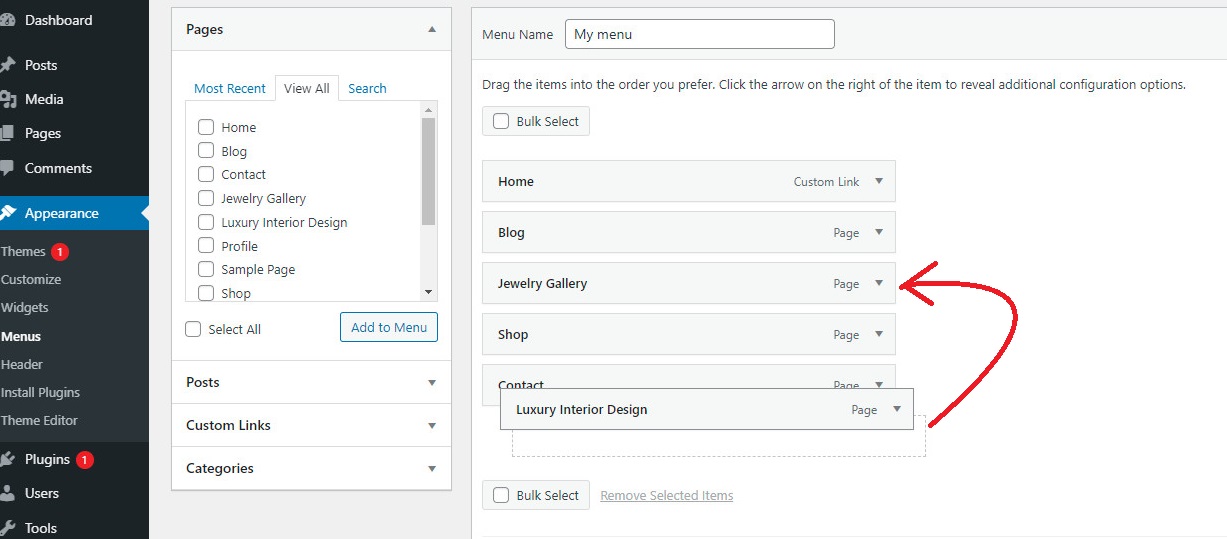
If you want to create a multi-level menu, for example, a drop-down menu, you just need to drag the child menu items below the parent menu item and drop it to the right of the parent item. And these child menus will display as sub-menu items. In our case, we choose Jewelry gallery and luxury interior design as child items of the shop menu item.
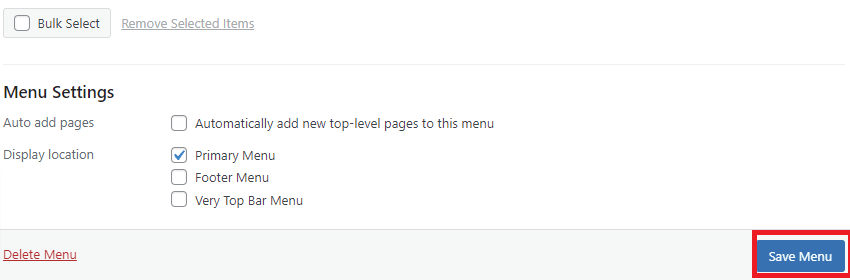
Next, if you are satisfied with the order of your menu items, you need to select the location where you want to showcase the menu for the following step. Most themes will offer various locations that allow you to optionally put menus. In our case, the theme has 3 different locations. After that, don’t forget to click on the “Save Menu” button
Now, this is how it looks on your site. You can see that the “Shop” has two child menu items. A drop-down menu like this will make your website menu more well-organized and professional.

Add categories to your menu
Categories are used to classify or group a lot of posts that have something in common into different sections. In addition, categories will help the readers quickly get posts that they are looking for on your site.
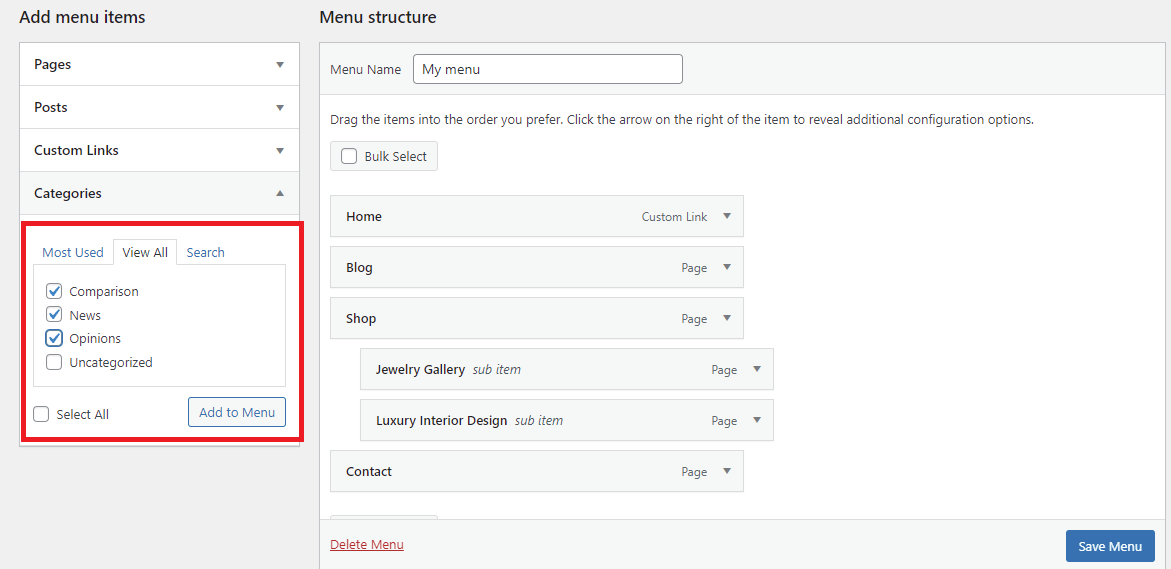
In order to add categories, you click on the “View all” tab in the Categories section to review all categories first and then choose the ones that you want to include in your menu. When all categories have been selected, let’s click on “Add to Menu”.
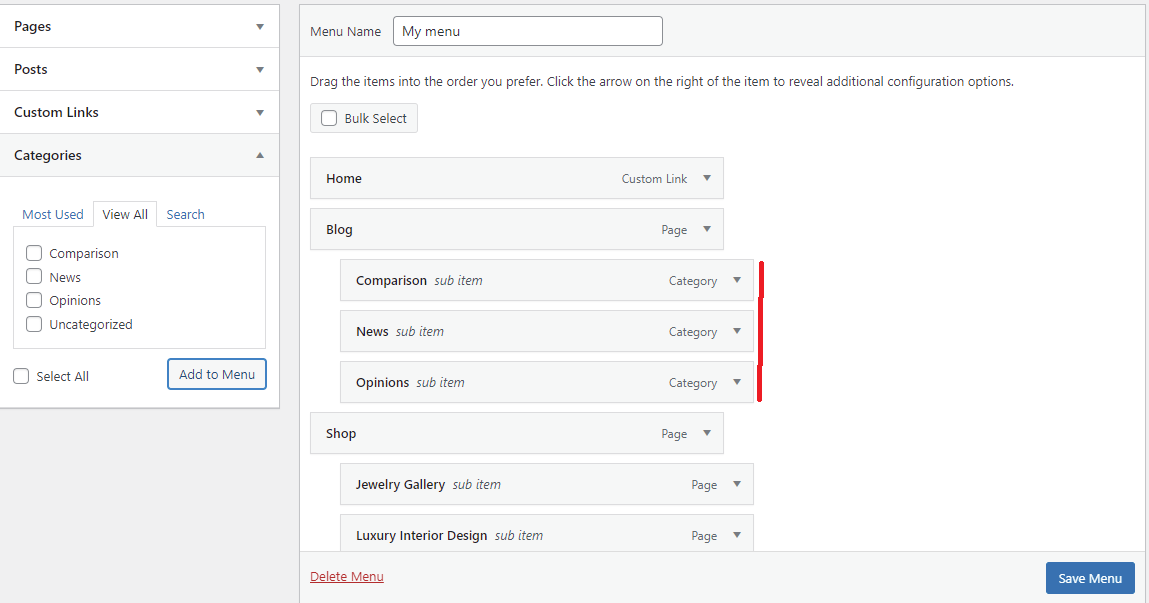
Now, all selected categories will display at the bottom of your menu. Therefore, you need to drag and drop them into the right position. In our case, we are putting all of these categories under the Blog menu item. These categories will be also displayed as child menu items.
Finally, click on the “Save Menu” button to update your changes.
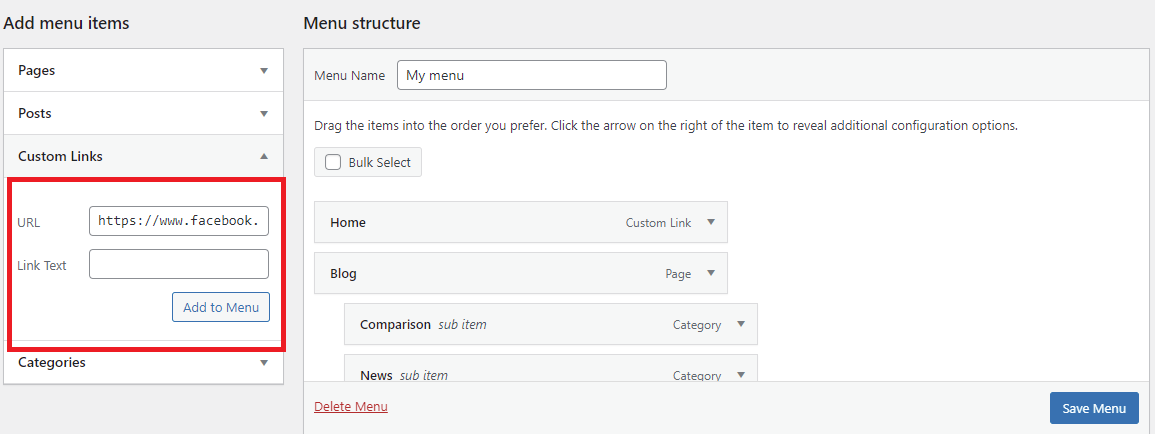
Add Custom Links to your navigation menu
Firstly, click on the “Custom Links” tab. Here, you can add the URL of your social media account or other links and add the link text. It is also similar to the way that you add menu items for pages or categories. And then click on “Add to Menu” button.
Just like other menu items, you are able to drag and drop these items into the desired position and nest them if you want.
Now, let’s see how it appears. You can also display these links by adding social media icons. We will share with you how to add social media icons to your menu by using the Menu image plugin in the next tutorials.

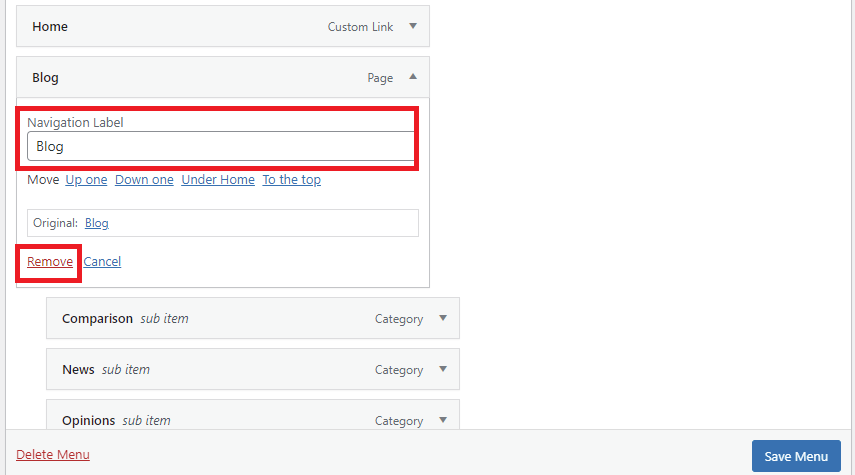
Edit and remove menu items
WordPress utilizes the page title or category name as the link text for pages and categories by default. Nevertheless, if you want to change this text, WordPress completely allows you to do that.
In order to edit the link text, let’s click on the particular menu item. Here, you are able to change the name of the menu in the Navigation label field.
Additionally, you can see the Remove options at the bottom of this menu item section. If you can click on it, this action will delete all child menu items related to this menu item. And then click on the “Save Menu“ button to store the changes.
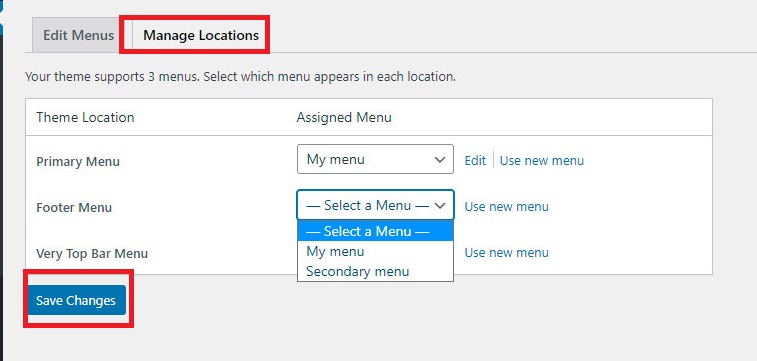
Change the locations of your menu
Whether you want to change the location of your menu on the front-end of your site, let’s go to Appearance>Menus and click on the “Manage Locations” tab. Here, you can add multiple menus that will appear in various locations on your site, the number of menu locations depends on the theme that you are using.
Summary
Adding a navigation menu is really necessary for your WordPress site. It not only brings the best experience for the visitors but also makes your site have a better structure. We hope that through this tutorial, you learned how to add a navigation menu by yourself. Whether you have any questions about the matter above or need our assistance, don’t be afraid to leave a comment below.
Last but not least, have you owned a beautiful and professional website? Luckily, there are hundreds of excellent, stunning themes at our free WordPress Themes that are suitable for various fields. You can visit and get one.

- Resolving the “Class JFactory Not Found” Error in Joomla When Upgrading to J6 - December 19, 2025
- The Utility Of VPNs For Site Authors And Admins - November 24, 2025
- Joomla! 6: What’s New and How to Upgrade from Joomla! 5 - October 23, 2025


Recent Comments