
Introduction
Sometimes, you can want to migrate your entire WordPress site to another website. In the case that you want to use the navigation menus in the old website, it is necessary for you to export your navigation menus and then import them to the new website which will help you save time and effort. It is an easy process for many people however, for others who are beginners, it is regarded as a challenging task. Therefore, in today’s tutorial, we guide you on how to export and import navigation menus in WordPress by using the easiest methods. Now, let’s dive into the following sections.
How to export and import navigation menus in WordPress?
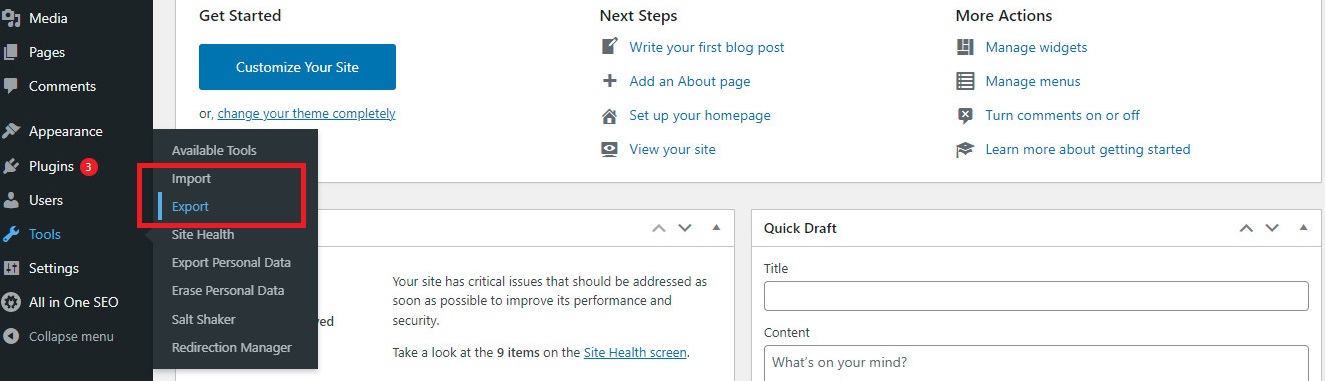
By default, WordPress has built-in import and export features. You can easily see these features by going to Tools > Import and Tool > Export in your WordPress dashboard.
The Export feature will allow you to export all content or choose options to only export your posts, pages, media. When you choose the All content option that will help you export all elements including navigation menus, posts, pages, comments, and much more.
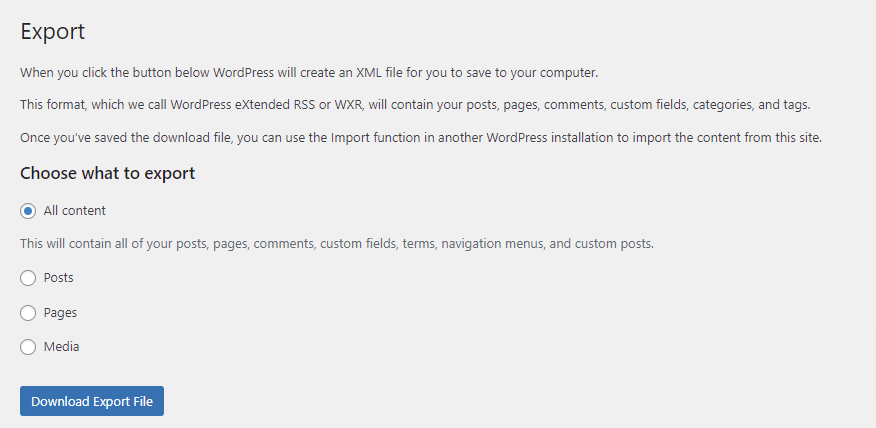
However, in some cases, you only want to export your navigation menus. If you choose this option, much of the exported data will be redundant.
Fortunately, nowadays, there are several plugins that allow you to export and export navigation menus only in WordPress. They will help you easily handle any problems.
Don’t waste your time, now let’s dive into the following sections to learn how to export and import the navigation menu in WordPress.
Export Navigation Menus in WordPress
Before exporting your navigation menus, you have to make sure that you are pleased with your current menus. You make any changes to your menus by going to Appearance > Menus. For more support, you can get our detailed tutorial on how to add a navigation menu in WordPress.
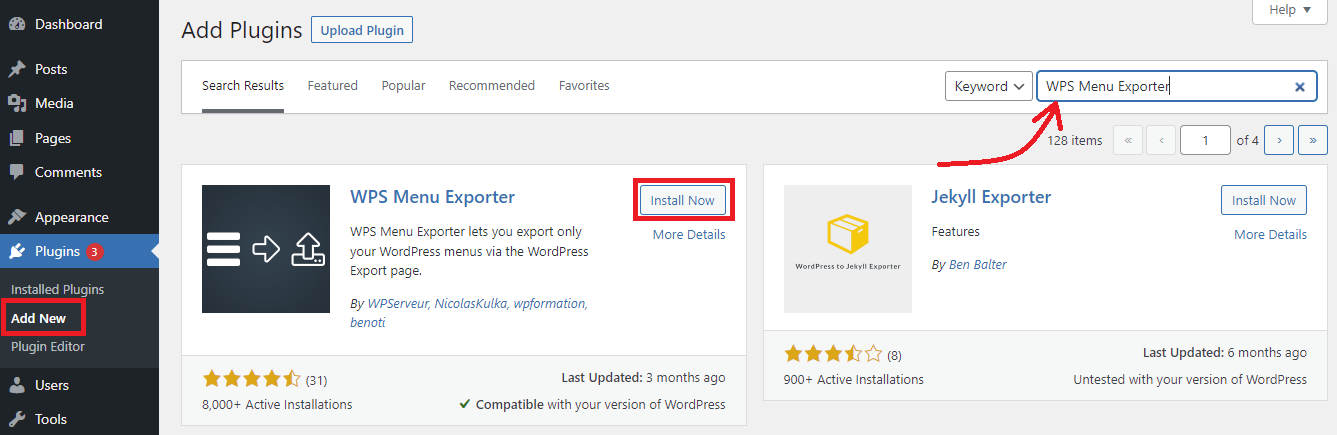
Now, you need to install and activate the WPS Menu Exporter Plugin. Just go to Plugins > Add New, and then type the plugin’s name on the search bar. Simply click on the Install Now button and activate it.
Once the plugin was installed, you need to go to Tools > Export Page in your dashboard. The additional option ” Navigation Menu Items should be displayed. This option includes your navigation menu and all the pages that are linked to your menu.
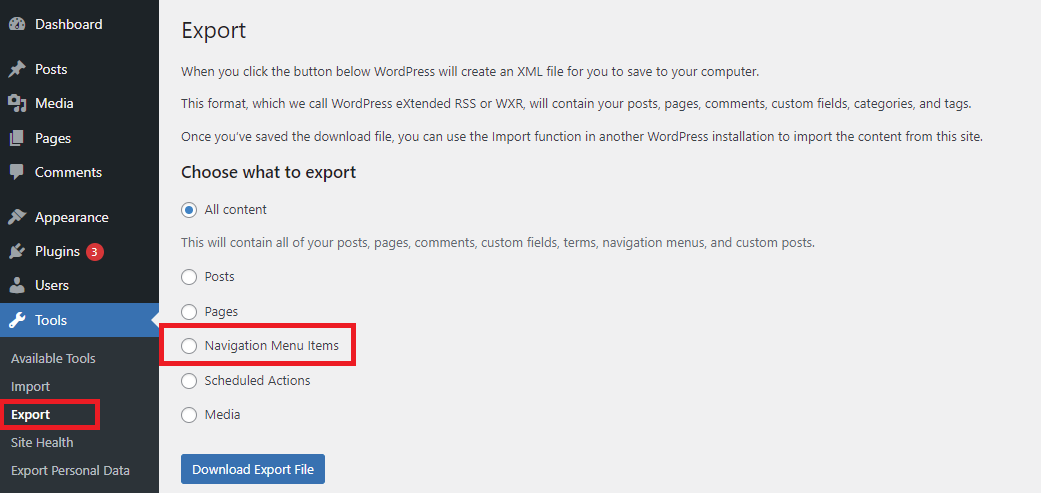
Let’s choose the Navigation Menu Items option and then click the Download Export File button.
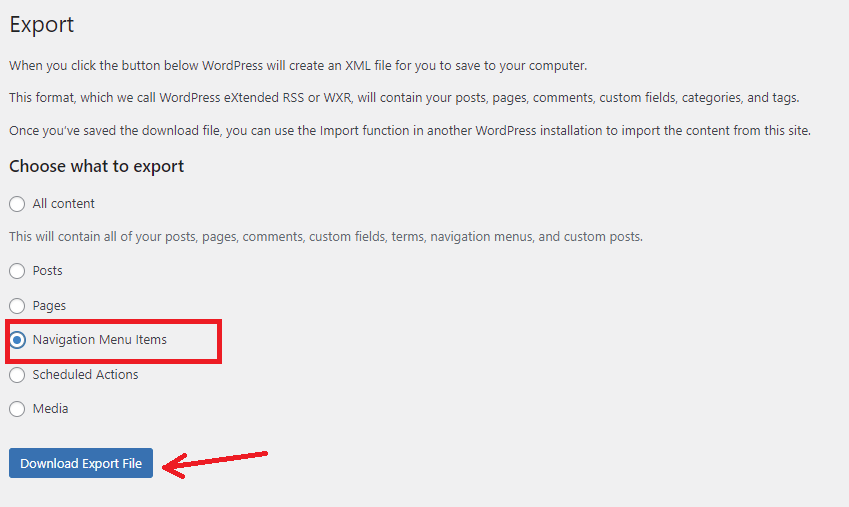
This will download your navigation menu and its linked pages to your computer. These data will be saved in a .xml file with the name site.wordpress.yyyy-mm-dd.

Import your Navigation Menu to your new site
You can easily import the .xml file that you have just downloaded by using the default import feature of WordPress.
However, you have to note that there are no existing pages with the same name as the pages in the menu you are importing, even if is existing in the trash. Because if you have two pages with the same name, the import tool is not able to import properly.
First of all, you need to log in to your new WordPress site where you would like to import your navigation menu.
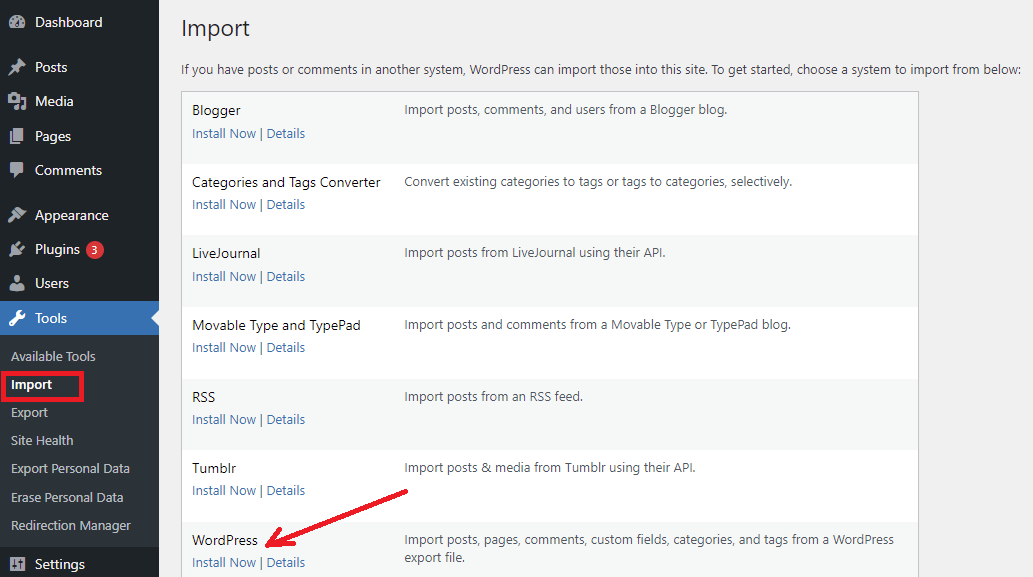
Now, switch to Tools > Import and you need to install the WordPress Importer. Let’s click on the Install Now link under the WordPress section.
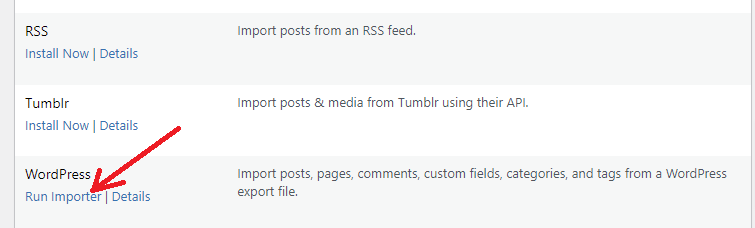
Next, keep clicking on the Run Importer link after installing the WordPress importer.
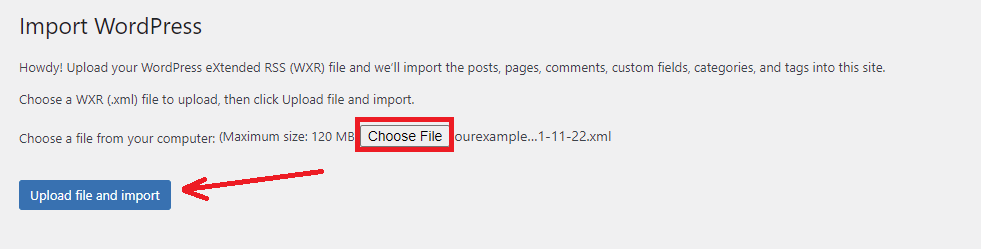
This will open the Import WordPress screen. Here, you will see the Choose File button. By clicking on this button, you can select the .xml file that you downloaded previously. Once done, let’s click on the Upload File and Import button.
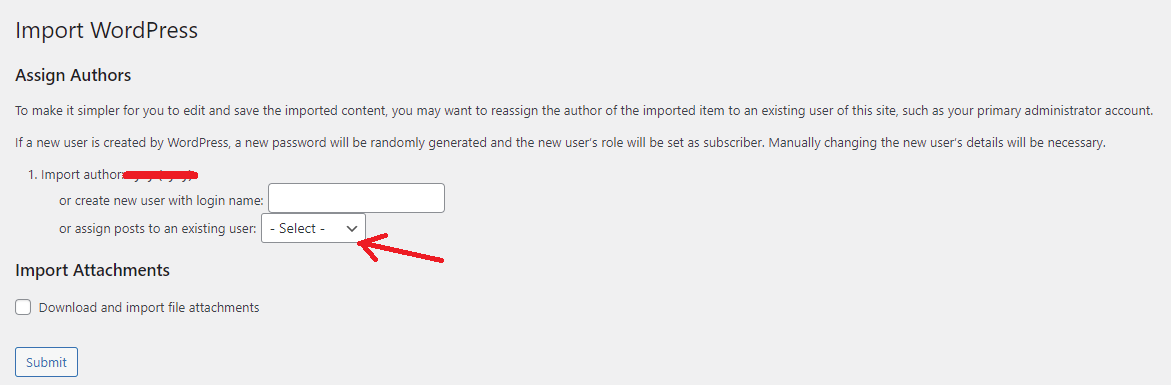
Next, you will be required to “Assign Authors“. The default option is to import the original author of the menu content. However, you can set an existing user as the author of the imported content by choosing the user’s name from the dropdown menu.
Moreover, if you want to re-utilize the content of the pages themselves, you can tick on the Download and import file attachment box.
Then click on the Submit button to save your selection.
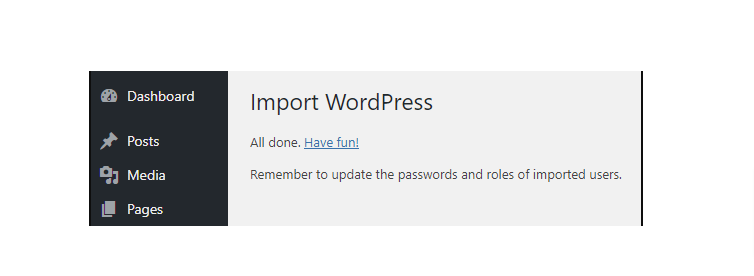
After completing the process of importing, you will see the following message.
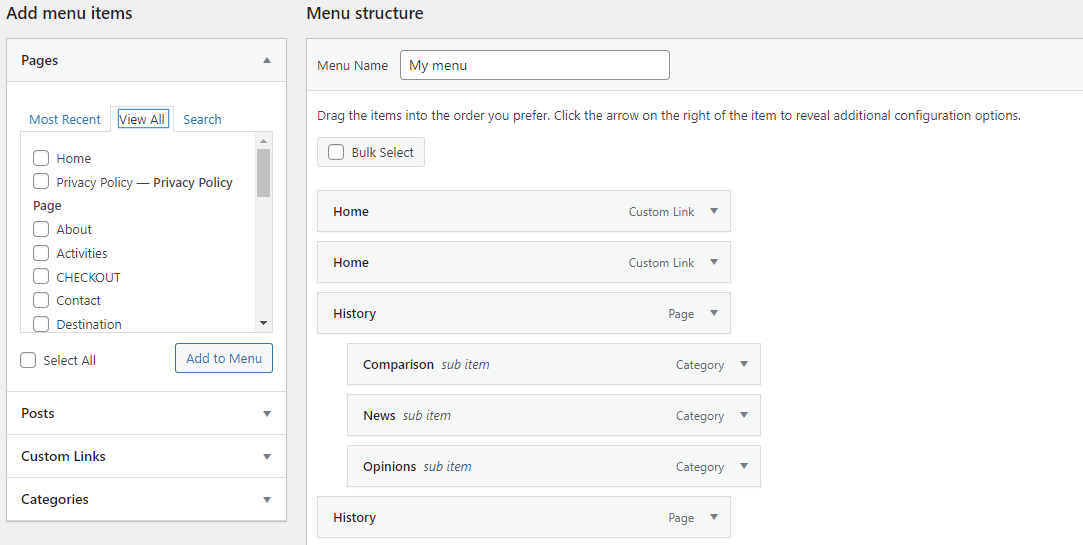
Now you can easily go to Appearance > Menus to check the imported menu in your new WordPress site.
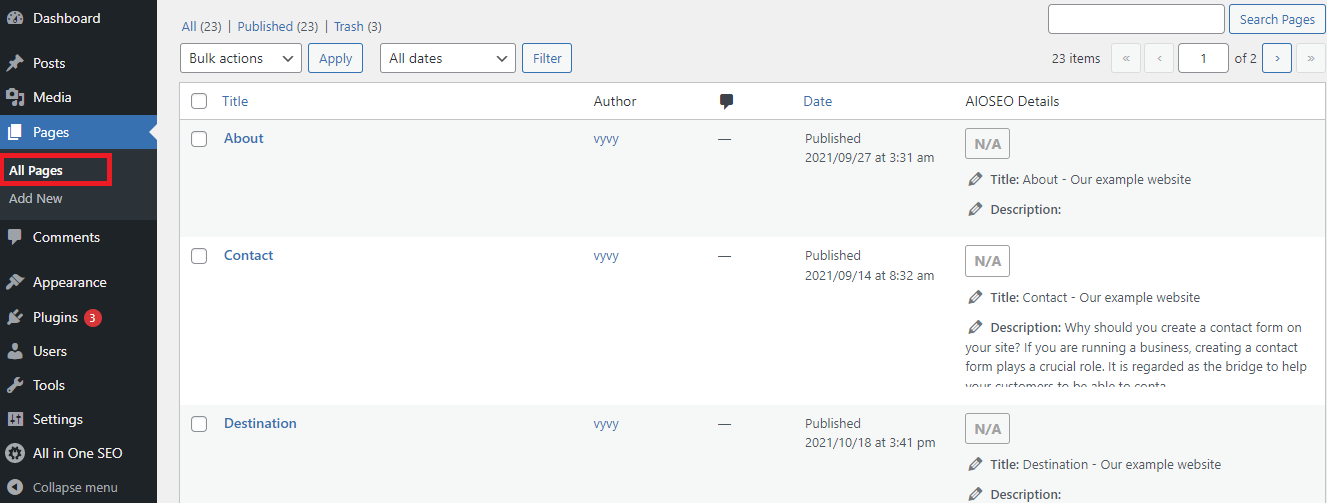
And switch Pages > All Pages in your WordPress dashboard to check out the new pages that have been imported into your new website.
Wrap up
Hopefully, through this tutorial, you can master the process of exporting and importing navigation menus in WordPress. If you have any questions or queries, don’t hesitate to mention them by writing a comment in the box section below.
Moreover, if you are going to make a new appearance for your existing website, don’t miss plenty of gorgeous and modern designs with our free WordPress Themes.

- Resolving the “Class JFactory Not Found” Error in Joomla When Upgrading to J6 - December 19, 2025
- The Utility Of VPNs For Site Authors And Admins - November 24, 2025
- Joomla! 6: What’s New and How to Upgrade from Joomla! 5 - October 23, 2025


Recent Comments