Are you looking for the most suitable way to add a single/double line spacing in WordPress? Look no further, this article will bring you a lot of flexible ways to help you resolve this problem without effort. Let’s discover right now.
Why should you add a single/double line spacing in WordPress?
There is no denying that your posts/pages’ formatting and overall style also have an essential part in creating a visual and reliable blog. Because proper line spacing will make it easier for your website visitor to locate the important content they are looking for. Thanks to that, it will attract more visitors and increase the traffic on your website. Moreover, it also helps your content enhance the readability as well as SEO structure.
How to add a new line spacing in WordPress?
Add a new line spacing in WordPress is a simple and easy task. Therefore, there are many ways to help you handle this matter. However, in today’s article, we are going to demonstrate the most prevalent methods to assist you quickly do this task by yourself including:
- Adding a single or double line spacing directly in the WP visual editor
- Changing Paragraph Spacing Manually With CSS Code
- Using the plugin to change line spacing
Don’t waste your time, now let’s dive into the following methods to find out your favorite way.
Add a single or double line spacing in the WordPress visual editor
- Double spacing
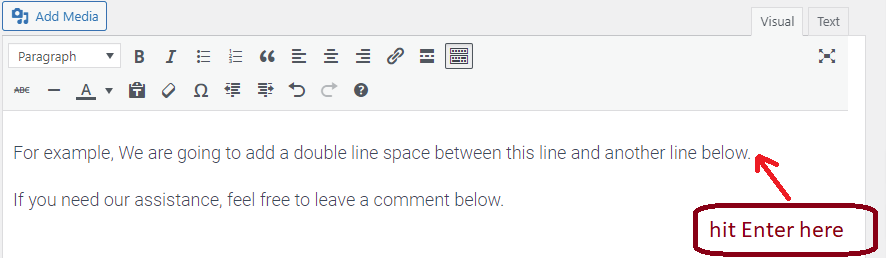
By default, in the WordPress visual editor when you hit the “Enter” button on your keyboard, it will automatically add a double line space. Therefore, this makes it easy and quick to generate a new paragraph with proper double spacing.
Now, simply press Enter button at the end of the first line and type something in the next line.
By doing that, it is easy for you to realize a clear distinction between paragraphs.
- Single spacing
As its name implies, this function is usually used in some situations. For example when you want to include your address.
In insert a single line space in WordPress, you just press Shift + Enter at the end of any line.

Changing Paragraph Spacing Manually With CSS Code
Although WordPress also allows you to add a single/double line spacing in wordpress by hitting the shortcuts on your keyboard. Nevertheless, generating multiple gaps between paragraphs and sentences by the default spacing can give the visitors the feeling of emptiness in your blog. In addition, it also creates wasted spaces in your content. Therefore, we will share with you how to change paragraph spacing manually to suit your requirements.
In order to change paragraph spacing in WordPress, you can add some CSS to your theme. This method is not too complicated, it only requires some coding knowledge.
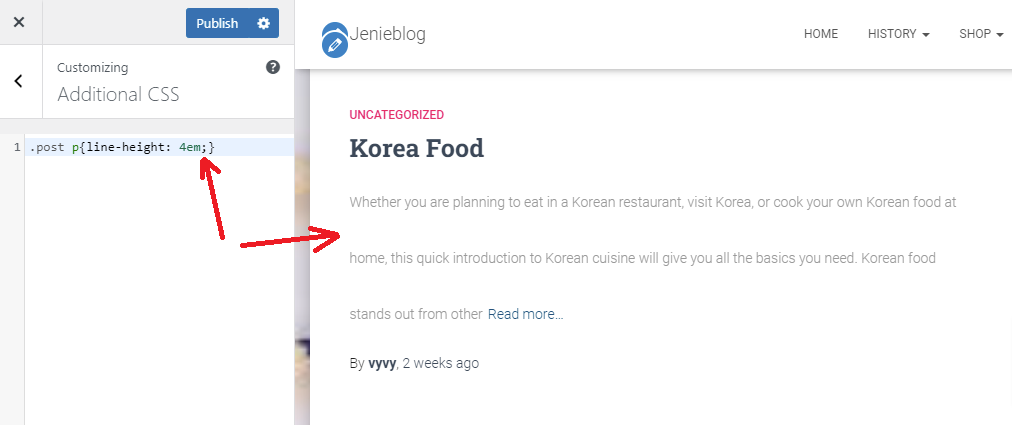
First of all, you need to go to the Appearance > Customize page. This will bring you to the WordPress Theme customizer. And then click on the Additional CSS option at the bottom of the left-hand sidebar.

In the custom CSS box, you need to add the following CSS code:
.post p{line-height: Xem;}
In which “X” is the number of ems that you want to reserve for each line. The “em” is a unit of width for typography and 1em equals 16px font size. We are utilizing the .post class that informs WordPress to apply the settings only to the content position area of all posts.
In our case, we are going to switch our line spacing of paragraph content to 4ems. You can see the changes on the live preview page.
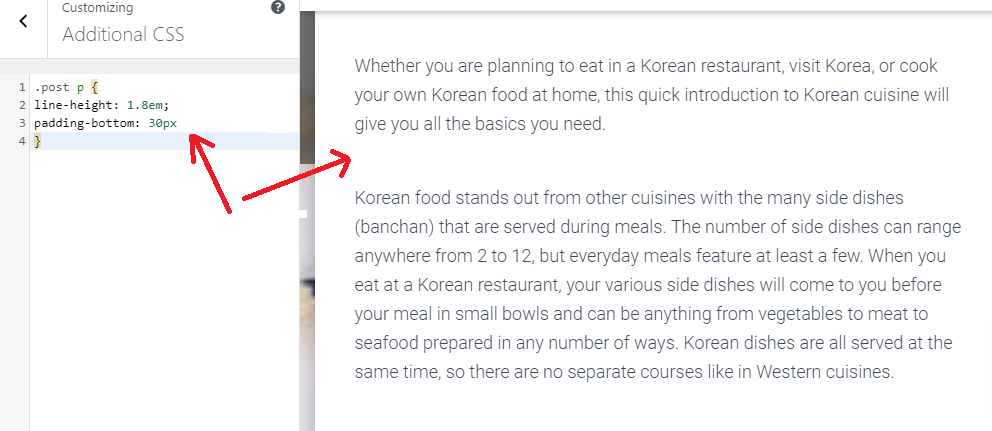
However, the CSS code above only changes the spacing between every single line. If you want to change the spacing between paragraphs, a padding should be added. You can follow the CSS code below:
.post p {

line-height: Xem;

padding-bottom: Xpx

}
Similarly, you can change “X” into any number of px, it depends on your purpose.
After you have been pleased with the result in the preview area, you can click on Publish button to save the changes.
Changing line spacing by using the plugin
Spacer is considered one of the easiest and most common WordPress plugins that help you create an unlimited amount of spacers, dividers, and section break presets. You can choose which Spacer you want to add to your content via the Spacer button directly in the WordPress visual editor.
What’s are you looking for? Now, let’s track the following steps.
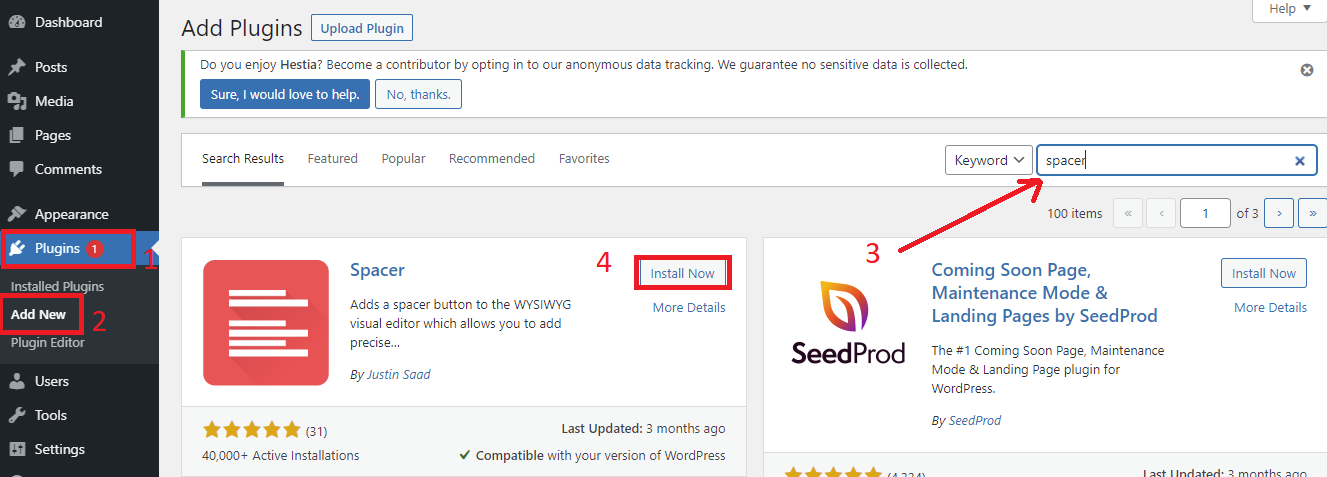
Step 1: Install and activate the plugin
Just similar to other WordPress plugins, to use this plugin, first of all, you need to install it. You go to Plugins > Add New and then type the plugin’s name in the search bar. After you will see the plugin that you are looking for displayed at the top of the results. Quickly click on the Install Now button and Activate it.
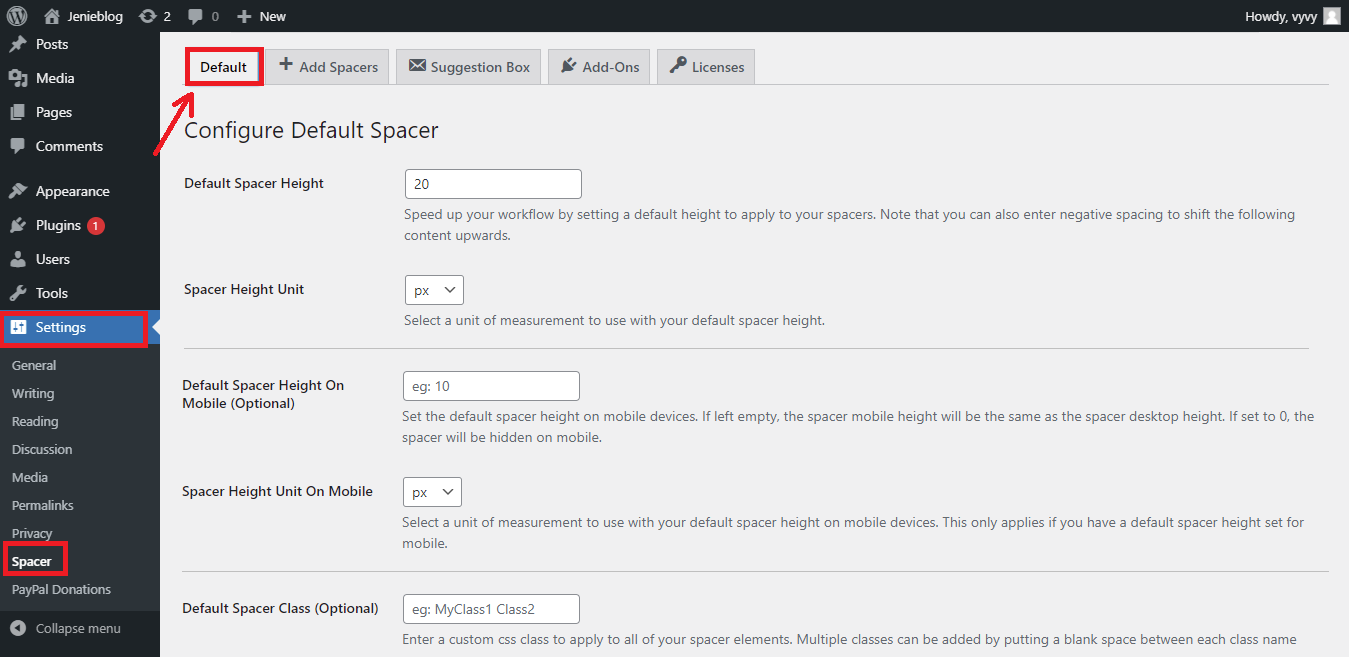
Step 2: Configuring the settings
Now, let’s visit the Settings > Spacer page on your dashboard.
You will see that there are 5 tabs at the top of the page including:
- The Default tab plays an important role as the main default configuration for the spacers used. It can be understood that whether you don’t install other spacers or partitions, it is the only one that can be added. In addition, you can also configure the main spacer to suit your requirements.
- The Suggestion box tab enables you to type your recommendations for the plugin to the developers
- In the Addon-ons tab, there are a lot of available add-ons that you can consider to purchase
- The licenses tab permits you to put in licenses for the pro version after you have purchased any add-on yet.
Step 3: Add Spacer
In order to add a spacer to your library, firstly you need to click on the Add Spacers button.
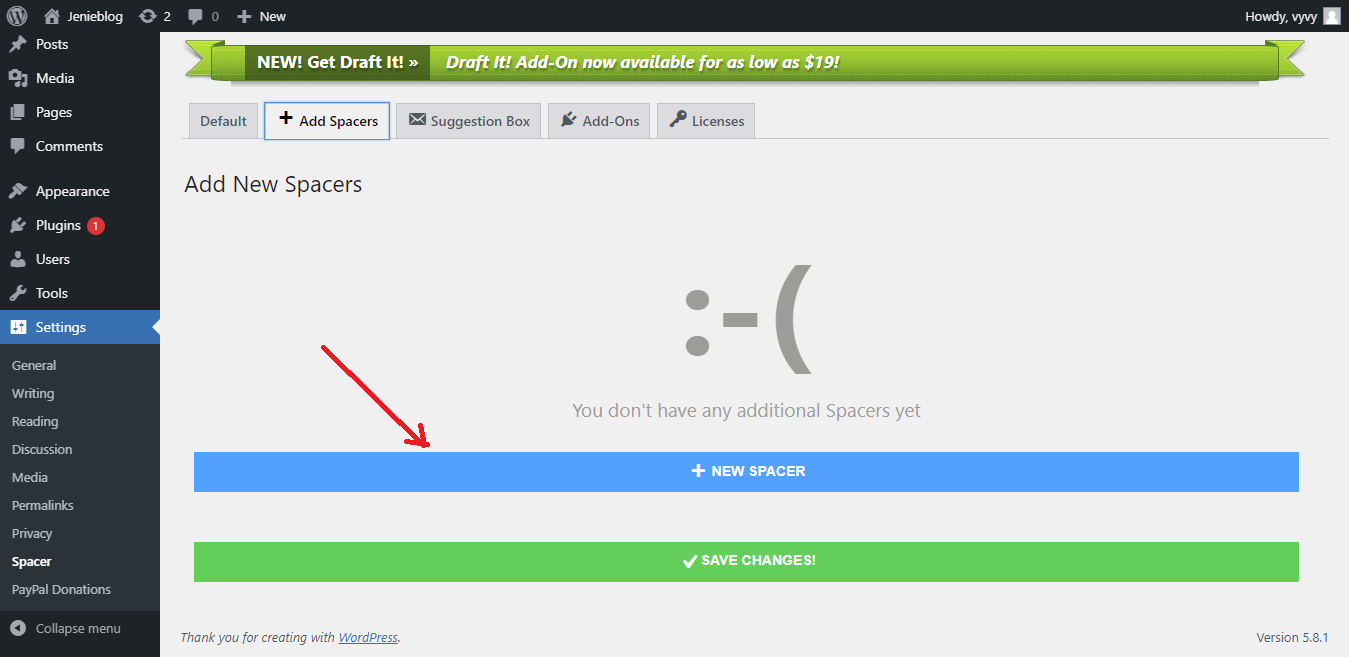
Here you can set the Spacer Title to help you easily distinguish between spacers when you adding them to a post/page later. In addition, you need to fill out the options for your new spacers.

After finishing, scroll down at the bottom of the page and click on the Save Changes button. And then your new spacer will be automatically inserted into your library.
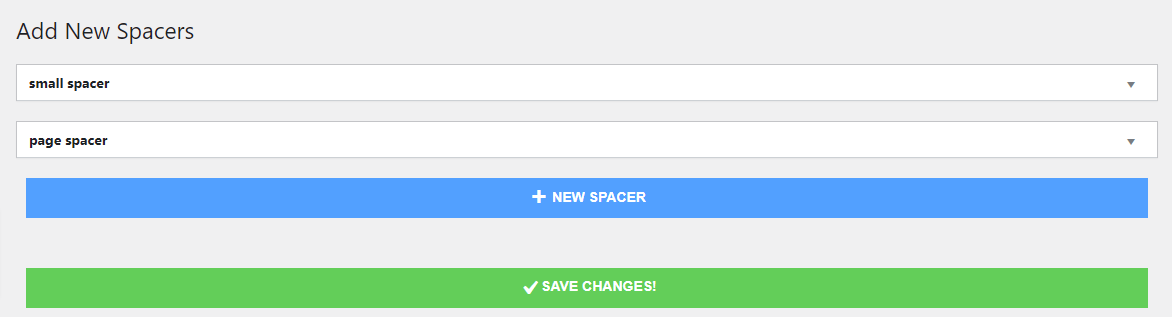
Step 4: Adding a line pacing to your post/page.
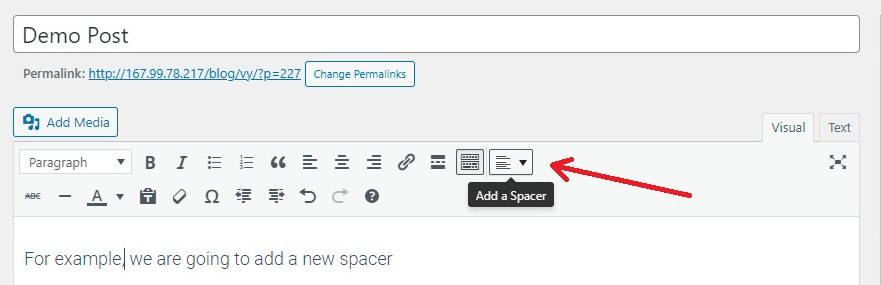
Now, you need to go to the post/page that you want to edit or start with a new post/page. Let’s take a look at your toolbar, you will see the Add a Spacer button added. Therefore, when you want to add one of the spacers for your content simply click on this button and choose from the drop-down created spacers.
You can choose which spacer you want to add through the spacer button flexibly.

Wrap up
We have just shared the three most effective and simplest methods to help you add a single/ double line spacing in WordPress. We hope that you can consider carefully and choose the most suitable one for your website. In case you have any queries or questions about the mentioned methods, don’t hesitate to mention them by leaving a comment below.
Moreover, there are tons of appealing, professional, and responsive themes and templates at our free WordPress Themes. If you are planning to build an eye-catching website, let’s drop by our website right now.

- Resolving the “Class JFactory Not Found” Error in Joomla When Upgrading to J6 - December 19, 2025
- The Utility Of VPNs For Site Authors And Admins - November 24, 2025
- Joomla! 6: What’s New and How to Upgrade from Joomla! 5 - October 23, 2025


Recent Comments