Are you looking for the most efficient method to control the number of archive months displayed in WordPress? Look no further, in today’s blog, we will give a detailed guide to handle this issue.
Why should you limit the number of archive months shown on your site?
Archive pages play an important role in organizing a list of posts under a specific post type, category or tag. With the support of the feature, your visitors can view any content on your website, even posts in the past regardless of the publish date. In addition, this feature is also useful for SEO since they enable search engines to easily look for the old content on your website.
However, if you have been publishing a wide range of posts for a long time, the shown archives can take a lot of space on your website. In addition, they make your website less professional.
How to control the number of archive months displayed in WordPress?
In fact, there are many methods that assist you to control the number of archive months displayed in WordPress. You can use WordPress plugins or edit the functions.php. In today’s tutorial, we are going to share with both of them. You can choose one of them to use for your website. Now, you can go over the following methods.
Method 1: Using Collapsing Archives plugin
This method is suitable for most users because it doesn’t require you to touch any line of coding.
To use this method, first of all, you need to install Collapsing Archives plugin. This is regarded as one of the effective WordPress archive plugins in the market.
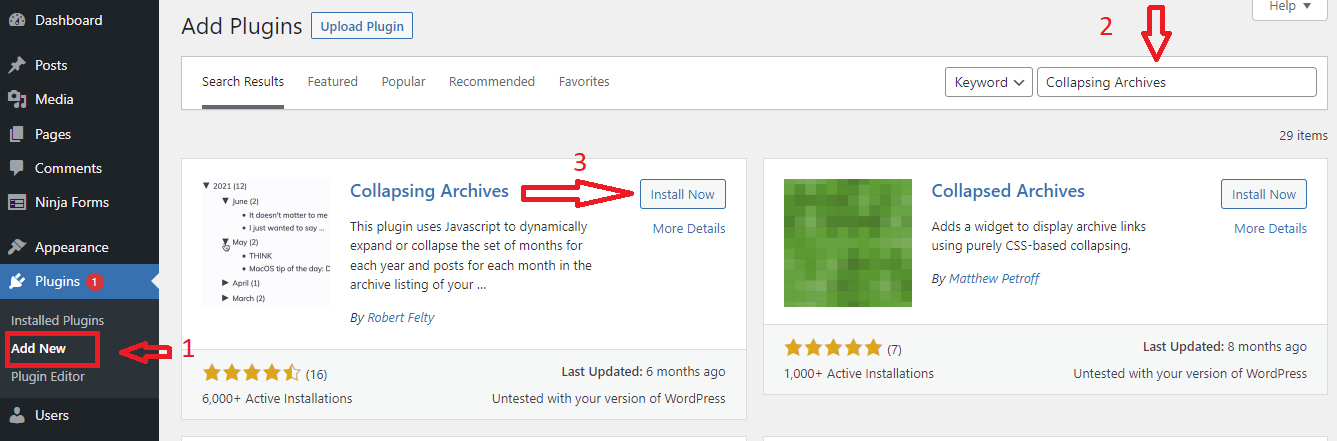
Just to go to Plugins > Add New page from your dashboard. Then you can use the search feature to look for the “Collapsing Archives Plugin”. As soon as the plugin appears, quickly click on the “Install Now” button and Activate it.
After the plugin has been installed yet. Now, you need to navigate to the Appearance > Widgets page and then drag the Collapsing Archives widget from available widgets to your sidebar.
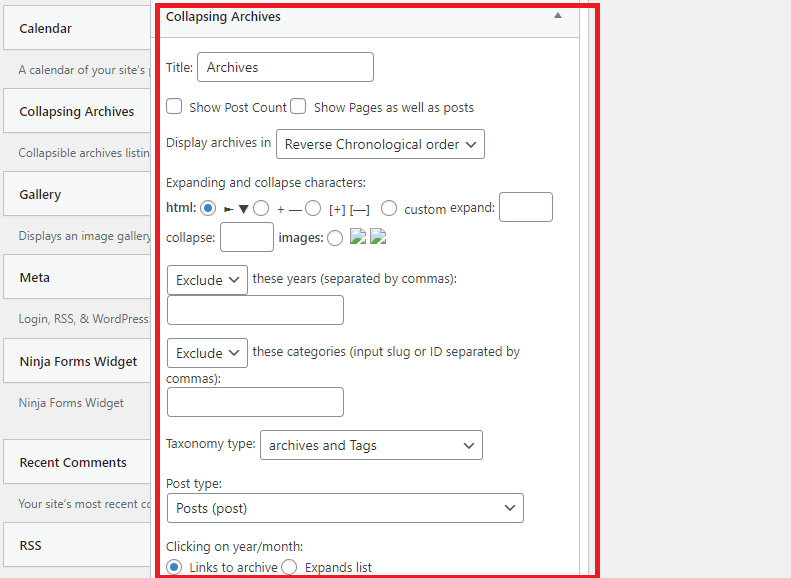
Immediately, the widget will expand to display its settings. From here, this plugin provides you with a list of options, you can customize it to suit your preference. Even it gives you the ability to link to the archive pages or not and whether or not you want to showcase individual posts, or not.
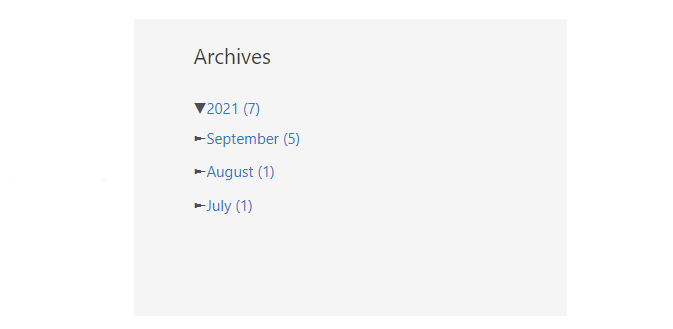
By using this plugin, your visitors simply click on years to expand them and view all monthly archives. Moreover, if you want to make monthly archives collapsible and enable visitors to view post titles below, this plugin completely allows you to do that.
Once you are pleased with your selection, let’s click on the “Save” button in advance of exiting the widget page.
Now, you can visit your website and check the result.
Method 2: Using Compact Archives plugin
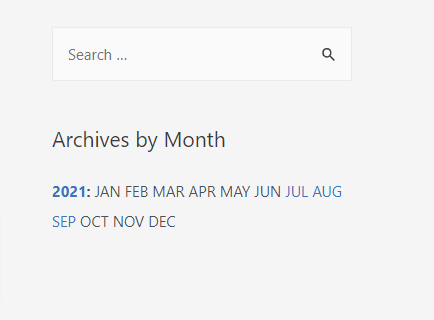
The Compact Archives plugin will make your website look more professional by displaying archive months in a compact, readable layout rather than the usual long list.
Similarly, to use this plugin, initially, you need to install and activate this plugin.
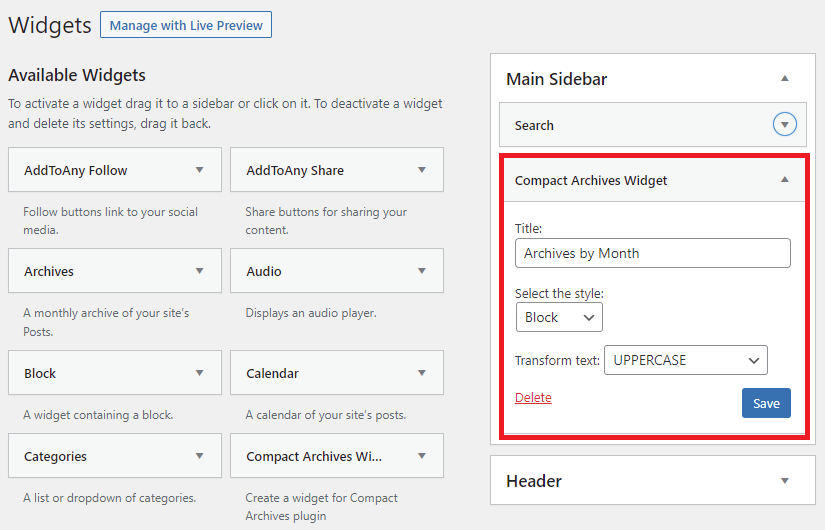
Upon activation, you need to go to the Appearance > Widgets page. Then drag the “Compact Archives Widget” to your sidebar.
Next, you need to enter a title for the archives, choose the style by clicking on the arrow icon and then click on the “Save” button to transform the text.
Now, you go to your website and see the compact archives appear.
Method 3:Editing functions PHP to control the archive months
This method allows you to limit the archive months by editing your theme’s function.php file and then adding a custom text widget to the sidebar.
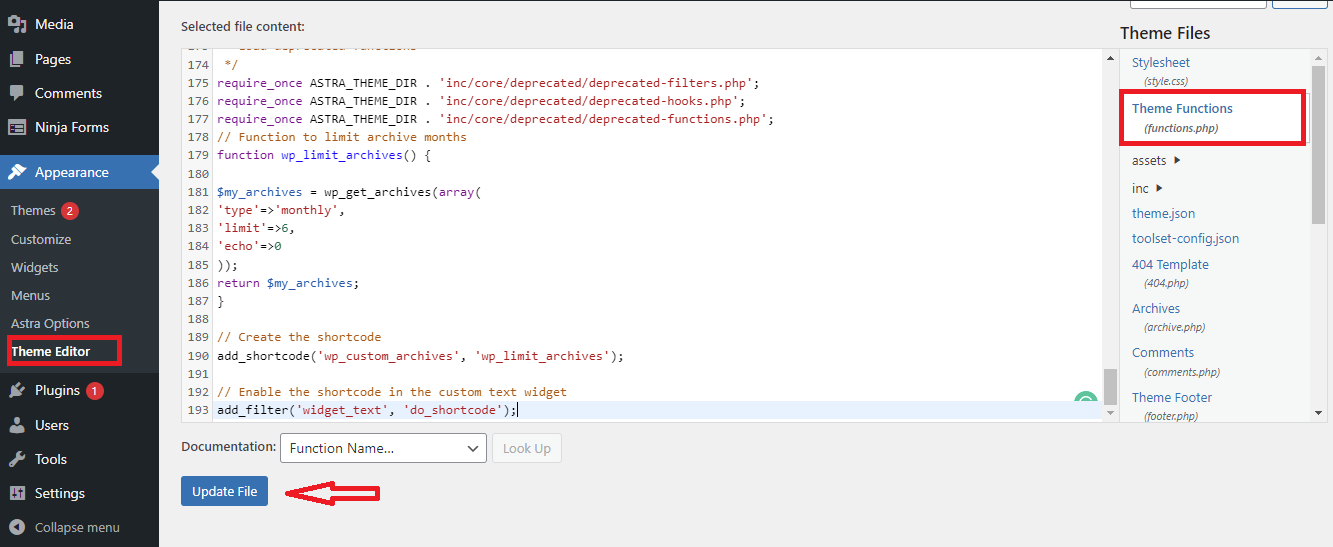
Firstly, you need to log into your WordPress dashboard, go to Appearance > Theme Editor, and click on Theme Functions(functions.php).
Now, you need to add the following lines of code to functions.php, then click Update File.
// Function to limit archive months

function wp_limit_archives() {
$my_archives = wp_get_archives(array(

'type'=>'monthly',

'limit'=>6,

'echo'=>0

));

return $my_archives;

}
// Create the shortcode

add_shortcode('wp_custom_archives', 'wp_limit_archives');
// Enable the shortcode in the custom text widget

add_filter('widget_text', 'do_shortcode');
Then, you navigate to the Appearance > Widgets page and drag the Text widget from a list of available widgets to your sidebar.
It’s time for you to enter a title for the sidebar widget. After that, click the Text tab to move to the text editor and add the following code.
<ul>

[wp_custom_archives]

</ul>
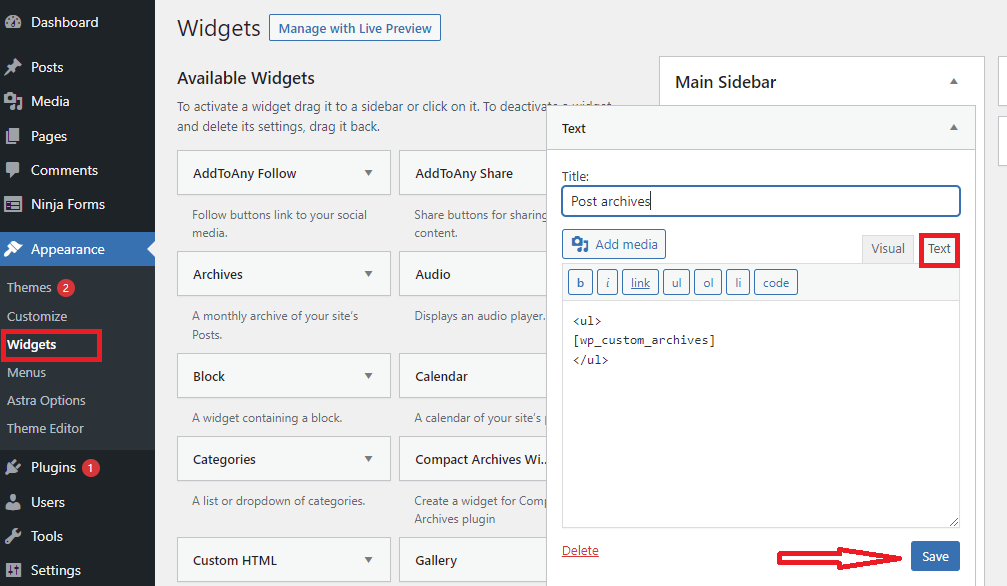
Don’t forget to click on the “Save” button to save your widget. Now, you will see the result of your custom text widgets on your WordPress site.
Conclusion
Have you determined your favorite measure for your website? Hopefully, this article brought a lot of useful solutions for your website. If you have any queries, don’t hesitate to mention them by writing down a comment below.
It’s time for you to visit our Free WordPress themes to explore a wide range of beautiful, SEO-friendly designs that are perfect for multiple websites.

- Resolving the “Class JFactory Not Found” Error in Joomla When Upgrading to J6 - December 19, 2025
- The Utility Of VPNs For Site Authors And Admins - November 24, 2025
- Joomla! 6: What’s New and How to Upgrade from Joomla! 5 - October 23, 2025


Recent Comments