Introduction
Contact Form 7 is one of the most popular WordPress Contact Form Plugins that will help website owners create a contact form on their website. Thanks to it, visitors can easily leave messages for you – the website owner easily. However, recently, when visitors send messages, there are some errors such as ‘sender email address does not belong to the site domain’, ‘Failed to send your message’, etc. That makes it impossible for them to send messages or get in touch with you. Therefore, you need to quickly fix the errors so that the exchange between you and your visitors becomes more convenient. So, in the blog today, we will show you the way how to fix Failed to send your message error in Contact Form 7. Let’s take a look now!
The way to fix Failed to send your message Error
Normally, when you use Contact Form 7 plugin, there will be 3 common error cases. Now, we will find out 3 error cases and the way how to solve these problems.
Address the ‘Your message was sent successfully’ but you can’t receive the message issue

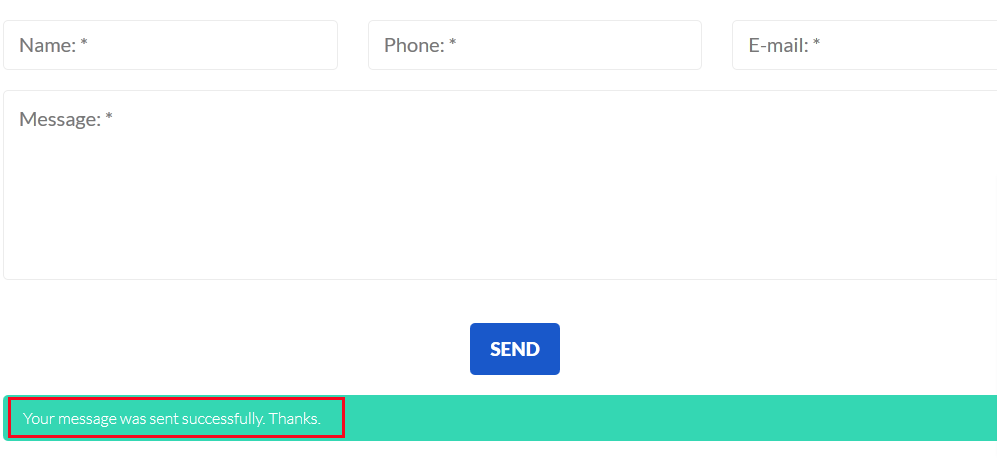
The first error case is that your visitors receive the notification to confirm their message was sent successfully. However, when you check the mail, there won’t be a new message for you.
The notification ‘Your message was sent successfully’ comes with a green box. This means that the PHP function for sending mail was completed. Therefore, you need to check the mail server’s log if you can’t receive the mail. Normally, this error happens because of the spam filter. So, you should check the spam box to make sure that you won’t miss any important mail.
Solve the ‘Failed to send your message’ error in an orange box

Secondly, after your visitors fill out the message and click the Send button, the ‘Failed to send your message. Please try later or contact administrator by other way’ error appears in an orange box.
In this case, you should check which version of Contact Form 7 you are using. If it is version 7.3.0 or earlier, this error may be caused by Akismet. Therefore, check if you have turned it off or not. If not, let’s disable it.
In case you are using Contact Form 7 with version 7.3.1 or later, this error occurs for many reasons. However, one of the most common reasons is cache. As you know, new versions of Contact Form 7, the verification have been implemented. In other words, when the cache file remains for more than 24 hours, the verification will fail. At this point, the ‘Failed to send your message’ error will appear with an orange box. Therefore, in order to tackle this trouble, you should check the settings of the cache plugin and clear the cache frequently.
Fix the ‘Failed to send your message’ error in a red box

If your visitors send messages but the ‘Failed to send your message’ error appears in a red box, there will be trouble with the mail server settings. Hence, it’s necessary for you to get in touch with the server admin to solve it.
Furthermore, you can also check and configure the contact form so that you can avoid or fix the error effectively.
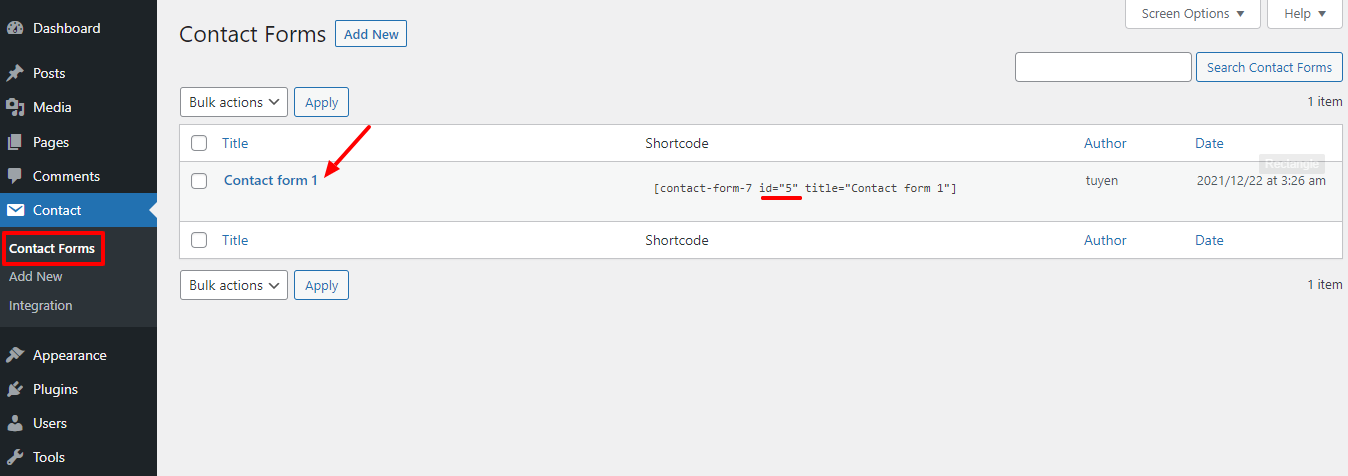
First of all, on the admin dashboard, you need to go to Pages -> All Pages -> Contact Page. Then, find the id of the contact form you are using via the contact form shortcode. After that, go to Contact -> Contact Forms, then choose the contact form with the corresponding shortcode.
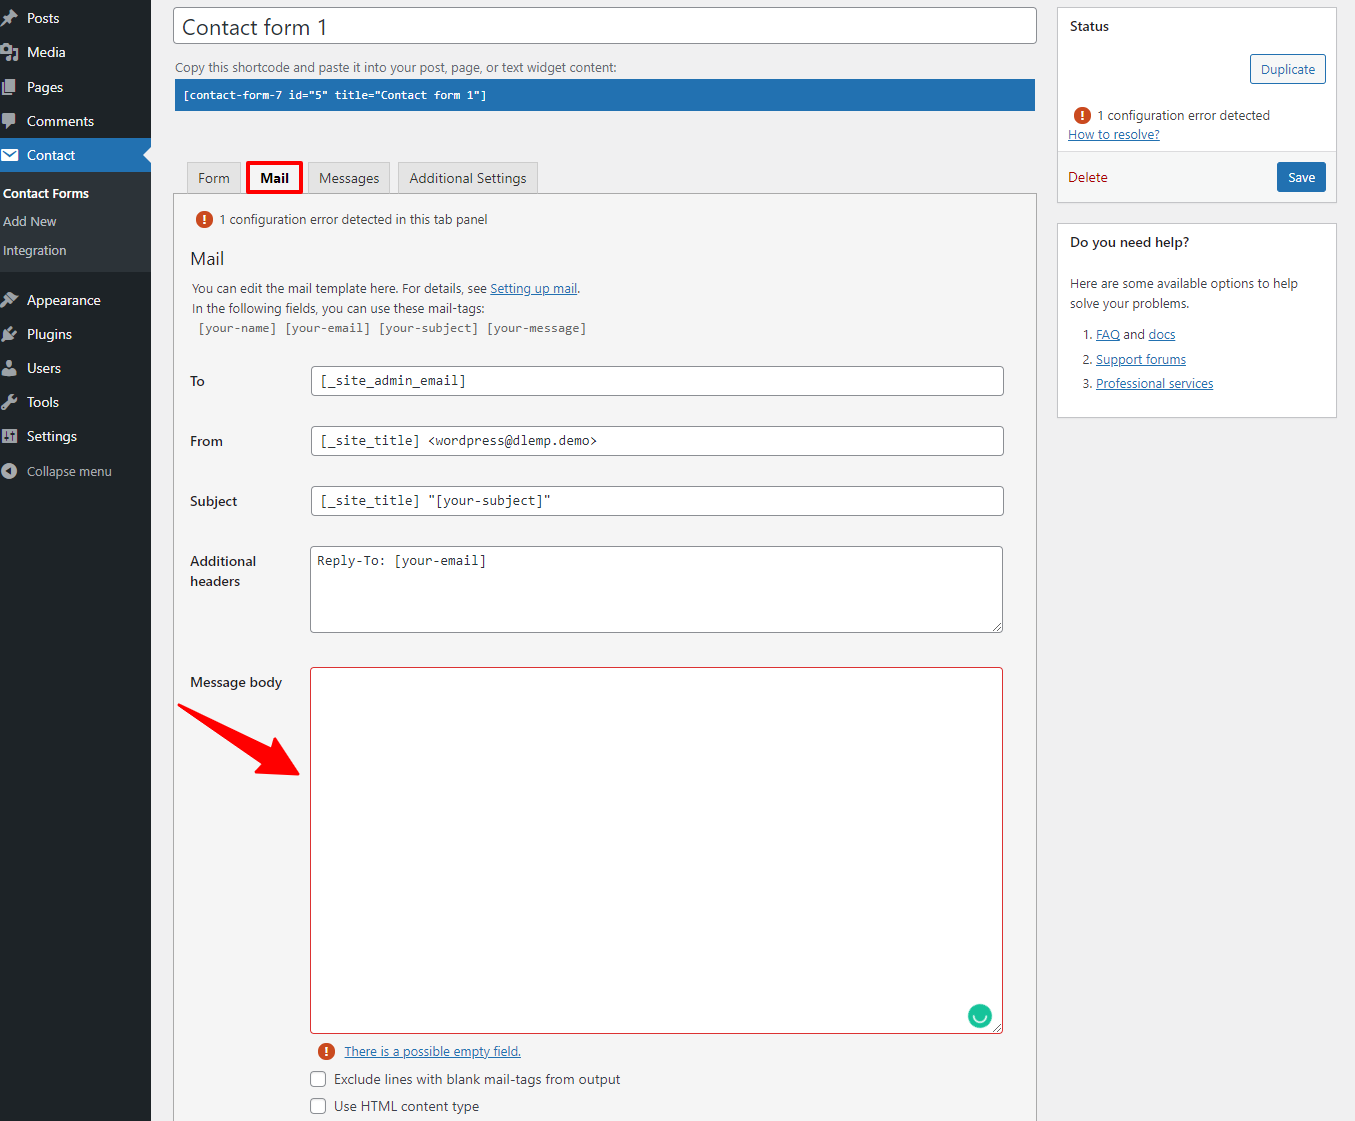
Now, you need to click on the Mail tab, find the Message body section. Let’s check whether the Message body box is empty or not. If it is empty, you need to fill out the box to avoid the error.
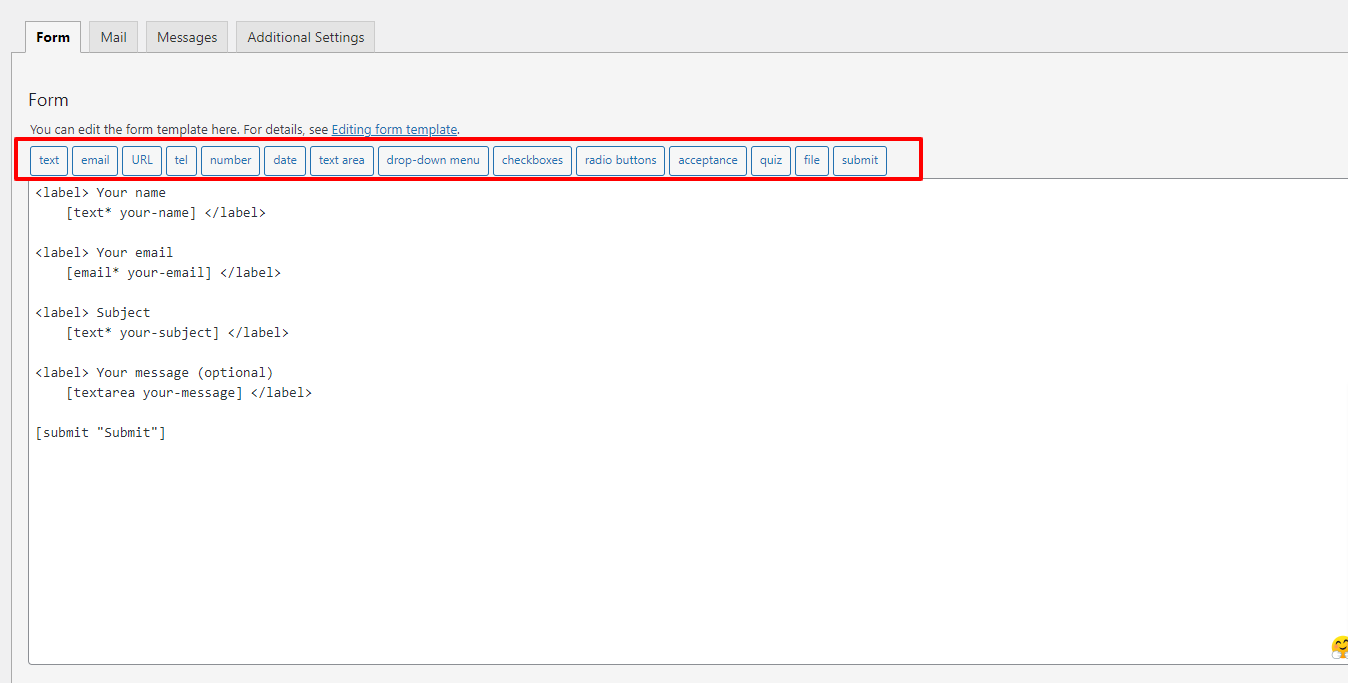
Next, let’s move on to the Form tab, then copy the field tags that you want to use in the Contact form.

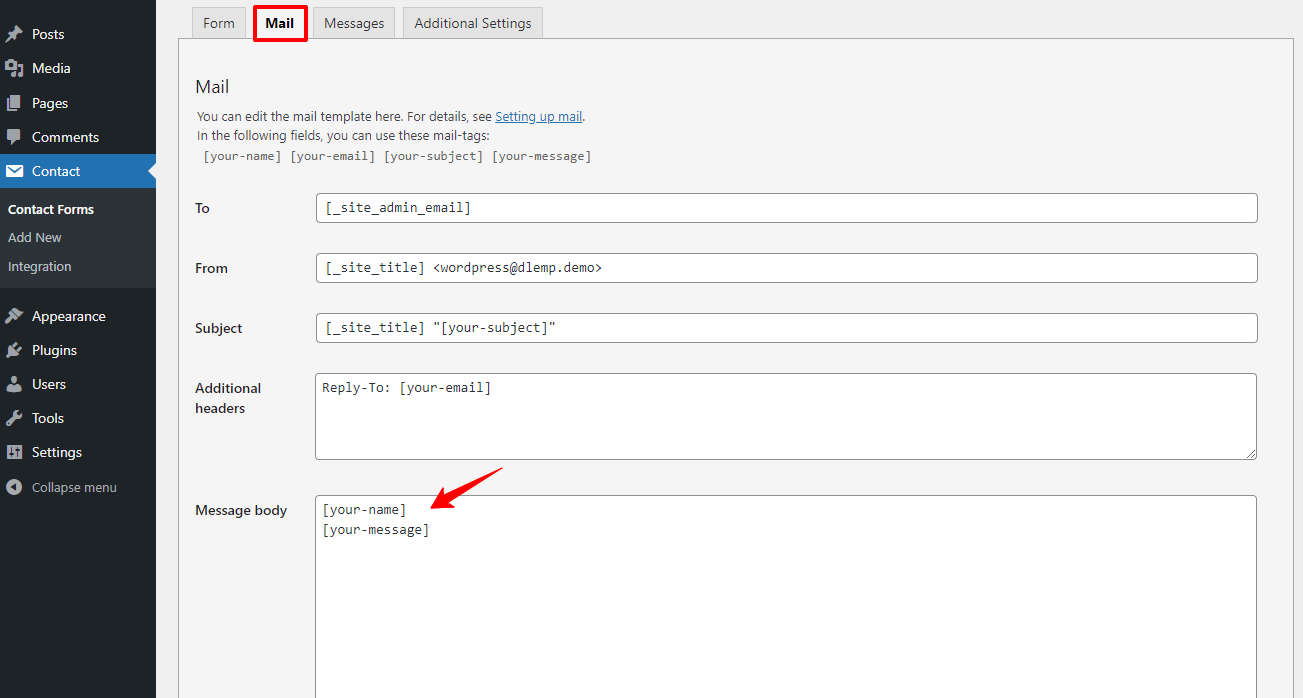
You need to switch to the Mail tab and paste the field tags you copied into the Message body box. Don’t forget that the tags have to be in the square brackets. For example, it would be [your-message].
In the last step, let’s click on the Save button to store all your settings.
Besides that, you can add more new tags such as text, URL, tel, and much more on your contact form. Let’s click on any tag you want.
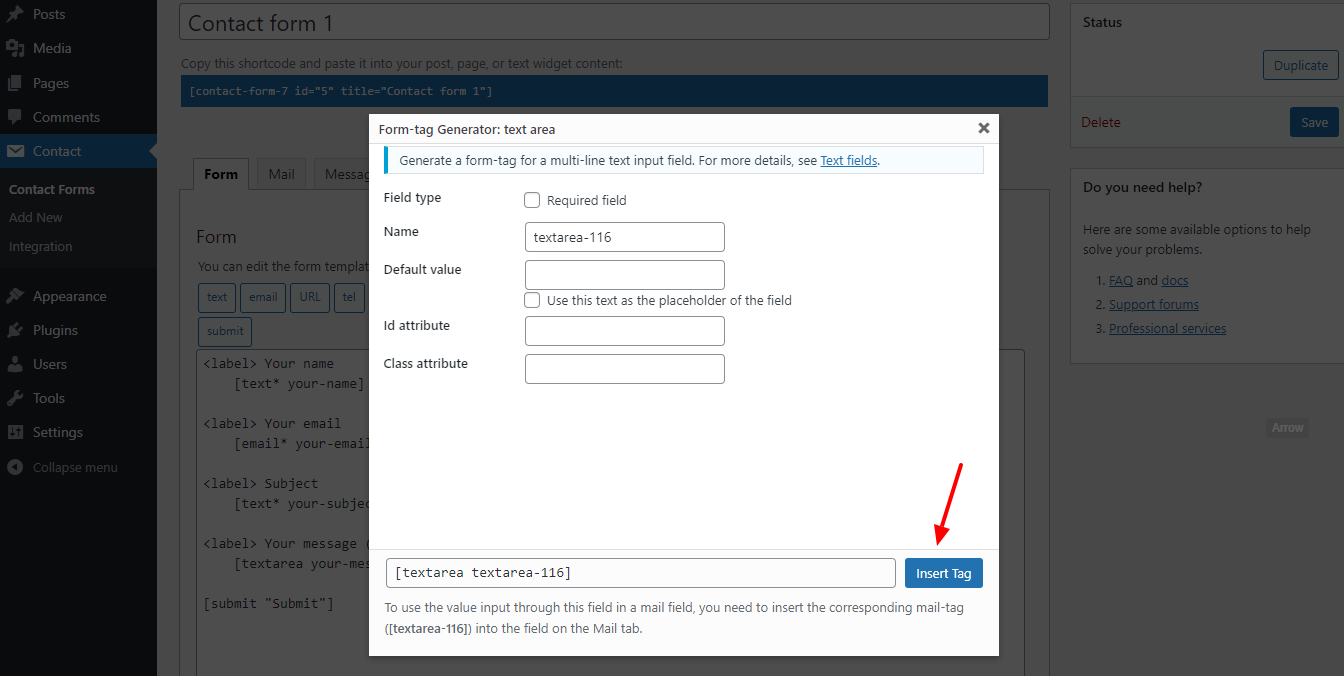
Now, a form-tag generator will appear. Simply click on the Insert tag button. This field tag will be added to the Form box. So, you can copy this field tag and insert it into the Message body box.
Finally, let’s check the Contact Form on your site. There won’t be any error now.
Conclusion
To sum up, besides two common errors such as ‘Failed to send your message’ or ‘sender email address does not belong to the site domain’, there are also other errors in the Mail tab. Therefore, it’s necessary and important for you to learn and configure the form carefully to avoid errors. With the blog today, we hope that we can help you fix Failed to send your message error smoothly. If you have any question, don’t hesitate to leave your comment below so that we can answer you quickly. Last but not least, don’t forget to visit our site to get more attractive and responsive Free WordPress Themes for your site.

- Resolving the “Class JFactory Not Found” Error in Joomla When Upgrading to J6 - December 19, 2025
- The Utility Of VPNs For Site Authors And Admins - November 24, 2025
- Joomla! 6: What’s New and How to Upgrade from Joomla! 5 - October 23, 2025


Recent Comments