Introduction
Are you using Contact Form 7 – one of the most useful WordPress Contact Form Plugins to build contact forms for your WordPress website? However, do you feel the form appearance is too monotonous and boring? Do you want to change the look of it to many eye-catching colors? If that’s what you want, then you need to customize this form to fit your website and attract more visitors. However, this plugin does not provide any options for you to change the shape of the form. Don’t worry too much about this. Today, in the blog, we will help you style Contact Form 7 form to make it become more attractive and modern. So, let’s get started now!
Let’s style Contact Form 7 form in WordPress
Create a new contact form with Contact Form 7 plugin
First of all, if you haven’t installed the Contact Form 7 plugin, you need to install and activate it. Simply go to Plugin -> Add New -> Search for Contact Form 7 -> Install -> Activate.
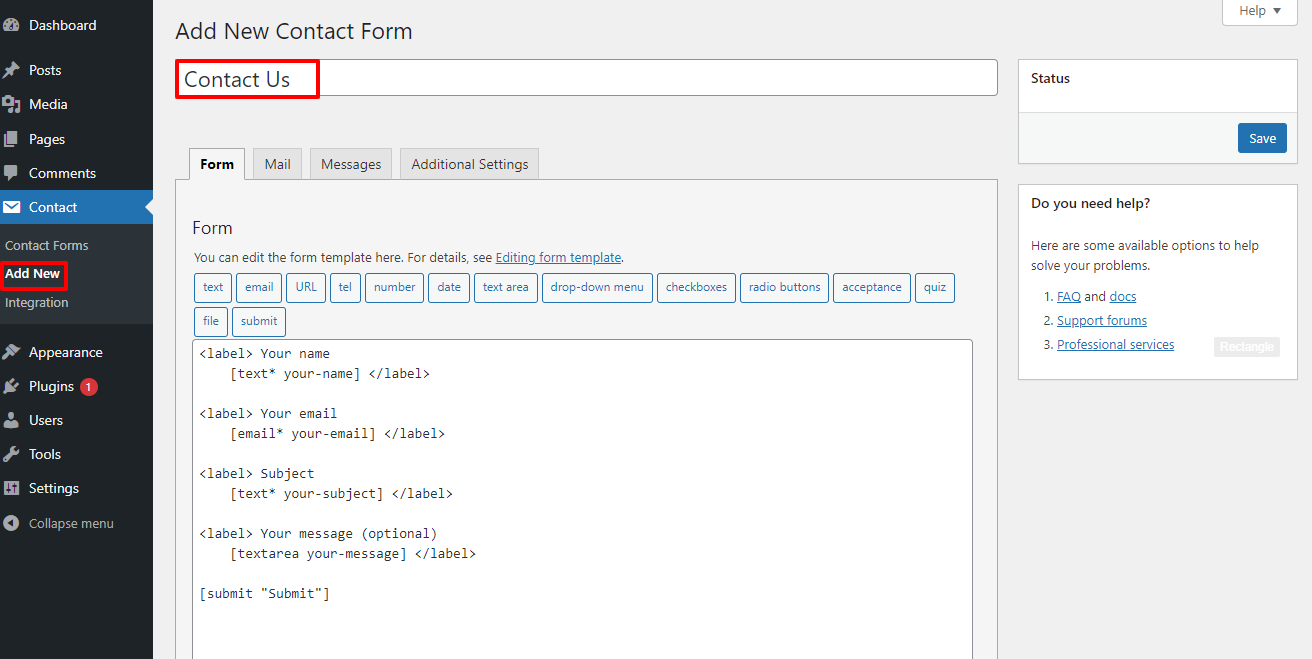
After activating, you just need to access Contact -> Add New on the dashboard. Next, let’s fill out the title of your form and edit it in the way you want. By default, when you create a new form, this plugin will acc the name, email, subject, and message fields automatically for you. However, you can add more fields.
When you finish creating a new form, don’t forget to save your settings.
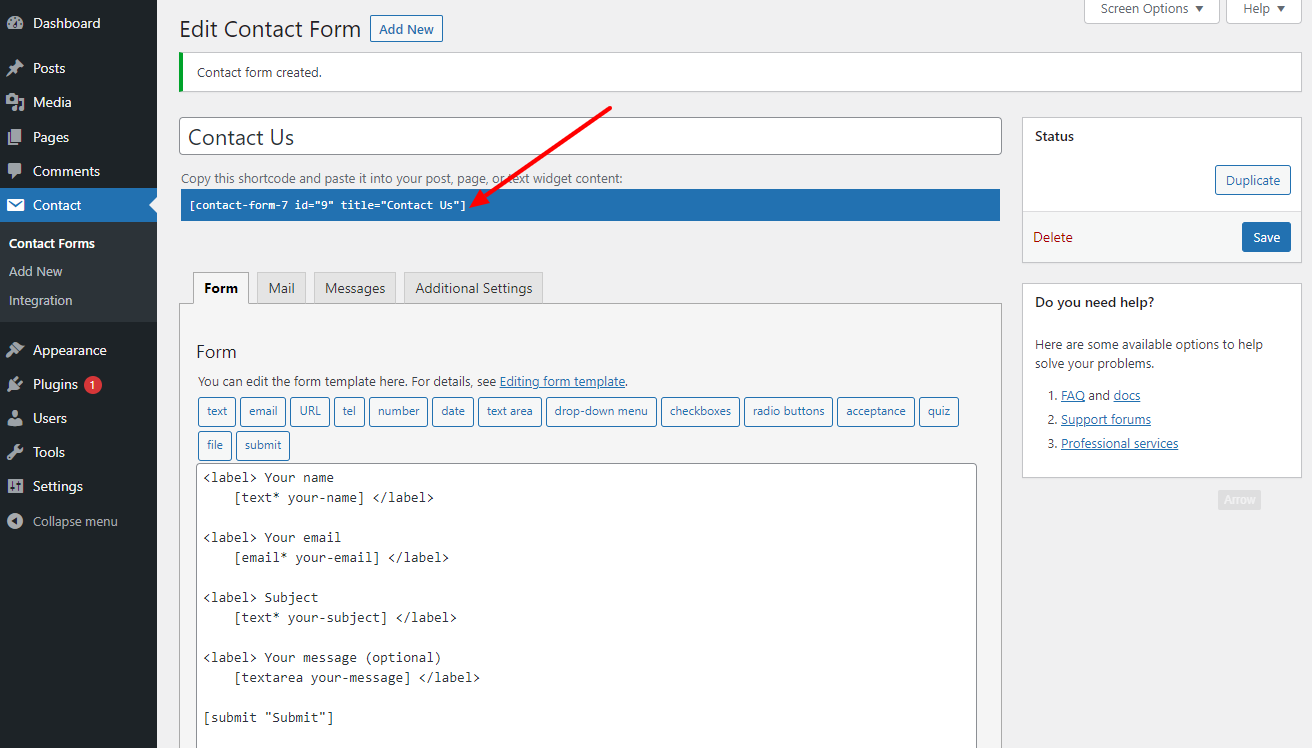
In the next step, you need to copy the shortcode under the title.
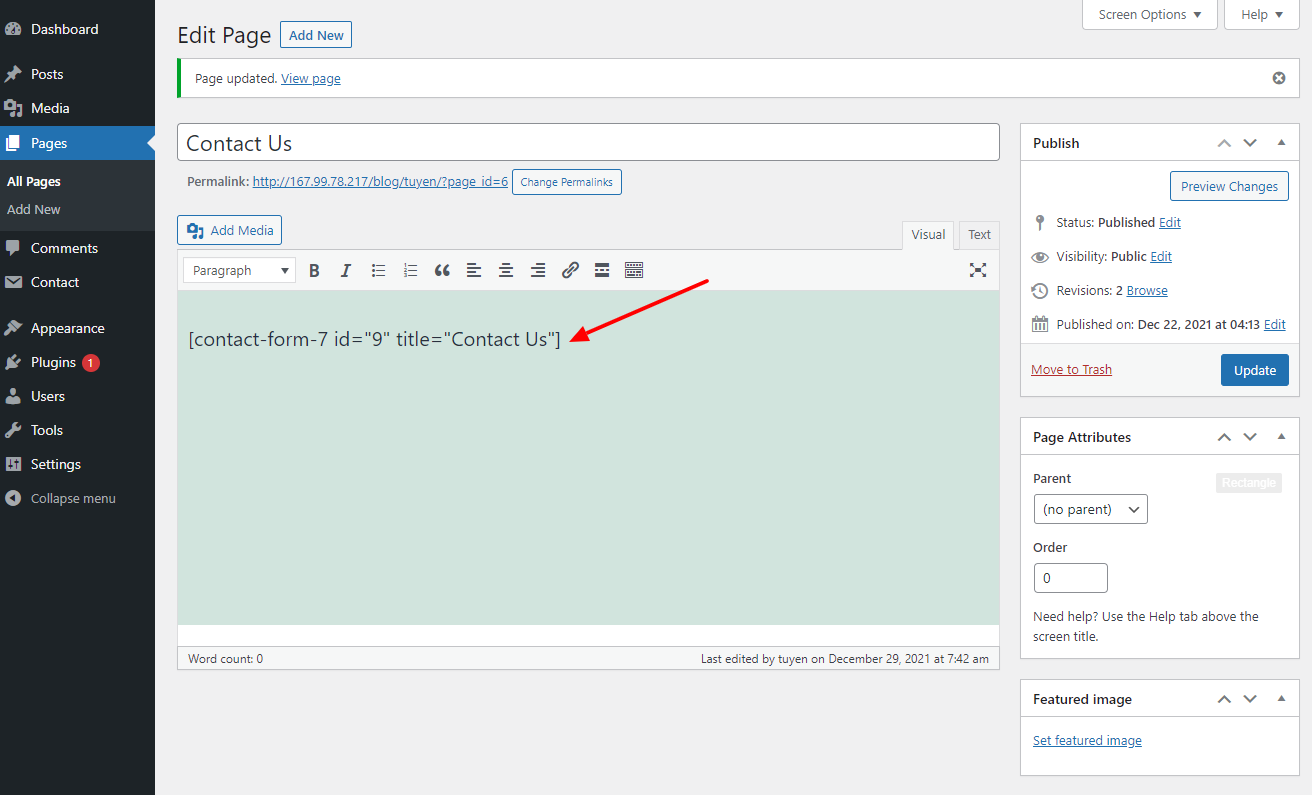
Now, let’s go to any post or page you want to add the contact form to. If you are using Classic Editor – one of the most popular WordPress Editor Plugins, you simply add the shortcode to the text box. You can see an example in the following image.
In case you are utilizing WordPress Block Editor, let’s click on the ‘+’ symbol -> add a Shortcode Block -> enter the shortcode to the block.
Don’t forget to save or update the post/page to store all your changes.
Now, you can see the contact form on the front-end post/page of your website.

Style Contact Form 7 Form by using Custom CSS
Because Contact Form 7 doesn’t come with any built-in style options, you have to use CSS to style the contact forms. In the blog, we recommend you to use Simple Custom CSS which is one of the most effective WordPress CSS Plugins to do that.
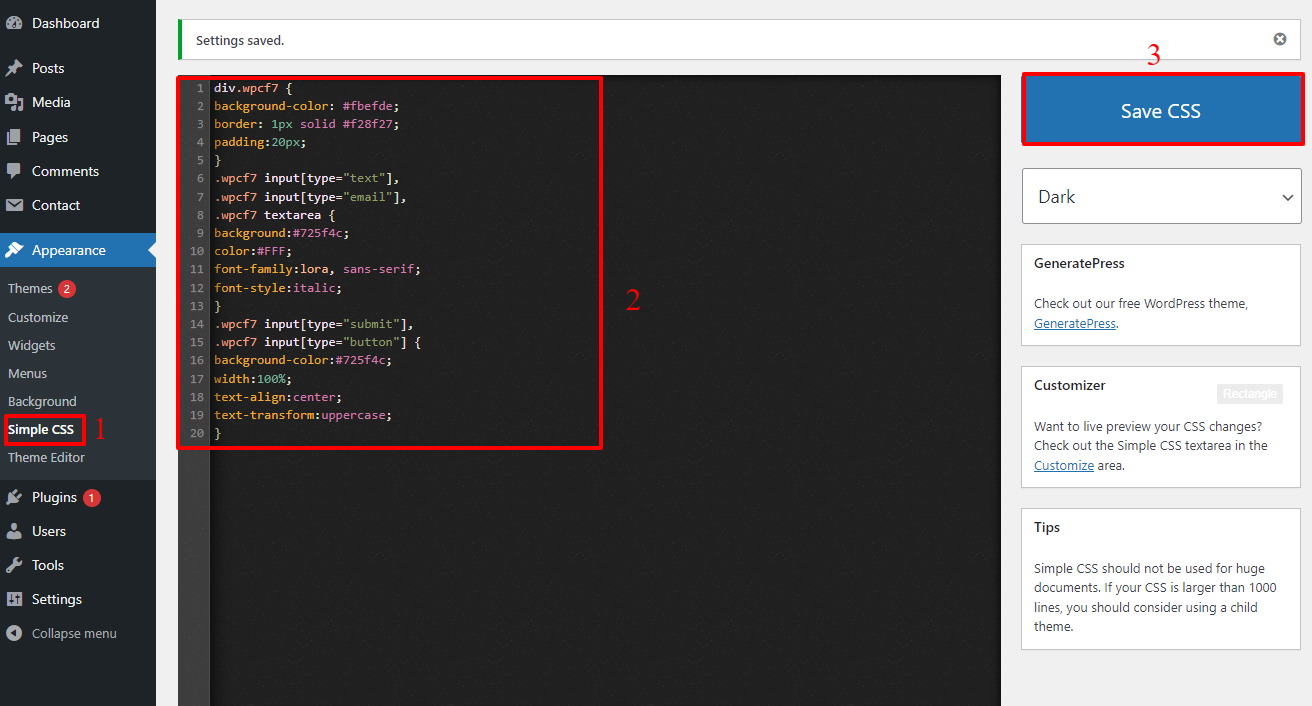
Now, let’s install and activate the Simple Custom CSS plugin. After that, on the admin dashboard, simply open Appearance -> Simple CSS. Then, add the following code and save it.
div.wpcf7 {

background-color: #fbefde;

border: 1px solid #f28f27;

padding:20px;

}

.wpcf7 input[type="text"],

.wpcf7 input[type="email"],

.wpcf7 textarea {

background:#725f4c;

color:#FFF;

font-family:lora, sans-serif;

font-style:italic;

}

.wpcf7 input[type="submit"],

.wpcf7 input[type="button"] {

background-color:#725f4c;

width:100%;

text-align:center;

text-transform:uppercase;

}
Since Contact Form 7 plugin creates standard-compliant code for the forms, each element will have a suitable ID and CSS class that will be associated with it. Therefore, you can easily and freely edit the contact form if you are professional in CSS.
As you can see in the example above, each Contact Form 7 will have a CSS class of .wpcf7. So you can use it to edit and style the form as you wish. In the code lines above, we will use Lora custom font as well as change the background of the form.
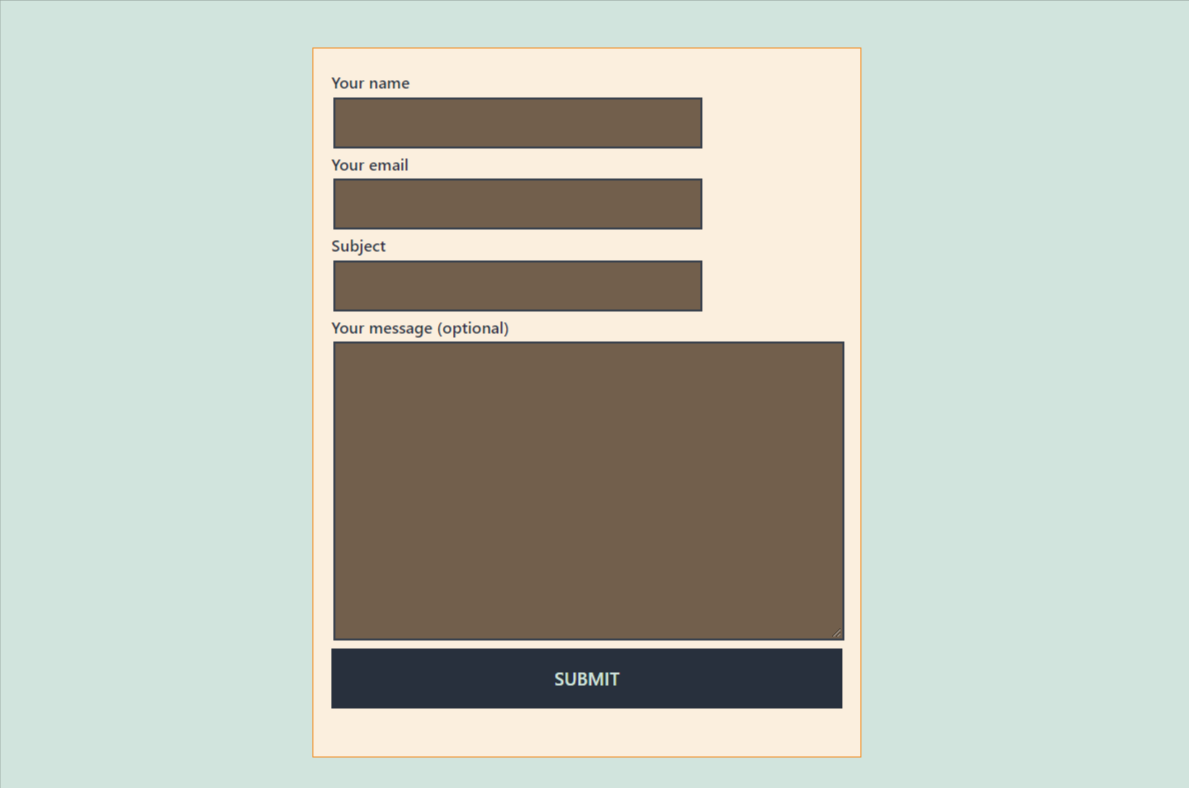
After adding the code to the Simple CSS plugin and saving it, you can check the result below. The font and the color of the background have been changed.
Style multiple Contact Form 7 Forms in WordPress
In case you are using many contact forms and need to style for each of them in different appearances, let’s follow the steps below.
Firstly, you need to open the page that has the form you need to edit. Then, simply right-click and choose Inspect. Now, you can see the page’s source code. So, let’s find the contact form code that starts with the following line:
<div role="form" class="wpcf7" id="wpcf7-f9-p6-o1" lang="en-US" dir="ltr">
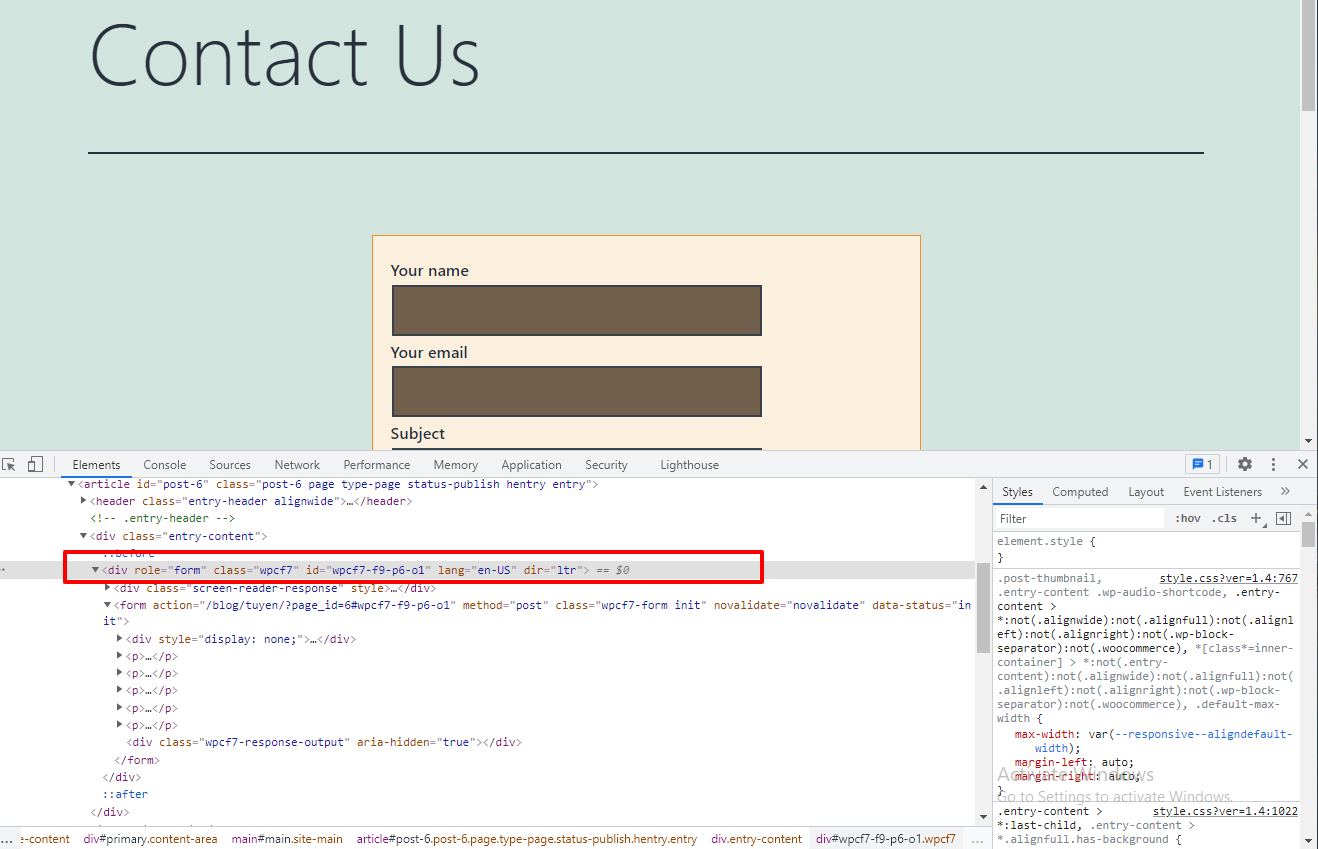
The Contact Form 7 created the ID attribute for each particular form. Thus, it is a combination of the post/ page id and the form id. In our example, you can see id=”wpcf7-f9-p6-o1″.
Now, we will utilize the ID in CSS in order to style a contact form, then replace the .wpcf7 in the first CSS snippet with #wpcf7-f9-p6-o1. Let’s see the example code below.
div#wpcf7-f9-p6-o1{

background-color: #fbefde;

border: 1px solid #f28f27;

padding:20px;

}

#wpcf7-f113-p114-o1 input[type="text"],

#wpcf7-f113-p114-o1 input[type="email"],

#wpcf7-f113-p114-o1 textarea {

background:#725f4c;

color:#FFF;

font-family:lora, "Open Sans", sans-serif;

font-style:italic;

}

#wpcf7-f113-p114-o1 input[type="submit"],

#wpcf7-f113-p114-o1 input[type="button"] {

background-color:#725f4c;

width:100%;

text-align:center;

text-transform:uppercase;

}
Now, all you need to do is repeat the step above for all your forms. Remember to replace the form ID for each contact form you desire to modify.
Add reCAPTCHA to Contact Form 7 form
If you want to add reCAPTCHA to Contact Form 7 form to prevent spam, you can do that with the following steps.
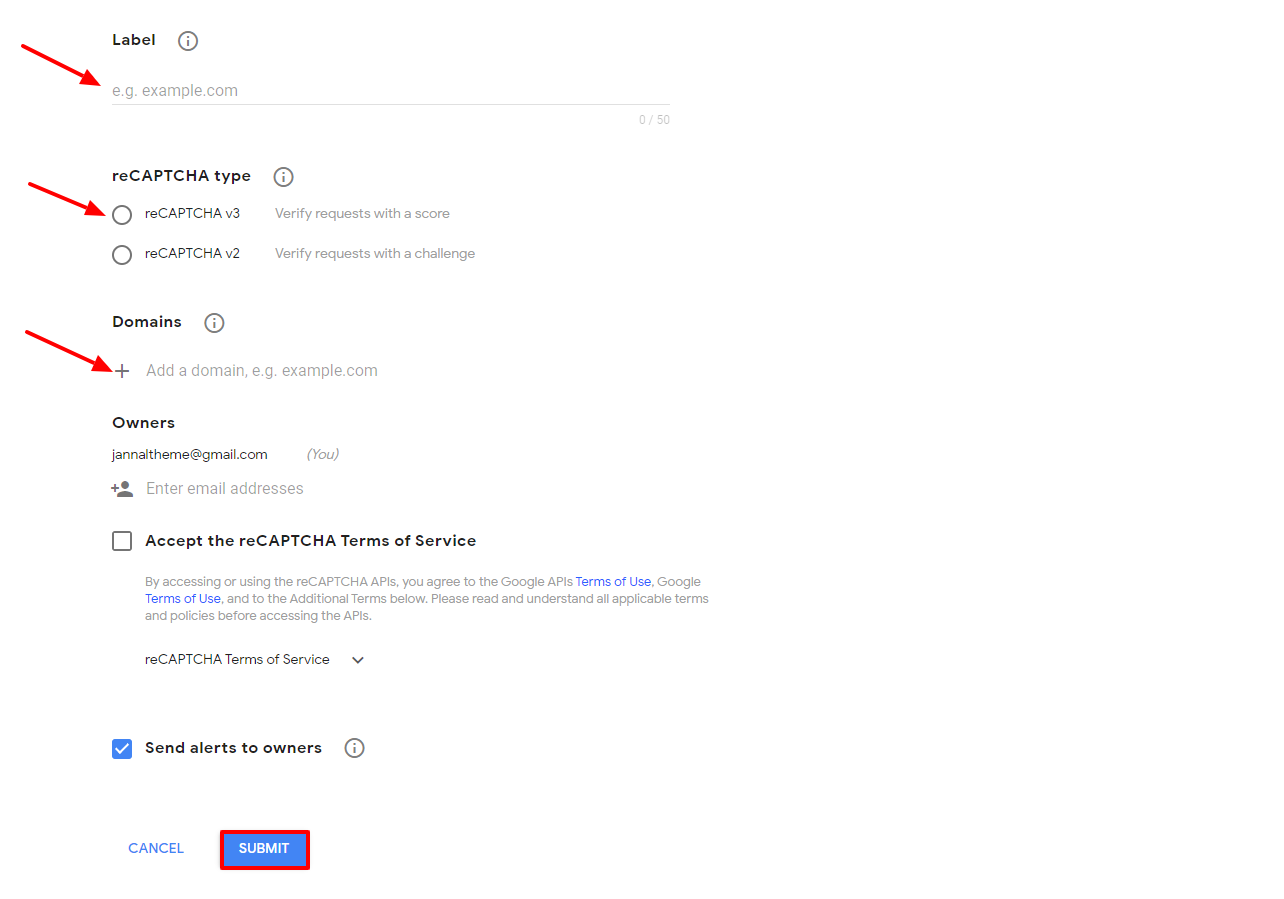
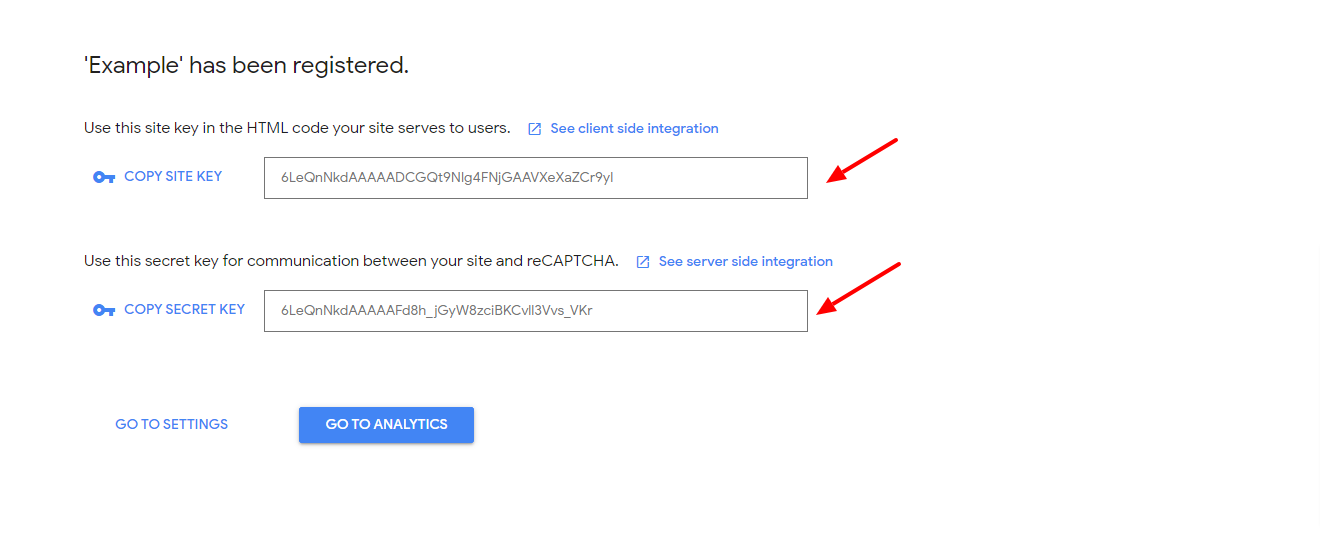
First of all, you need to register your WordPress site. So, let’s open the My reCAPTCHA page and fill out some main information. Simply enter the Label, choose reCAPTCHA v3, add the domains of your site, click on accept the terms of services. After that, you just need to press Submit button to move on to the next step.
Now, you need to copy the site key and the secret key for your WordPress site.
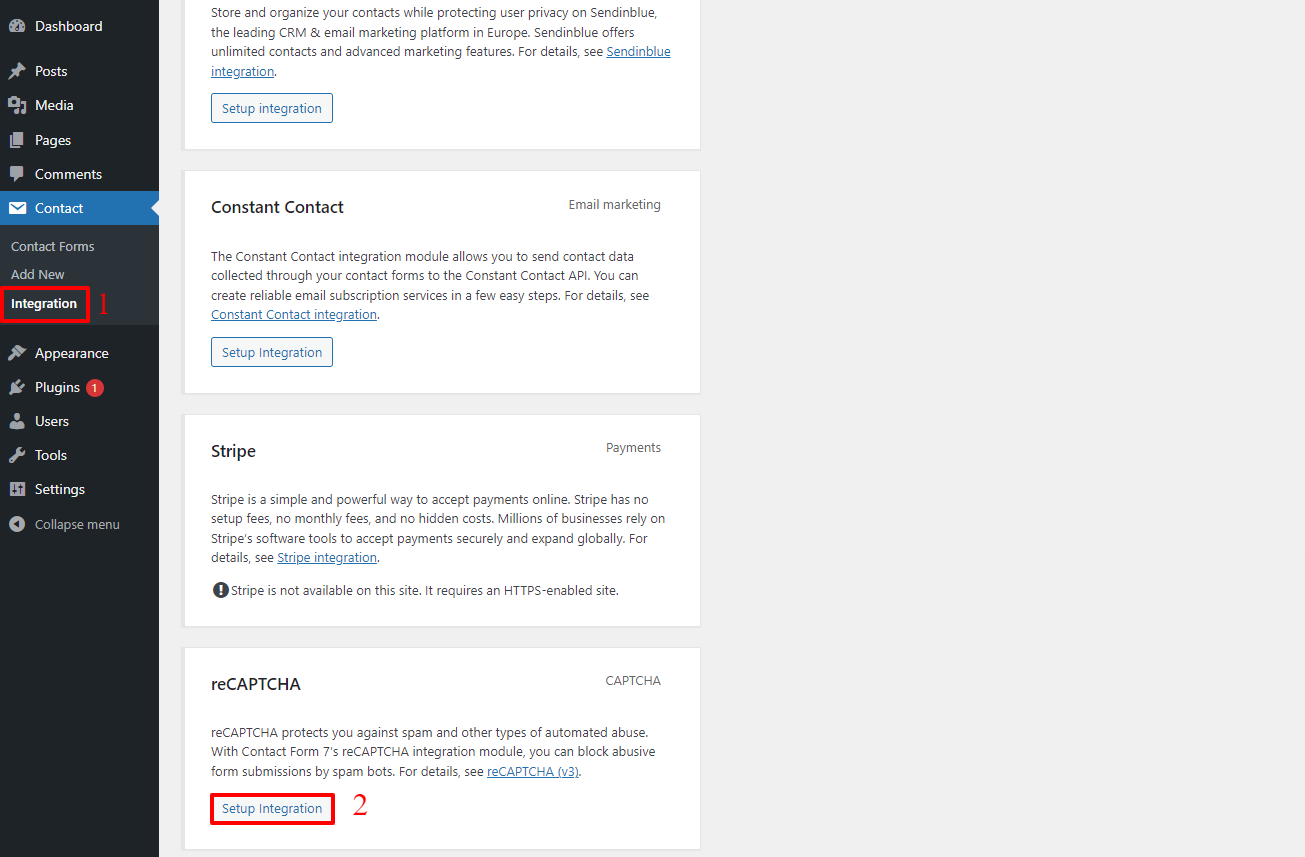
The next step is to go back to your WordPress admin dashboard. Then, go ahead Contact -> Integration, find the reCAPTCHA section, and click on Setup Integration.
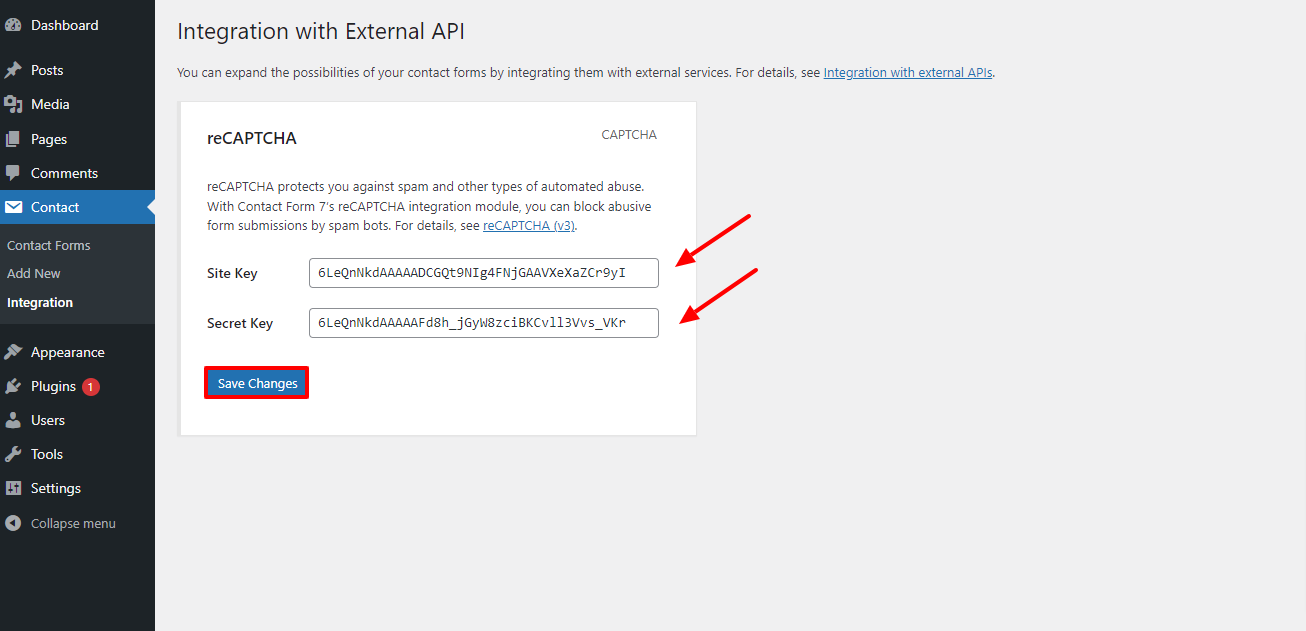
Finally, you just need to paste the site key and secret key you copied before. Don’t forget to save all your changes.
Conclusion
All in all, if you know CSS, you can easily style Contact Form 7 form without any difficulty. With the instruction in the blog today, we hope you can do that smoothly and effectively. If you believe the blog today is useful, why don’t you share it with your friends? What’s more? In case you have trouble with Contact Form 7, you can visit here to learn how to fix Failed to send your message Error. Last but not least, whenever you want to renew your site interface, let’s get many Free WordPress Themes here.

- Resolving the “Class JFactory Not Found” Error in Joomla When Upgrading to J6 - December 19, 2025
- The Utility Of VPNs For Site Authors And Admins - November 24, 2025
- Joomla! 6: What’s New and How to Upgrade from Joomla! 5 - October 23, 2025


")


Recent Comments