Are you seeking the simplest method to disable automatic empty trash in WordPress? Fortunately, in today’s blog, we are going to write about this topic. We will share with you some useful ways to answer this question. Now, let’s explore the following solutions.
What is Trash in WordPress?
The trash in WordPress is similar to the Recycle Bin on your computer. In each WordPress site, the administrators and editors will have the ability to remove a post, page, or article. After deleting, it is immediately transferred to the trash bin and it will be stored for 30days. From here, you can restore any item that you may have deleted by accident.
Within 30 days of your deletion, if you don’t restore, those items in the trash will be automatically and permanently removed from your WordPress database. Therefore, to minimize the risk of unintended deletion of items, the trash feature has been introduced in WordPress 2.9.
If you would like to stop deleting the item from trash automatically in WordPress, you can dive into our tutorial to find the most useful method that will help you disable this feature.
How to limit and disable Automatic Empty Trash in WordPress?
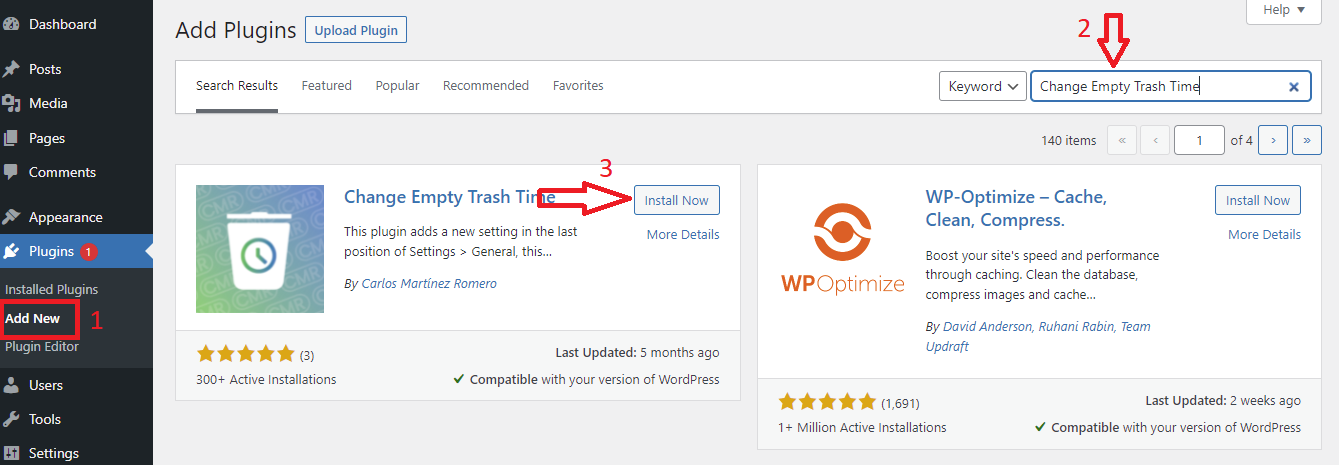
Method 1: Using Change Empty Trash Time Plugin
Change Empty Trash Time Plugin is a simple and easy-to-use plugin that enables you to select the time in days that WordPress will automatically empty your trash.
To use this tool, first of all, you need to install and activate it.
Just go to Plugins > Add New and then you can use the search feature to find the “Change Empty Trash Time” plugin. Once the plugin appears, quickly click on the “Install Now” button and activate it.
After the plugin was installed, you need to visit the Settings > General from your dashboard menu. On the General settings page, let’s scroll down the screen at the bottom of the page and you will see a new “Time to empty trash” setting.
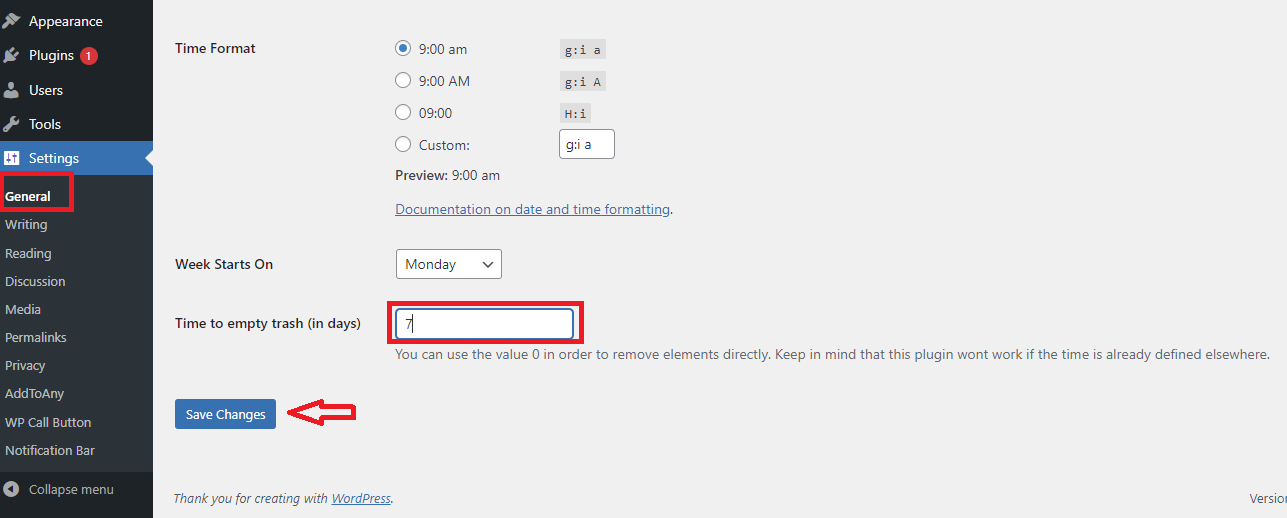
From here, you can enter the number of days that WordPress should take to empty the trash. For example, you can select 1 for daily, 7 for weekly, or any number of days you want.
You should note that if you type 0, once you deleted posts/pages. Then WordPress will immediately delete them permanently instead of moving them in the trash.
Once you are done, don’t forget to click on the “Save Changes” button to store your settings.
Method 2: Editing your theme’s functions.php file
If you don’t want to install any additional plugins, you can use this method to disable automatic empty trash in WordPress. Now, you need to follow these steps
Initially, you need to visit Appearance > Theme editor and then click on the “Theme functions” and simply add the following code to it. or a site-specific plugin.
function wpb_remove_schedule_delete() {

remove_action( 'wp_scheduled_delete', 'wp_scheduled_delete' );

}

add_action( 'init', 'wpb_remove_schedule_delete' );
This code will help you disable the action that WordPress automatically deletes trashed items once their time is up.
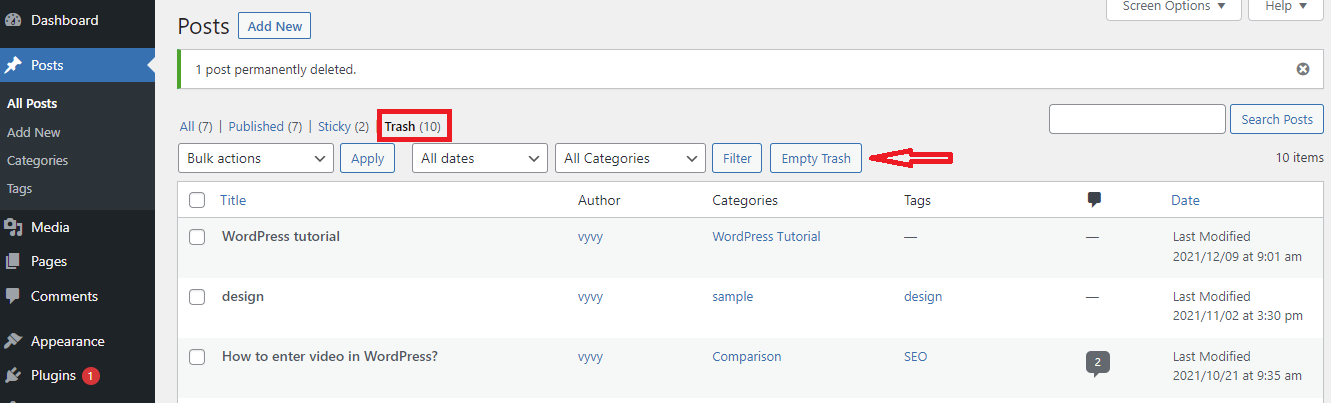
Now, anywhen you delete posts/pages, they will be moved to trash. And these items will remain there until you visit your trashed files and manually click on the “Empty Trash” button.
Sum up
Disable automatic empty trash in WordPress is really useful in some situations. For example, anyone clicks the ‘Delete link on a post accidentally. We have just shared the easiest ways to handle this issue in WordPress. If you have any questions, feel free to mention them in the comment section below.
Last but not least, if you are planning to build an impressive and professional WordPress, don’t ignore our free WordPress themes website. At here, we offer a wide array of SEO-friendly, responsive designs for your website. Let’s visit and get one.

- Resolving the “Class JFactory Not Found” Error in Joomla When Upgrading to J6 - December 19, 2025
- The Utility Of VPNs For Site Authors And Admins - November 24, 2025
- Joomla! 6: What’s New and How to Upgrade from Joomla! 5 - October 23, 2025


Recent Comments