Do you want to rename uncategorized category in WordPress? Look no further. This blog provides you with a lot of helpful methods to assist you to tackle this simple task. Firstly, you need to understand the role of category in WordPress.
What is the meaning of the Default Category in WordPress?
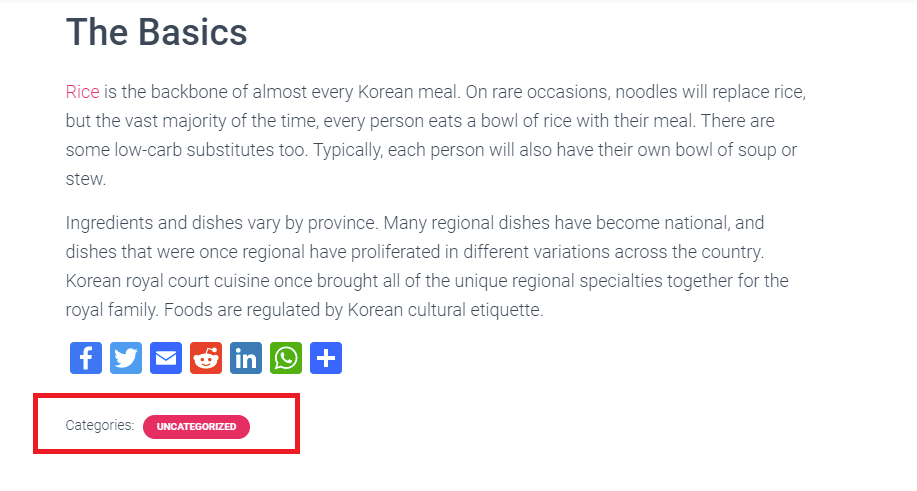
In WordPress, the category is understood as one of the default taxonomies. In short, using categories is the most prevalent method to shorting and grouping your content on a WordPress site into various sections.
Unluckily, if you accidentally forget to set a category to your post, then WordPress will automatically set it as the default category. And in the new WordPress install, the default category will be named “Uncategorized“.
How to Rename Uncategorized Category in WordPress?
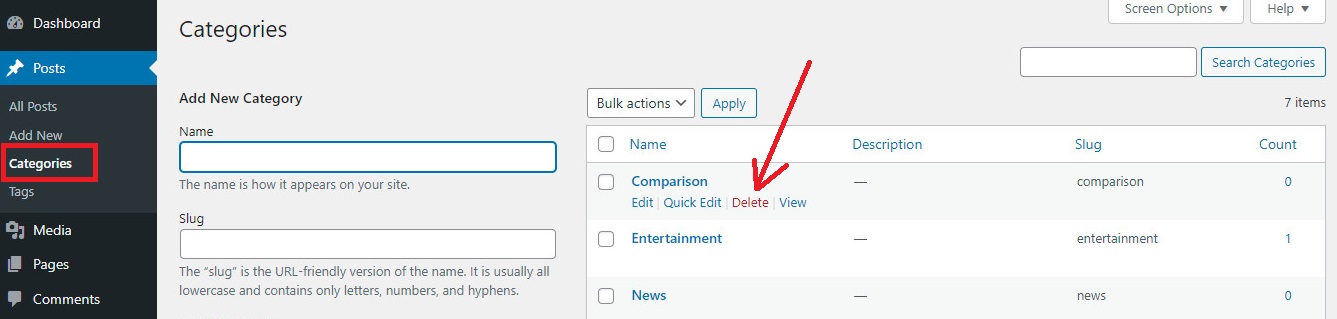
Commonly, if you want to remove a category, you simply go to Post > Categories and click the Delete option below your pre-determined category.
Nevertheless, you are not able to delete the default category until you assign another category to play a role as a default category.
Luckily, there are still some ways to handle this problem. In today’s blog, we are going to share with you the methods that can either change the default category(uncategorized) into another meaning category or you can set a new default category. Now, let’s follow the two methods below.
Method 1: Renaming Uncategorized category in WordPress
Although you don’t have the ability to remove the default category, you can still rename it.
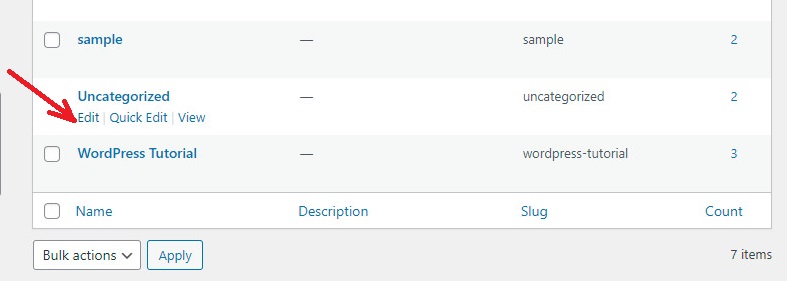
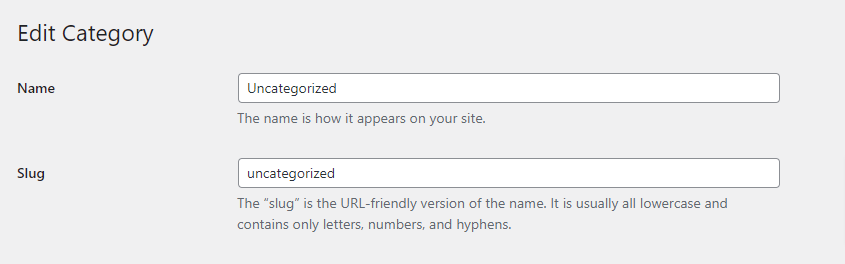
First of all, you need to go to the Posts > Categories page from the WordPress dashboard and click on the “Edit” link displayed below the “Uncategorized” Category.
After clicking the “Edit‘ link, this will take you to the category edit screen where you can rename any category as well as change its URL slug.
In that case, your WordPress site is not indexed by search engines, you are able to change the URL slug. In contrast, if your WordPress is live, making changes in the URL slug will cause some 404 errors once search engines or your website visitors access the old URL. Don’t worry, we will mention a useful way to handle this issue in the following section. Keep reading!
Method 2: Changing default Category in WordPress
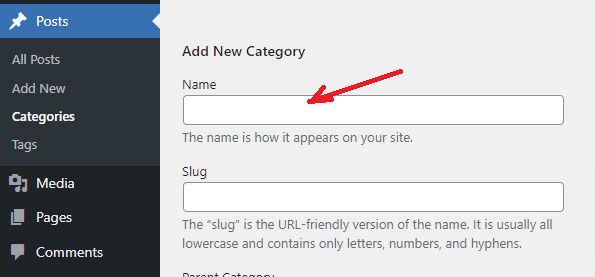
It is very easy to change the default category in WordPress. Initially, you have to make sure that there is at least one category in WordPress, except the Uncategorized category. If your website doesn’t have any category, you can go to Posts > Categories and create a new category.
After you have defined a particular category to use as the default category, let’s keep reading to see the next steps.
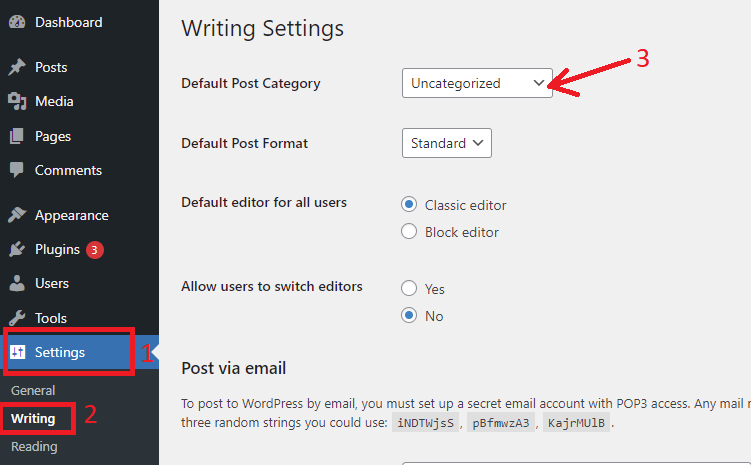
Now, it’s time to visit the Settings > Writing page. Currently, the first option is to assign a default post category.
Let’s click on the drop-down menu displayed next to it and choose another default category that you want to use.
Remember to click on the “Save Changes” button at the bottom of the page to store your settings.
Now, WordPress will utilize the category that you have just chosen as the default category. So whenever you forget to set a category to a post, it will be automatically filed under this default category.
Nevertheless, you should note that posts/pages sorted under uncategorized will not be changed to the new category. You can only edit those posts and change their category.
In addition, you are able to delete the “Uncategorized” category. Whether your post was only assigned under uncategorized, then it will be moved to your new default category.
How to redirect old uncategorized URLs?
As we mentioned above, your website users and search engines will certainly see 404 errors for the old URL once you make changes to the uncategorized category slug and whereas your site was live.
Now, we will give you a method to fix this issue quickly and redirect to your new category URL or the renamed URL instead of the old URL.
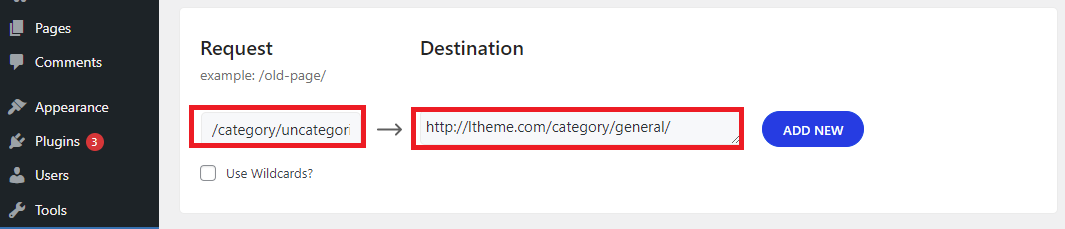
After you have activated it yet. Let’s visit the Settings > 301 Redirects page and enter your old uncategorized URL in the Request field and the new URL in the Destination field.
For example, your old uncategorized URL like this:
http://example.com/category/uncategorized/
Then you need to add it into the request field.
Next, in the destination field, you need to add a new URL that is similar to the following example URL.
http://example.com/category/general/
And don’t forget to click on the “Add New” button to store your changes. You may need to see our detailed tutorial on how to create redirects in WordPress.
Now, anyone who visits your old “uncategorized category” URL, will be redirected to the new URL that you changed.
Summary
Those are all useful and simple methods to help you rename uncategorized category in WordPress. Hopefully, you can choose a suitable one to rename the default category in WordPress. If you have any queries, don’t hesitate to leave a comment below.
Moreover, why don’t you visit our Free WordPress Themes to discover a huge array of eye-catching, SEO-friendly designs for your site?
Welcome to LT Digital Team. We make daily blogs for Joomla! and WordPress CMS, support customers and everyone who has issues with these CMSs and solve any issues with blog instruction posts, trusted by over 1.5 million readers worldwide.
Latest posts by LT Digital Team (Content & Marketing) (see all)
We use cookies to improve your experience on our website. By browsing this website, you agree to our use of cookies.
Functional
Always active
The technical storage or access is strictly necessary for the legitimate purpose of enabling the use of a specific service explicitly requested by the subscriber or user, or for the sole purpose of carrying out the transmission of a communication over an electronic communications network.
Preferences
The technical storage or access is necessary for the legitimate purpose of storing preferences that are not requested by the subscriber or user.
Statistics
The technical storage or access that is used exclusively for statistical purposes.The technical storage or access that is used exclusively for anonymous statistical purposes. Without a subpoena, voluntary compliance on the part of your Internet Service Provider, or additional records from a third party, information stored or retrieved for this purpose alone cannot usually be used to identify you.
Marketing
The technical storage or access is required to create user profiles to send advertising, or to track the user on a website or across several websites for similar marketing purposes.


Recent Comments