After logging in, open your purchased products or membership downloads section. Locate the Joomla template package you want to install and download it to your computer.
Once the download is complete, extract the package. Inside the extracted folder, you should find several files and directories, such as documentation, template installation files, extensions, and the quickstart package.
Open the quickstart package folder and look for these two files:
your-package-name.jpa
installer.php
The .jpa file contains the complete Joomla website backup, while installer.php is used to start the restoration process on your server.
Step 2: Upload the Quickstart Files to Your Server
Next, upload both the .jpa file and the installer.php file to your website’s root directory.
On most hosting accounts, the website root folder is:
public_html
You can upload the files using one of the following methods:
An FTP client, such as FileZilla
Hosting File Manager, such as cPanel, DirectAdmin, or Plesk
Both files must be uploaded to the same directory. For example:
Before continuing, make sure the installation directory is empty. If another website already exists in the same location, create a full backup first to avoid data loss.
Step 3: Launch the Installation Panel
After uploading the required files, open your browser and access the installer using your domain name:
https://yourdomain.com/installer.php
Replace yourdomain.com with your actual domain.
If you uploaded the files to a subfolder, use this format:
https://yourdomain.com/subfolder/installer.php
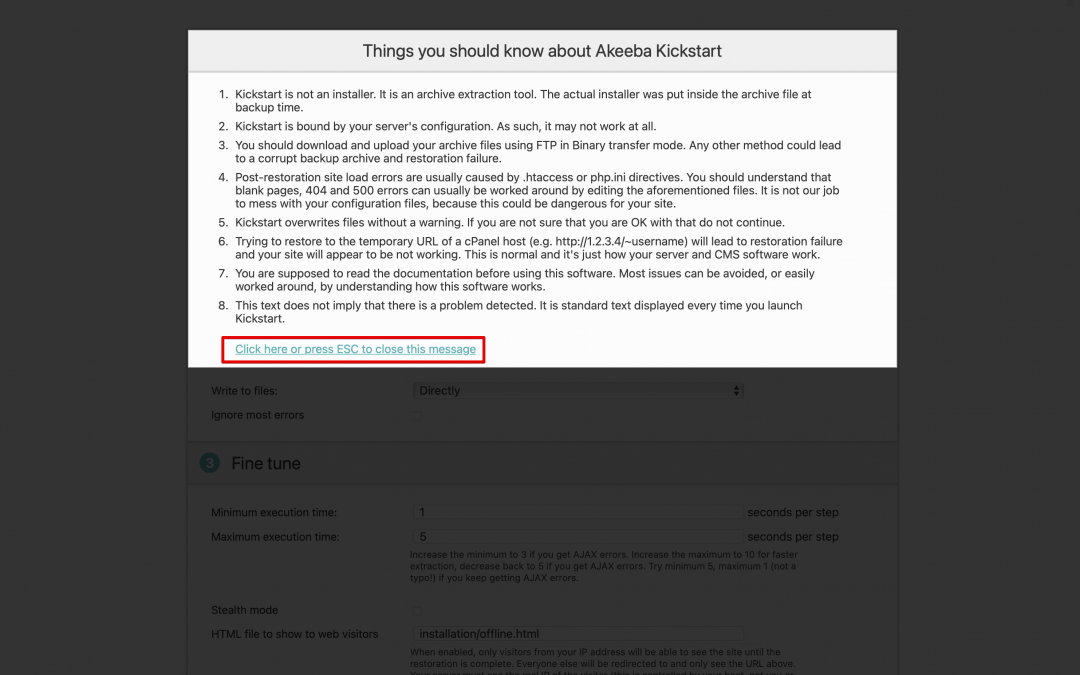
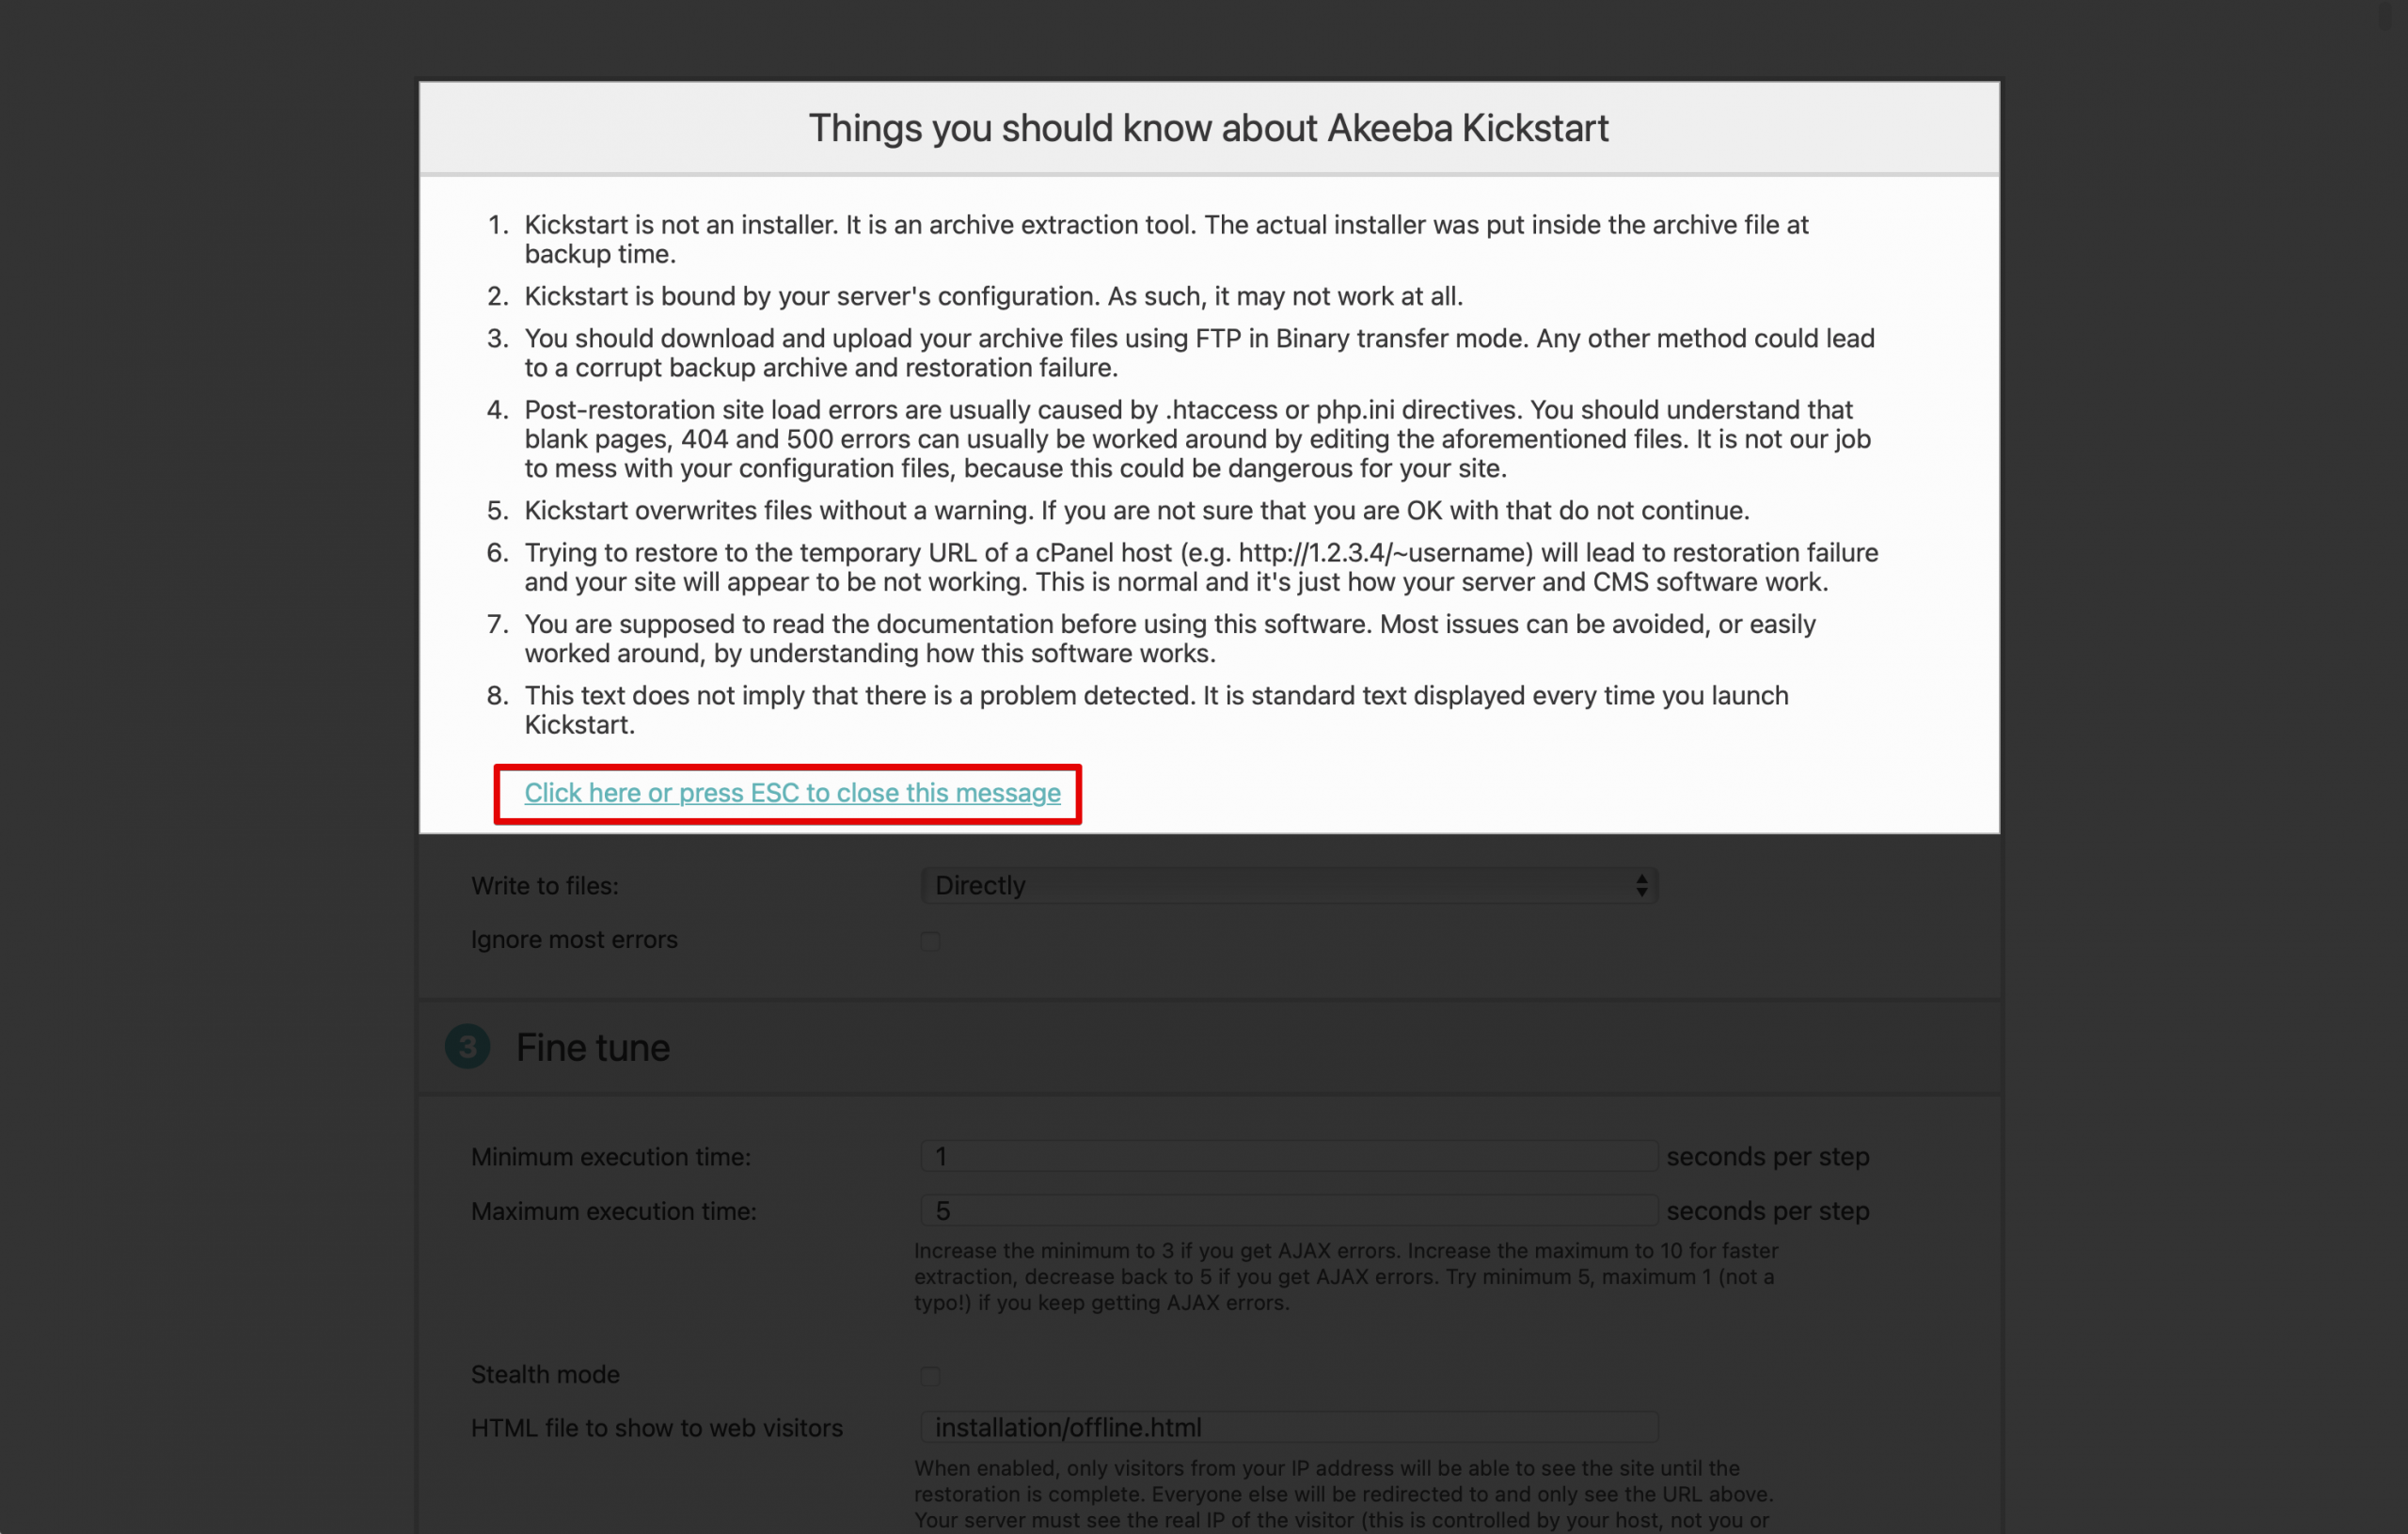
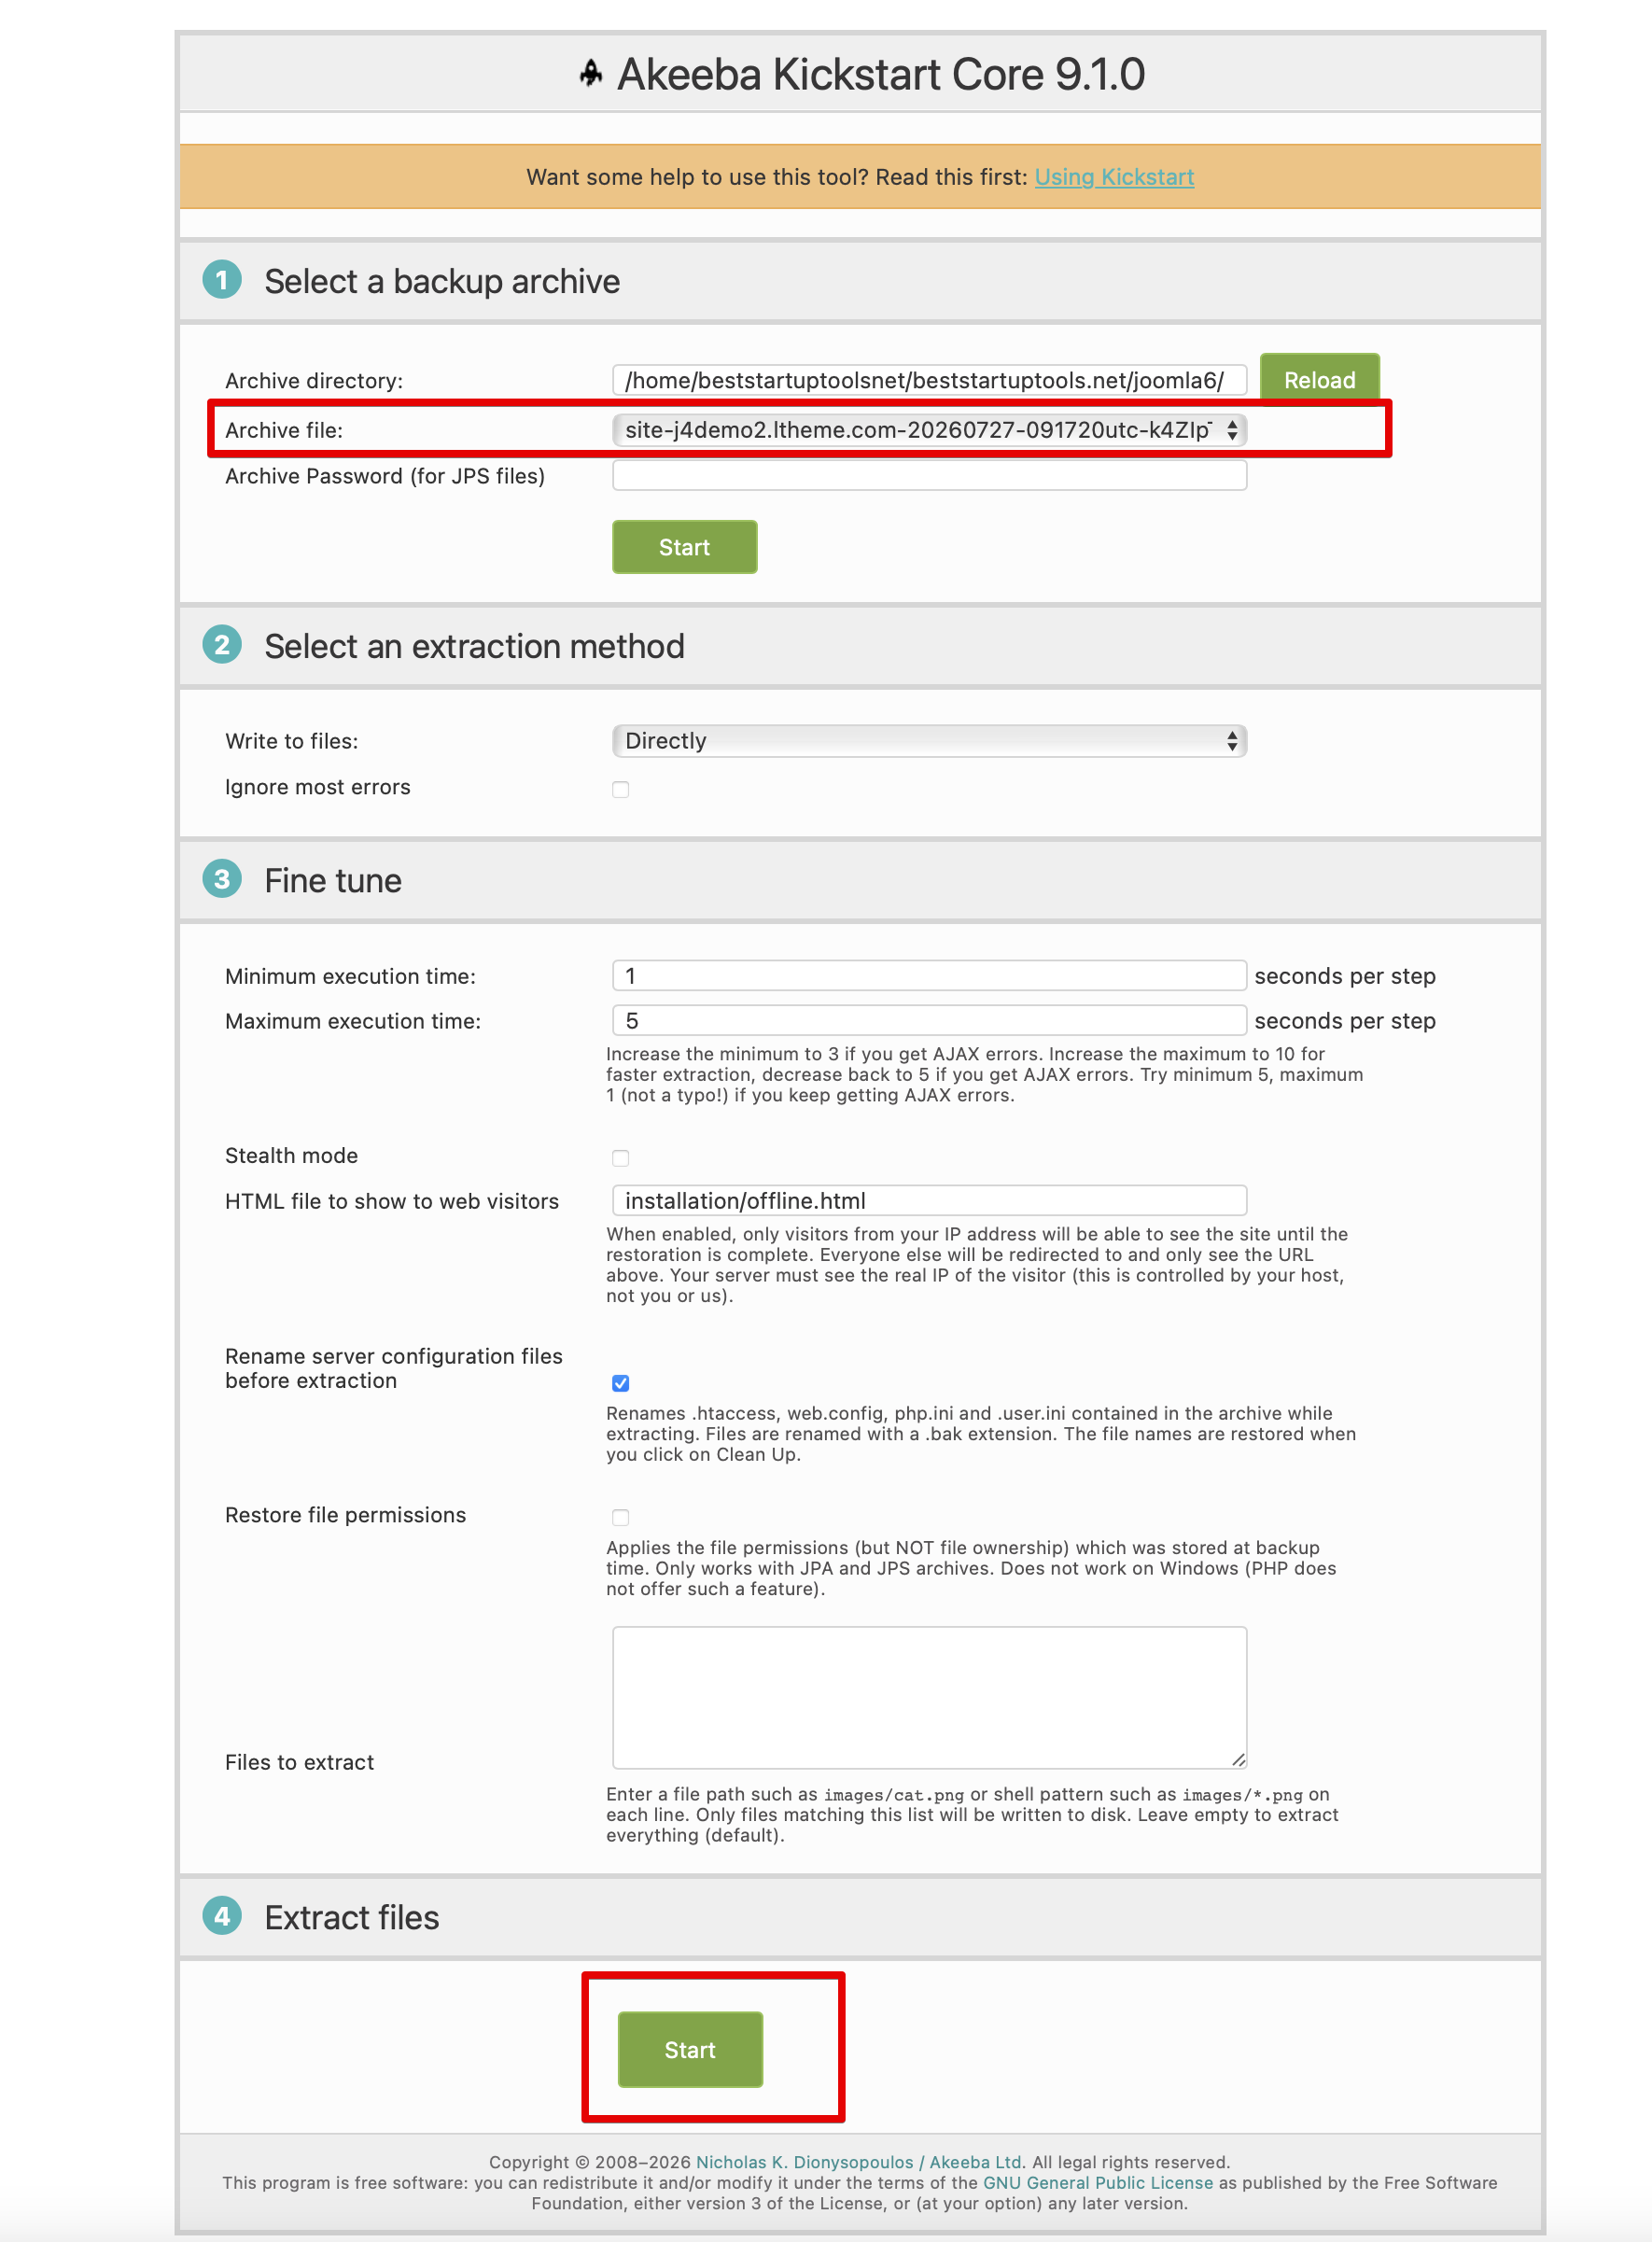
This will launch the Akeeba Kickstart installation panel. Kickstart will detect the JPA archive and allow you to extract the full Joomla website backup.
Step 4: Extract the JPA Archive and Configure the Database
In the Akeeba Kickstart panel, select the JPA package and start the extraction process. The system will unpack all website files from the backup archive into your hosting directory.
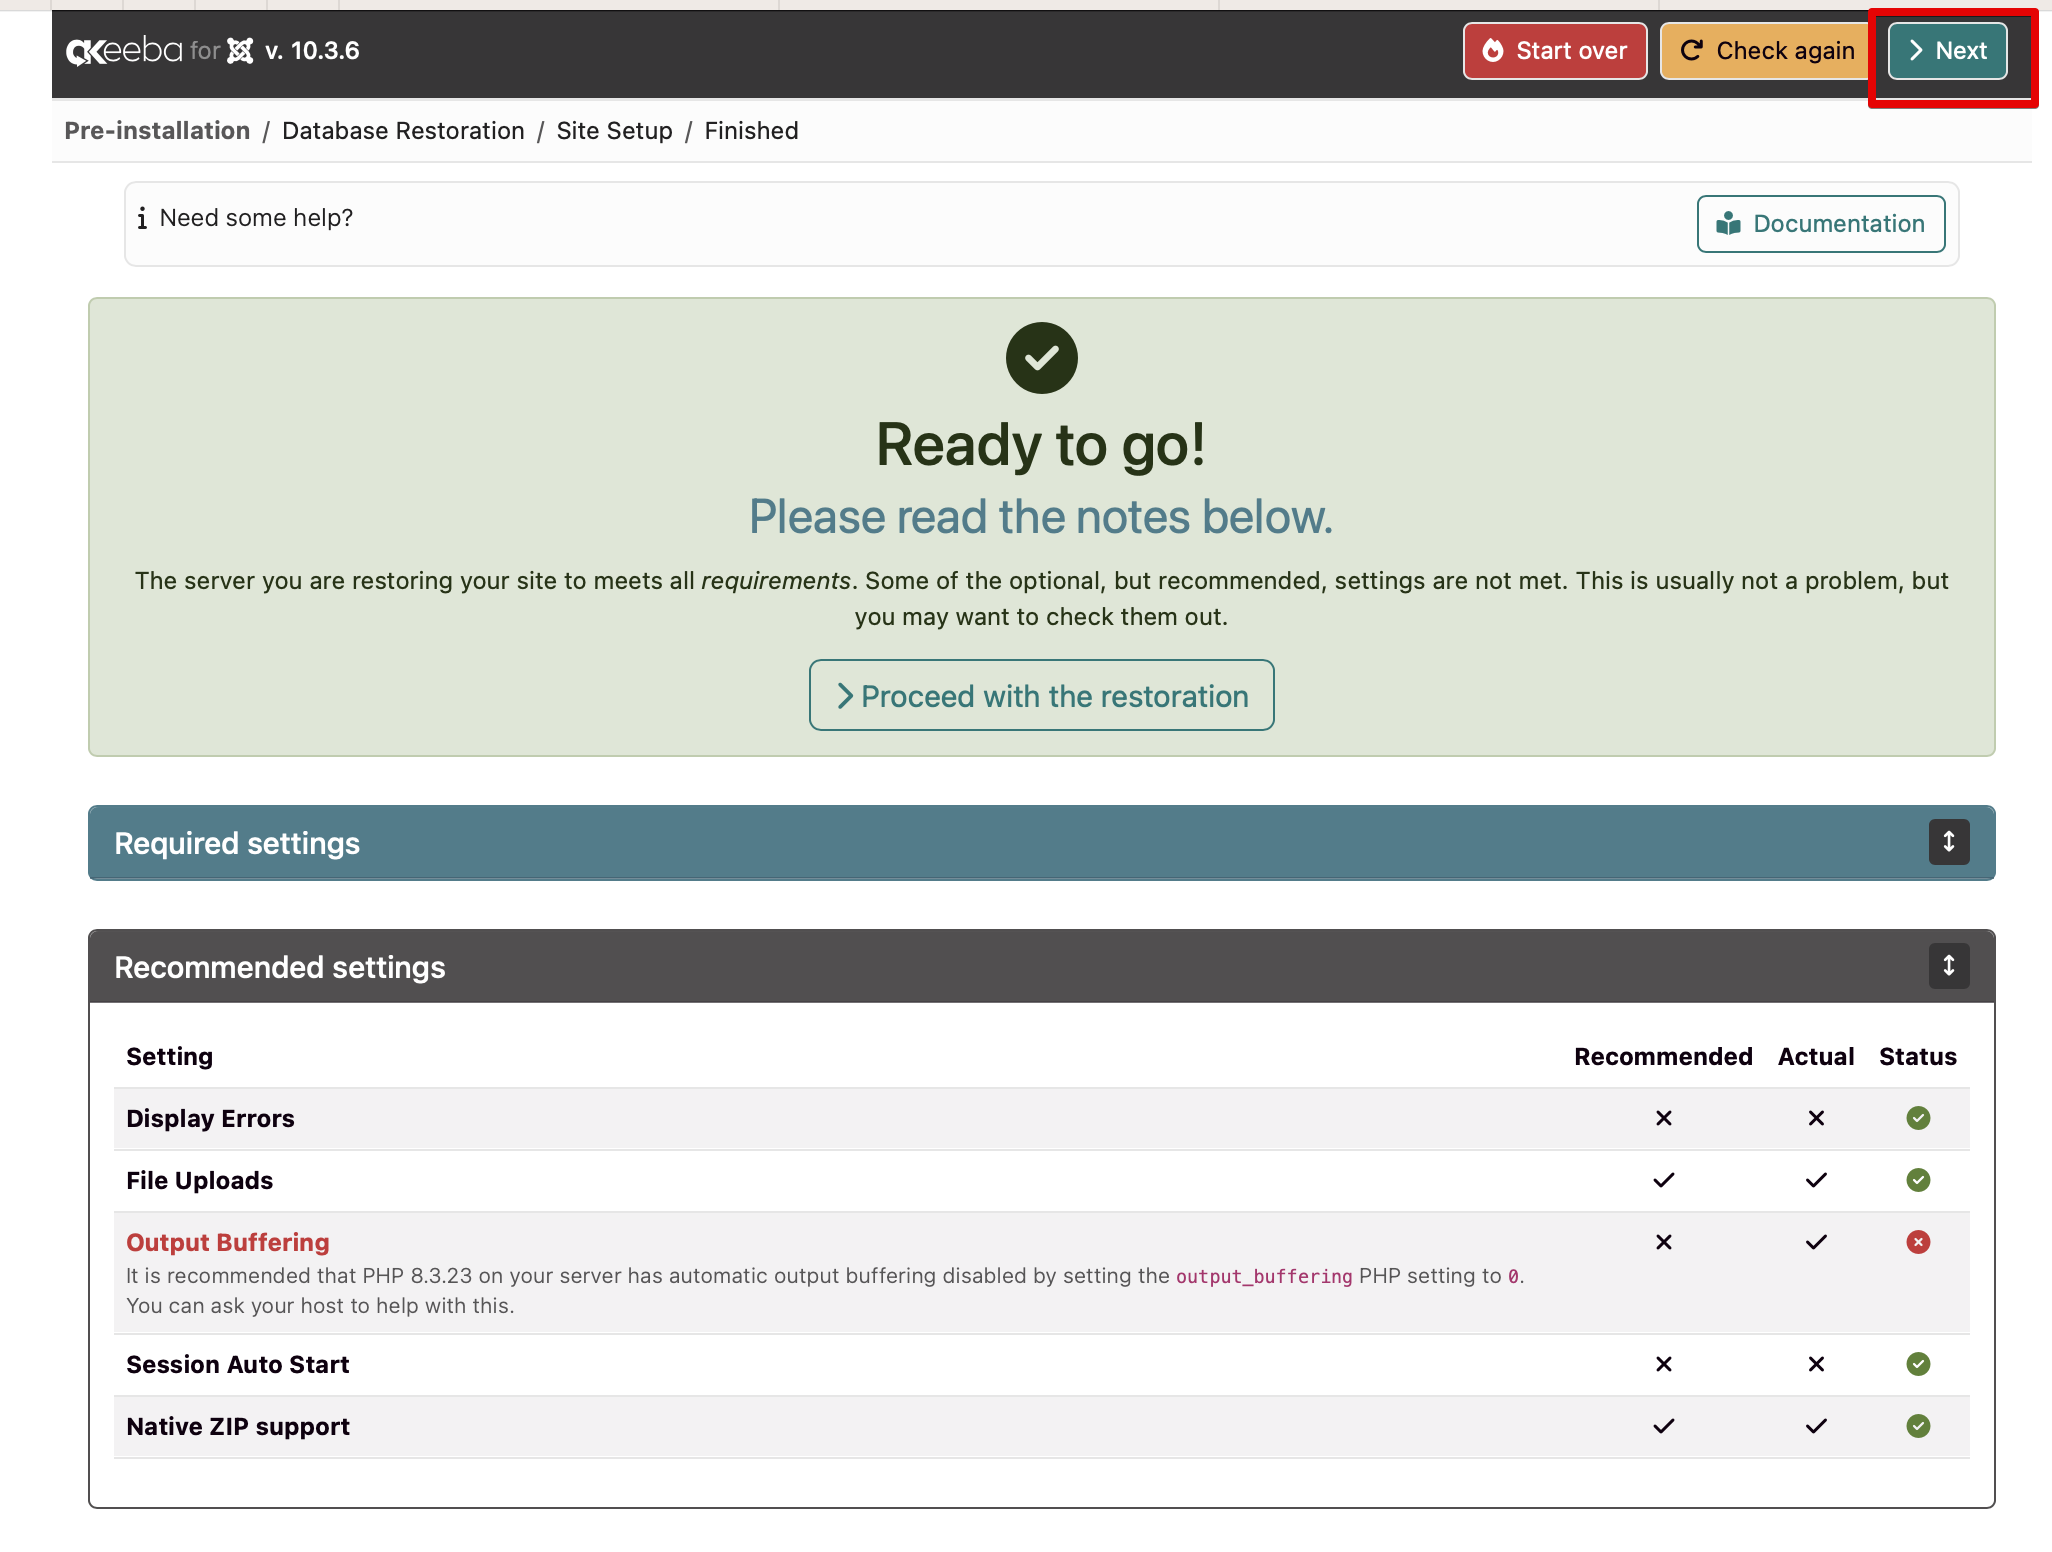
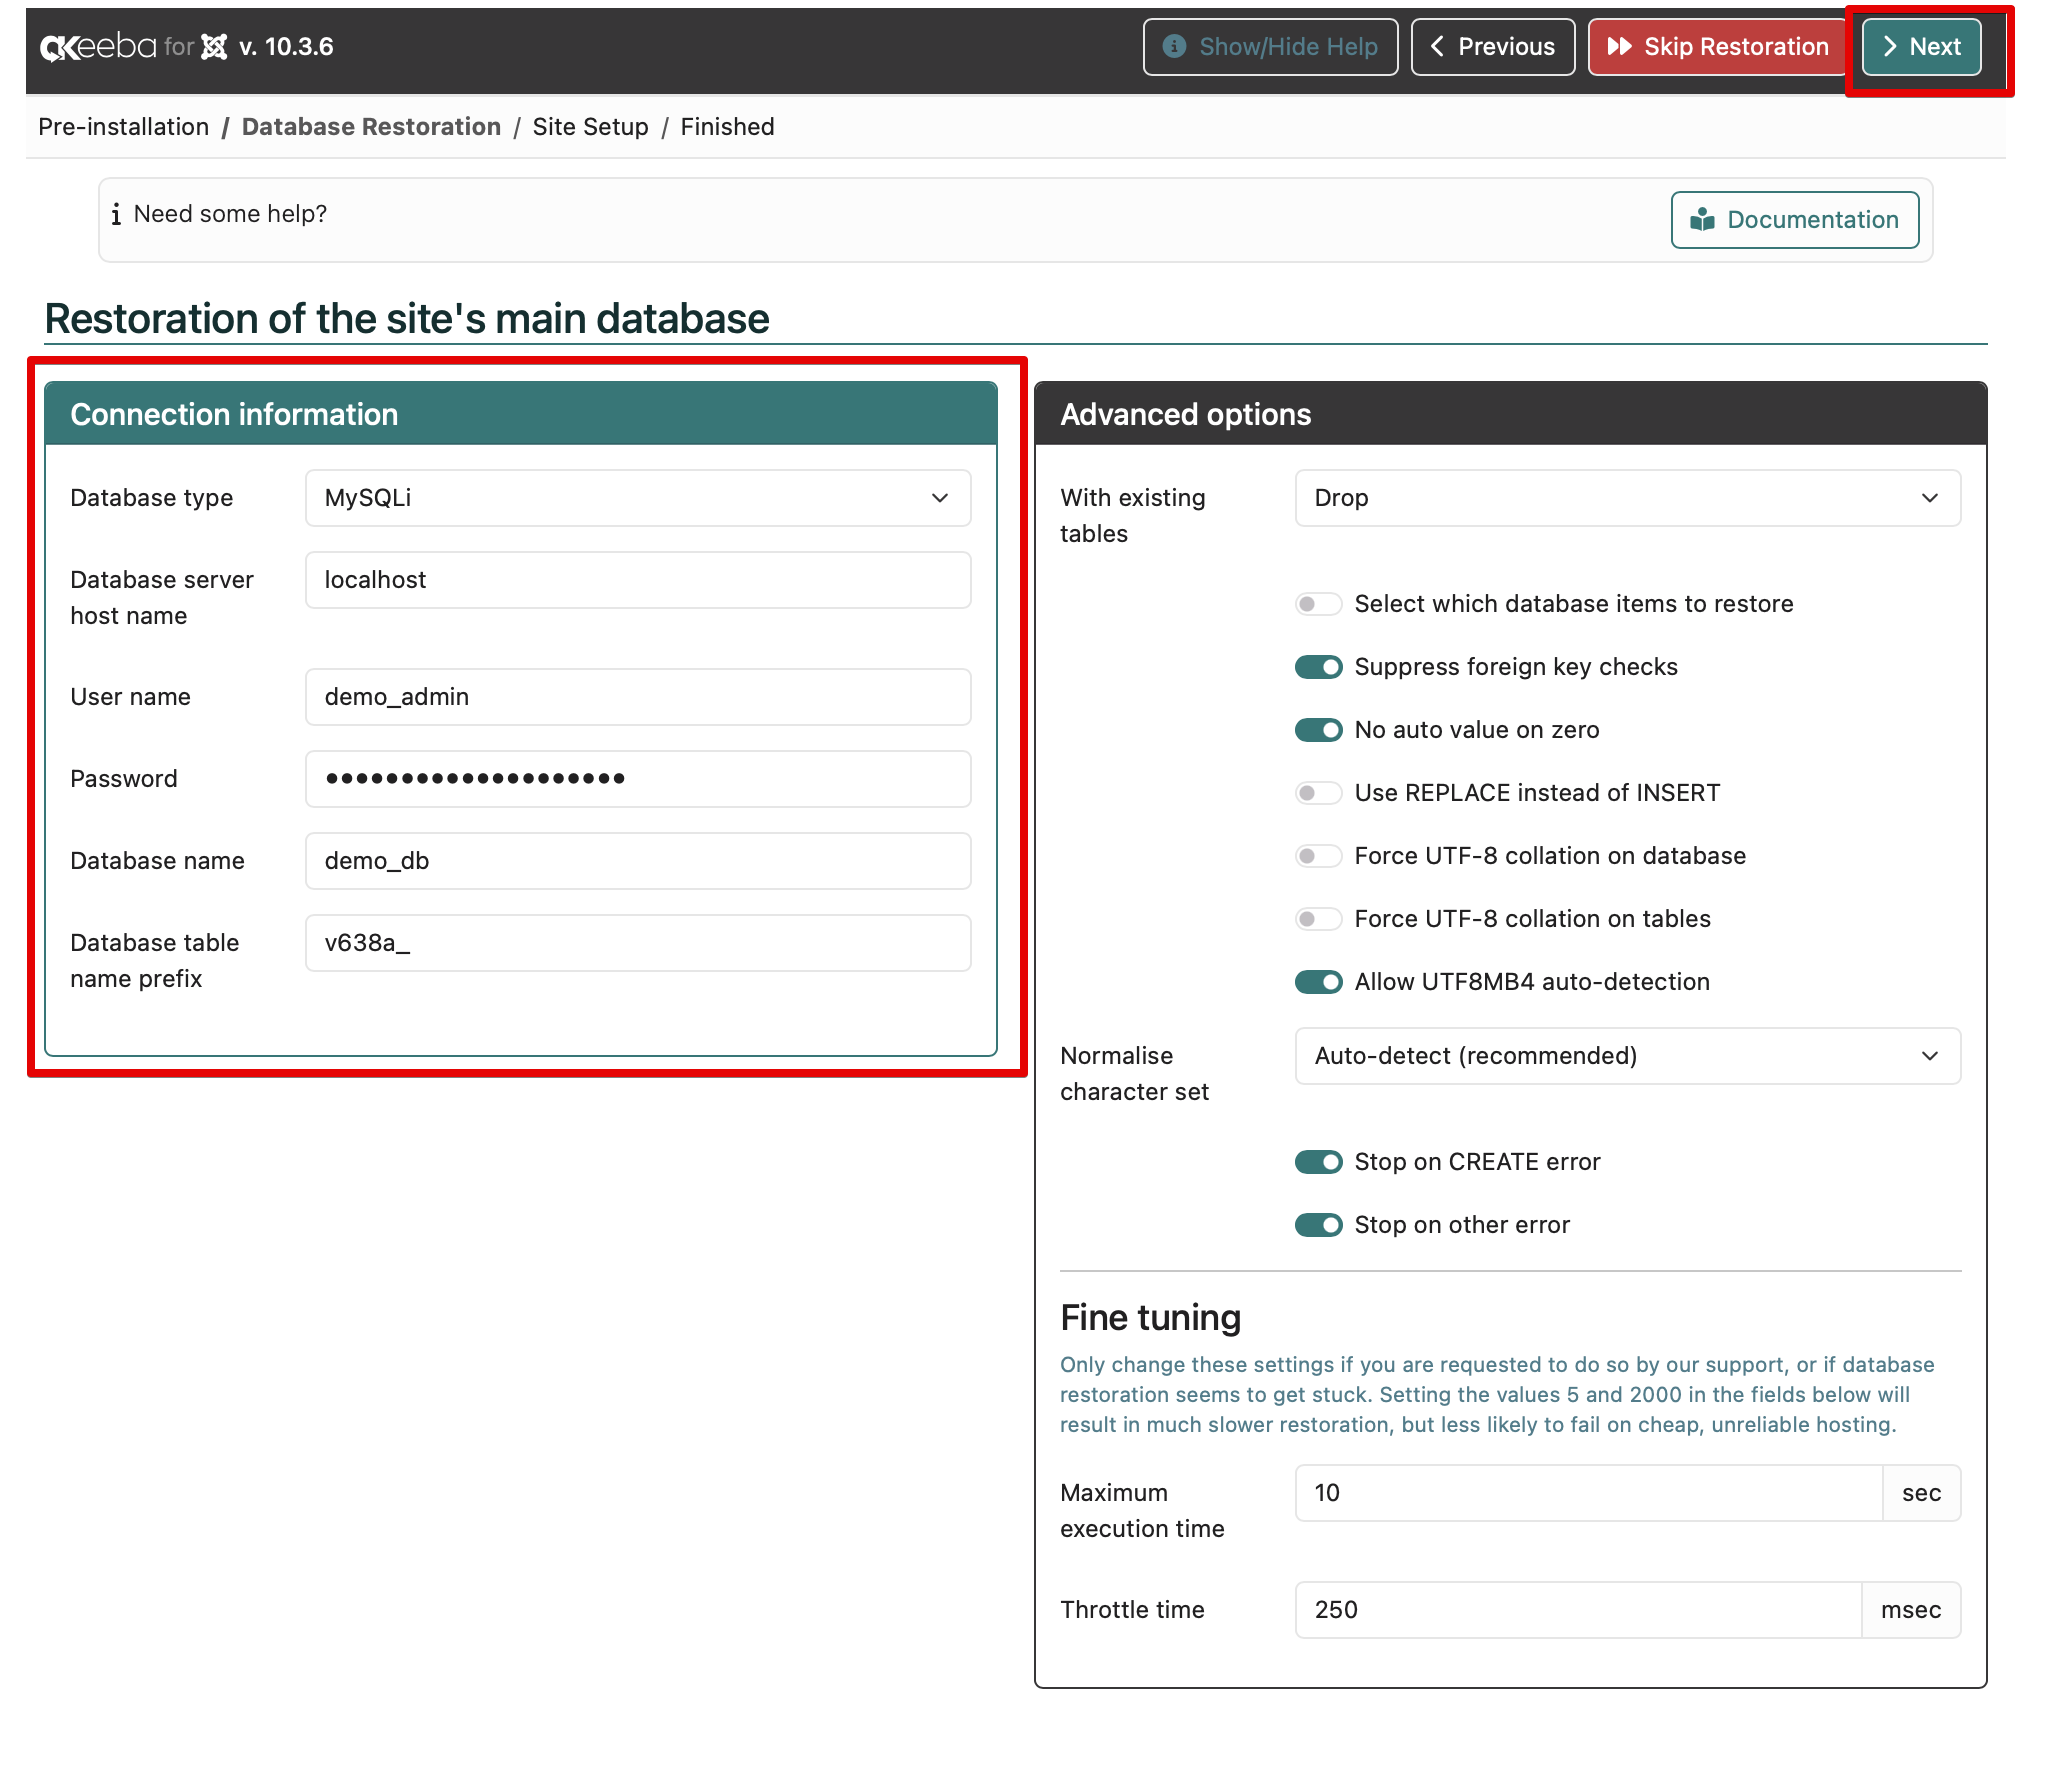
After extraction is complete, the Joomla restoration installer will open. At this stage, you need to provide your database details, including:
Database type (leave a default value)
Database server hostname (by default it’s localhost)
Database username
Database password
Database name
Table prefix, if required
Before reaching this step, you should create a new database from your hosting control panel. Most hosting providers allow you to create databases through tools such as cPanel, DirectAdmin, or Plesk.
If you are unsure how to create a database, contact your hosting provider for assistance.
After entering the database information, continue through the restoration steps.
Step 5: Configure the Super Admin Account
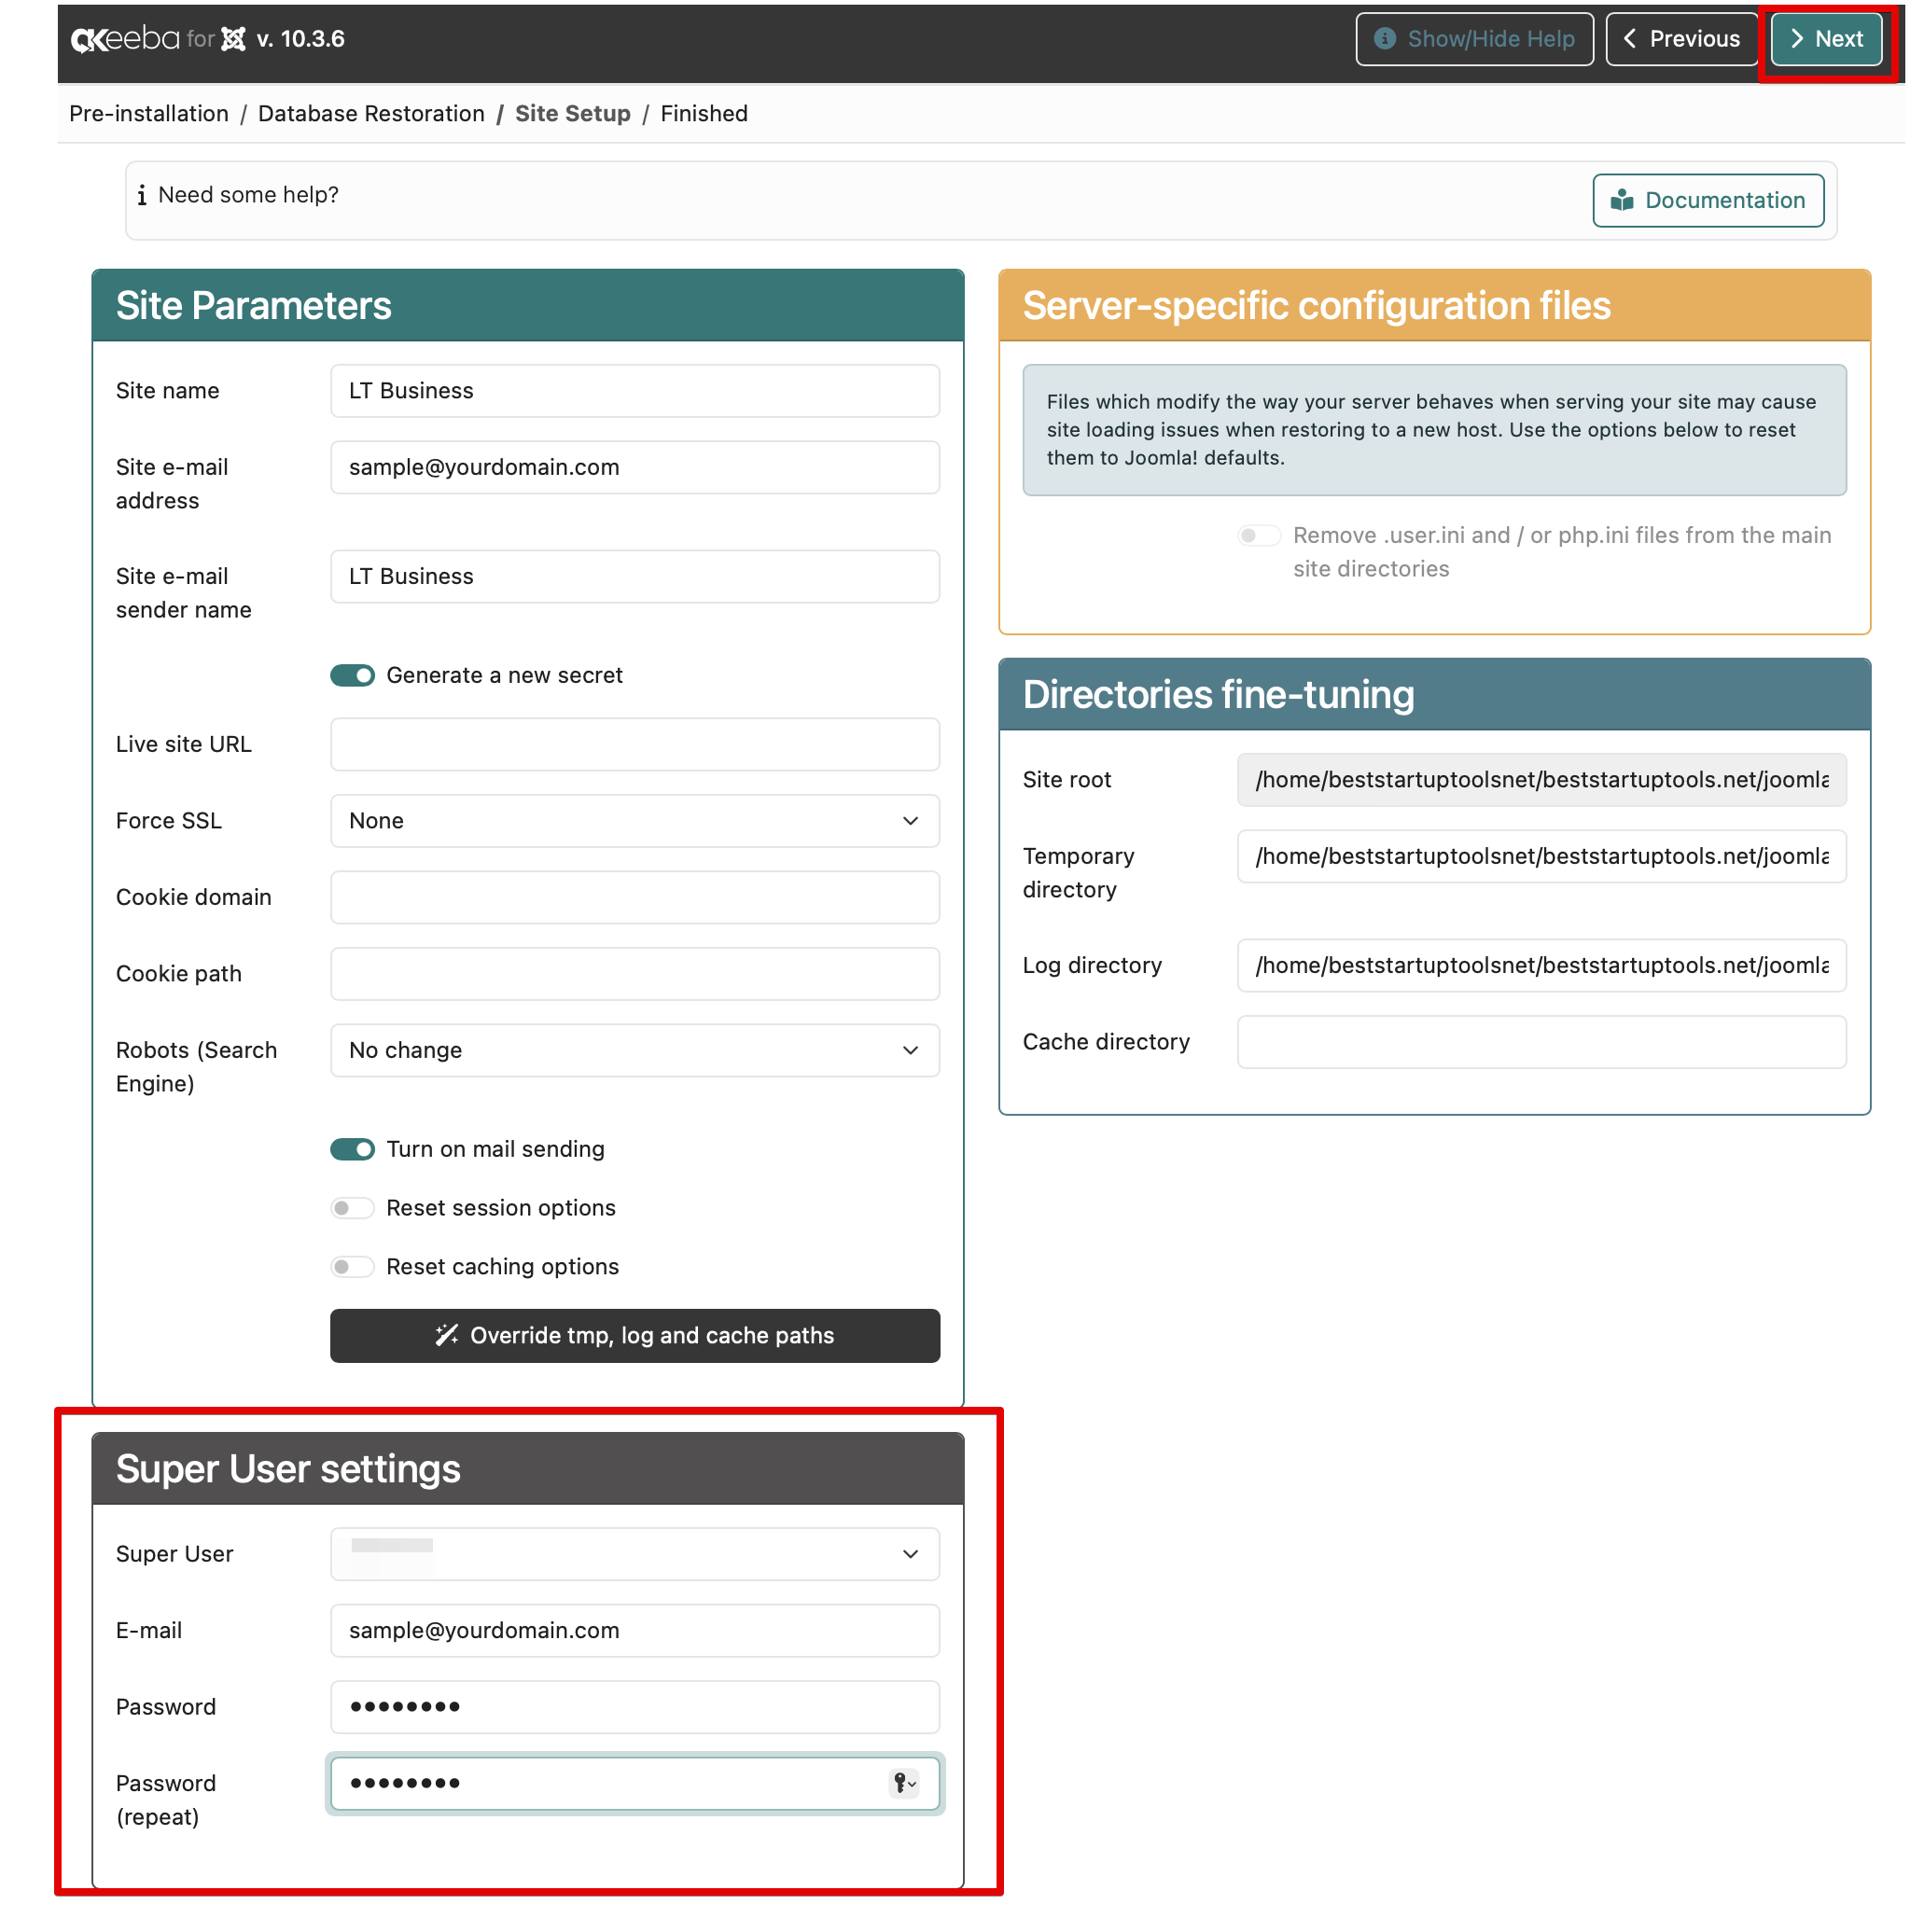
During the installation process, you will be asked to configure your Joomla website information and create the Super Admin account.
This account is essential because it gives you access to the Joomla administrator dashboard after installation.
You should configure the following information:
Site name
Super Admin username
Super Admin password
Super Admin email address
Store these details securely. You will need them to log in to the Joomla administrator panel.
Your Joomla administrator login URL will be:
https://yourdomain.com/administrator
If the website is installed in a subfolder, the administrator URL will be:
https://yourdomain.com/subfolder/administrator
Step 6: Complete the Installation and Clean Up Files
After entering all required information, continue through the final installation steps.
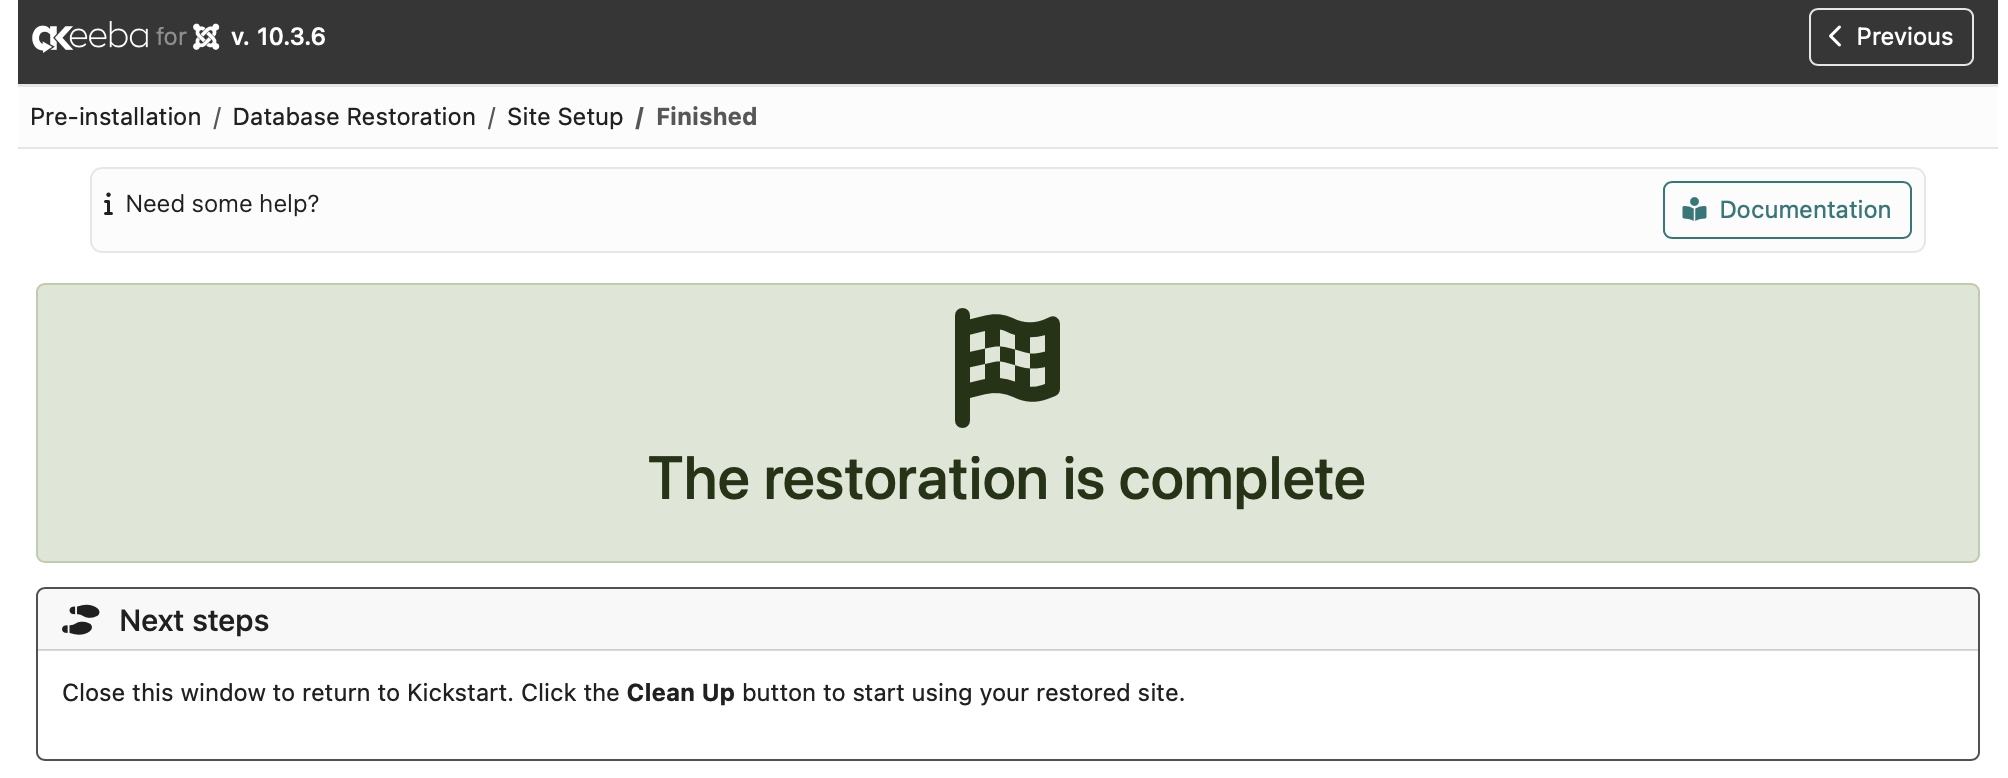
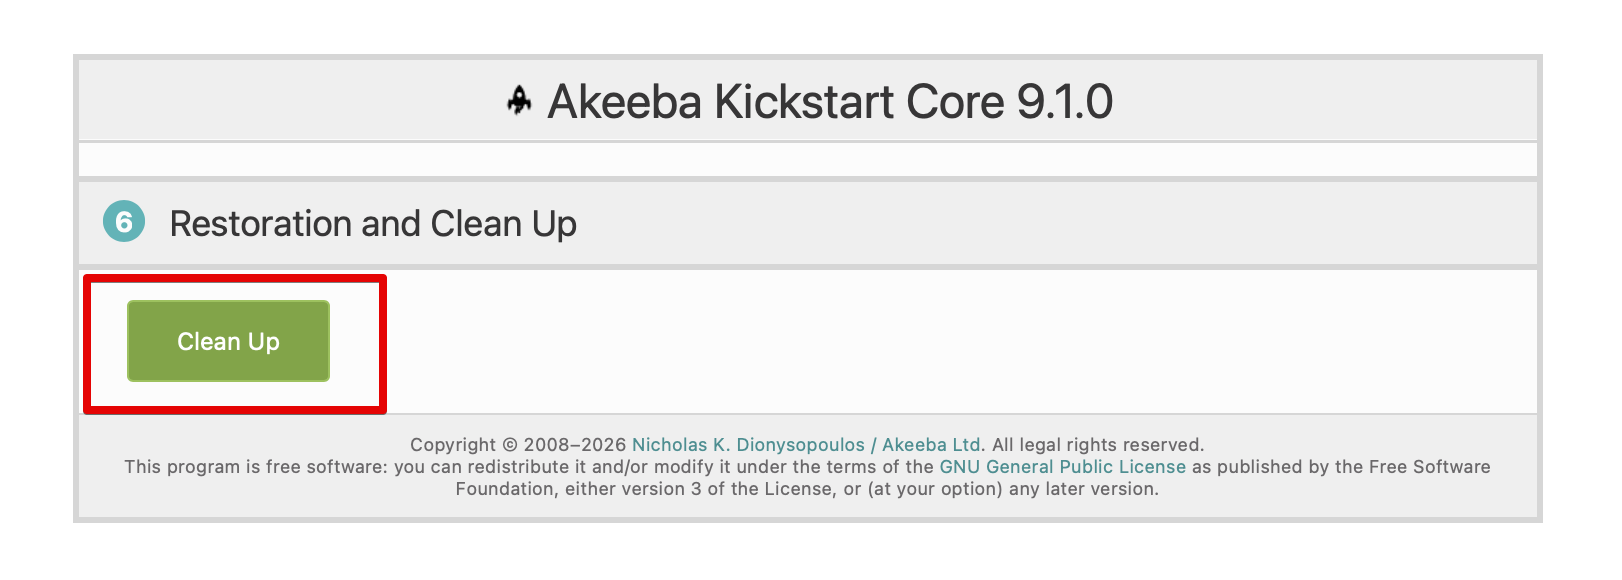
When the installation is complete, just close the current window to return to kickstart tab, the installer will ask you to remove the installation directory or clean up installation files. This step is important for security and should not be skipped.
After cleanup is complete, you can access the website frontend:
https://yourdomain.com
You can also access the Joomla administrator panel here:
https://yourdomain.com/administrator
Log in using the Super Admin username and password you created during installation.
Trouble shots
Default Ads banner and Chatbox
If you see the Chat Box (Olark) and Ads Banner at the bottom-left and bottom-right corners of your demo after installation, don’t worry.
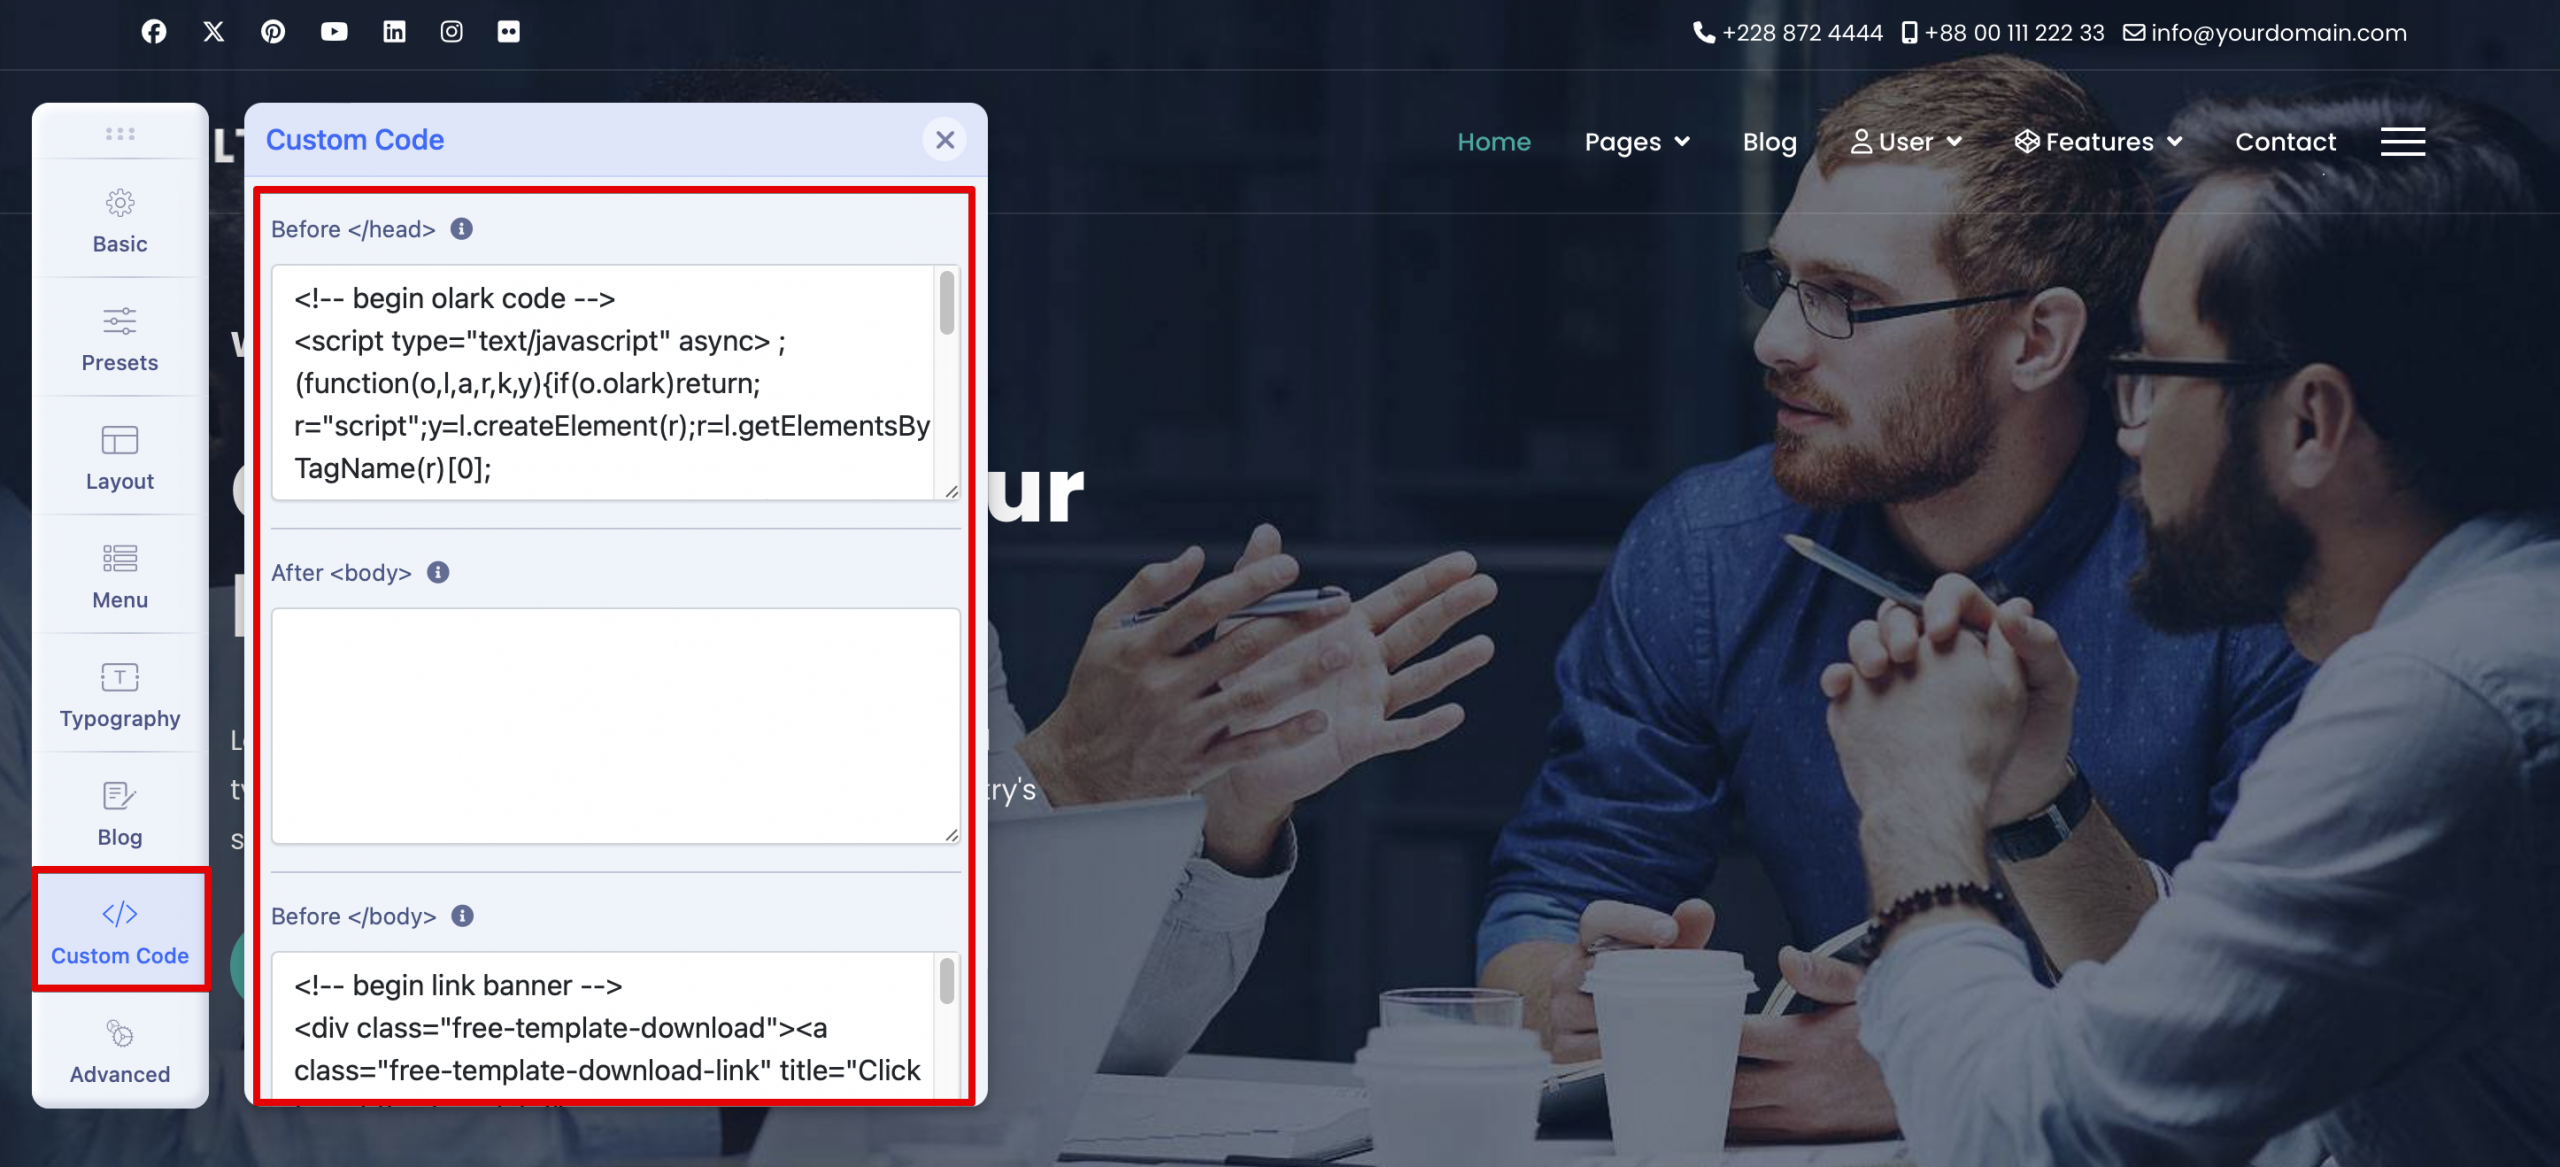
Simply log in to the Admin Panel, go to Template Options, and open the Custom Code tab. Then, remove all code from this area and check your website again.
Can’t remember admin login
In some cases, you may forget the admin username or password you entered during installation. If this happens, you can access phpMyAdmin to reset or restore it. Please refer to the official guide on the Joomla! website for detailed instructions.
In this case, open the configuration.php file located in the root directory of your website source code and search for the following line:
$live_site = “your_domain.xxx”;
Then, leave the value blank as shown below:
public $live_site =””;
Save the file, then reload your website. It should now work correctly.
Final Thoughts
A Joomla quickstart package is the fastest way to deploy a complete website based on a template demo. It includes Joomla, the selected template, required extensions, demo content, and preconfigured settings in a single restore package.
By downloading the product package from the LTheme Customer Area, uploading the .jpa archive and installer.php file to your hosting account, running the installer, entering the database details, and creating your Super Admin account, you can launch a fully configured Joomla website with minimal manual setup.
This method is ideal for users who want to save time, preserve the demo layout, and begin customizing their Joomla website immediately.
My name is Kelvin, and I’m the Chief Marketing Officer at LTheme. I have over 10 years of experience in Joomla! and WordPress web development, as well as in digital marketing, where I specialize in SEO. Every day, I write blogs about Joomla! and WordPress, assist others in creating beautiful websites using these CMS platforms, and provide support on the Joomla Support Board as a Joomla Guru in the forum. Thank you for being here!
When I try to run the quickstart through php, it fails when trying to find installation/index.php I installed the template since there was no quickstart file in mojo. So was that part of the problem. Can I do it in that order?
Hi
I have the same problem in step 2. I opened link that you replied. But I am still a little confused about it. Do you mean that I should re-buy the hosting?
Urgent for help!!
please reply me ASAP
All the best
Weixin
Hello, I’m quite new to Joomla and I’ve just bought your web design theme and I can’t get the demo files to install through akeeba, I’ve FTP’d the unzipped files to http://80.74.***.***/httpdocs/joomla/tmp/lt_web_design_onepage_quickstart_package and in my web browser tried to start the kickstart.php therein, but I get an error that it can’t be found.
“Not Found. The requested URL /httpdocs/joomla/tmp/lt_web_design_onepage_quickstart_package/kickstart.php was not found on this server.”
I’ve even tried it on the root folder but still get the not found error, Could you help me further please?
PS. My hosts PHP version is 5.3. is this a problem?
Via your desc, I see you uploaded file to wrong folder in your hosting. Please test with simple text file before to upload to make sure that you upload correct folder.
PHP version is not problem, but 5.3 is too old, you should ask your hosting provider to update it.
I’ve got the demo files installed, but when in the Joomla control panel I click on the top right, my homepage name it goes to my homepage but it’s just blank.
I’ve tried above
$live_site = ‘your_domain.xxx’;
and leave it blank like as below
public $live_site = ”;
It is already set to “public $live_site = ”;”
also tried removing:
}
body.homepage #sp-main-body-wrapper {
display: none;
}
but that didn’t help.
If I try externally I get the demo site fine but with no changes
If you can’t change everything in demo on back-end, so i think you have problem with cache. Just go to Admin > System > Clear Cache, select all item and click to delete cache.
Please deleted your all files, and try to re-upload all quickstart file and recheck, make sure that all files uploaded to your hosting completely before to run.
Thanks for your info. We will recheck this package. If it’s really problem, so we will update.
Angelos Troul
on August 13, 2015 at 8:00 pm
Hello,
I try to install quickstart package but I get stack in step 7-8 (cant connect to DB).
I want to install the package to a subdirectory of my server, which database should I use?
You can create new database for your sub website via Database Manager in your hosting, then you can put your database information as normal. The database host name should be at ‘localhost’.
May be you purchased wrong template version, each design, we have multi-page template and Onepage template versions. Please send your purchase information (includes email) via [email protected] , so we can help you change and exchange template.
CommentFiz a instalação via akeba com successo mas quando tento acessar as configurações do tema via joomla (extenções – temas – lt_portfolio – Default) aparece uma mensagem de erro.
Erro no servidor
500
RecarregarOcultar detalhes
O site encontrou um erro ao recuperar. Ele pode estar em manutenção ou configurado incorretamente.
I am having the hardest time installing your templates. I keep getting this error message:
AN ERROR OCCURRED
AJAX Loading Error
HTTP Status: 500 (Internal Server Error)
Internal status: error
XHR ReadyState: 4
Raw server response:
I have done everything your installation troubleshooters have suggested. If I cannot get these installed, I would like a refund before my 7 days is up.
Could you pe help me install Joomla! (download from http://joomla.org), then send us FTP account via email [email protected] , so we can help you install template and sample data like our demo site. Also let us template that you want to install. Don’t worry about your money, if we can’t solve your problem, we happy to send you full refund for your order. Thank you!
Hello,
Normaly i buy your tempates from ASTemplates, but in this case i now like to use the free onepage lt storage. but after downloading and unzipping there are only the 2 zip files. with akeeba kickstart i can not instal that kind of file (not .zip, only .jpa) but that’s not in the package. what to do? if i have to pay, no problem, but i want that onepage as at the demo:-).
thanks in forward
In the step 7 and 8, which database data should I use? If I try to use root as user and the password I get this error: “Unable to connect to the Database: Could not connect to MySQL.”. In my cpanel I just have 1 user for MySql that is mycpaneluser__joom150. Is this user I have to use?
Parse error: syntax error, unexpected ‘[‘ in /home/petronoz/public_html/administrator/components/com_sppagebuilder/builder/classes/addon.php on line 124
Fatal error: Class ‘FOF30\Container\Container’ not found in /home/petronoz/public_html/plugins/quickicon/akeebabackup/akeebabackup.php on line 240
Akeeba Kickstart is a PC-only application, right? How do I do this on OS X?
Honestly, this walk-through is confusing as hell. I thought Joomla was supposed to be simpler… why do you have such a byzantine and convoluted process? I bought a PRO version of LT Profile Onepage, and for the life of me, I can’t figure out how to install in on my web hoster! Why isn’t it possible to install it through the Joomla web interface???
No, quickstart package can be installed via hosting or localhost.
For how to upload quickstart files and run it on hosting, we mentioned in first paragraph of this instruction, you just search for keyword “Step 2A. How to install quickstart on your cPanel hosting account”.
Basically, run quickstart via panel is the same on local or hosting, just different with copy files method.
Hello,
after installing “quickstart” on localhost this problem appeared:
Warning: A non-numeric value encountered in C:\xampp\htdocs\Test\test-quickstart\plugins\system\helix3\core\helix3.php on line 490
Honestly, i had all the problems discribed above. I tryed to install 7 times, and with every installation i could solve one problem.
After restoring the superuser password, i thought i am ready – but not.
i have a blank page.
the entrys in my configuration.php:
public $live_site = ”;
public $cookie_path = ”;
I bought Lt-Corporation pro.
Hi,
I am struggling a lot of time with correct installation of joomla, buyed lt onepage theme and additional components.
Now I installed a fresh copy of joomla 3.8.3, then I install your lt onepage theme. When I put on also quickstart package, joomla system automatically downgrade to joomla 3.6.4. Furthermore all components I have installed on joomla 3.8 are not seen anymore after installing quickstart (Akeeba Backup, TZportfolio).
When I upgrade joomla from 3.6.4 to 3.6.5 and then to 3.8, system crashes down too.
Hi, I paid for LT Strategy pro version. When I try to install quickstart package my installation jumps from step 6 to step 11 with no quickstart package installed. In the end I just get empty template site. How can this be fixed?
For quickstart install, simple is you just unzip quickstart paclage, you will see files .ini and .jpa, just upload all files to your website space and run install panel by access [yoursite]/kickstart.php
Hello! I do exactly as you advised [yoursite]/kickstart.php. However installation jumps from step6 to step11 without restoring database. How can I fix this?
Im confused……how do l get this to my main domain name. Do l do everything again but use my domain or is there a way to transfer from the local to the main.
On the front page it loaded with same two warnings
Warning: count(): Parameter must be an array or an object that implements Countable in C:\xampp\htdocs\Test\Test-quickstart\lt_elearning_joomla_quickstart_package\components\com_advportfoliopro\router.php on line 48
Warning: count(): Parameter must be an array or an object that implements Countable in C:\xampp\htdocs\Test\Test-quickstart\lt_elearning_joomla_quickstart_package\components\com_advportfoliopro\router.php on line 126
l have tried using Akeeba back and the restore but cannot get it localhost to the main server for my domain. l’m not very good and wish l had not taken on the purchase of the quickstart package if l’d know what was involved. you’ll make it sound easy when its not.
No, you only install template package via Extension > Manage > Install to get template style.
For quickstart install, it already included Joomla! core, so you can’t install it via Extension Manager, but follow out guide above.
Please submit ticket support with your site and FTP account, so our staff can help.
BTW, make suer that you have permission for your website folder, look like it’s permission files/folders issue.
I’ve already got the latest version of Joomla installed via my cPanel; is there a method by which I can install the complete configured demo version of this theme without utilizing the quickstart package? Thanks in advance.
Quickstart package already included Joomla! core, so you don’t install Joomla! first. If you already installed, just delete it, then you can upload quickstart files and install it.
I bought and installed in mi PC (localhost) “Quickstart package LT Industrial Onepage Joomla” but after the installation when I clic frontend, just shown text. I left blank the line public $live_site =””; from configuration.php but the page continues only with text, no images, no modules, nothing.
I’ve just bought one of your templates, installed it and ran quickstart to install the setup package. All which worked beautifully. However, when I run the front end of the site it lists two PHP errors:
Warning: count(): Parameter must be an array or an object that implements Countable in C:\wamp64\www\xxx\components\com_advportfoliopro\router.php on line 126
and
Warning: count(): Parameter must be an array or an object that implements Countable in C:\wamp64\www\iGravy\components\com_advportfoliopro\router.php on line 48
also when I try and log into the backend my username and/or password is no longer recognized?
Hi,
It’s not error, just warning with PHP version. Please go to Admin > System > Global Configuration ,open tab “Server” and set “None” for option called “Error Reporting”.
I have problem after installation AT Costrix template, the forntpage “HTTP 500 Whoops, looks like something went wrong.” and administrator page “An error has occurred.
0 Class ‘Joomla\Plugin\Behaviour\Taggable\Extension\Taggable’ not found” I have 5 times re-install but still zonk, Please get back to me ASAP.
I already have a Joomla 5 instance in place. The LT Salon Car Premium template (lt_saloncar) has been purchased and installed. How do I install all of the demo resources into my own Joomla instance? Running the kickstart procedure installs a new Joomla 4 instance which I do not want. I want the demo resources to be placed into my Joomla 5 template installation.
Thank you in advance for any and all help you may provide.
We still keep J4 as stable package for our Quickstart package, since some hosting providers is not support well with latest PHP 8 (using for J5). You can install the Quickstart package with J4, then you just run update with all extensions if you see update alert. Last, you can run J4 to J5 without issue.
We use cookies to improve your experience on our website. By browsing this website, you agree to our use of cookies.
Functional
Always active
The technical storage or access is strictly necessary for the legitimate purpose of enabling the use of a specific service explicitly requested by the subscriber or user, or for the sole purpose of carrying out the transmission of a communication over an electronic communications network.
Preferences
The technical storage or access is necessary for the legitimate purpose of storing preferences that are not requested by the subscriber or user.
Statistics
The technical storage or access that is used exclusively for statistical purposes.The technical storage or access that is used exclusively for anonymous statistical purposes. Without a subpoena, voluntary compliance on the part of your Internet Service Provider, or additional records from a third party, information stored or retrieved for this purpose alone cannot usually be used to identify you.
Marketing
The technical storage or access is required to create user profiles to send advertising, or to track the user on a website or across several websites for similar marketing purposes.







awesome !!
When I try to run the quickstart through php, it fails when trying to find installation/index.php I installed the template since there was no quickstart file in mojo. So was that part of the problem. Can I do it in that order?
Solved via support.
@Everyone who can’t list files in step 2, just run http://yourdomain.com/kickstart.php as well. Some hosting do not allow access direct to file list.
Hi
I have the same problem in step 2. I opened link that you replied. But I am still a little confused about it. Do you mean that I should re-buy the hosting?
Urgent for help!!
please reply me ASAP
All the best
Weixin
Solved via email.
Hi,
when i install the package, my front page just has text and looks nothing like the app i downloaded – no photos and alignment seems off.
I also get a blank page when trying to get into the backend of it all?
Thanks.
Hi @Boddy,
In your case, you just open file ‘configuration.php’ and replace
$live_site = ‘your_domain.xxx’;
and leave it blank like as below
public $live_site = ”;
Save and recheck.
Hello, I’m quite new to Joomla and I’ve just bought your web design theme and I can’t get the demo files to install through akeeba, I’ve FTP’d the unzipped files to http://80.74.***.***/httpdocs/joomla/tmp/lt_web_design_onepage_quickstart_package and in my web browser tried to start the kickstart.php therein, but I get an error that it can’t be found.
“Not Found. The requested URL /httpdocs/joomla/tmp/lt_web_design_onepage_quickstart_package/kickstart.php was not found on this server.”
I’ve even tried it on the root folder but still get the not found error, Could you help me further please?
PS. My hosts PHP version is 5.3. is this a problem?
Hi,
Via your desc, I see you uploaded file to wrong folder in your hosting. Please test with simple text file before to upload to make sure that you upload correct folder.
PHP version is not problem, but 5.3 is too old, you should ask your hosting provider to update it.
Thank you,
Hello,
I’ve got the demo files installed, but when in the Joomla control panel I click on the top right, my homepage name it goes to my homepage but it’s just blank.
I’ve tried above
$live_site = ‘your_domain.xxx’;
and leave it blank like as below
public $live_site = ”;
It is already set to “public $live_site = ”;”
also tried removing:
}
body.homepage #sp-main-body-wrapper {
display: none;
}
but that didn’t help.
If I try externally I get the demo site fine but with no changes
Could you help me further please
Ian
PS. PHP version is now 5.5
Hello Ian,
If you can’t change everything in demo on back-end, so i think you have problem with cache. Just go to Admin > System > Clear Cache, select all item and click to delete cache.
Thank you,
Hello,
Thanks, I’ve tried that still no change.
Ian
Hi Ian,
Could you please send me your site address and admin login and FTP info via my email at [email protected], so I can help you check it.
I am stuck on step two. I am using joomla. any help please.
Sorry I meant to say steps three. Nothing is being preselected. Your help will be very appreciated. Thanks.
Hi Franck,
Please send your screenshot about problem to our support email at [email protected] ,so our support staff can help you solve it.
Thank you,
where i can find the login and password for admin, they didn t ask me.
Thanks
Default login username / password is admin / abc123
You also define login username and password via step 9, part ‘Supper User Settings’.
Hello, I am not able to sign into the administration… Any help?
Eve
Please try to re-install quickstart package and recheck, also do not fill the password, just use default login:
username: admin
password: abc123
After finished install and login, you can change the password.
I finished installation, now the default login username / password do not work. I am unable to access the back-end. please help!
Please try to re-install quickstart package and recheck, also do not fill the password, just use default login:
username: admin
password: abc123
After finished install and login, you can change the password.
I’ve re-installed quickstart package (gravity theme), and I’ve left the password field not filled.
And I’m not able to access to the administrator panel.
What shall I do now?
@Alboka Soft,
Please try to reinstall and recheck.
Thank you,
Hi, after the extraction the installation of joomla doesn’t start. at the page mydomain.com/installation/index.php appear a 500 Internal error page.
What can i do?
Thank you!
Please deleted your all files, and try to re-upload all quickstart file and recheck, make sure that all files uploaded to your hosting completely before to run.
Thank you,
Hi,
I am setting up the package on my localhost and following the conventional method using kickstart(which I always do).
Now, I’ve repeated the process twice but still getting the “500 Internal Server Error” for both front end and back end.
Is there something that I missed?
I realized that the above issue is occurring only for lt_event_joomla.
As I was able to install the other package.
Thanks for your info. We will recheck this package. If it’s really problem, so we will update.
Hello,
I try to install quickstart package but I get stack in step 7-8 (cant connect to DB).
I want to install the package to a subdirectory of my server, which database should I use?
You can create new database for your sub website via Database Manager in your hosting, then you can put your database information as normal. The database host name should be at ‘localhost’.
Thank you,
Hello. I did the installation as provided here, but I found out that its not a one page site… what im doing wrong?
http://www.awesomescreenshot.com/image/766740/d2b095ee3473685509282157a77614be
thanks.
May be you purchased wrong template version, each design, we have multi-page template and Onepage template versions. Please send your purchase information (includes email) via [email protected] , so we can help you change and exchange template.
CommentFiz a instalação via akeba com successo mas quando tento acessar as configurações do tema via joomla (extenções – temas – lt_portfolio – Default) aparece uma mensagem de erro.
Erro no servidor
500
RecarregarOcultar detalhes
O site encontrou um erro ao recuperar. Ele pode estar em manutenção ou configurado incorretamente.
Can you send me admin login for your website via email [email protected] to check?
I am having the hardest time installing your templates. I keep getting this error message:
AN ERROR OCCURRED
AJAX Loading Error
HTTP Status: 500 (Internal Server Error)
Internal status: error
XHR ReadyState: 4
Raw server response:
I have done everything your installation troubleshooters have suggested. If I cannot get these installed, I would like a refund before my 7 days is up.
Thanks
Could you pe help me install Joomla! (download from http://joomla.org), then send us FTP account via email [email protected] , so we can help you install template and sample data like our demo site. Also let us template that you want to install. Don’t worry about your money, if we can’t solve your problem, we happy to send you full refund for your order. Thank you!
Hello,
Normaly i buy your tempates from ASTemplates, but in this case i now like to use the free onepage lt storage. but after downloading and unzipping there are only the 2 zip files. with akeeba kickstart i can not instal that kind of file (not .zip, only .jpa) but that’s not in the package. what to do? if i have to pay, no problem, but i want that onepage as at the demo:-).
thanks in forward
I replied you via your email [email protected], please recheck it.
Para que venden paquetes de QUickstar que no funcionan? Deberian probarlos primero
I replied you via ticket support, please follow up and keep reply back to us.
Thank you,
In the step 7 and 8, which database data should I use? If I try to use root as user and the password I get this error: “Unable to connect to the Database: Could not connect to MySQL.”. In my cpanel I just have 1 user for MySql that is mycpaneluser__joom150. Is this user I have to use?
I got it! My previous question can be deleted. Thanks!
Thank you 🙂
Parse error: syntax error, unexpected ‘[‘ in /home/petronoz/public_html/administrator/components/com_sppagebuilder/builder/classes/addon.php on line 124
Fatal error: Class ‘FOF30\Container\Container’ not found in /home/petronoz/public_html/plugins/quickicon/akeebabackup/akeebabackup.php on line 240
have these issues after install
Thanks for your info, it’s just problem with PHP version, Joomla! 3.6.x need PHP version from 5.6.x or higher. You can see more at https://downloads.joomla.org/technical-requirements
You just ask your hosting provider to update PHP version for your hosting.
Akeeba Kickstart is a PC-only application, right? How do I do this on OS X?
Honestly, this walk-through is confusing as hell. I thought Joomla was supposed to be simpler… why do you have such a byzantine and convoluted process? I bought a PRO version of LT Profile Onepage, and for the life of me, I can’t figure out how to install in on my web hoster! Why isn’t it possible to install it through the Joomla web interface???
Hi,
No, quickstart package can be installed via hosting or localhost.
For how to upload quickstart files and run it on hosting, we mentioned in first paragraph of this instruction, you just search for keyword “Step 2A. How to install quickstart on your cPanel hosting account”.
Basically, run quickstart via panel is the same on local or hosting, just different with copy files method.
Hello,
after installing “quickstart” on localhost this problem appeared:
Warning: A non-numeric value encountered in C:\xampp\htdocs\Test\test-quickstart\plugins\system\helix3\core\helix3.php on line 490
Look like you put wrong format for coming soon option via Template Settings, please re-install it and recheck.
Error displaying the error page: Call to undefined method JAdminCssMenu::addChild(): Call to undefined method JAdminCssMenu::addChild()
After update joomla 3.8.1
Please check our blog http://ltheme.com/update-joomla-3-8-how-to-make-good-update-without-troubleshoots/
I did it. Yeah! Beautiful. Thank you!
You’re welcome!
Honestly, i had all the problems discribed above. I tryed to install 7 times, and with every installation i could solve one problem.
After restoring the superuser password, i thought i am ready – but not.
i have a blank page.
the entrys in my configuration.php:
public $live_site = ”;
public $cookie_path = ”;
I bought Lt-Corporation pro.
Thank you for your info. Can you submit ticket support, so we can help http://ltheme.com/ticket-support/
Hey admin,
in order to submit a ticket I would need to register somewhere. Could you please give me an URL to register?
admin ???
Why am I unable to edit frontend. I bought the package with the quick start. This is a very tedious template to use.
Hi,
Did you submit ticket support?
Hi,
I am struggling a lot of time with correct installation of joomla, buyed lt onepage theme and additional components.
Now I installed a fresh copy of joomla 3.8.3, then I install your lt onepage theme. When I put on also quickstart package, joomla system automatically downgrade to joomla 3.6.4. Furthermore all components I have installed on joomla 3.8 are not seen anymore after installing quickstart (Akeeba Backup, TZportfolio).
When I upgrade joomla from 3.6.4 to 3.6.5 and then to 3.8, system crashes down too.
What is a cause of such behaviour?
Hi,
I replied you via email support. Thank you!
Hi, I paid for LT Strategy pro version. When I try to install quickstart package my installation jumps from step 6 to step 11 with no quickstart package installed. In the end I just get empty template site. How can this be fixed?
Thanks!
For quickstart install, simple is you just unzip quickstart paclage, you will see files .ini and .jpa, just upload all files to your website space and run install panel by access [yoursite]/kickstart.php
Thank you!
Hello! I do exactly as you advised [yoursite]/kickstart.php. However installation jumps from step6 to step11 without restoring database. How can I fix this?
Thanks!
I was able to get up to “Step 9: Restore database”, then I had no idea about what to write from “Database server host name” till “Database name”…
Normally it’s localhost. Only when your hosting has special config for mySQL host, so you must to change it.
Im confused……how do l get this to my main domain name. Do l do everything again but use my domain or is there a way to transfer from the local to the main.
http://localhost/Test/test-quickstart/lt_elearning_joomla_quickstart_package/administrator/index.php?option=com_templates&view=styles
On the front page it loaded with same two warnings
Warning: count(): Parameter must be an array or an object that implements Countable in C:\xampp\htdocs\Test\Test-quickstart\lt_elearning_joomla_quickstart_package\components\com_advportfoliopro\router.php on line 48
Warning: count(): Parameter must be an array or an object that implements Countable in C:\xampp\htdocs\Test\Test-quickstart\lt_elearning_joomla_quickstart_package\components\com_advportfoliopro\router.php on line 126
Just problem with PHP version, you just go to Admin > System > Global Configuration, open tab ‘Server’ and set ‘None’ for option ‘Error Reporting’.
l have tried using Akeeba back and the restore but cannot get it localhost to the main server for my domain. l’m not very good and wish l had not taken on the purchase of the quickstart package if l’d know what was involved. you’ll make it sound easy when its not.
Version pro is not actived ….help
Did you submit ticket support?
How to install on Joomla directly?
Hi,
No, you only install template package via Extension > Manage > Install to get template style.
For quickstart install, it already included Joomla! core, so you can’t install it via Extension Manager, but follow out guide above.
I used quickstart and everything works, however it sees my joomla as 3.6.4.
However before quickstart it was 3.9.1 and cpanel still says it is.
Trouble is, I cannot access Revolution Slider 2, it says “An error has occurred.
0 [] operator not supported for strings”
Is there an update for quickstart?
Please download patch https://goo.gl/HypMwP
Then, install it via Admin > Extension > Manage > Install, and recheck.
AJAX Loading Error
HTTP Status: 500 (Internal Server Error)
Internal status: error
XHR ReadyState: 4
Raw server response:
Please submit ticket support with your site and FTP account, so our staff can help.
BTW, make suer that you have permission for your website folder, look like it’s permission files/folders issue.
I’ve already got the latest version of Joomla installed via my cPanel; is there a method by which I can install the complete configured demo version of this theme without utilizing the quickstart package? Thanks in advance.
Hi,
Quickstart package already included Joomla! core, so you don’t install Joomla! first. If you already installed, just delete it, then you can upload quickstart files and install it.
I bought and installed in mi PC (localhost) “Quickstart package LT Industrial Onepage Joomla” but after the installation when I clic frontend, just shown text. I left blank the line public $live_site =””; from configuration.php but the page continues only with text, no images, no modules, nothing.
Please go to Admin > Quix, click to button “Clear Cache” and recheck.
I’ve just bought one of your templates, installed it and ran quickstart to install the setup package. All which worked beautifully. However, when I run the front end of the site it lists two PHP errors:
Warning: count(): Parameter must be an array or an object that implements Countable in C:\wamp64\www\xxx\components\com_advportfoliopro\router.php on line 126
and
Warning: count(): Parameter must be an array or an object that implements Countable in C:\wamp64\www\iGravy\components\com_advportfoliopro\router.php on line 48
also when I try and log into the backend my username and/or password is no longer recognized?
Hi,
It’s not error, just warning with PHP version. Please go to Admin > System > Global Configuration ,open tab “Server” and set “None” for option called “Error Reporting”.
Acabo de comprar la plantilla :LT Web Design (Pro Standard) # 350452
Y tengo el siguiente error cuando hago la restauración con : Akeeba Backup
Database error processing line 42
Database server error reply:
ErrNo #1071
Specified key was too long; max key length is 767 bytes
SQL=CREATE TABLE `sjt1i_akeeba_common` ( `key` varchar(192) COLLATE utf8mb4_unicode_ci NOT NULL, `value` longtext COLLATE utf8mb4_unicode_ci NOT NULL, PRIMARY KEY (`key`) ) ENGINE=InnoDB DEFAULT CHARSET=utf8mb4 COLLATE=utf8mb4_unicode_ci
Raw query text:
CREATE TABLE `#__akeeba_common` ( `key` varchar(192) COLLATE utf8mb4_unicode_ci NOT NULL, `value` longtext COLLATE utf8mb4_unicode_ci NOT NULL, PRIMARY KEY (`key`) ) ENGINE=InnoDB DEFAULT CHARSET=utf8mb4 COLLATE=utf8mb4_unicode_ci
Hi,
Please check to two checkboxes as screenshot during install https://ltheme.com/wp-content/uploads/2014/01/fix.jpg
Hello Admin,
I have problem after installation AT Costrix template, the forntpage “HTTP 500 Whoops, looks like something went wrong.” and administrator page “An error has occurred.
0 Class ‘Joomla\Plugin\Behaviour\Taggable\Extension\Taggable’ not found” I have 5 times re-install but still zonk, Please get back to me ASAP.
Thanks.
Please submit ticket support http://ltheme.com/ticket-support/ and give us your site URL, hosting cpanel login, so we can help you check it.
Hello:
I already have a Joomla 5 instance in place. The LT Salon Car Premium template (lt_saloncar) has been purchased and installed. How do I install all of the demo resources into my own Joomla instance? Running the kickstart procedure installs a new Joomla 4 instance which I do not want. I want the demo resources to be placed into my Joomla 5 template installation.
Thank you in advance for any and all help you may provide.
We still keep J4 as stable package for our Quickstart package, since some hosting providers is not support well with latest PHP 8 (using for J5). You can install the Quickstart package with J4, then you just run update with all extensions if you see update alert. Last, you can run J4 to J5 without issue.