
Do you want to make your WordPress site more visually appealing by including header images? The ability to add header images is incorporated into most WordPress themes. These photos have the ability to drastically alter the appearance and feel of your website. In this post, we’ll show you how to add a header image in WordPress without having to write any code.
Where is the header image?
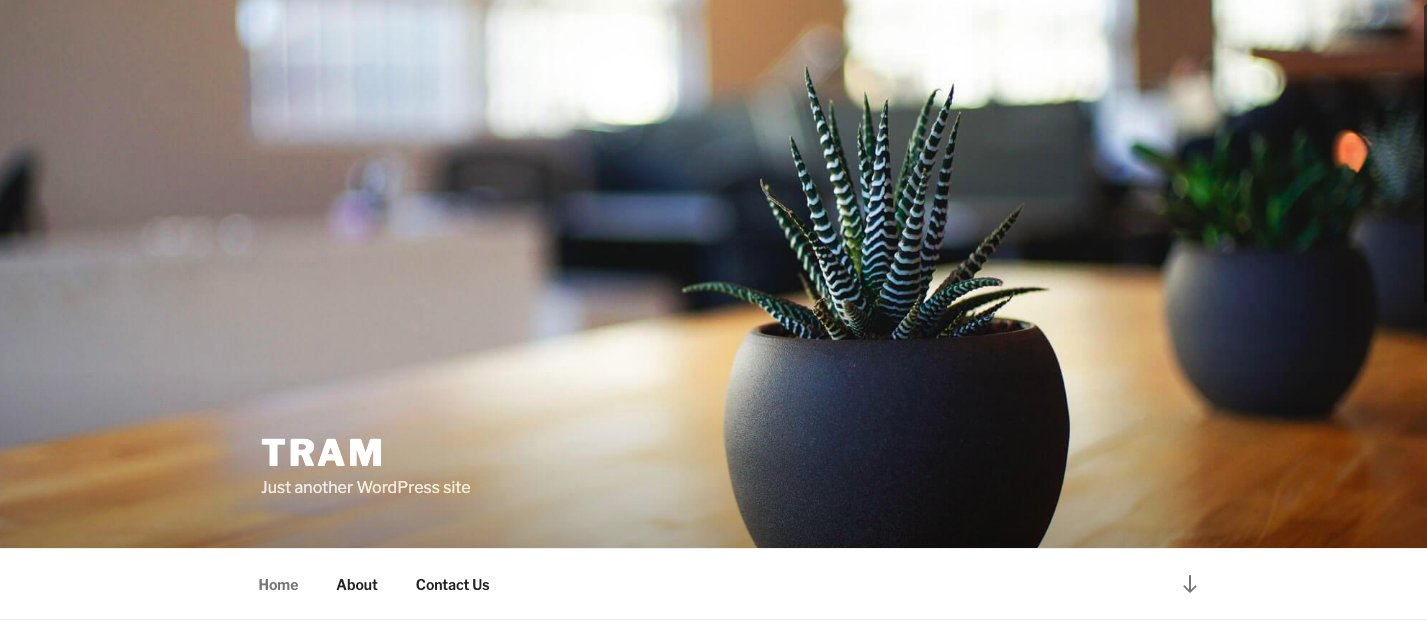
As the name implies, a header image is usually found near the top of any website. Following the header image, you’ll notice the website title and a separate menu. It’s possible that the theme you’re using has a default image. Setting a custom header image that describes your site, on the other hand, is always a good idea.
What images can you use for your header?
You may use any image for your header as long as it is either on your computer’s hard drive or has previously been uploaded to your WordPress account. You can’t copy and paste an image’s URL, and you can’t drag and drop a photo from a website. Create a “WordPress Header” folder on your computer and save the photos you wish to use there to find them fast.
How to Add a Header Image in WordPress
Method 1. Header Images Using WordPress Theme Customizer
This is a simple solution that makes use of the Theme Customizer and is adaptable enough for anyone to utilize. This is the way we would most likely recommend if you are new to WordPress. Because of how simple it is to understand and follow the instructions with this strategy.
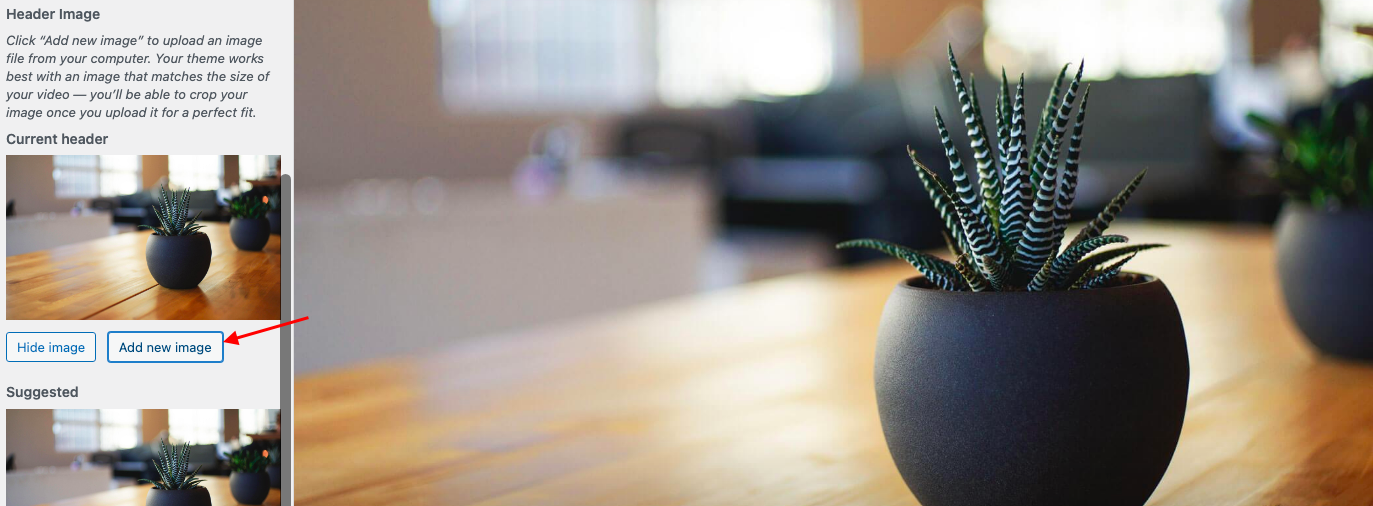
First, go to Appearance, then Customize to get to the WordPress Theme Customizer. After being redirected to the page, click on the Header option to access the option. Depending on your theme, the option could be called Header Media or Header Images.

You’ll see your current header image as well as any other header images that are available for use on your site.
To upload the images you want to use as header images, click the Add image button.
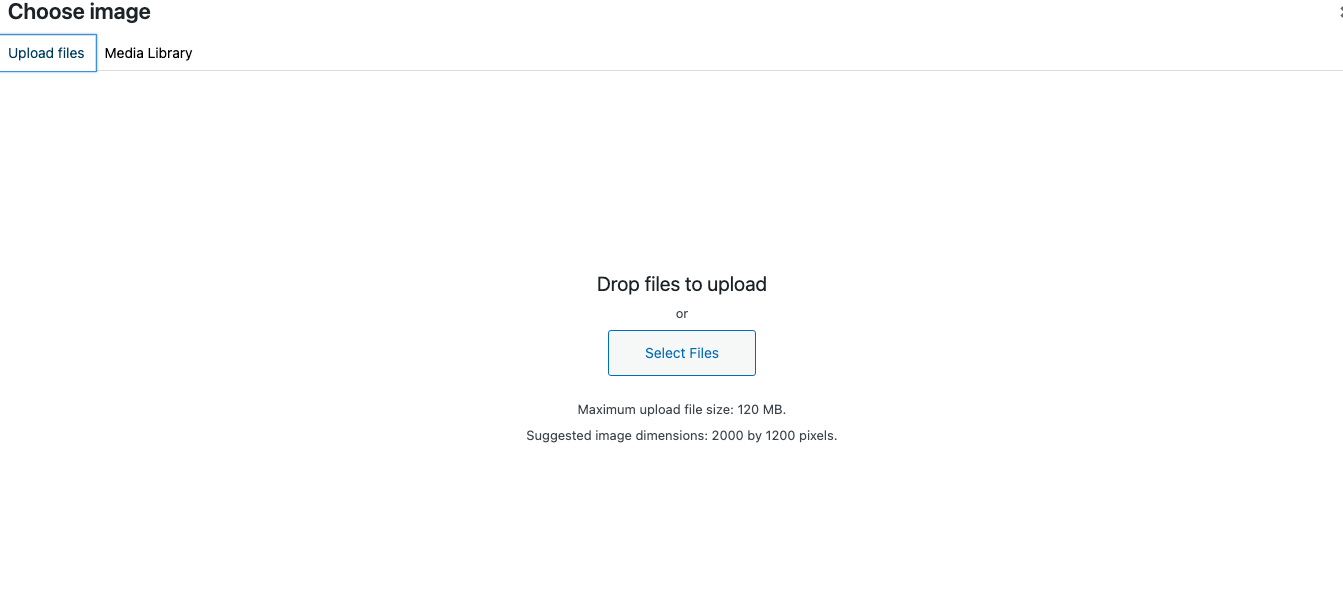
A new window will appear, allowing you to “Add new image“. The newly added image will appear as a new WordPress header image on your site once you’ve finished uploading and cropping.
Now, under recently submitted pictures, click the ‘Randomize uploaded header‘ button and then save your modifications.
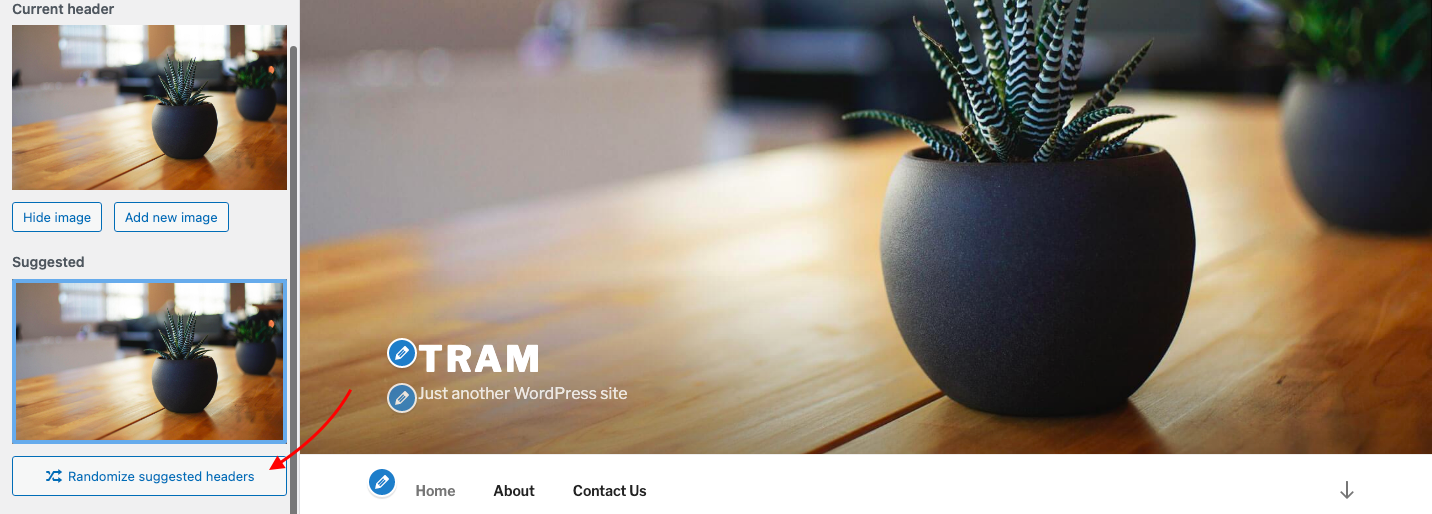
You can now reload your page to see how the header images vary at random.
Method 2: Add WordPress Header Image using Plugin
This solution is more versatile and provides you with more choice over how to display varied or random header images for WordPress posts, pages, categories, and tag archives.
The first step is to download and activate the WP Header Images plugin, which is one of the great WordPress Header Plugins.
To use this plugin, you can follow these steps:
- Select Plugins from the dashboard menu and click Add new.
- Locate and install the tool’s files.
- Return to the website control panel after activating it.
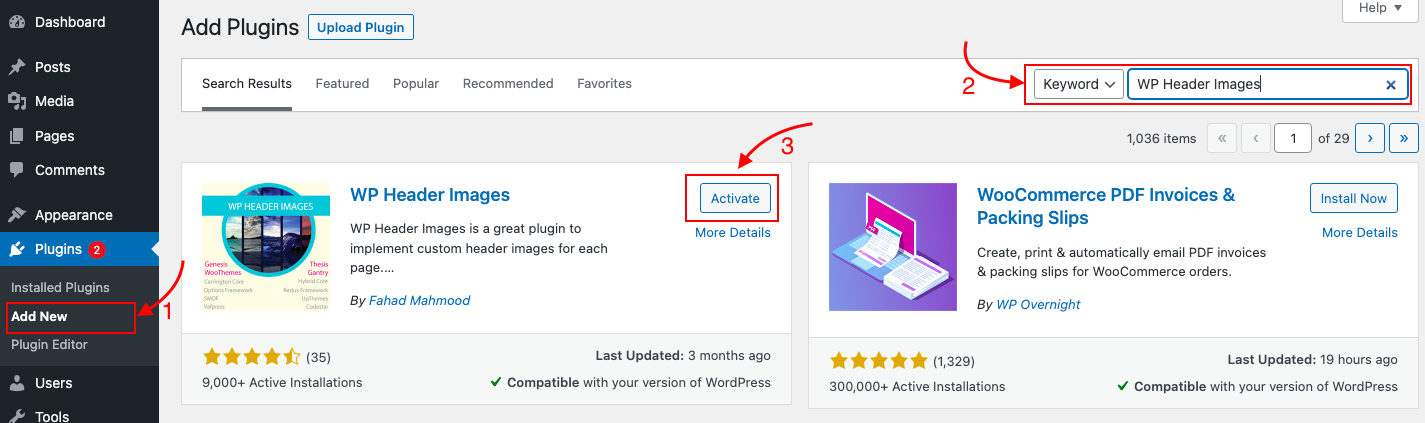
Now WP Header Images plugin is installed and ready to be configured.
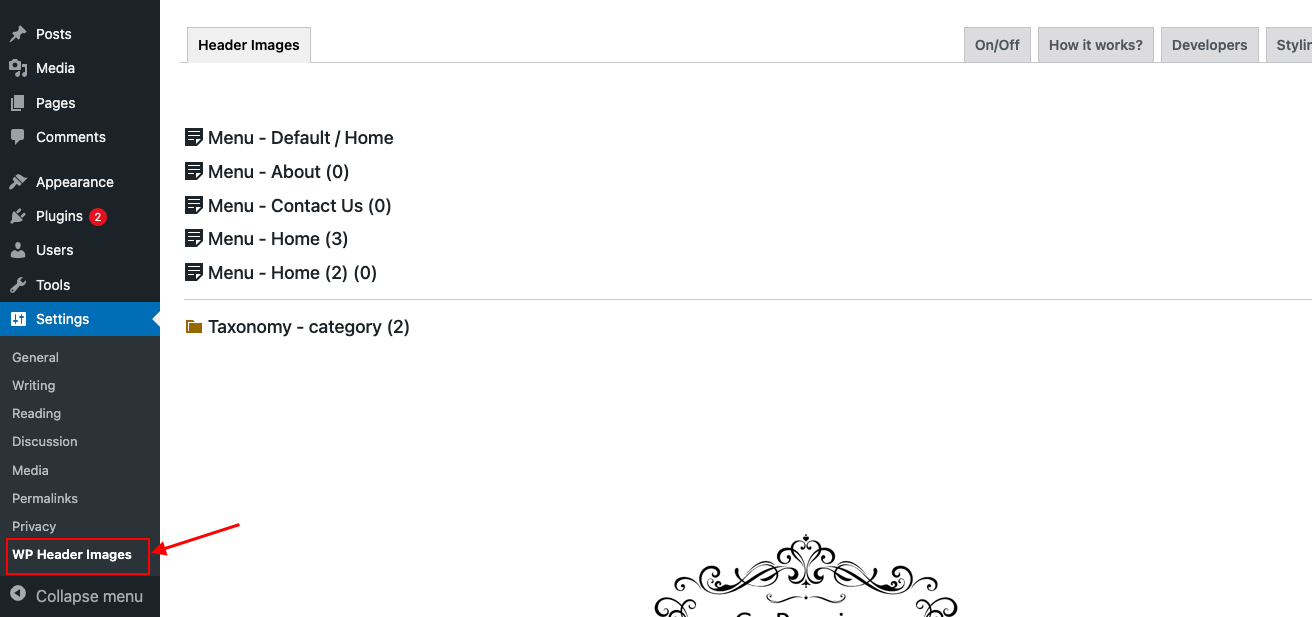
After you’ve installed and activated the header images plugin, go to Settings > WP Header Images to see the plugin’s main settings and configuration page.
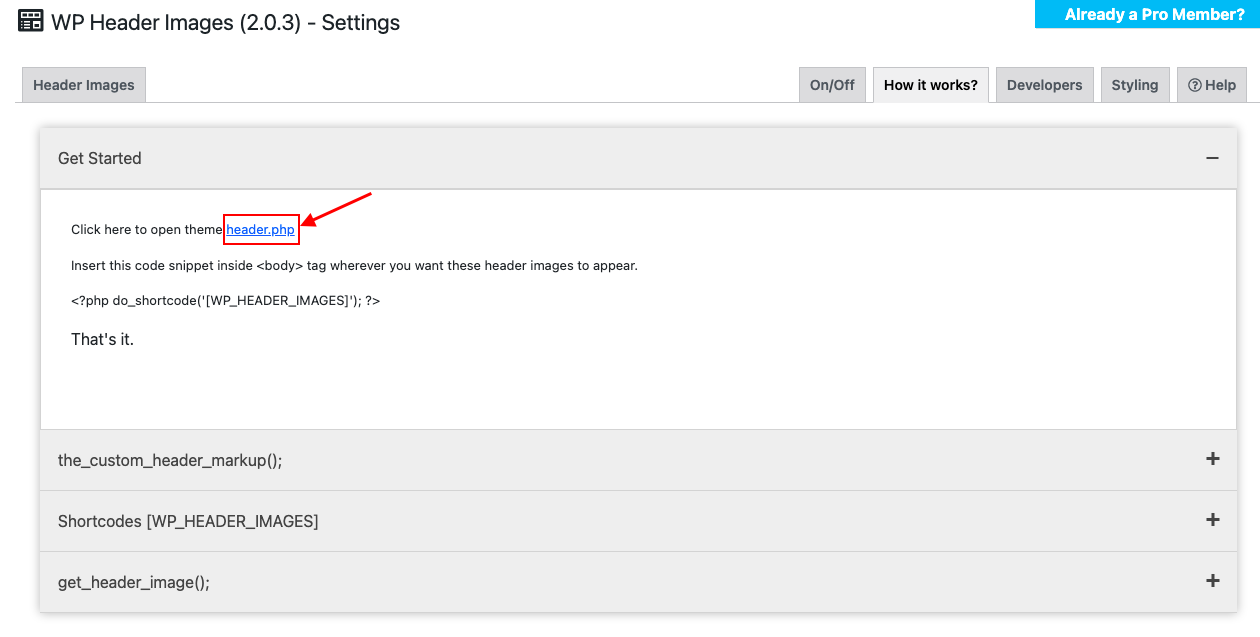
To begin, go to the “How it Works” tab and click the “open theme header.php” link, then paste the code into your header.php file. You can accomplish this by copying and pasting the coded lines. Then select “Save” from the drop-down menu.
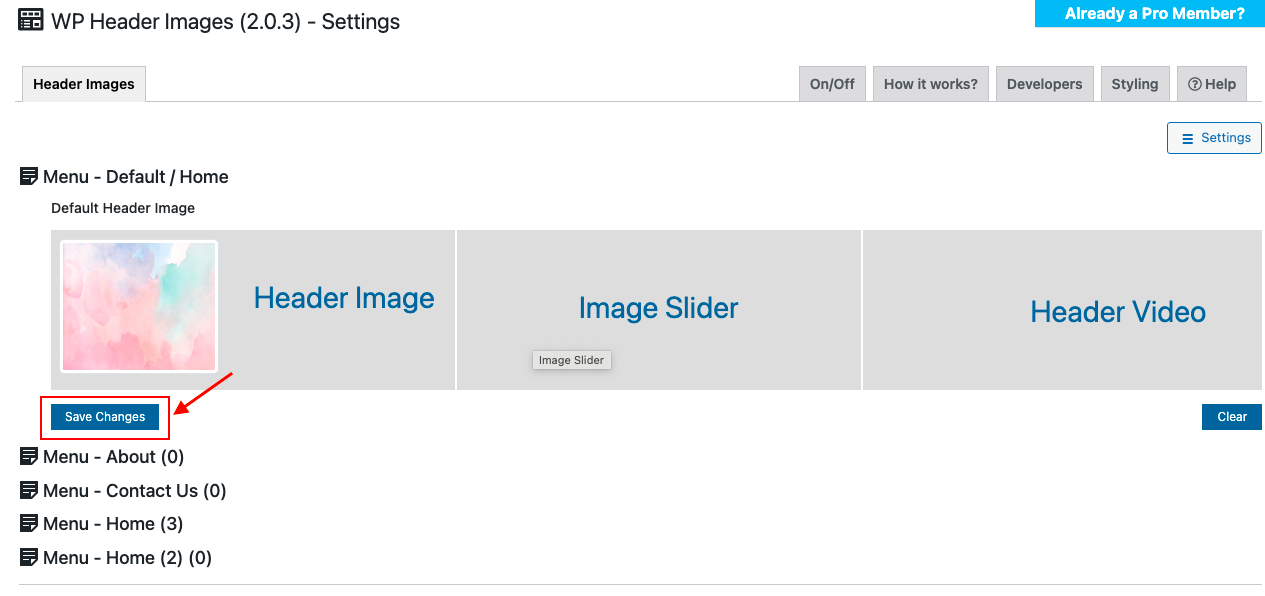
Return to the “Header Images” tab now. As you can see from the screenshots above, several items are already present depending on the menu items we have in place.
On top of that, any of the menu items on your specific list can be selected by clicking on them. In any of the option boxes where you want a header image, click the “Header Image” link.
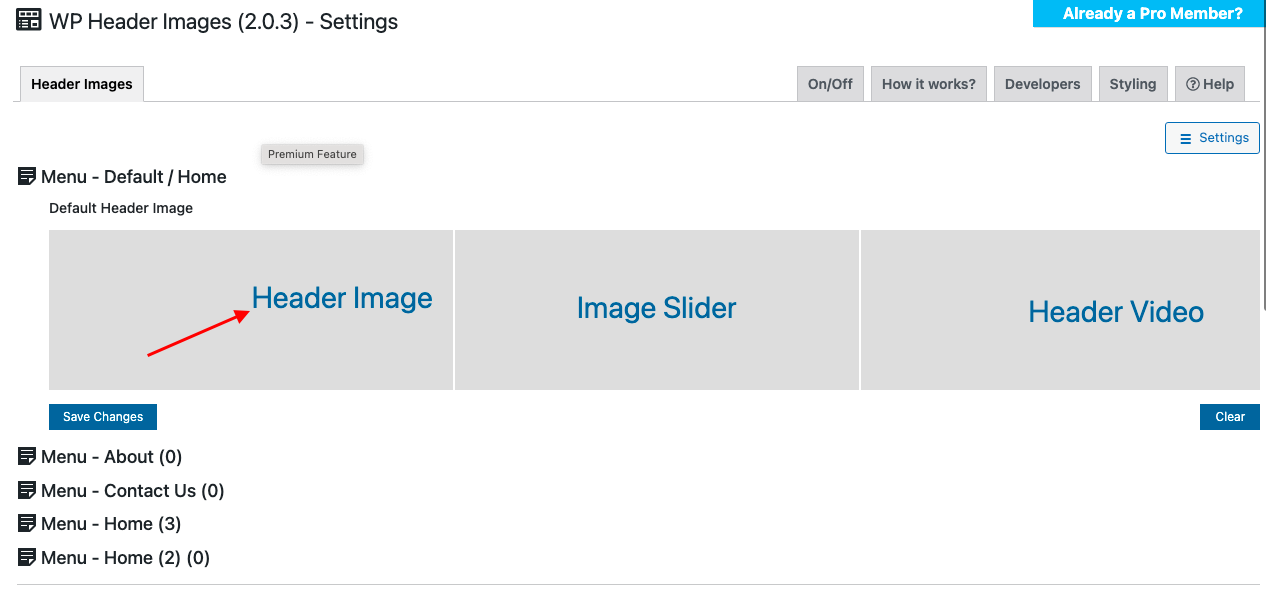
This will allow you to access your media library. Choose the image you want to use for the WordPress header image for that page from your library. Select “Insert into Post” from the drop-down menu.
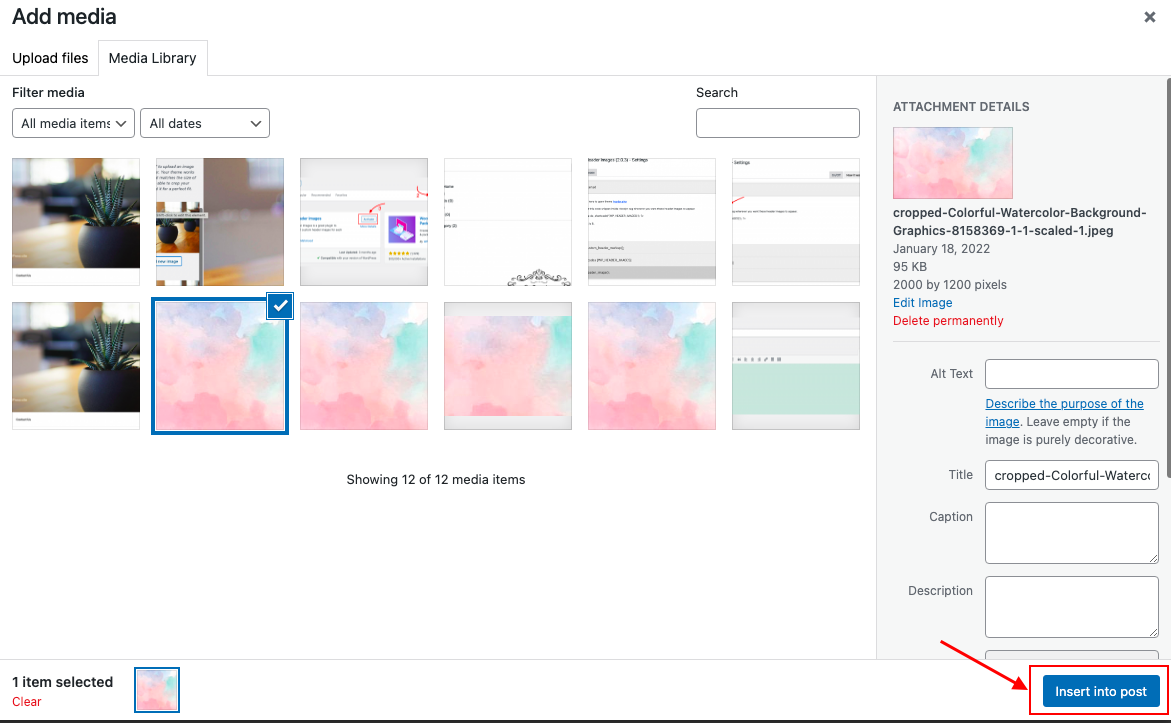
The file has been added to that location, and a checkmark appears to indicate that the menu image has been selected.
Don’t forget to click on the ‘Save changes’ button to save your changes.
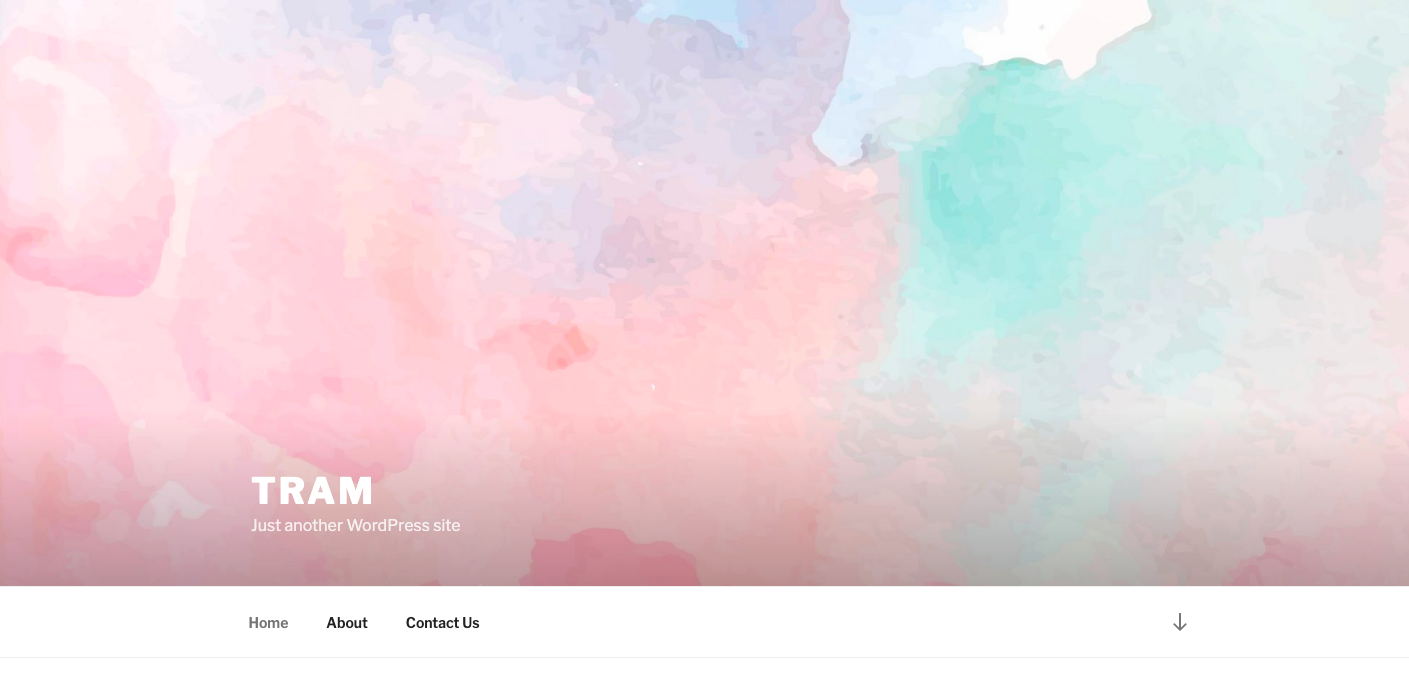
Go ahead and have a look at your live site. Simply click on the menu item for which you set the picture, and the image will appear in the header.
Conclusion
With the ability to add images and media files to your header, your site will seem both intriguing and inviting! Moreover, this will not only keep your users interested, but it will also benefit your site in every manner! And we hope that with these two simple tutorials, you can easily add a header image to your WordPress blog.
Don’t forget to access Free WordPress Themes to make your site more appealing and professional!

- Resolving the “Class JFactory Not Found” Error in Joomla When Upgrading to J6 - December 19, 2025
- The Utility Of VPNs For Site Authors And Admins - November 24, 2025
- Joomla! 6: What’s New and How to Upgrade from Joomla! 5 - October 23, 2025


Recent Comments