A great way to share a link to a specific section on your WordPress site is to create anchor links. This allows users to easily jump to that section from anywhere. However, do you know how to add anchor links in WordPress effectively? In today’s blog, we will give you a definition of anchor links and provide you with a step-by-step guide to creating anchor links in WordPress. Let’s explore.
What is an anchor link?
An anchor link is understood as jump links or in-page links. When you click on an anchor link, immediately this will lead you to another part of the same page. Thanks to that, users can easily jump to different sections that they are looking for information quickly.
Why and when should you use anchor links?
Most websites use anchors links to create a table of contents for blogs that come with long content. By adding anchor links, users only take less than a few seconds to move to a special section on the same page instead of wasting a lot of time reading whole your post.
In addition, this method helps your user have a better experience once browsing your website. It is really true when your posts come to long-form content.
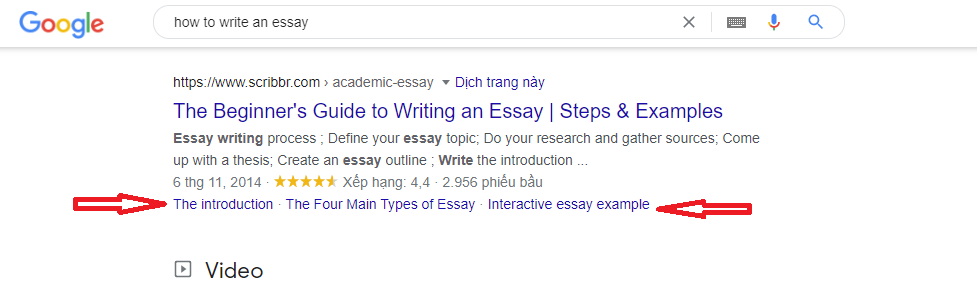
Additionally, Google can also show tons of links from your pages as jump to links. They will help you improve the organic click-through rate for your WordPress website. Because users might find something useful related to their query that you didn’t display in the meta description or title.
How to manually add anchor links in WordPress Block editor?
Step 1: Create an anchor link
First of all, you need to choose the text that you would like to place a link to and then click on the Insert link button on the block toolbar.
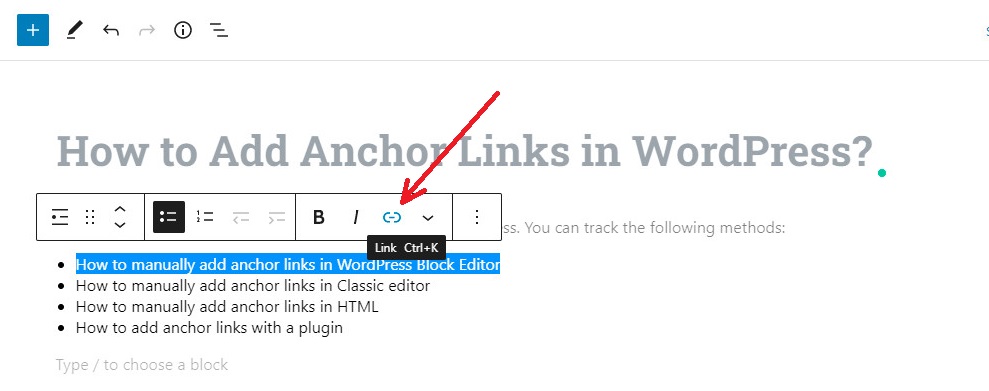
Immediately this will open the insert link popup where you can add the URL on it.
However, instead of linking it to a URL/post/page, you have to enter it with an anchor name. You simply specify “#” as a prefix and enter the anchor name for the section that you want the user to jump to.
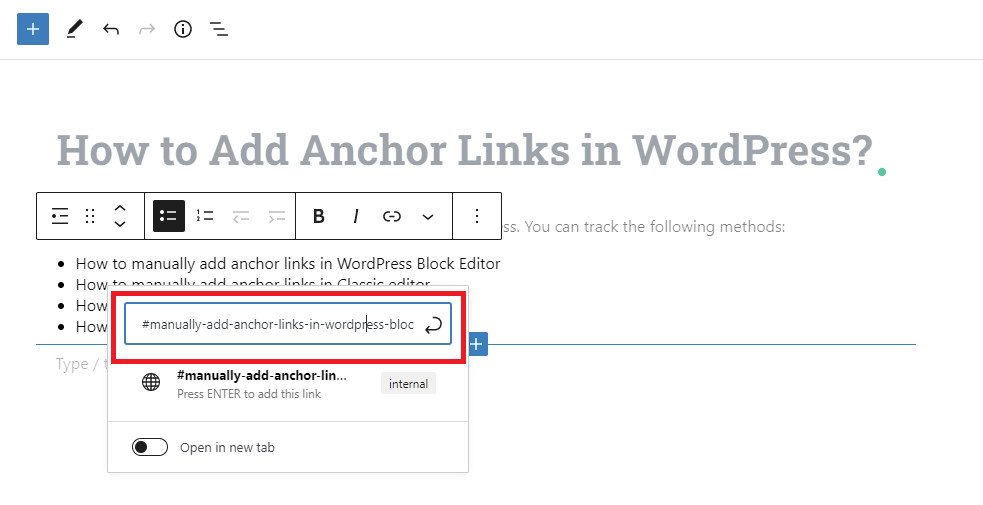
Then, click on the “Enter” button to create the link.
After you have added the link yet, now you can see the link that is viable in the editor. Nevertheless, when you click on this link, it doesn’t do anything. Hence, let’s keep reading to take the next step.
Step 3: Add the ID attribute to the linked section
To do this, firstly, place the cursor on the header or section you want your anchor link to jump to. you need to click on the three-dot menu on the block settings and choose “Edit as HTML” to switch over to the text view (HTML) in the editor.
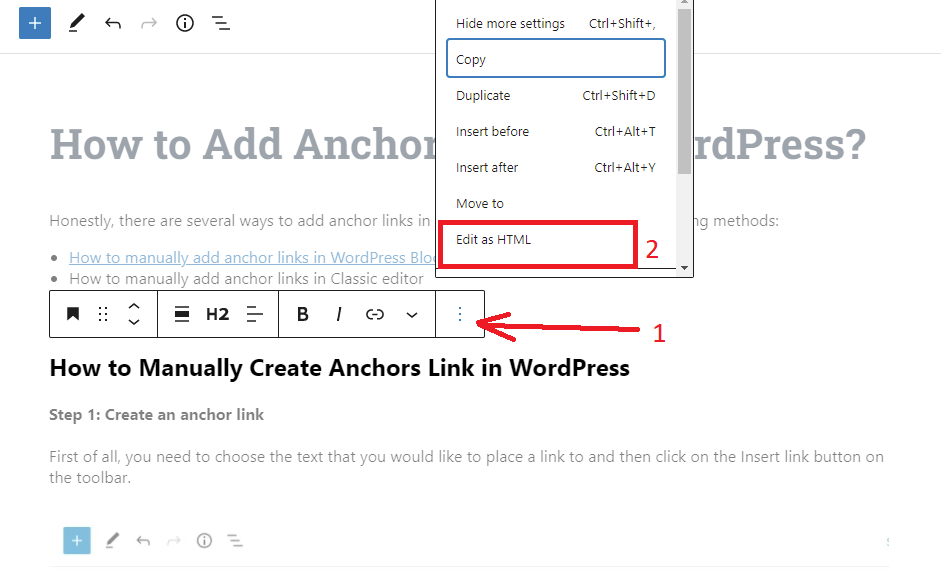
Then, let’s add ID along with the anchor name that you entered in step 2. You should notice that the anchor name and ID attribute must be exactly the same for the link to work.
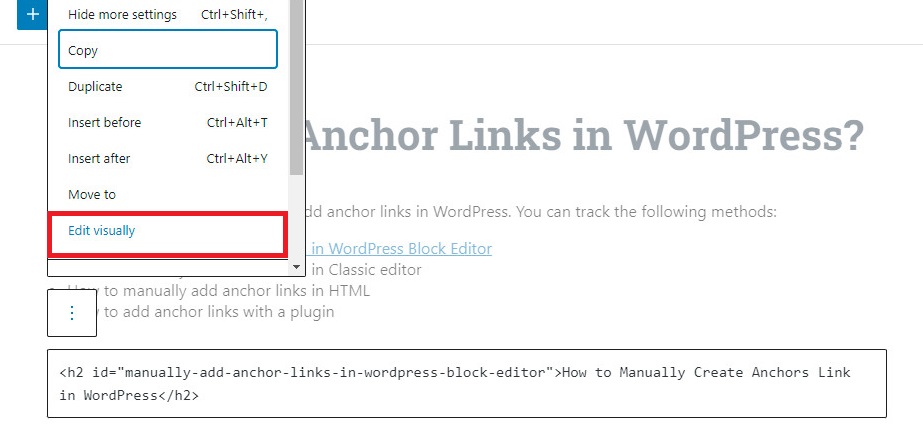
In order to convert HTML to the visual editor, you keep clicking on the “three-dot” and select the “Edit visually” option to preserve the changes you made.
How to manually add anchor links in Classic editor?
The process of adding anchor links in the Class editor is also the same as you did in the WordPress Block editor. You can see the following steps.
Step 1: Create an anchor link
Initially, you need to choose the text that you want it becomes the anchor link and then click on the “Insert link” button in the toolbar.
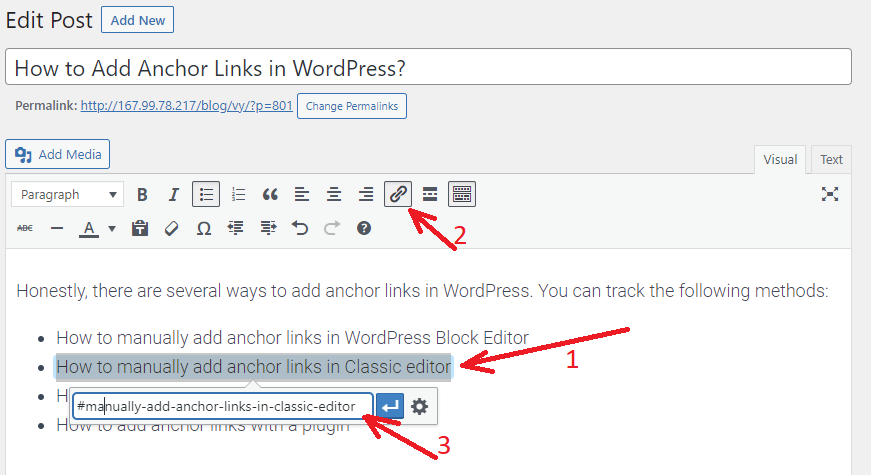
Next, you have to add your anchor link with a “#” character as a prefix followed by the anchor name. Don’t forget to click the “Enter” button to create the link.
Step 2: Add the ID attribute to the linked section
Next, you need to define the section you want to display when users click on your anchor link.
To do that, you need to convert the Visual Editor to the Text editor by clicking on the “Text” tab in the Classic editor. Then, place the cursor at the section your want to display.
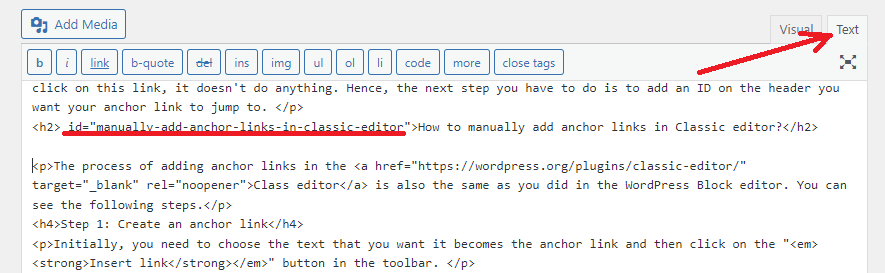
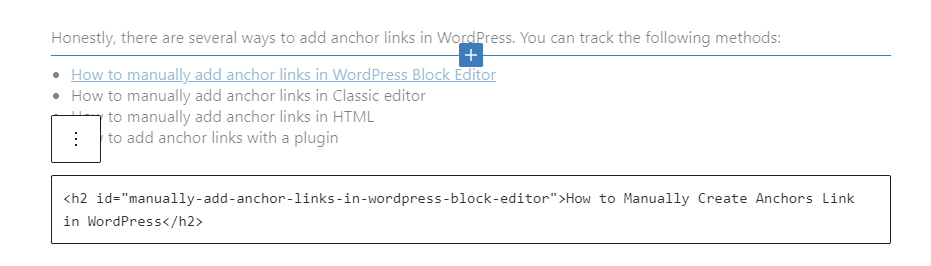
Now, you need to add the ID attribute behind the HTML tag you want to target followed by your anchor name without the # character. For example:
<h2 id=”manually-add-anchor-links-in-wordpress-block-editor”>How to Manually Create Anchors Link in WordPress</h2>
Then, you can click on the “Save Draft” and see your anchor link in action by clicking on the “Preview” button.
How to add anchor links in WordPress with a plugin
If you don’t want to touch to HTML code. Don’t worry, there are still a few useful plugins that help you easily add anchor links and even create a table of content to your post.
The helpful plugin that we would like to introduce is the Easy Table of Contents Plugin. This is one of the remarkable WordPress tables of contents plugins. To use this method, you need to follow the steps below.
Step 1: Install and Active plugin
The process of installing this plugin is also the same as you did with other plugins. For more support. you can access our step-by-step guide on how to install a WordPress plugin for beginners.
Step 2: Configure the plugin’s settings
Once you activated the plugin, let’s navigate to the Settings > Table of Contents page to configure the plugin’s settings.
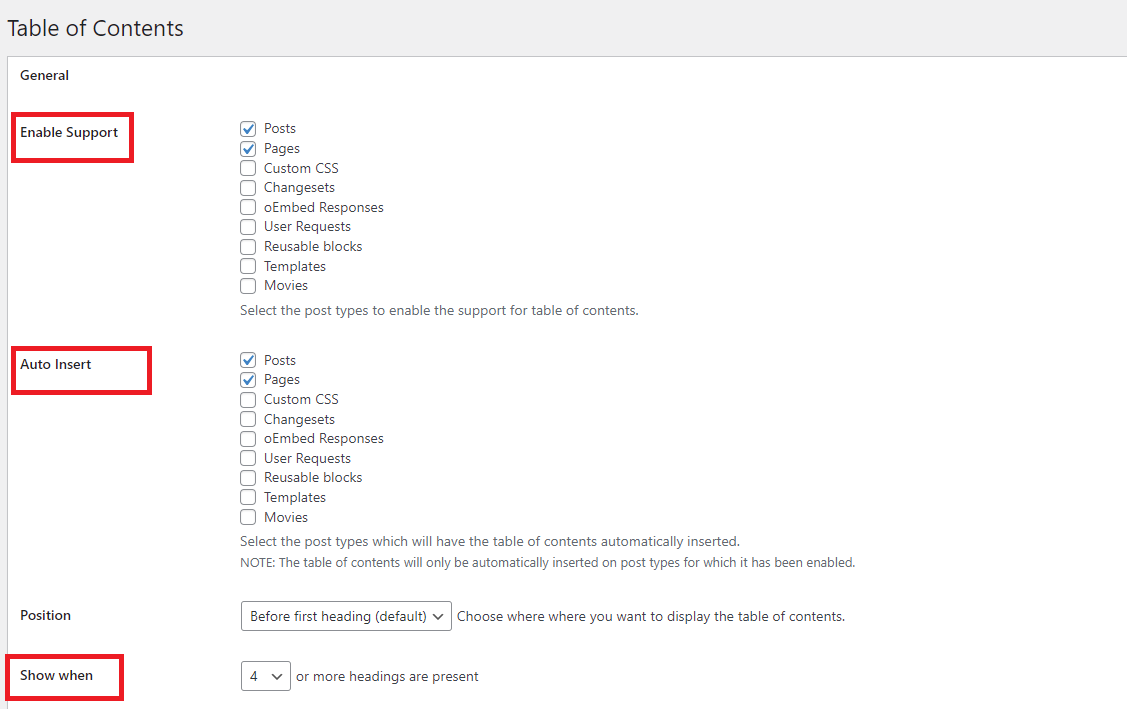
On the settings page, you need to pay attention to the following section:
- The “Enable support” option enables you to select which post types you want to use the table of contents on. By default, the plugin will be enabled for pages. However, you are able to enable it for your posts as well.
- The “Auto-insert” option allows the plugin to automatically create the table of contents for all posts including the other posts. If you want to create a table of content manually for special posts, you can uncheck these boxes.
- The “Show when” option permits you to define the number of headings that the post should have before a table of contents display. For example, if your website comes to long-form posts, it is necessary to set it at least four or more headers.
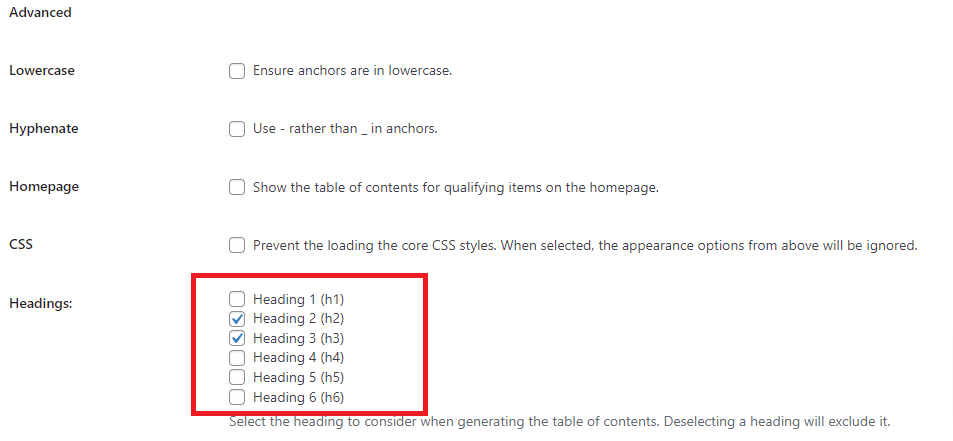
Let’s scroll down the screen to the Advanced section. From here, you can select the headings you want to display as anchor links.
And there are a lot of other advanced settings. Such as you can select a theme, adjust width and height, set the font size, create a custom color scheme for your table of contents box, and much more. You can choose and adjust them to suit your requirements.
Once you are pleased with your selections. Don’t forget to click on the “Save Changes” button at the bottom of the page.
Step 3: Add a table of content to the page/post
If you enable the Auto Insert option, now the plugin will automatically add a table of contents to posts based on the settings that you selected in step 2.

Therefore, you can open your existing posts that were written with multiple headings, you can simply preview it to see the table of contents in action.
The bottom lines
As you can see, there are a lot of ways to add anchor links in WordPress. However, we selected and shared with you the easiest methods to help you handle this task without effort. Hopefully, through this post, you can create a professional table of content for your posts, which will help you improve CTR on your organic listing. Moreover, if you have any questions, please let us know by leaving a comment below.
Furthermore, it’s time to drop by our Free WordPress Themes where we specialize in providing plenty of gorgeous, powerful, responsive designs for your successful website.

- Resolving the “Class JFactory Not Found” Error in Joomla When Upgrading to J6 - December 19, 2025
- The Utility Of VPNs For Site Authors And Admins - November 24, 2025
- Joomla! 6: What’s New and How to Upgrade from Joomla! 5 - October 23, 2025


Recent Comments