Do you know how to change font size in WordPress? This blog will help you change font size with a lot of the easiest methods. Let’s check them out.
Why should you change font size in WordPress?
In fact, if your content contains countless sentences and words, but they are completely displayed in a single font. As a result, it is difficult for the readers to read your valuable content easily. In addition, they will don’t know which main ideas are in your post to help them easily scan your whole content.
Moreover, change font size in WordPress brings you a lot of value. Initially, a post that comes with different font sizes is one of the most important factors to create user-friendliness as well as make your site more professional. What’s more, it also contributes to making SEO friendly.
How to change font size in WordPress?
There are several ways to change font size in WordPress. However, if you are a beginner, it is complicated for you to choose one of them to start. Therefore, in today’s blog, we will teach you how to easily change the font size in WordPress with 4 easy methods. Let’s dive into the step-by-step guide below.
Solutions
Method 1: Change font size in the Block editor
If you are running the default block editor of WordPress, you should track the following steps.
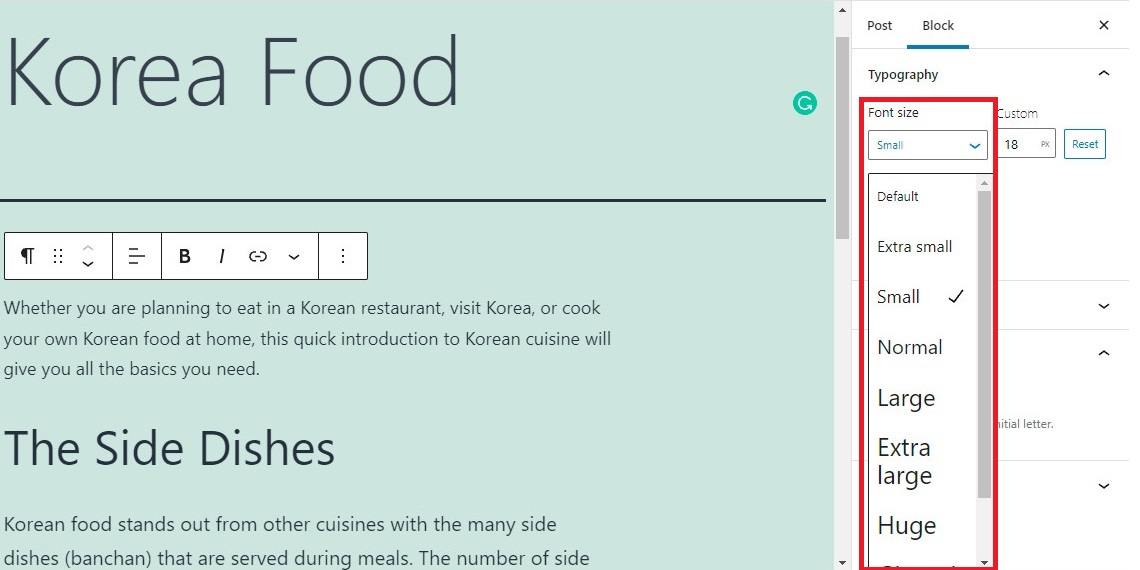
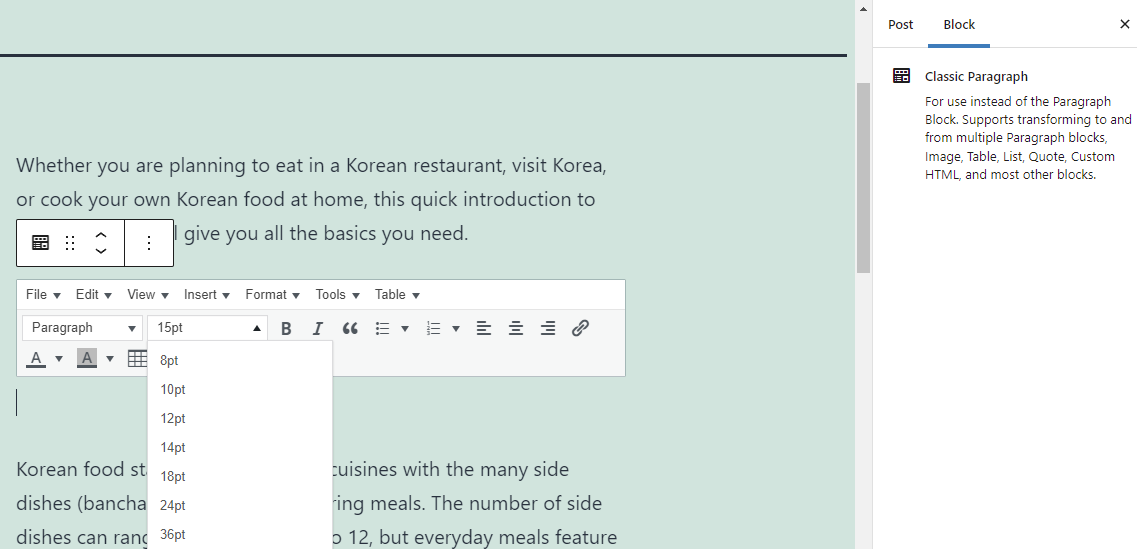
Firstly, you need to click on the paragraph that you want to change the font size. And then, let’s take a look at the right sidebar, you can see the typography section. Simply click on the Font size box, at here there is a list of drop-down fonts that including Small, Normal, Medium, Large, Huge.
In addition, it also offers you a “Custom” option that you can easily increase or decrease the type in the pixel size according to your preference.
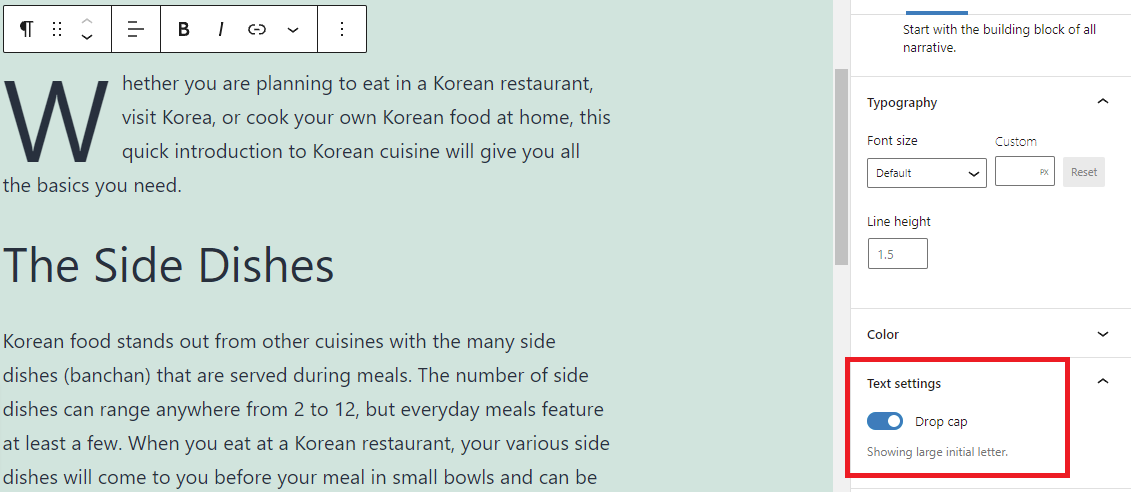
Moreover, if you want to set a large Drop Cap to show a large initial letter of your selected paragraph, you enable the Drop Cap button.
For any reason, you want to retain the default font size, let’s click on the Reset button to set it.
Method 2: Change font size in the Classic Editor
Next, this way is suitable for those who are running the Classic editor-the old editor in WordPress.
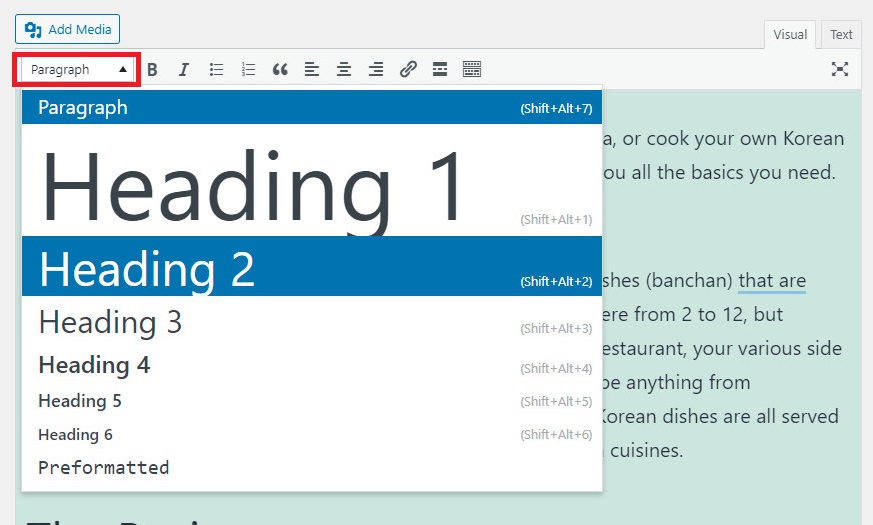
Initially, place your mouse pointer at the paragraph where you want to change the font size. And then click on the Paragraph option above the editing field, a list of drop-down headings will be displayed and you can optionally choose from these to highlight the text that you want to turn into a heading.
Additionally, the Classic Editor also allows you to change the sizes and colors for various headings by using HTML or CSS.
In case that you are utilizing a premium WordPress theme, it will offer you the useful option to edit these settings under Appearance> Customize.
Method 3: Using Advanced Editor Tools plugin to change font size
Advanced Editor Tool was formerly called TinyMCE Advanced. This plugin has recorded over 2 million active installations around the world. Therefore, it is considered an effective and popular tool that helps you change font size in WordPress. Especially, this plugin is completely compatible with the Classic Editor and the Gutenberg editor. So you are assured that they work well with both of these.
Step 1: Just like other plugins, firstly, you need to install and activate this plugin. You go to Plugins> Add New and enter the Advanced Editor Tools plugin at the search bar. And then quickly install and activate it.
Step 2: Configure the settings
You just switch to settings> Advanced Editor Tool to configure the editor settings.
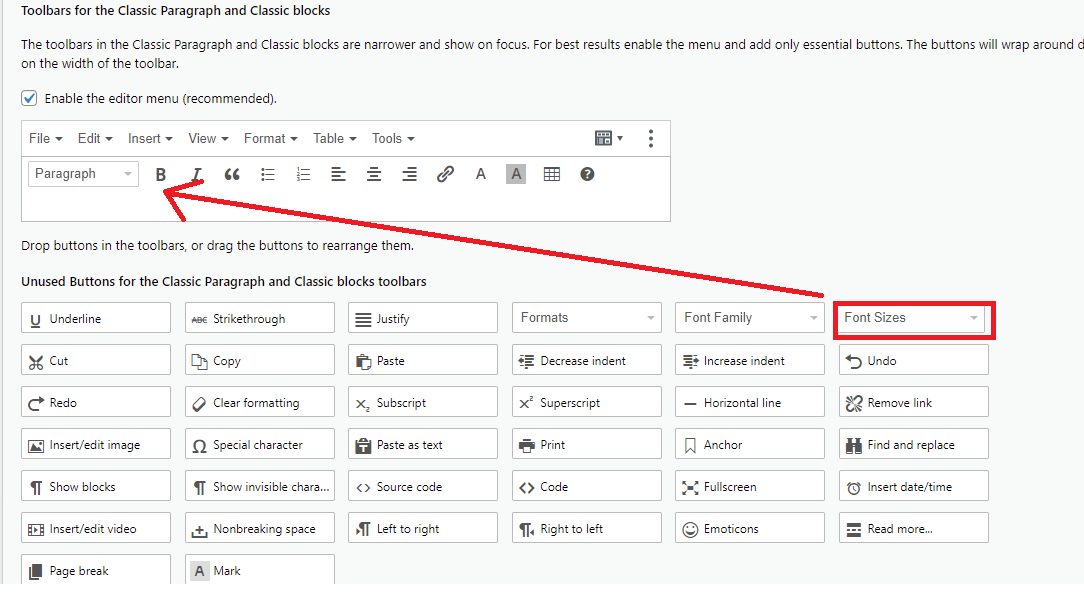
In the first case, if you are using the Classic Editor, let’s click on the Classic Editor Tab. You can view that the font size option is available in the second row of icons. It allows you to drag and drop buttons in the toolbars to rearrange them.
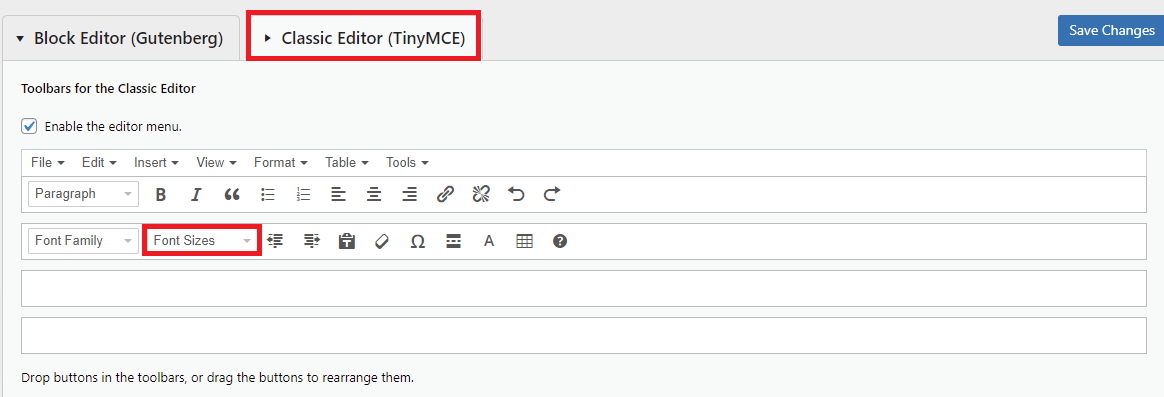
In the second case, if you are running the Gutenberg Editor, you need to scroll down the screen, at here a list of useful buttons is displayed including the Font Sizes button. You can easily drop and drop to add it to the toolbars.
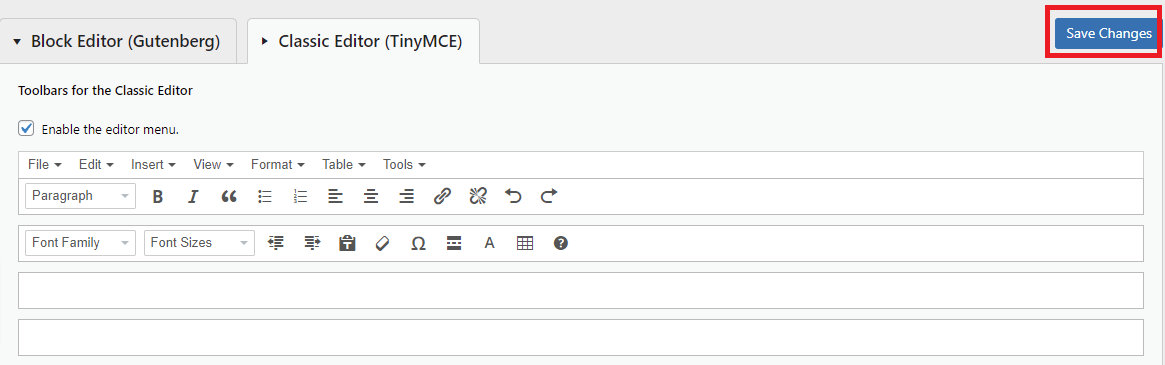
After finishing all settings, don’t forget to click on Save Changes before moving to the next steps.
Step 3: Change font size in each the editor
To view how this button works, you should create a new post or edit an available post.
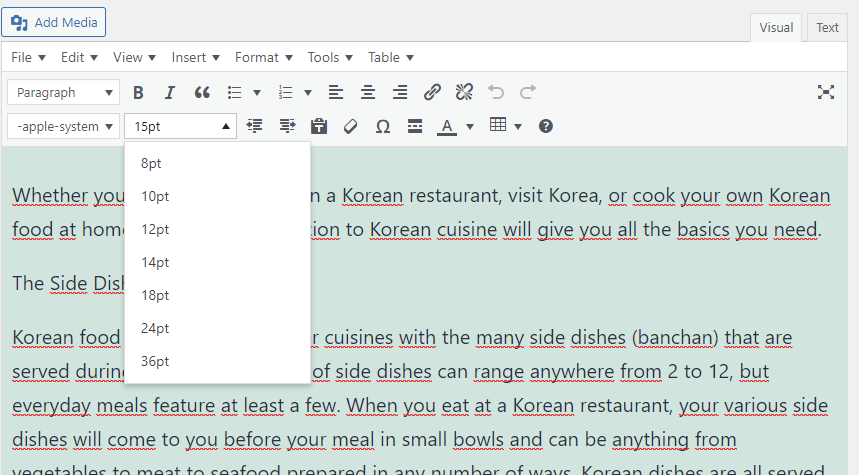
In the Classic Editor, you can see a list of drop-down font sizes on the toolbar. Therefore, you can optionally choose a reasonable font size for your paragraph.
In the block editor, you just add a Classic Paragraph block to start typing your content.

Let’s take a look at a list of drop-down font sizes shown on the visual editor toolbar in the Classic Paragraph block. It is easy for you to create a lot of paragraphs with different font sizes. However, there is a restriction that you can not optionally customize the font size you want as in the WordPress block editor.
Method 4: Using Custom CSS to change font sizes
In case the theme you are using to run your blog doesn’t provide any easy options to help you change the font size in your theme settings. You should contact your theme’s developers or review their documentation before using this method to change the font size. Because custom CSS requires you have experience with coding.
If you have tried to find it anyway, but can not turn up results. Now, let’s track the following steps to change the font size of your blog.
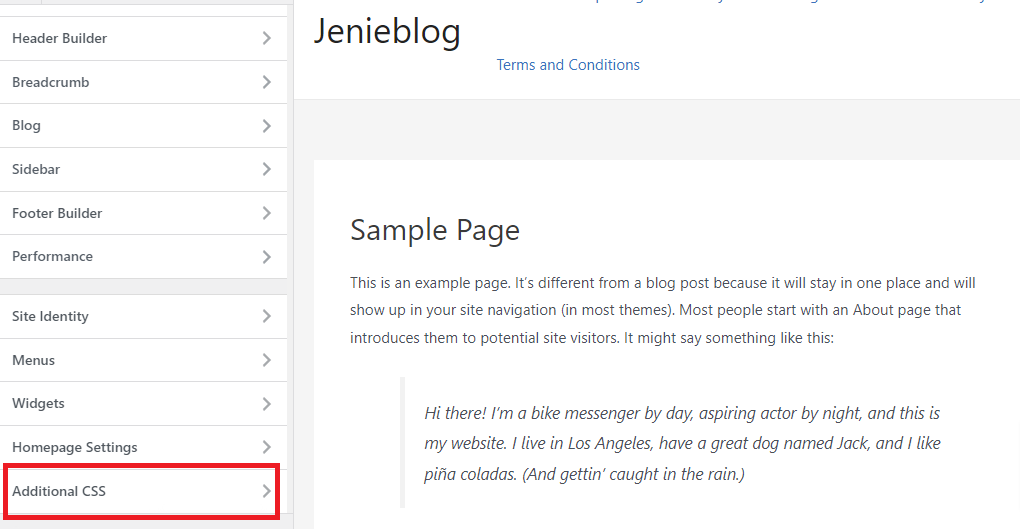
Firstly, navigate to Appearance > Customize to add CSS to your blog via the “Additional CSS” area. It is easy for you to view a list of options like the screenshot below, simply click on ” Additional CSS”.
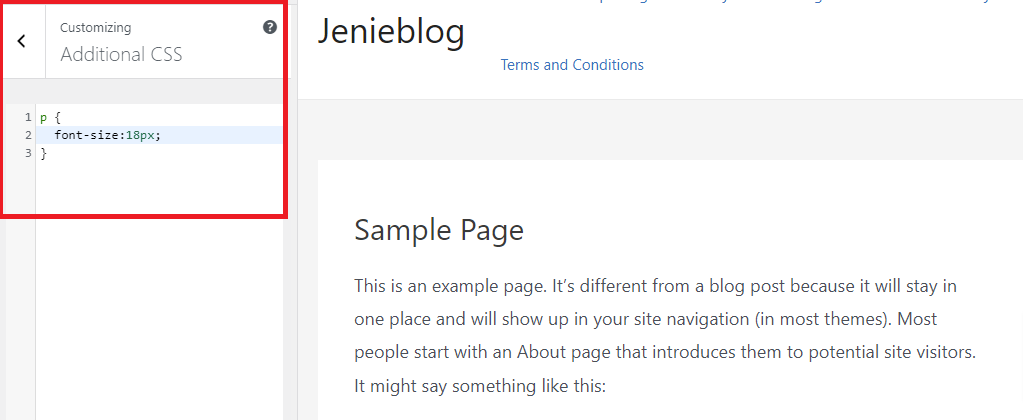
Now, in the “Customizing Additional CSS” area, if you want to change the font size for your paragraph, you can add the following CSS rule on the image below. In our example, we are changing the font size to 18px, you can optionally add your font size according to your purposes.
At the same time, you can view the changes on your page in the preview area. If you are satisfied with this font size, quickly click on the “Publish” button.
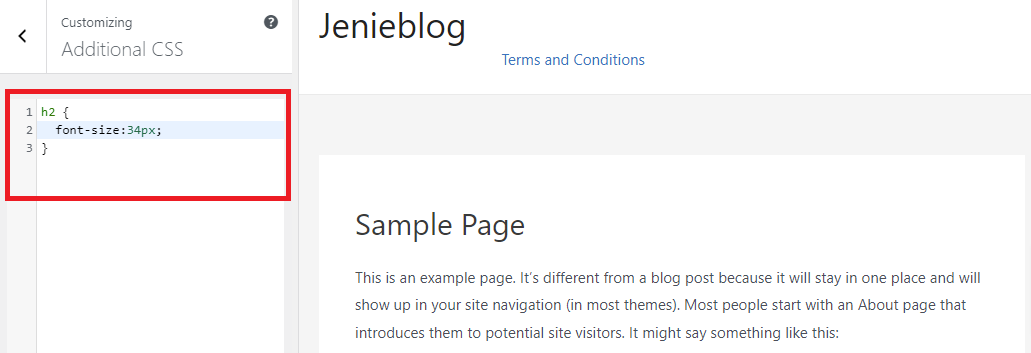
If you want to change the font size of all H2 subheadings, you need to add a new CSS rule. For example, we added the following CSS code: h2 {font- size:34px;}. You only need to change h2 into h3, h4, or h5 if you want to change the font size for other headings.
Finally, you’re ready to hit publish and set your font size change live.
Summary
We have offered 4 ways to change the font size in WordPress. In which the first 3 methods are quite easy to use and completely suitable for those who are beginners. If you have a piece of professional coding knowledge, you can consider adding a new CSS rule to defines new font sizes for paragraph text or special headers.
If you have any queries or encounter any difficulties during using these methods, don’t hesitate to mention them in the comment section below. We will give you support as soon as possible. By the way, whether you want to refer to more WordPress font plugins that help you improve the design of your site. Let’s check them out.

- Resolving the “Class JFactory Not Found” Error in Joomla When Upgrading to J6 - December 19, 2025
- The Utility Of VPNs For Site Authors And Admins - November 24, 2025
- Joomla! 6: What’s New and How to Upgrade from Joomla! 5 - October 23, 2025


")


Recent Comments