Do you know how to create an image gallery in WordPress? If not yet, this article is a perfect place for you, in today’s blog, we provide a step-by-step guide with the easiest and most effective solutions. Let’s take a look.
Why should you create an image gallery in WordPress?
If you are going to showcase multiple images on your site, a gallery is considered the best option for your site. Because it not only make your page more attractive at the first sight but also engage your visitors and increase the time they spend on your page. In addition, there is no denying that visuals can generate a huge impact than content with a lot of words.
Moreover, people often tend to respond to images strongly than to the text. Thanks to that, you can minimize the bounce-back rate and keep the visitors engaged and as a result, you have more chances to increase the higher conversion rates.
One of the other important reasons is that creating a beautiful image gallery can help you improve SEO. The number of Image searches is often fewer than the text searchers, so you can take your images to higher rankings easily and draw more visitors as well.
How to create an image gallery in WordPress?
Fortunately, there is a wide range of flexible ways that can help you create an image gallery in WordPress with a few clicks. You can consider choosing either to build image blocks with Gutenberg editor or create a gallery with Classic Editor. Besides that, developers also offer you a lot of useful plugins to assist you to organize your image gallery better by changing designs, styles with many available options. In today’s tutorial, we will teach you how to create an image gallery with Classic Editor and one outstanding plugin. Let’s start.
Solutions
Method 1: Creating an image gallery with the Classic Editor
Classic Editor is the old default editor of WordPress. This plugin is regarded as a lightweight content material editor that allows you to format simply. Classic Editor is suitable for those who have professional coding skills to create rich content. However, if you are using this editor, this is a great idea because it also allows you to create a simple gallery with a few clicks. Now, let’s dive into the step-by-step guide below.
Stage 1: Uploading the image you want to showcase
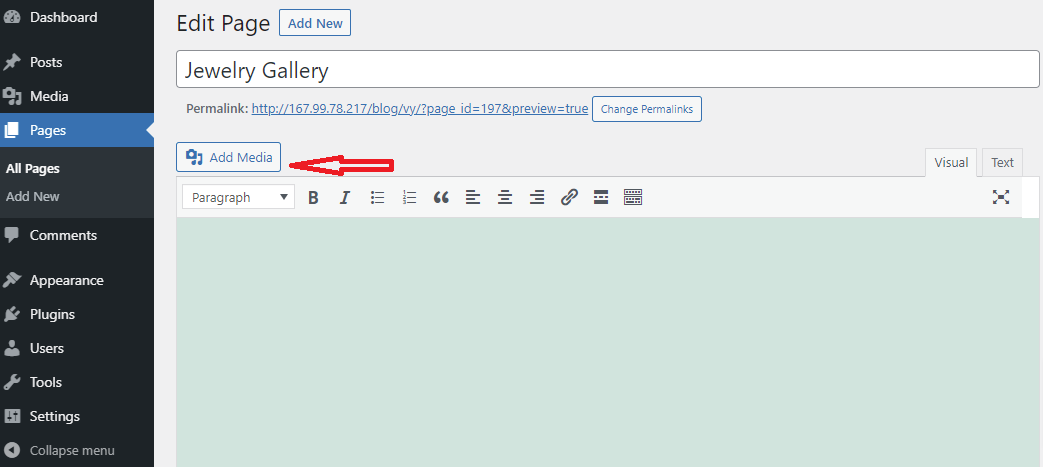
Firstly, you need to go to Page/Post > Add New on your dashboard and enter the title for your gallery. In the editor, let’s click on the Add Media tab above the editing area to upload all images from your files.
The process of uploading images can take you a few minutes or seconds that depend on your internet speed and the number of images you upload. Wait a few moments, until your images are uploaded.
Stage 2: Adding images to your gallery
After all your images are ready in the Media Library. Now, navigate to the Create Gallery option on the left sidebar.
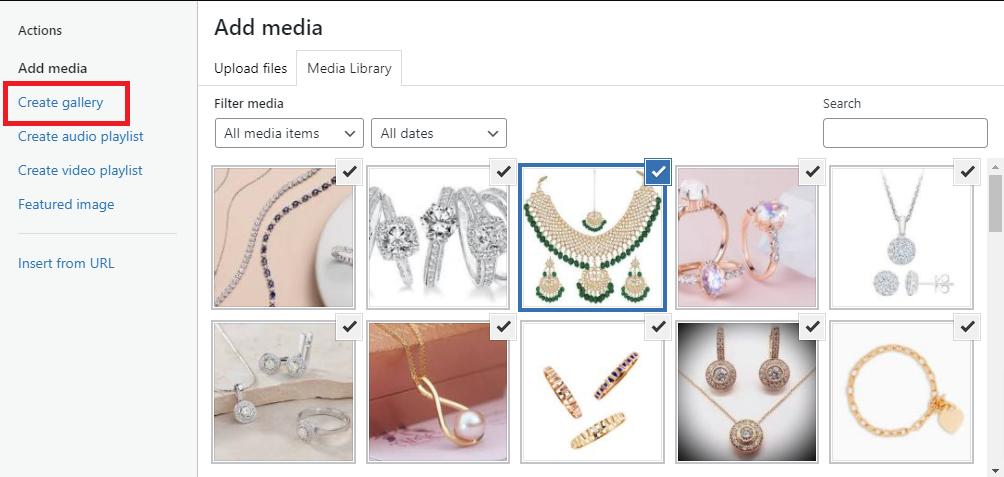
Let’s choose all the images you want to showcase in your gallery. And the number of images that you have selected is shown below this field. For example, we have just selected 10 images to display.
Next, take a look at the Attachment Details field. Here, this field allows you to add title, alt text, and caption or description for each image. In addition, you can view the image’s URL.
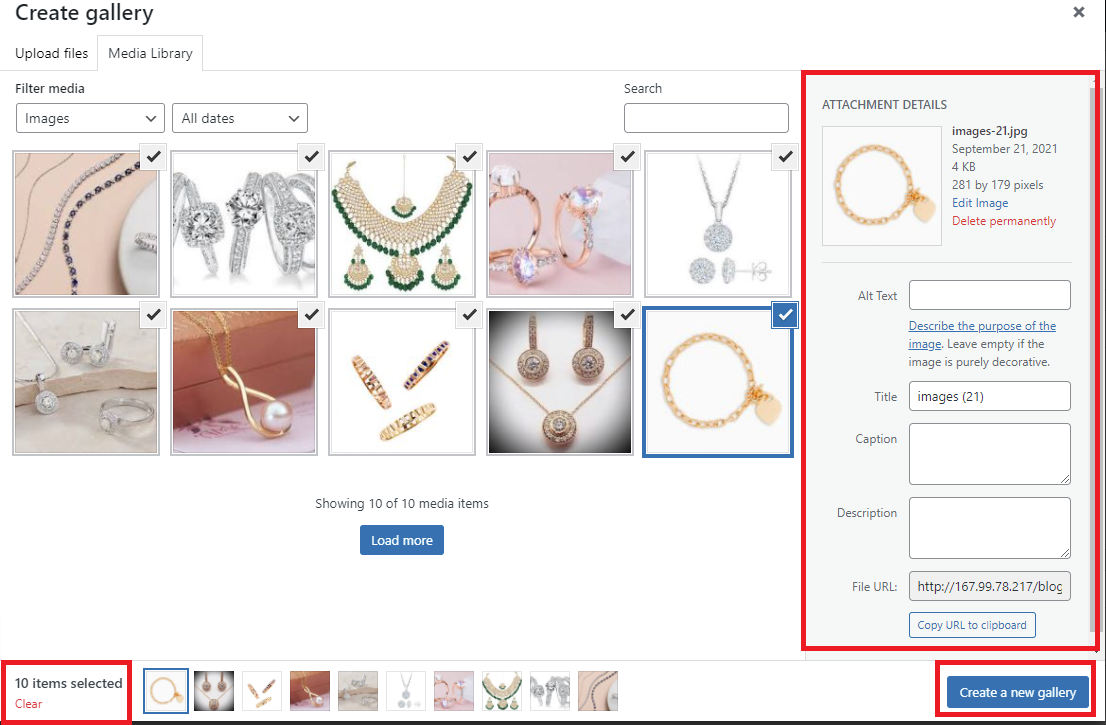
After filling in all information in this field. Now, it is a great time to create an image gallery. Quickly click on the Create a new gallery button at the right of the screen.
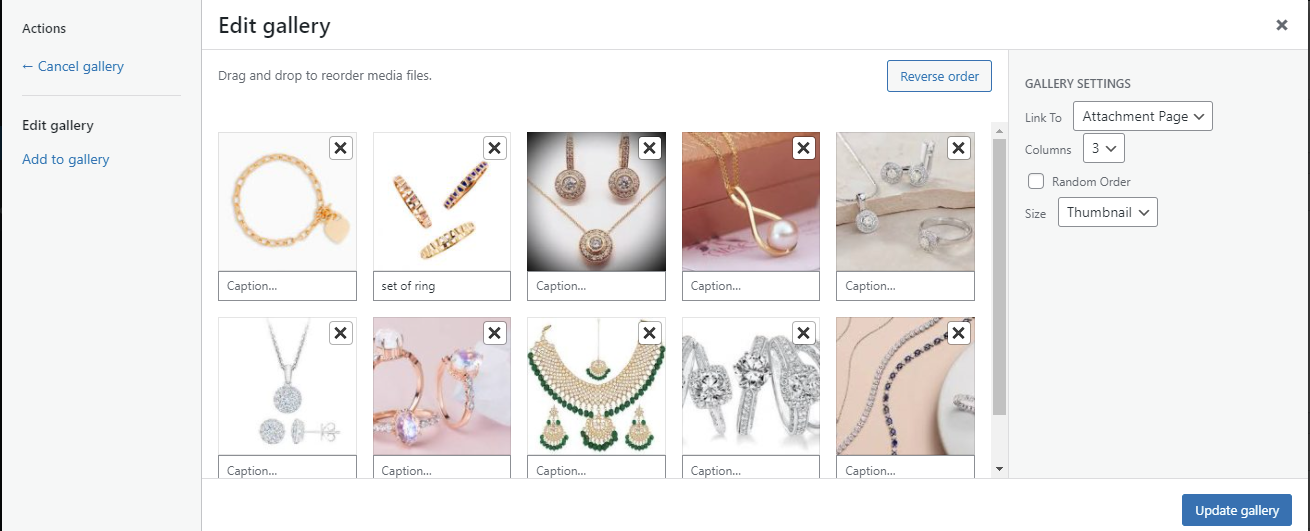
Stage 3: Add your image gallery to your page
At this stage, you are able to edit your gallery with ease. It allows you to reorganize the order of the images in your gallery with a drag and drop interface. In addition, you can easily add a caption below each thumbnail. In case that you want to remove any image, you can click on the X symbol to remove it quickly. What’s more, if you want to add more images, just click on Add to the gallery on the left sidebar and redo the same steps as before.
At Gallery Settings fields, you need to consider four options including:
- Links to: This option will link the image to the attachment page or to the source image file itself.
- Columns: You can optionally select the number of columns that you want to display. And 3 columns are recommended for most sites.
- Random order: If you tick on this option, your gallery will display your image thumbnails in a random order each time.
- Size: It allows you to change the size of each image. There are some available options including Thumbnail, media, large and full size.
After completing all settings, you can click on Insert gallery to open your gallery on the WordPress Editor.
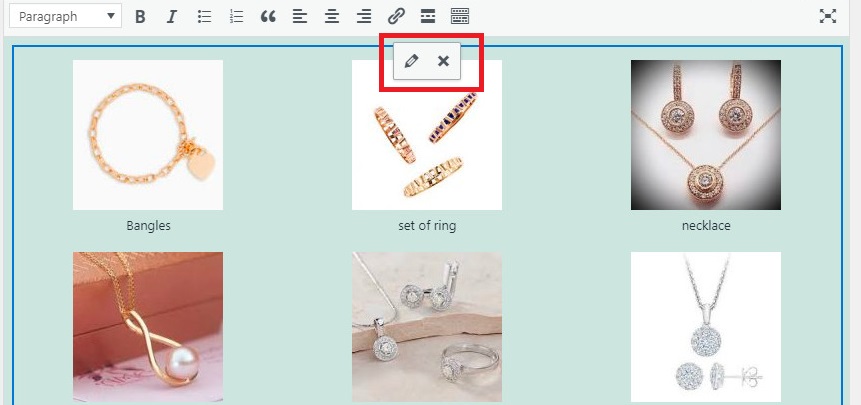
This is how it looks on the WordPress editor.
For any reason, if you want to edit, add images, add captions and much more, simply click on the pencil icon to edit. In addition, if you want to remove this gallery, let’s click on the X symbol. Don’t forget to click on the Public button to publish your page.
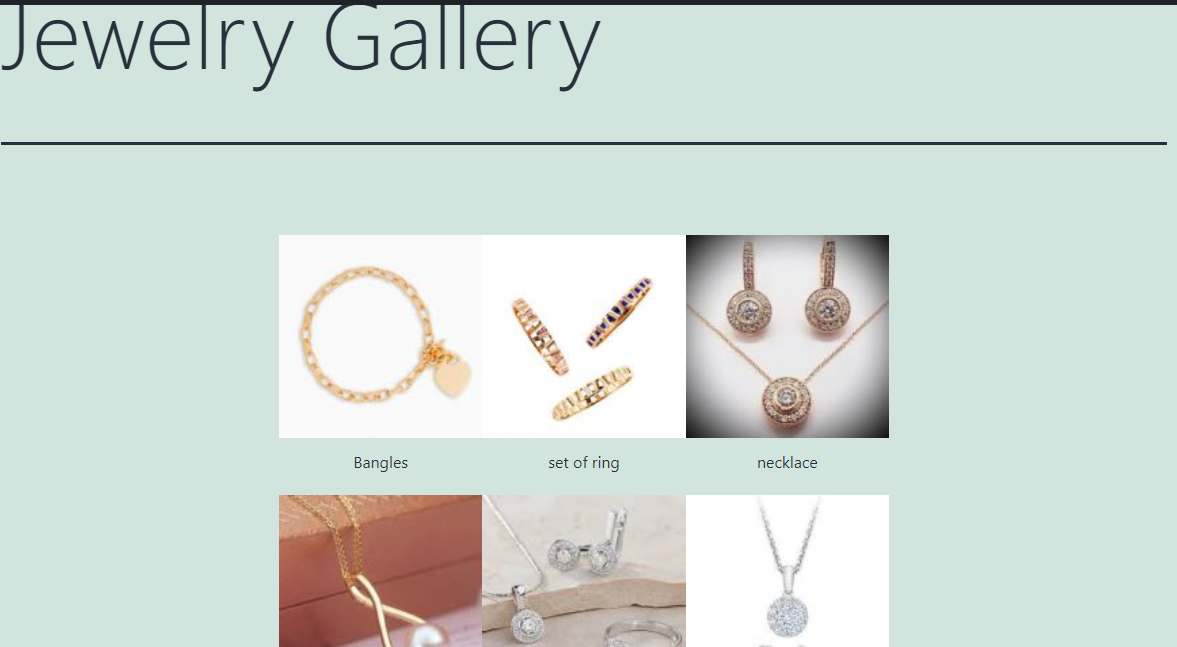
And now, our gallery looks like this after publishing.
Method 2: Using FooGallery Plugin
FooGallery Plugin is an easy-to-use image gallery plugin. It comes with a lot of stunning gallery layouts and effects. Thanks to that, your gallery looks attractive than ever. In addition, it is also responsive, retina-ready, and supports lazy loading to help you create an image gallery quickly. FooGallery has received a lot of positive feedback and 5-start ratings, so you can rest assured about the quality of this tool. Now, go over the following steps to create a beautiful gallery with FooGallery Plugin.
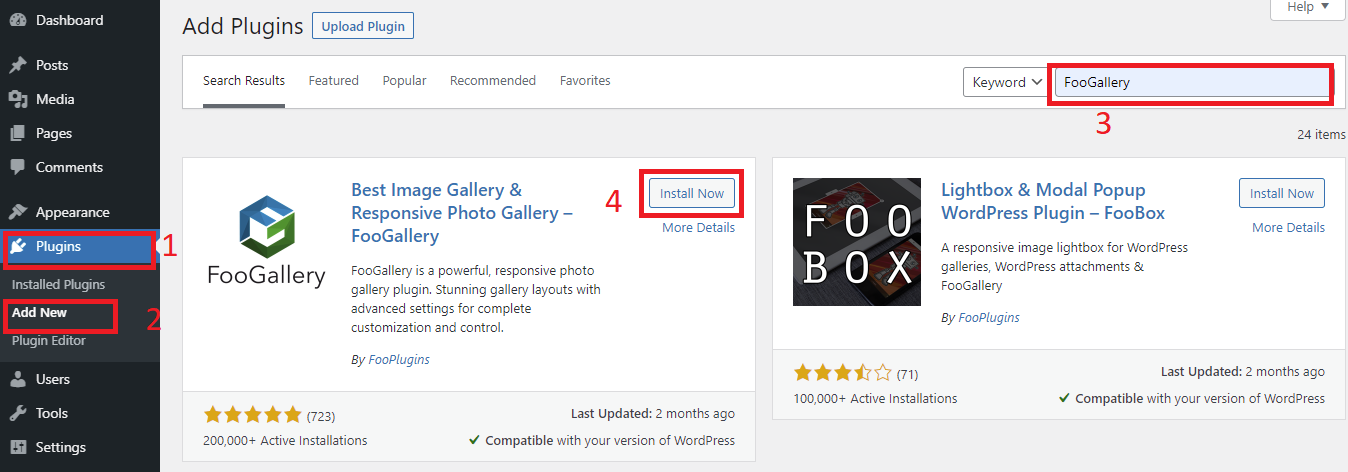
Stage 1: Installing and activating FooGallery Plugin
First thing, just go to Plugins>Add New on your dashboard, enter the FooGallery Plugin on the search bar. Now, quickly click on Install Now button and activate it.
Stage 2: Building a beautiful image gallery
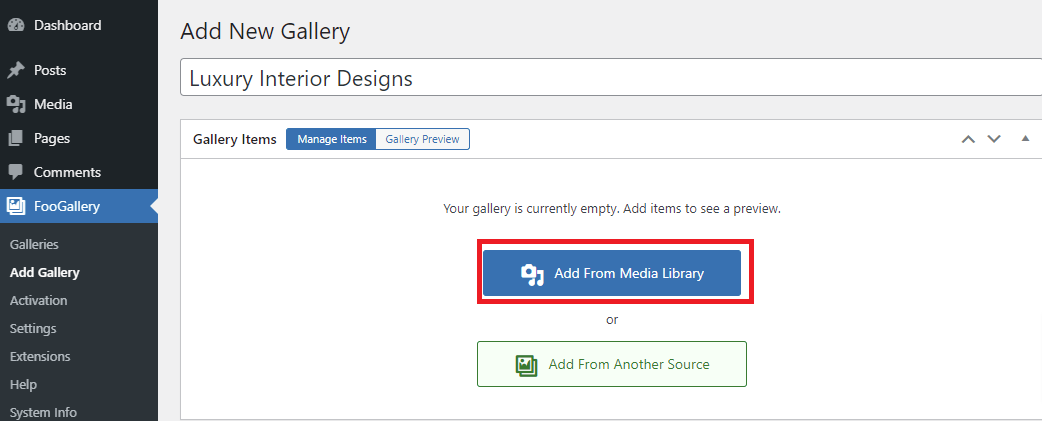
After you have installed and activated the plugin yet, you can start building your image gallery by switching to FooGallery> Add Gallery in your dashboard.
At here, you can enter a title to your gallery and click on Add From Media Library button to update the images you want to showcase.
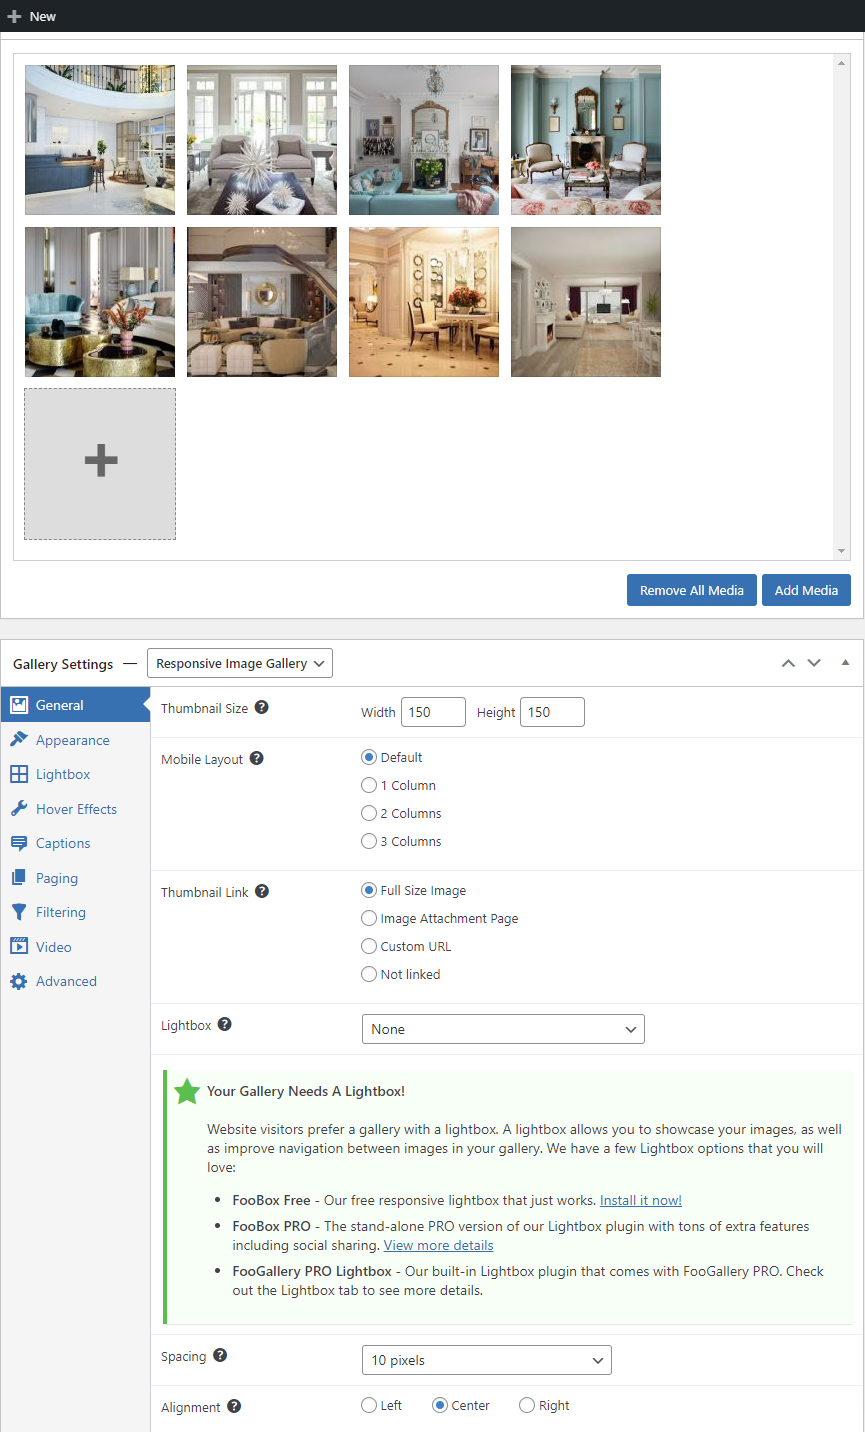
After that, you can modify some general options for your gallery by clicking on the General tab.
In our case, we will set the Width and Height of thumbnails to 150px. You can optionally choose layout when displaying on mobile.
The Thumbnails links option allows you to determine what occurs once the user clicks on one of the thumbnails. You can select the first option as in our case, your image will be displayed in full size. In case that you want to create a gallery with items images, you choose Custom URL to open a particular product page.
In addition, you can customize the spacing and the alignment depending on your preference.
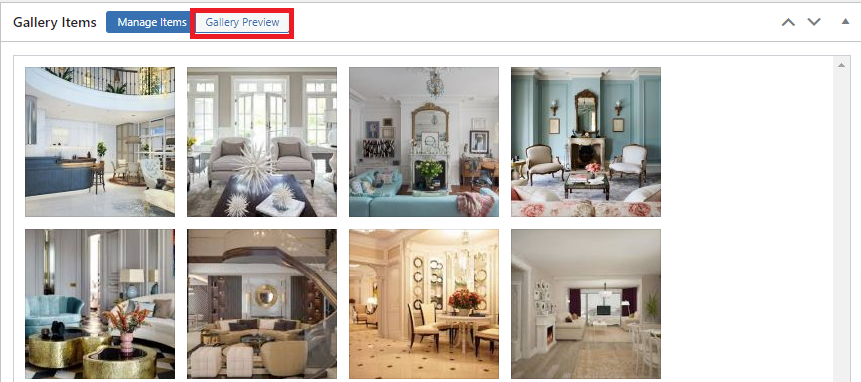
To view how your gallery looks after changing these settings, you should click on the Gallery Preview Buton.
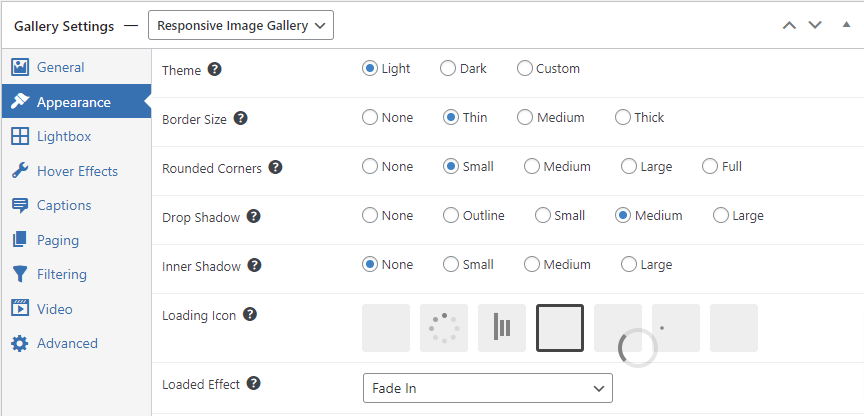
Under the Appearance tab, you can optionally customize the border size, choose a light or dark border, set the size for rounded corners. If the Rounded Corners is set to None, the thumbnails will be showcased as spare or rectangles.
The Loading Icon setting is utilized to decide the icon which display before the thumbnails have loaded.
You can set Loaded Effect to make your gallery more impressive after loading. In our case, we choose Fade In animation.
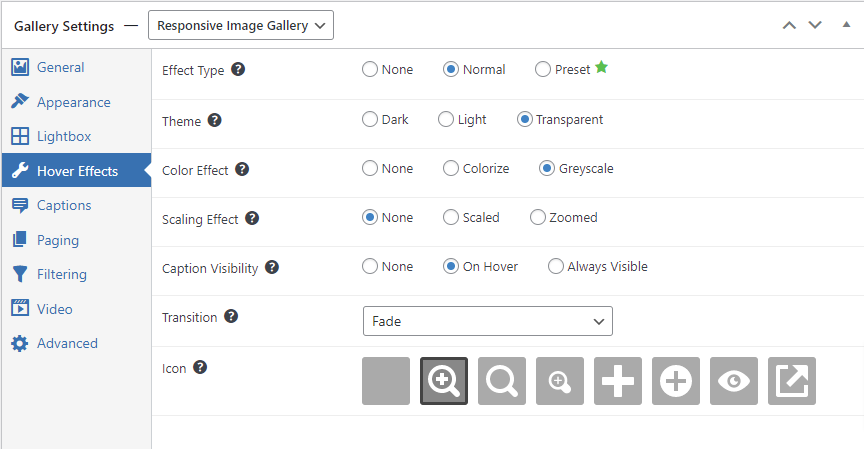
The next tab is the Hover effect, you can choose the type of effect, color effect, scaling effect, transition. This will make the thumbnails look more eye-catching and clear when a user hovers over them. For the Icon setting, this feature allows you to determine the icon that will appear in the overlay. It indicates the users know that when clicking on the thumbnails will display them the full size of the image.
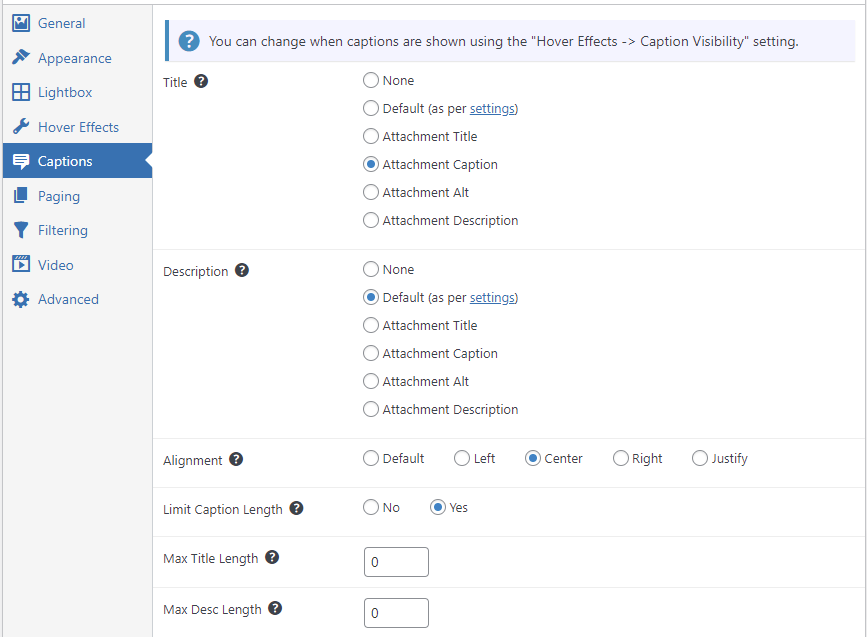
The Caption setting enables you to set which words to display as your title and description. You can also set the default for the title and description field so that your title and description will import from the same source. Else, you can customize these in the Cations tab for each gallery.
The alignment field allows you to choose the position where your cation appears on the left, right, or center of the thumb. You can optionally select justify captions or leave this field. And it means that the field will be set to default.
If you want to limit the caption length for the thumbnail, this plugin completely allows you to do that. And this will not affect the caption length when the image is opened in a lightbox.
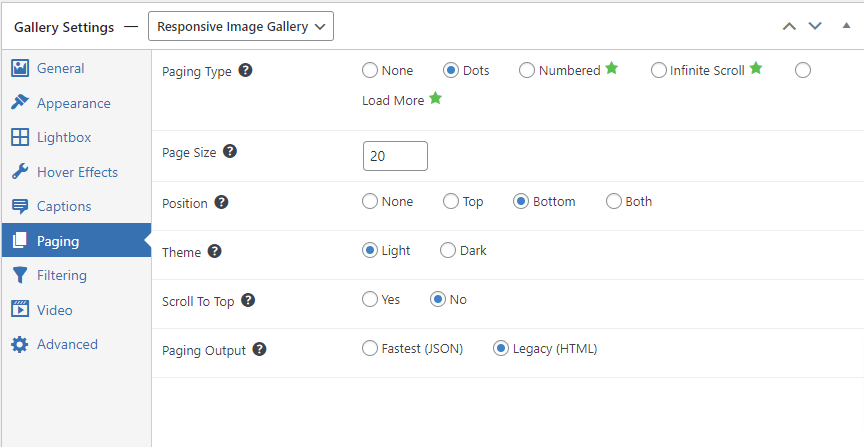
Next, switch to the Paging setting, this plugin provides pagination in the form of dots. So, in order to use Pagination, you need to choose select Dots at Paging Type fields. And then you will have more options for how you set up your gallery pagination.
You can set your page size, determines where the dot appears (at the top, bottom or both), choose the color of the dots ( either dark or light).
Scroll to Top enables the gallery to scroll to the top of the page once the page was changed. And lastly, you should consider choosing the JSON option or HTML option at the Paging OUtput field. This option depends on the number of images in your gallery. If this is a large gallery, JSON is recommended. And in contrast, you should choose HTML.
For the Filtering and video Tab, you need to upgrade to the pro version to use these features.
After creating a beautiful gallery, quickly click on Public and get your gallery shortcode as the screenshot image below. Then, you can paste it to any position on your page/post.
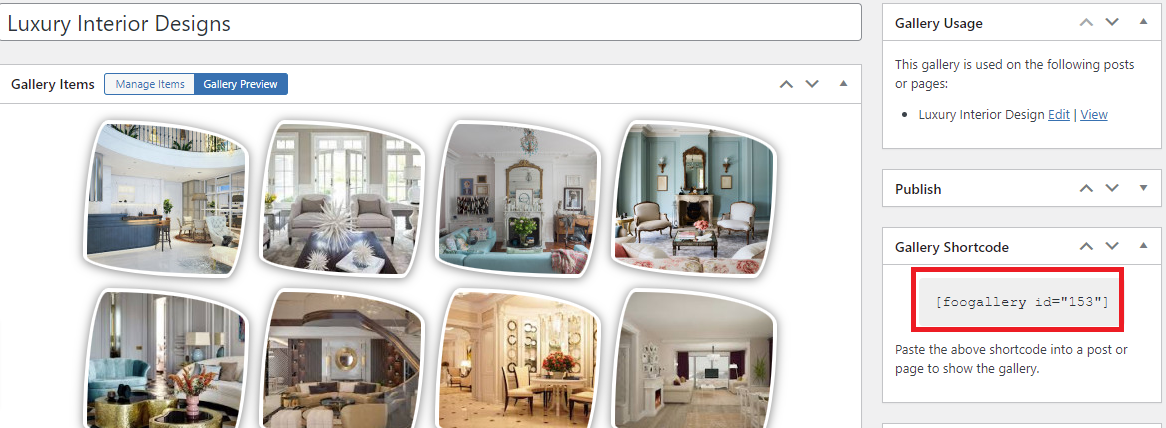
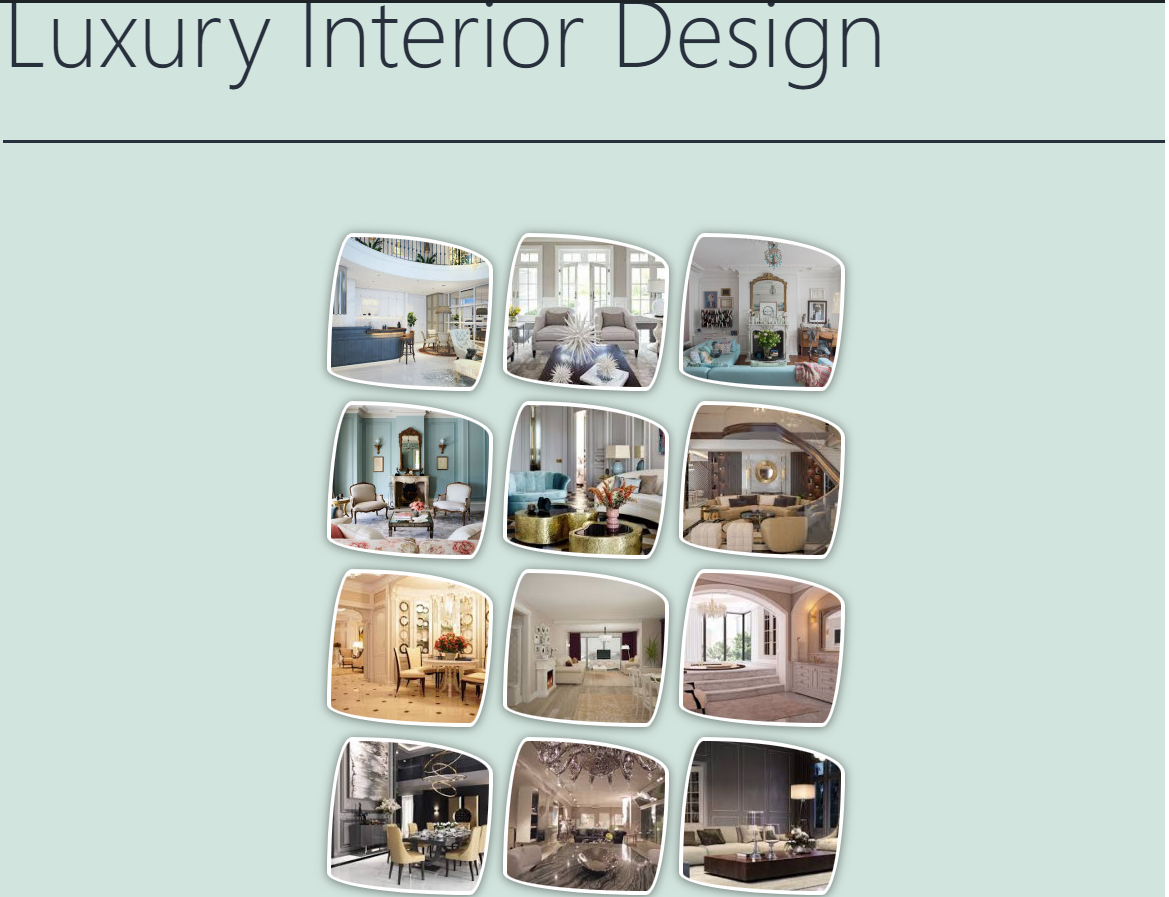
Now, let’s take a look at the result.
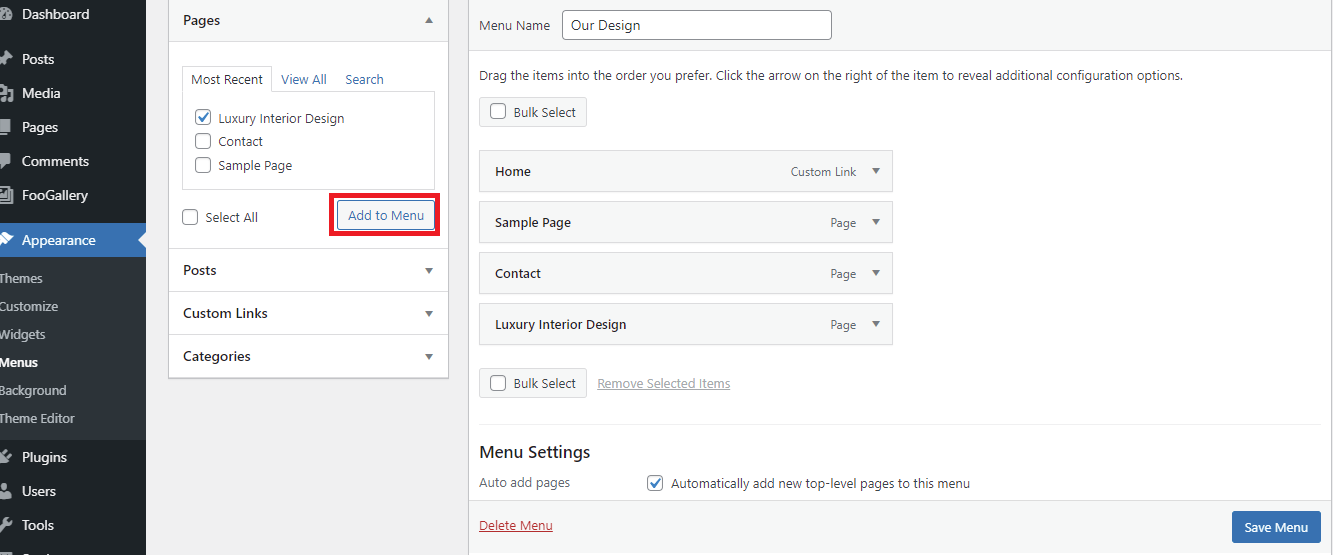
Stage 3: Adding your gallery to the menu
Simply visit Appearance>Menu and choose the page that you want to add to the menu. Click on Add to menu. In addition, you can optionally choose the position between elements. Don’t forget to click on Save Menu to save your changes.
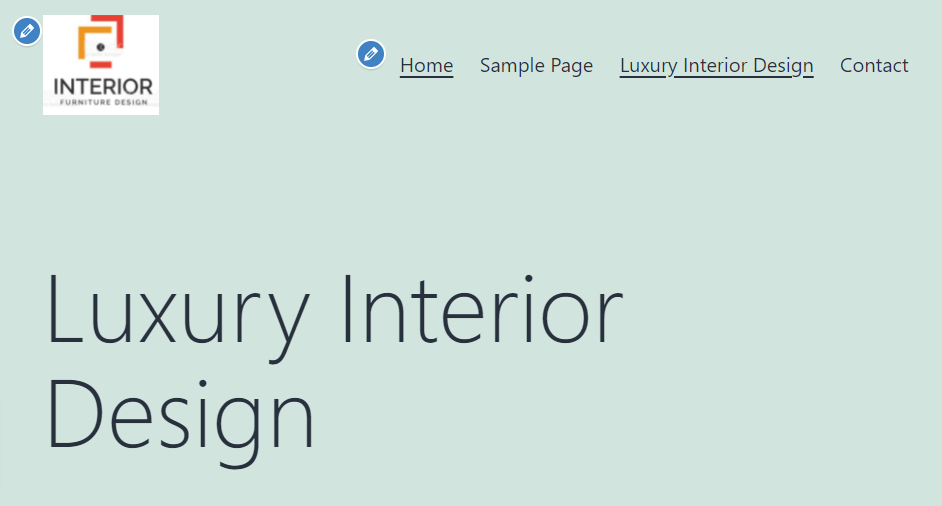
And this is how it looks on your page.
Summary
We have just provided the two easiest methods to assist you to create an impressive image gallery in WordPress. Hopefully, you can consider carefully and choose the best way to create a gallery for your site. If these solutions don’t meet your requirements, you can refer to other options by accessing WordPress Image Gallery Plugin to get one.
In case that you encounter any problems during the use of these solutions, don’t hesitate to leave a comment below, we are always ready to support you.

- Resolving the “Class JFactory Not Found” Error in Joomla When Upgrading to J6 - December 19, 2025
- The Utility Of VPNs For Site Authors And Admins - November 24, 2025
- Joomla! 6: What’s New and How to Upgrade from Joomla! 5 - October 23, 2025


")


Recent Comments