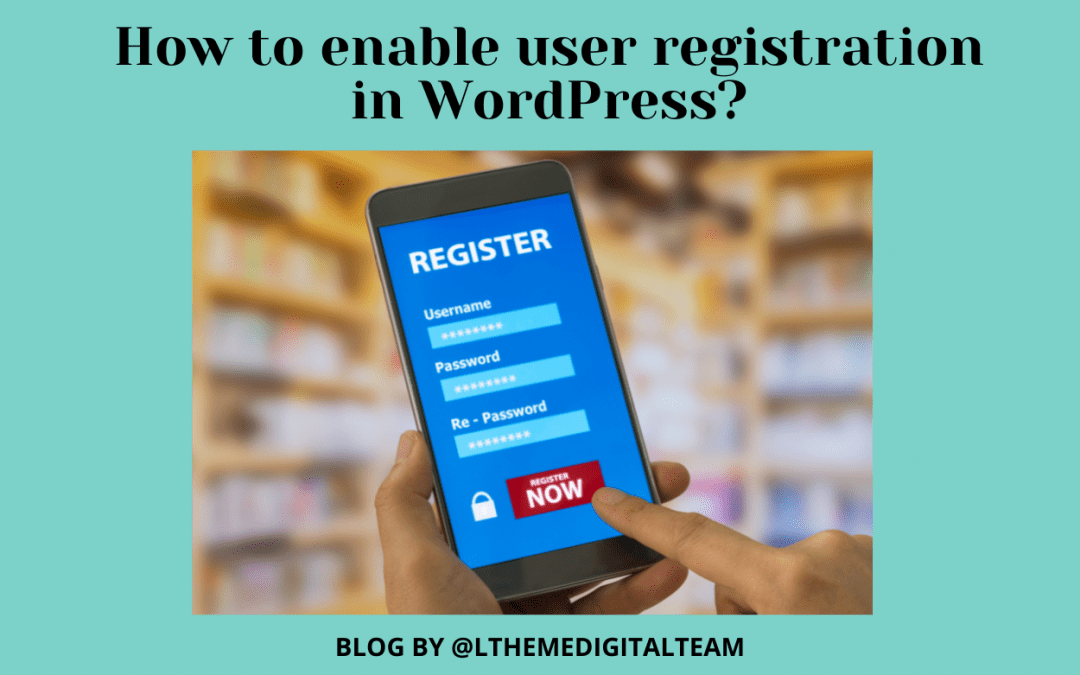
Are you going to turn your WordPress site into a membership site? It is necessary for you to enable User Registration in WordPress. This article covered all steps to allow User Registration on your WordPress site without effort. Let’s discover right now.
Why should you enable User Registration on your WordPress site?
There are numerous reasons why you should allow User Registration on your website including:
It helps you easily make accepting guest posts.
If your customers have a need to contribute their blogs to your website, allowing your guest bloggers to register to your site and submit them as a new Contributor will make things more effective for you. Because you will not need to receive guest posts via email and consider them before publishing the posts. This method takes you a lot of time to resolve.
It can turn your WordPress site into a membership site
In fact, WordPress allows you to create special content on your website that only enables registered users to access it. You can do this by making your post private and assigning particular users as contributors or subscribers.
You can collect a lot of useful information for marketing campaigns
When the users fill up the user registration form, you will get some important data from the users including email addresses, names, and much more. Therefore, when you get in touch with them and send them content, promotions, and offers. In addition, you can automatically send your message or notification to your subscribers via email.
How to enable User Registration on your WordPress site?
Now, we are going to demonstrate a step-by-step guide via the following section. Let’s check them out.
Enabling User Registration in WordPress
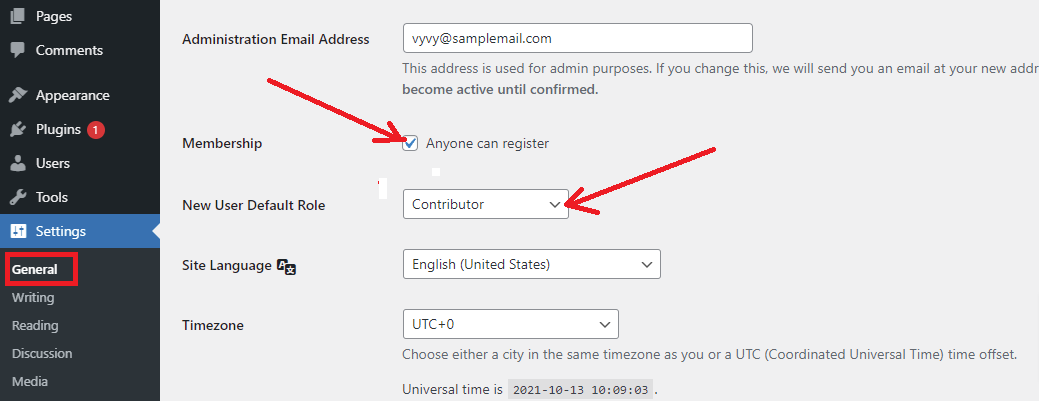
To display register and login links on your WordPress site, first of all, you have to enable user registration on your settings page. By default, this setting is turned off, you need to turn it on by going to Settings > General page in your dashboard.
Let’s find the Membershipsection, and tick the Anyone can Register option.
Then, you need to pick the default user role. This user role will be assigned to each new user who registers on your WordPress. Each user role in WordPress has its own permissions and capabilities.
By default, the user role for registered users is the Subscribe role. If you want to change it to another user role. Simple click on the arrow symbol and choose the user role from the drop-down menu.
Note: let’s make sure that you never assign the Administrator role for registered users.
And don’t forget to click on the Save Changes button before moving to the next step.
Adding Login and Register Links in WordPress
Now, you can enable the users to register and login on to your website. It is time to add the links to the login and registration page. There are several ways to help you to do that. In today’s tutorial, we are going to add the register and login links with 2 methods:
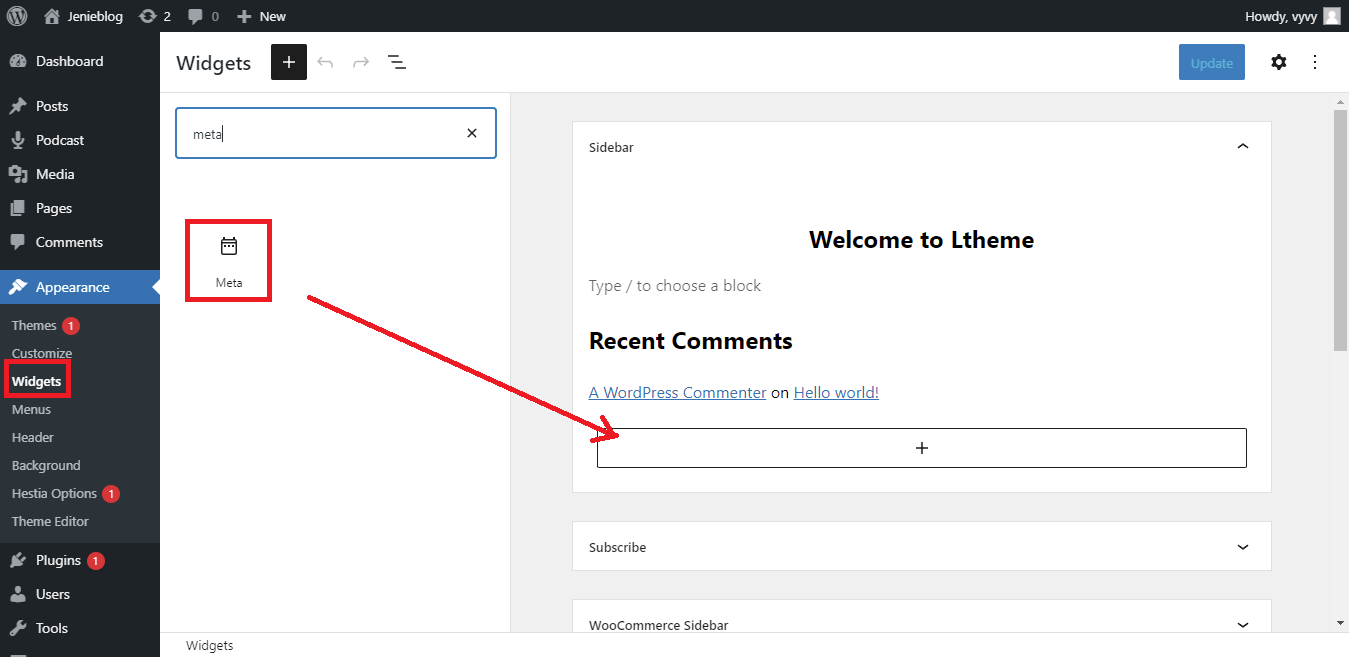
Using the Meta widget in the WordPress sidebar
Using the support of WordPress User Registration plugins.
Method 1: Using the Meta Widget in the WordPress Sidebar
Firstly, you need to visit Appearance > Widgets and then search the Meta widget on the search bar. Simply drag this widget to the WordPress sidebar area.
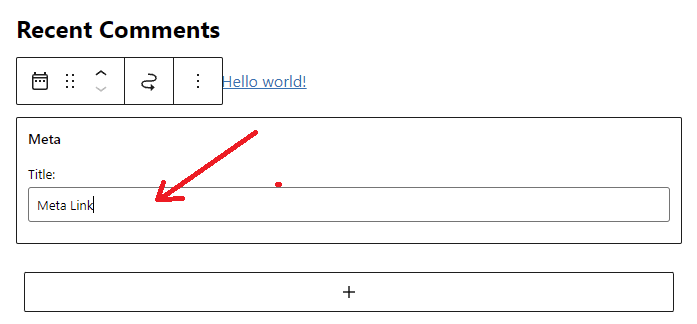
Here, you can fill in the title in the meta box. Let’s click on the Update button in the top right corner of the screen.
Here is how it looks on your website.
Method 2: Creating Custom Login and Register pages by using a plugin
The developers have designed a lot of powerful plugins to support you build your desired website. And in order to create custom login and register pages, we will use the Ultimate Member plugin that is one of the most excellent and effective WordPress User Registration plugins. This plugin is extremely easy to use. You don’t need to touch any complicated line of code. It allows you to display custom login and register pages by using a shortcode.
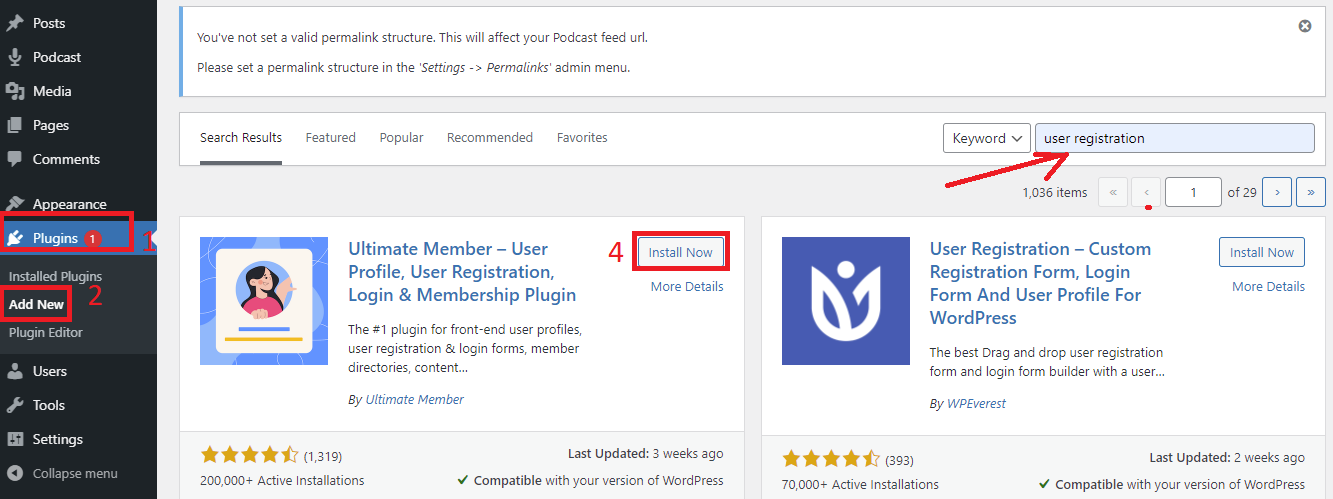
Step 1: Install and activate it
Now, you need to install and activate it by going to Plugins > Add New. And then enter the Plugin’s name on the search bar. Quickly click on the Install Now button and activate it.
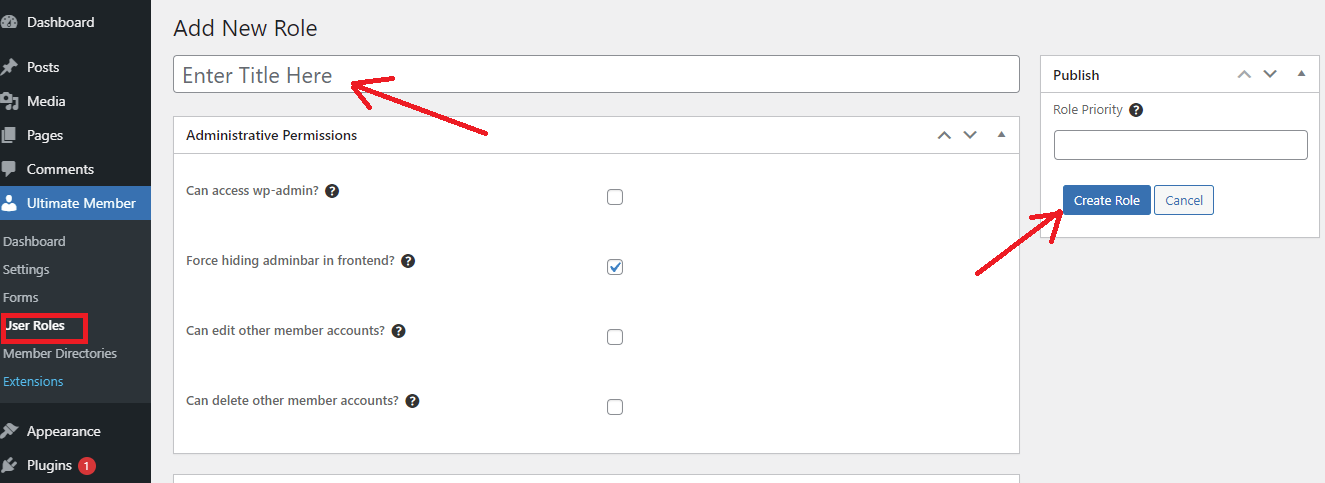
Step 2: Adding a new user role
Ultimate Member plugin allows you to add a new user role depending on your purpose, you only need to visit Ultimate Member >User Roles and click on the Add New button.
Here, you can type the name for the new user role. In addition, you can assign the permission and capabilities for the new user role. After that, click on the Create Role button to finish.
Step 3: Creating a registration form
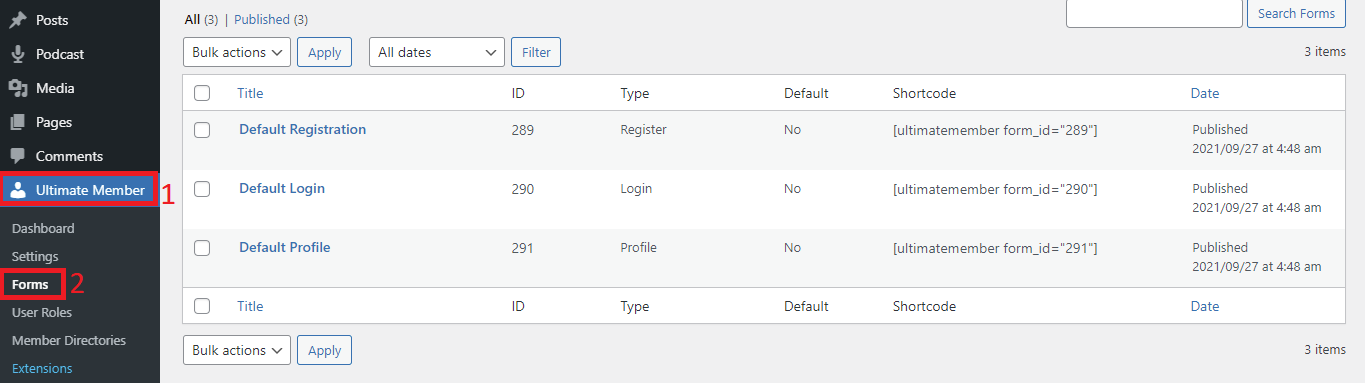
After installing and activating the plugin, you need to navigate to Ultimate Member > Forms pages.
Here you will see that by default, Ultimate Member automatically created three types of forms including:
Registration form
Login form
Profile form
Have look at the shortcode column. You can see that each form has its own shortcode. If you are interested in the default form, you can copy this shortcode and paste it to the page that you want to display this form.
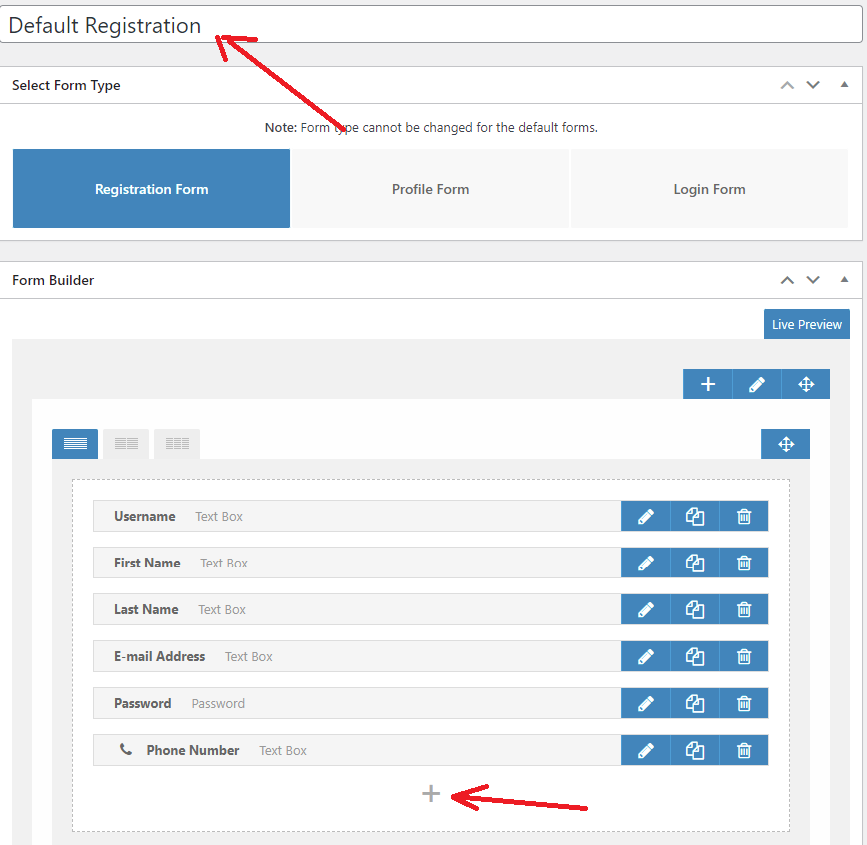
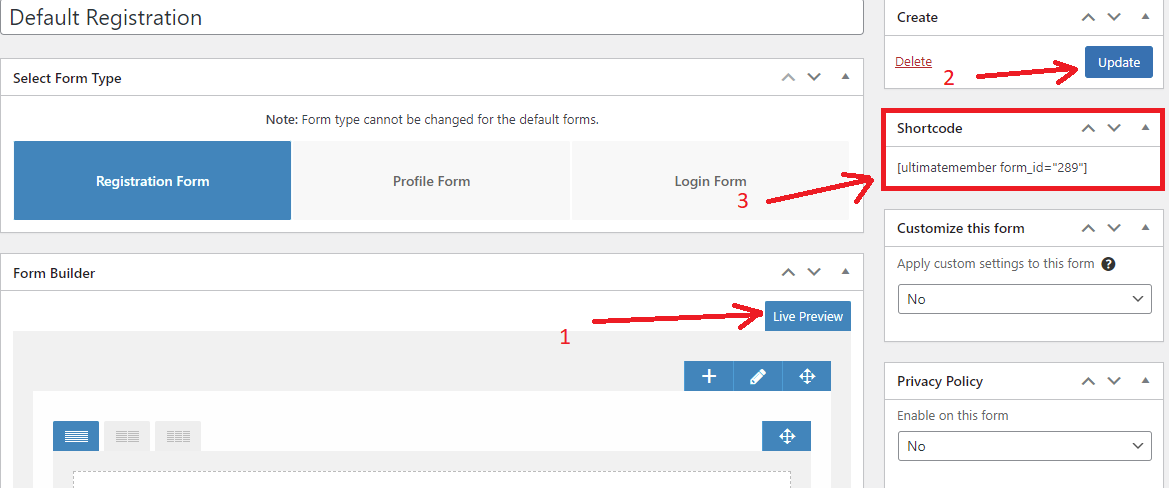
Otherwise, let’s click on the Registration form to edit it.
Here, it allows you to change the name of the form. In addition, you can also rearrange the order of fields in your form by dragging and drop them.
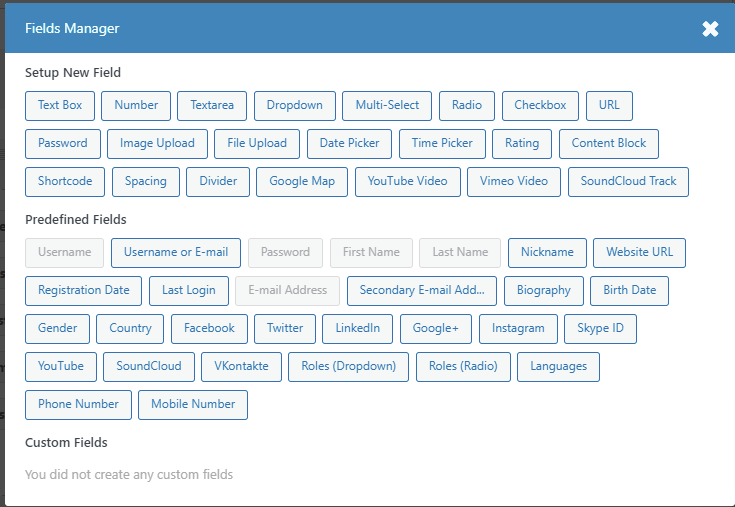
If you want to add a new field, let’s click on the “+” symbol at the bottom of your form.
This will open the popup window where there are a lot of predefined fields that you can add to your form. In addition, you can set up a new field depending on your purposes.
Let’s take a look at the right-hand sidebar, you will see the Customize this form section. There are a lot of options including:
Make this profile form role-specific: it allows you to assign a role to the form which will give anyone signing up to your site via this form that role
Template – This option is intended for advanced users and developers, you can leave this option
Max Width (px)– With this option, you can set a custom max-width which will be applied on larger devices
Alignment– This option enables you to decide the alignment of the form on the page. You can choose to align the form to the left, center, or right.
Field Icons: It allows you to select the appearance of font icons on the form. There are three options for you to select from Show with label, inside text field , and turned off.
Primary button text: With this option, you can customize the text that appears inside the primary button.
Show secondary button: You decide whether or not to show the secondary button on the registration form.
Secondary button text: This option lets you to customize the text that appears inside the secondary button.
If you are satisfied with your form, let’s click on the Live Previewbutton to see how it look. Then hit the Update button to save your changes. Quickly copy the shortcode of this form and paste it to the register page.
Now, visit your website to view the register page.
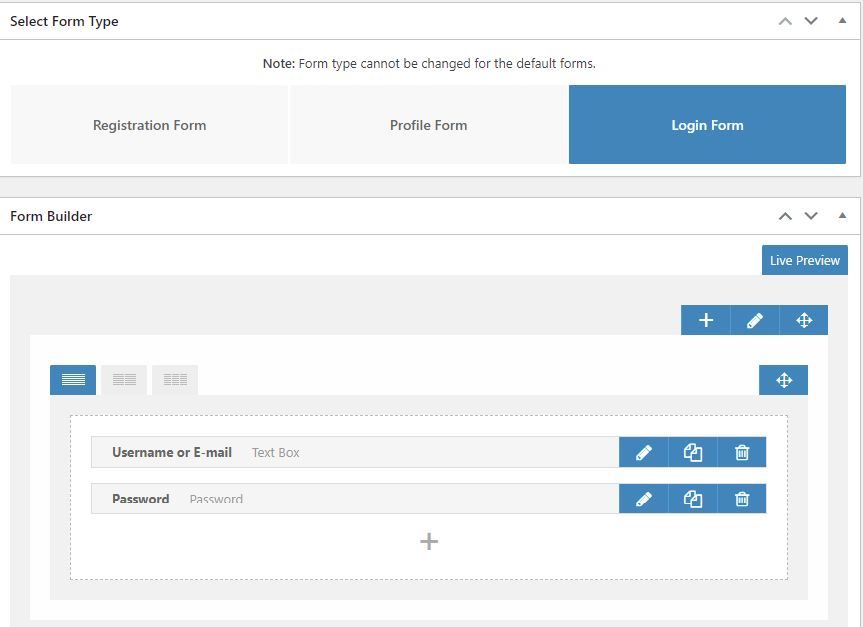
Step 4: Creating a login form
The process of creating a Login form is similar to the registration form. Just click on the Login form in the Form type box.
This plugin created a form with the login fields. You can add additional fields to the form by clicking on the “+” symbol and choose form available fields on the popup window.
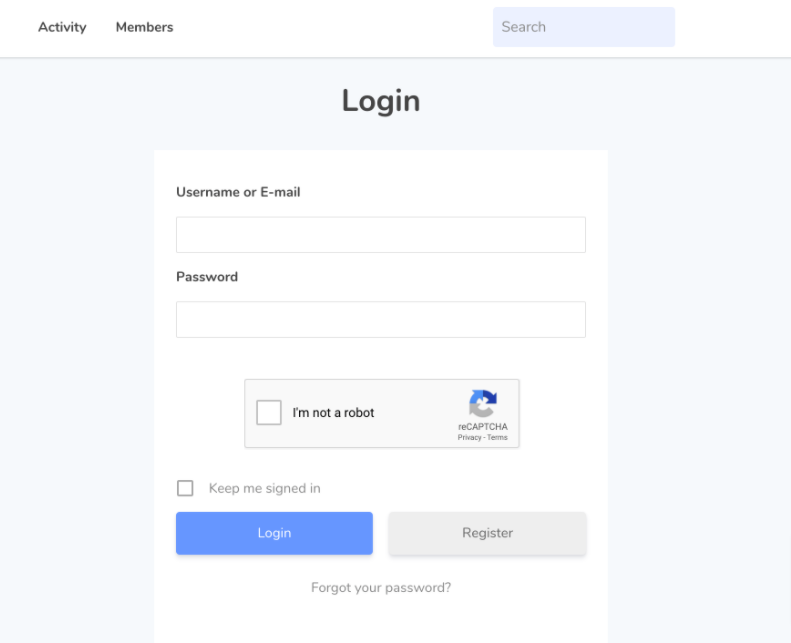
Similarly, click on the Update button and copy the shortcode to paste it to the login page.
Now, you can visit your website to see your custom login form in action.
Summary
In nutshell, enabling user registration on your WordPress site is pretty necessary for your site to build a membership site. Hopefully, through this tutorial, you can master the steps to enable user registration in WordPress by yourself. If you have any queries or need our support, please leave a comment below.
By the way, our free WordPress Themes has a wide array of appealing, SEO-friendly, fully responsive themes that can be used for various topics. Let’s visit and try one for your site.
Welcome to LT Digital Team. We make daily blogs for Joomla! and WordPress CMS, support customers and everyone who has issues with these CMSs and solve any issues with blog instruction posts, trusted by over 1.5 million readers worldwide.
Latest posts by LT Digital Team (Content & Marketing) (see all)
We use cookies to improve your experience on our website. By browsing this website, you agree to our use of cookies.
Functional
Always active
The technical storage or access is strictly necessary for the legitimate purpose of enabling the use of a specific service explicitly requested by the subscriber or user, or for the sole purpose of carrying out the transmission of a communication over an electronic communications network.
Preferences
The technical storage or access is necessary for the legitimate purpose of storing preferences that are not requested by the subscriber or user.
Statistics
The technical storage or access that is used exclusively for statistical purposes.The technical storage or access that is used exclusively for anonymous statistical purposes. Without a subpoena, voluntary compliance on the part of your Internet Service Provider, or additional records from a third party, information stored or retrieved for this purpose alone cannot usually be used to identify you.
Marketing
The technical storage or access is required to create user profiles to send advertising, or to track the user on a website or across several websites for similar marketing purposes.


")


Recent Comments