Creating flipbox overlays and hovers in WordPress is one of the useful features to enhance your website’s appearance as well as the feeling of your site’s visitors. However, many people still don’t know how to use this feature. In this blog, we provide you with a detailed guide to resolve it. Let’s keep reading.
What is a flip box and Why should you use it?
A flip box is a common effect that appears when your visitors hover their mouse over it. Using a flip box is an efficient method to add engaging effects to an image. Especially, if your website has limited space and you can’t add the image description for each image. Using a flip box will help you save much space by displaying more information in the back of the flip box when visitors hover over the image.
In addition, you can show a lot of impressive elements when using a flip box, for example, you can get to combine the power of an infobox and a call action.
Moreover, this feature brings your site’s visitors the best experience when visiting your website.
How to Create Flipbox Overlays and Hovers in WordPress
There are several ways that allow you to add hover effects in WordPress. If you have rich code knowledge, you can create flipbox overlays and hovers in wordpress by adding CSS code. However, this method may take a lot of time to edit and format. Hence, in today’s tutorial, we are going to guide you easily create image hover effects by using a plugin.
One of the easiest methods to create this effect is that you can use Flipbox – Awesomes Flip Boxes Image Overlay plugin. This tool allows you to simply add custom flip box effects to your WordPress images.
To use this plugin, first of all, you need to install and activate it.
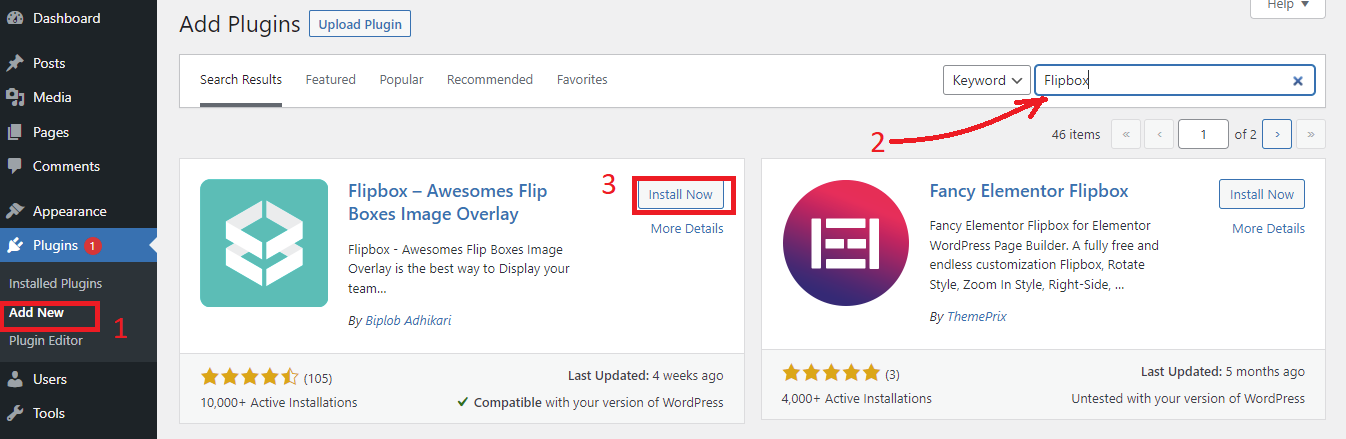
Step 1: Install plugin
Just similar to other plugins, you only need to go to Plugins > Add New from your dashboard menu. Then using the search feature to look for the plugin. Quickly click on the Install Now button and Activate it.
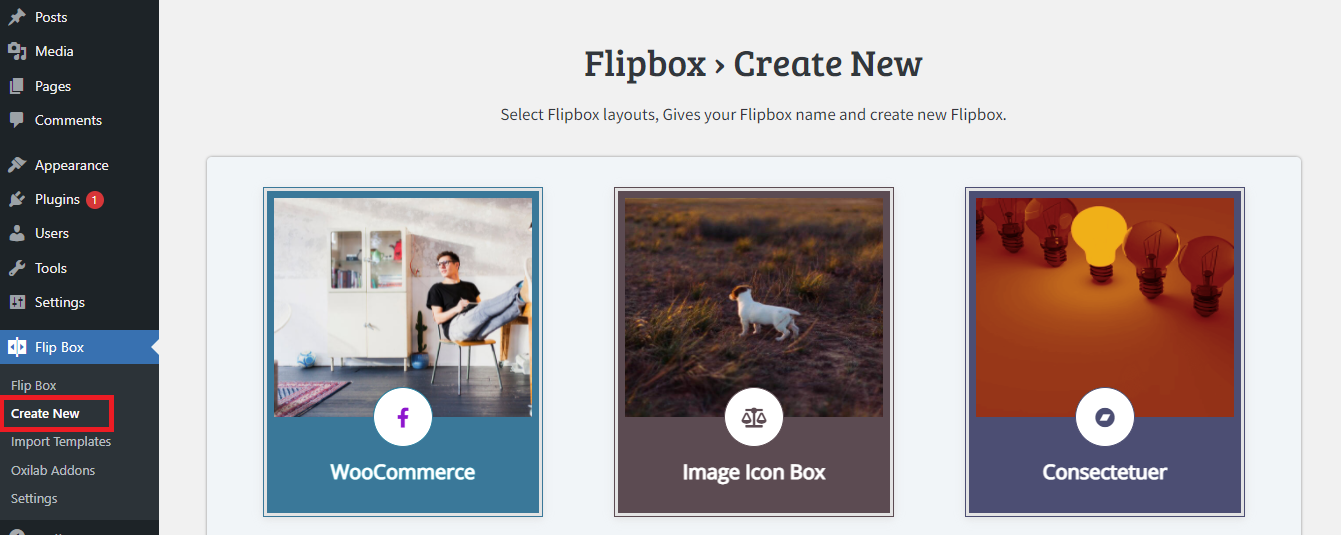
Step 2: Choose a template and customize your flipbox
After you have installed this plugin yet. Let’s go to Flip Box > CreateNew to start creating your first flip box.
From there, you will see a list of different templates offered by the plugin. The free version of this plugin provides you with 5 templates with various styles to choose from.
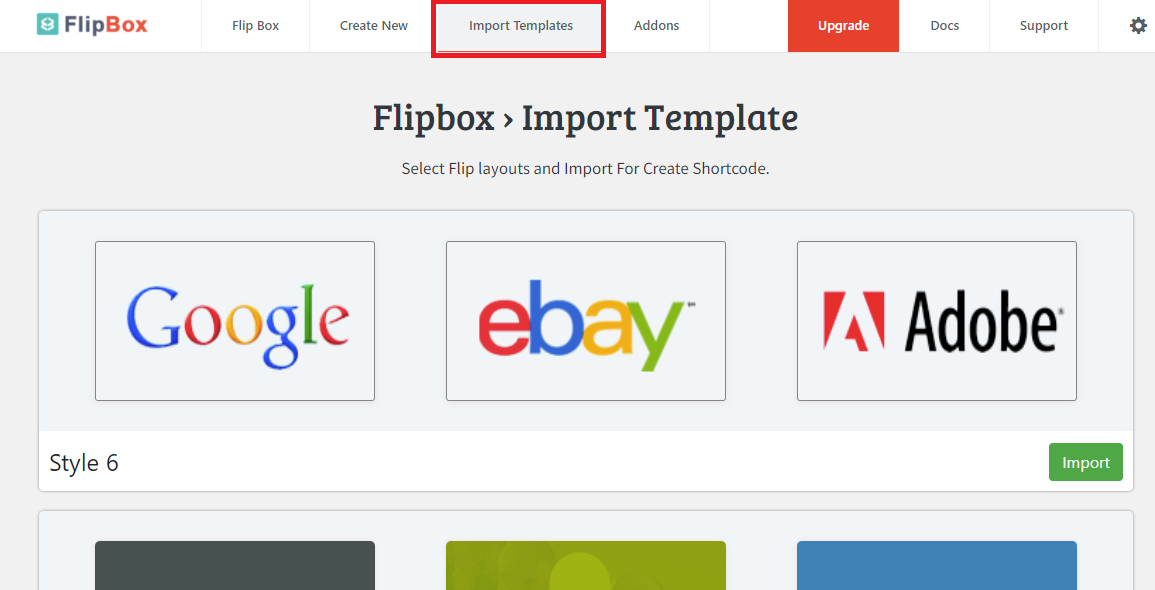
If you want to get more styles, you can click on the “Import templates” to open 5 more templates that you can use.
To import a new template, simply click on the “Import” button.
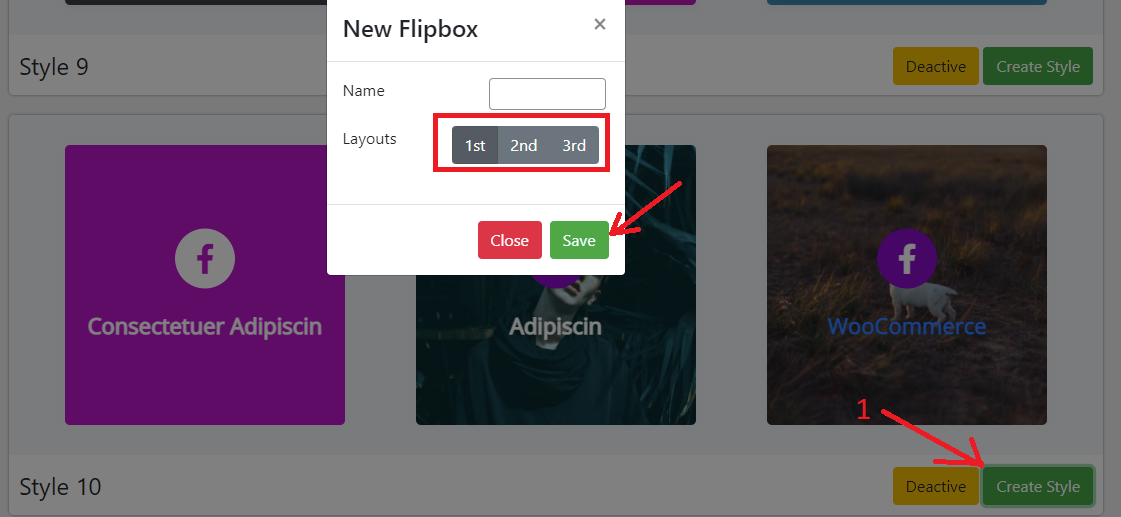
Now, you can select any templates to start customizing them. Then click on the “Create Style” button. This will open a popup window where you can give your flip box a name and select which layout you want to customize.
The 1st, 2nd, and 3rd layout options will correspond to the individual flip box in the layout. So you can refer to the flip box template before picking a template that you want to use.
After you have made your selection, let’s click on the “Save” button.
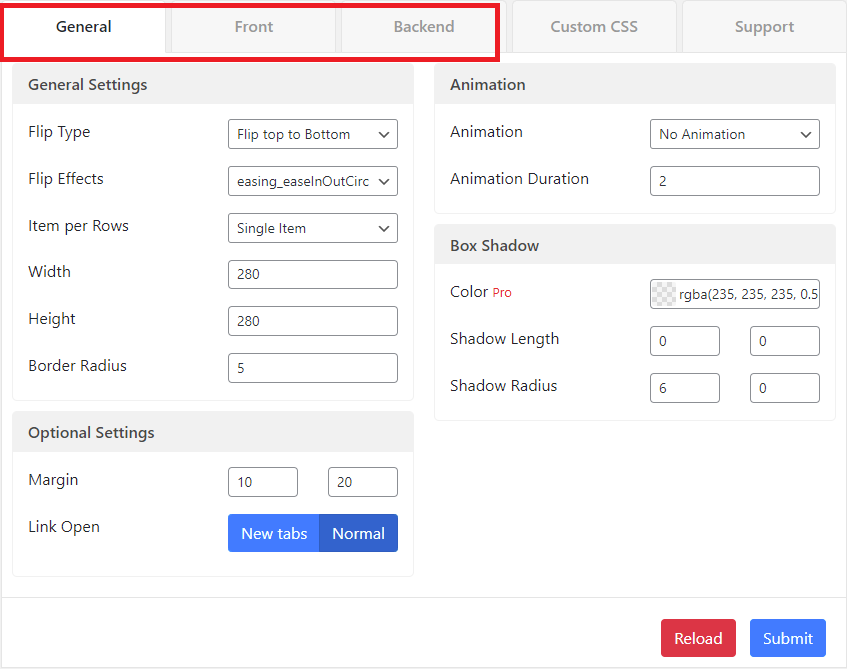
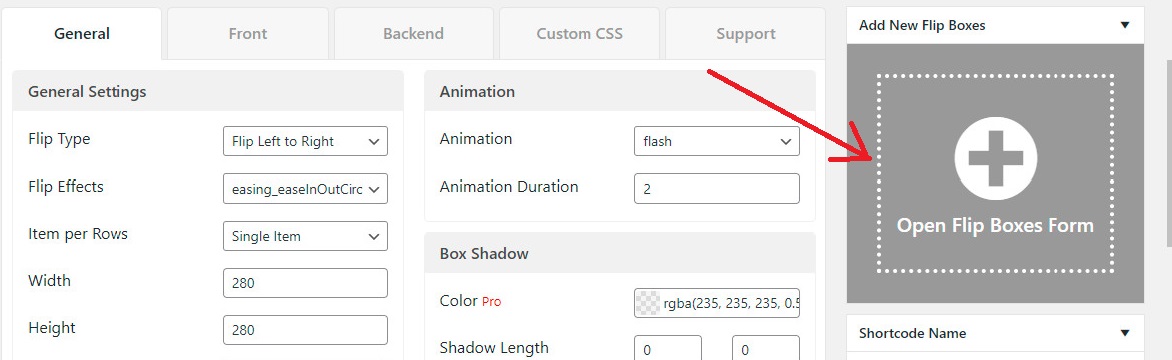
From here, you change the appearance of your flip box with many options. You only need to be concerned with three main tabs including “General“, “Front“, and “Backend“.
On each tab, the plugin allows you to change the font, padding, color, margin, and much more. You can optionally change it to suit your preference. However, to save much time, you can use the default template instead of customizing because the default option also looks perfect.
Next, let’s scroll down the screen, you will see the Preview section.
Simply hover over the flip box and click on “Edit“.
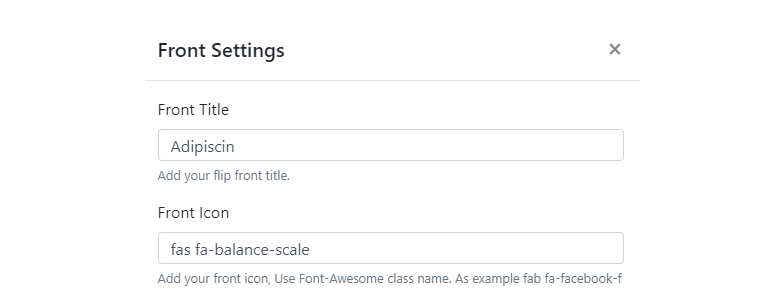
This will open a popup where you can change the text on both sides of the flip box and background image.
Let’s edit the “Front Title” text box to change it into your own title. In addition, you can change the “Front icon“, if you want to display another icon.
Next, if you want to add your own background image, let’s click on the “Upload Image” button under the “Front Image” option. Then it opens your media library where you can choose from your existing images.
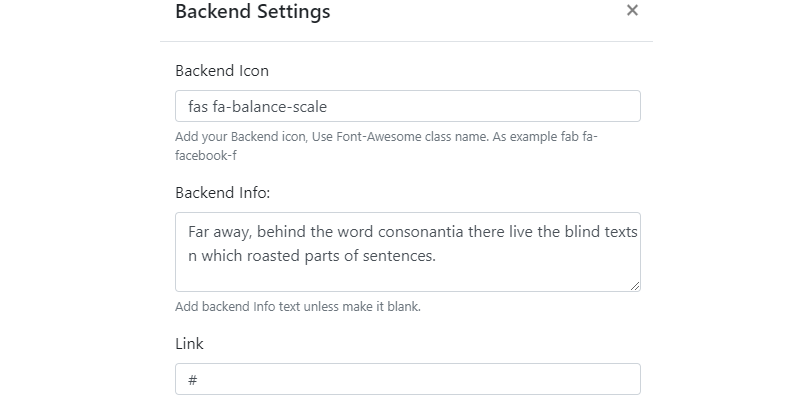
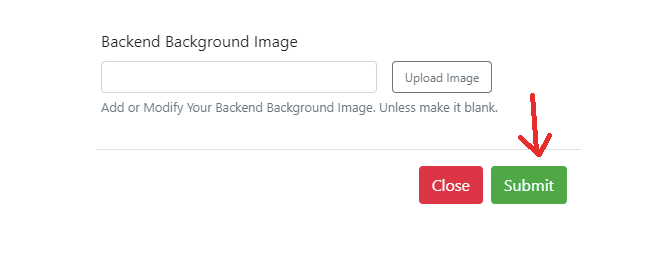
Under the Backend Settings, you can change the title and text that showcase once the card flips. Besides that, you can also change the “Backend Info” and “Link” field fields.
Finally, you click on the ” Upload image” button to change the background image on the back of the flip box. This process is similar to the process that you have done with the front image.
Once you are pleased with your editing, don’t forget to click on the “Submit” button to save your changes.
Now, you can see your new changes in the “Preview” section.
Moreover, whether you want to create an entire row of flip boxes, let’s click on the “+” symbol in the “Add New Flip Boxes” meta box.
This will open a popup window that is also similar to the one above. Here you can customize your second flip box.
Step 3: Display flip box on your post/page
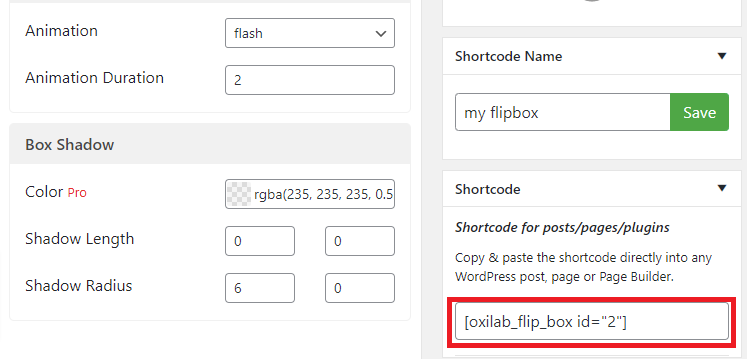
After you have done your desired flip box, have a look at the “Shortcode” meta box on the right-hand side of the screen.
Quickly copy this shortcode and then paste it on your page or post where you would like to add the flip box.
Then click on the “Publish” or “Update” button, you will see it in action.
Step 4: Display flip box at your preferred location by using a widget
This plugin also offers you a flip box widget that you easily add to any area supported by your theme.
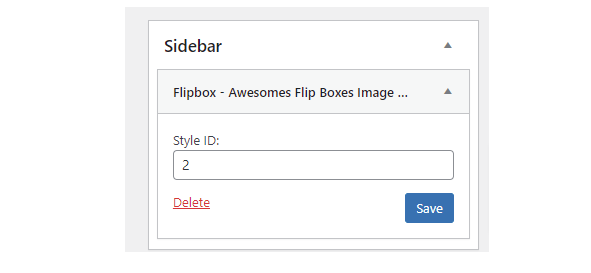
To do this, initially, you need to navigate to Appearance > Widgets and find the “Flipbox-Awesomes Flip Boxes Image Overlay“.
Quickly drag and drop this widget to your desired location.
Next, you need to input the style ID that can be displayed in the main Flipbox plugin menu and then click on the “Save” button.
Summary
Hopefully, through this article, you learned how to create Flipbox overlays and hovers in WordPress. If you encounter any problem during the process of using this method, you can mention it by leaving a comment below. We are always willing to support you.
Last but not least, you can spend a little time visiting our free WordPress Theme to explore hundreds of SEO-friendly, gorgeous themes, and templates for your website.
Welcome to LT Digital Team. We make daily blogs for Joomla! and WordPress CMS, support customers and everyone who has issues with these CMSs and solve any issues with blog instruction posts, trusted by over 1.5 million readers worldwide.
Latest posts by LT Digital Team (Content & Marketing) (see all)
We use cookies to improve your experience on our website. By browsing this website, you agree to our use of cookies.
Functional
Always active
The technical storage or access is strictly necessary for the legitimate purpose of enabling the use of a specific service explicitly requested by the subscriber or user, or for the sole purpose of carrying out the transmission of a communication over an electronic communications network.
Preferences
The technical storage or access is necessary for the legitimate purpose of storing preferences that are not requested by the subscriber or user.
Statistics
The technical storage or access that is used exclusively for statistical purposes.The technical storage or access that is used exclusively for anonymous statistical purposes. Without a subpoena, voluntary compliance on the part of your Internet Service Provider, or additional records from a third party, information stored or retrieved for this purpose alone cannot usually be used to identify you.
Marketing
The technical storage or access is required to create user profiles to send advertising, or to track the user on a website or across several websites for similar marketing purposes.


Recent Comments