In this article you will get detailed instructions on setting up blog for your Helix Ultimate templates. Your blog will be set in this area (as the image below). It allows you to enable some appearance elements as social share, author info button.
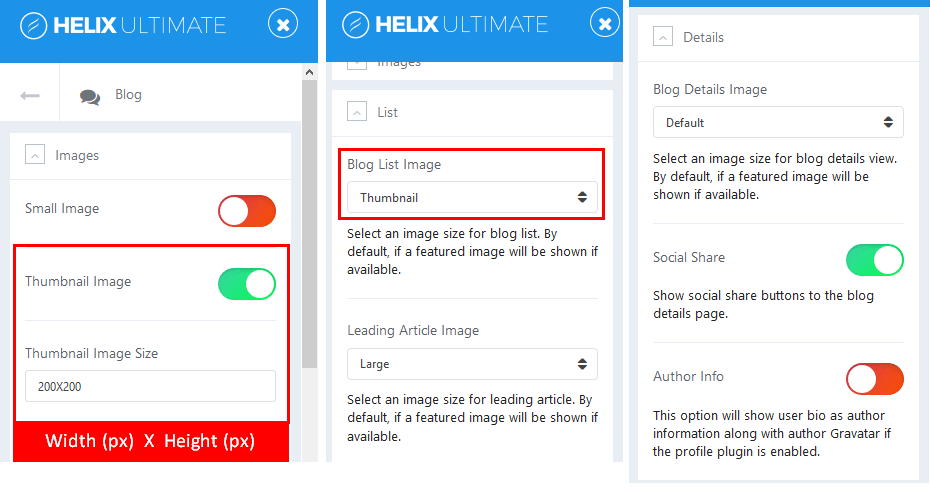
Image by Joomshaper
Images
This option allows you to set image size and resolution that are used inside different article views.
Crop Quality
Used to set image quality for better compressions for images size resolution. (for JPG images only).
Blog List Image
You can select an image size for blog list. By default, it will show featured image if available.
Leading Article Image
It allows you to select an image size for leading article. By default, it will show featured image if available.
Blog Details Image
It allows you to select an image size for blog details view. By default, it will show featured image if available.
Social Share
Show social share buttons (Facebook, Twitter, LinkedIn, Google+) to the blog details page. By default, they will be shown in top right corner.
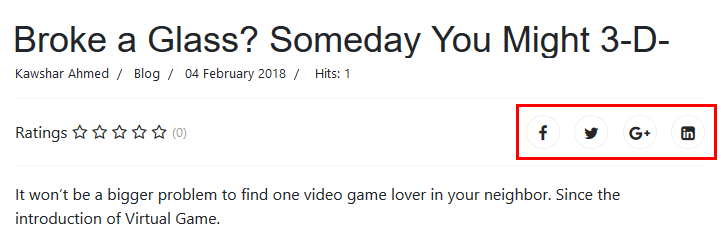
Image by Joomshaper
Author Info
Enable this option if you want to show bio as author information along with author profile image taken from Gravatar if the profile plugin is enabled.
By default, images ate shown at 64px by 64px. It’s taken from Joomla user email. If an email address has no matching Gravatar image, it will show blue box with gravatar logo inside.
Comments
You can add IntenseDebate Comments system, Facebook comments and / or Disqus Comments to your Joomla website. It allows your readers to log in via their social network and leave comment under your article.
Make sure you choose and set the correct Facebook Application ID, IntenseDebate Account or Disqus Username/Subdomain. You can use only one selected social comments system or disable it and use your own.
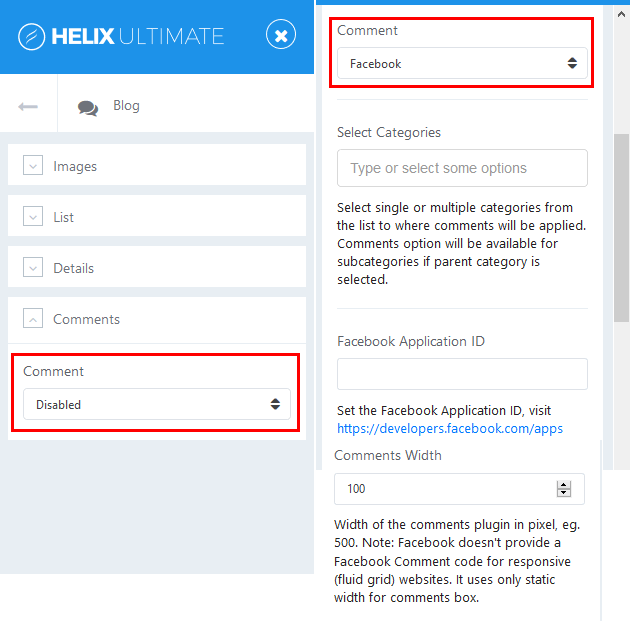
Image by Joomshaper
Disqus Comments have three membership plans, and in basic one Advertising and sponsored comments are displayed.
- Select Categories – from the list to where comments will be applied.
- Comments Width – select width of the comments plugin in pixel. It uses only static width for comments box.
- Comments Count – you can choose comments count show or hide on blog view or frontpage.
So simple, isn’t it? If you have any question about this tutorial, don’t hesitate to leave a comment below. And don’t forget to share with your friends if you find it useful! Thanks! ?

- Resolving the “Class JFactory Not Found” Error in Joomla When Upgrading to J6 - December 19, 2025
- The Utility Of VPNs For Site Authors And Admins - November 24, 2025
- Joomla! 6: What’s New and How to Upgrade from Joomla! 5 - October 23, 2025


Hello.
The blog options images (featured image or gallery) are not displayed in the detail article, with the Joomshaper template Estate on Helix Ultimate.
You can contact Joom shaper and ask for this issue since you already bought product.