Typography is a very important part in building Helix Ultimate templates because it has a huge impact on overall appearance of your site. So in this article we will give you a detailed look at setting typography for templates in Helix Ultimate. Go and get it!
1. Google Fonts
In Helix Ultimate, typography is mainly based on Google Fonts collection ( including 850+ fonts with so many uniqe fonts). It allows you to easily choose fonts as you like from the Google Font Directory to apply to your templates. You can assign the Google fonts to specific CSS elements only.
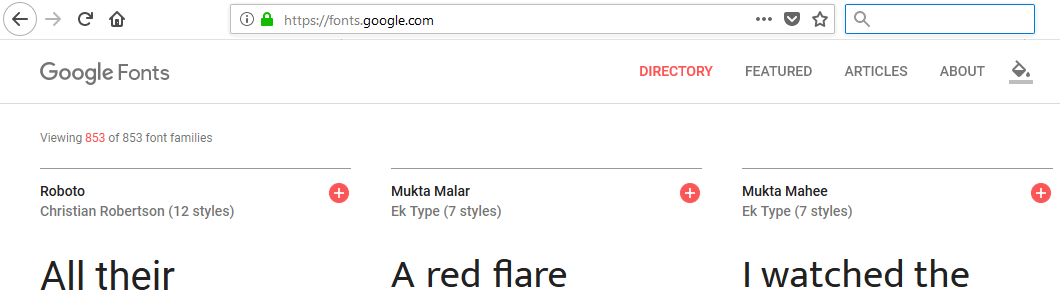
Image by Joomshaper
All Google fonts are released under open source licenses. You can use them in any projects. They all work on the vast majority of modern mobile operating systems. Only some of the fonts in the Google Font Directory support full range of subset – multiple scripts (like Latin, Latin Ext, Cyrillic, and Greek for example). And not all fonts are fully support your native language diacritical marks.
2. Arial, Verdana, Georgia..
In addition to google fonts, you can choose widely-supported cross-platform fonts: Arial, Tahoma, Verdana, Helvetica, Times New Roman, Trebuchet MS and Georgia. “Web Safe” fonts mean that they will look perfect on all the browser. These fonts are very popular and pre-installed on operating system: Windows, iOS or Linux. They are not loaded during loading a website so it will keep fast loading pages.
3. Default Font
The Default fonts are used from Bootstrap 4 if none of Typography option will be enabled. Helix Ultimate use “native font stack” for optimum text rendering on every device and OS. Here is Default Font Family:
// Safari for OS X and iOS (San Francisco)
-apple-system,
// Chrome < 56 for OS X (San Francisco)
BlinkMacSystemFont,
// Windows
“Segoe UI”,
// Android
“Roboto”,
// Basic web fallback
“Helvetica Neue”, Arial, sans-serif,
// Emoji fonts
“Apple Color Emoji”, “Segoe UI Emoji”, “Segoe UI Symbol” !default;
This font-family is applied to the <body> and automatically inherited globally throughout Bootstrap 4.
4. Body
Enable or Disable using Fonts integration. It allows you to assign default System Font (Arial, Tahoma, Helvetica, Georgia etc.) or the Google font to whole Body of your website. And you can choose Font Size, Font Weight, Style and Subset as your requirements (for Google Fonts only).
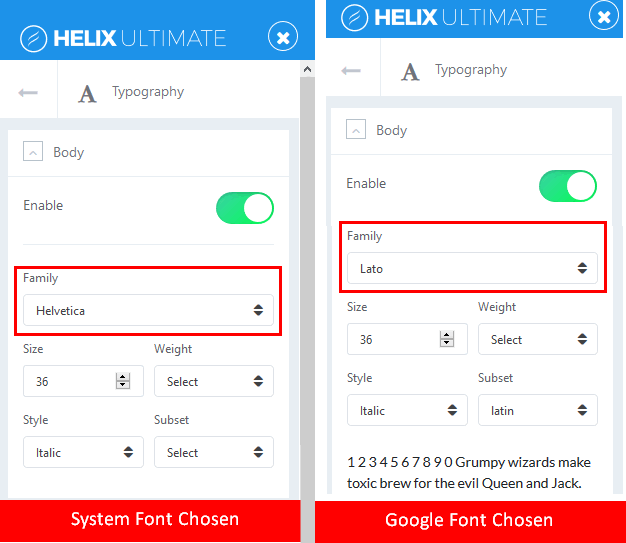
Image by Joomshaper
5. Headings (h1-h6)
Enable or Disable using Fonts integration. It allows you to assign default System Font (Arial, Tahoma, Helvetica, Georgia etc.) or the Google fonts to specific Headings (h1-h6) used inside your website content. Choose Font Size, Font Weight, Style and Subset as your requirements (for Google Fonts only).
6. Navigation
Enable or Disable using Fonts integration. It allows you to assign default System Font or the Google font to main navigation of your Joomla website. Then choose Font Size, Font Weight, Style and Subset as your requirements (for Google Fonts only).
7. Custom
You can choose default System Font (Arial, Tahoma, Verdana, Georgia etc.) or Google Font for custom CSS Selectors (class, ID, element). Enable option, then choose Font Size, Font Weight, Style and Subset. Then you insert name(s) separated by comma in to the Custom Selectors field.
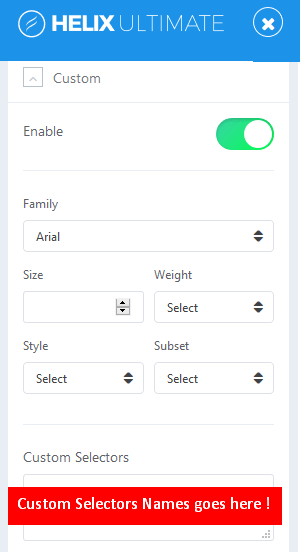
Image by Joomshaper
8. Update Font List
If there are any new ones, you can use this features to quickly update fonts and refresh the list of available Google fonts.
If you have any question about this tutorial, don’t hesitate to leave a comment below. And don’t forget to share with your friends if you find it useful! Thanks! ?

- Resolving the “Class JFactory Not Found” Error in Joomla When Upgrading to J6 - December 19, 2025
- The Utility Of VPNs For Site Authors And Admins - November 24, 2025
- Joomla! 6: What’s New and How to Upgrade from Joomla! 5 - October 23, 2025


hello
thank`s for your article and I want to ask a question about how I can add system font in helix framework .
can you describe this ?
regards
Just follow our guides bro, we already provide with details.
no you don’t. This only describes how to use google fonts or system fonts. Not how to add our own fonts.
You can read this blog joomshaper.com/documentation/helix-framework/helix3#how-to-add-new-font-to-helix3-template