
If you feel confused because you don’t know what is exact method to set up mega menu builder in Helix Ultimate Framework, don’t worry. Today, we would like to give you a guide on how to do it smoothly and effectively. Let’s get started.
The reasons you should set up Mega Menu Builder In Helix Ultimate Framework
What is a mega menu?
As you know, a mega menu is known as a type of expandable menu that contains a lot of options or lower-level site pages or submenus without scrolling. A mega menu will have some specific features, including:
- It has a big and two-dimensional panel that is divided into small groups of navigation options.
- There are two form factors when you activated the top navigation bars, including vertical form and horizontal form.
- The menu options will be showcased on click, tap, or hover.
- All options will appear at the same time so that you needn’t scroll or click on any submenu.
The benefits of using a mega menu
Some of the outstanding benefits when you build a mega menu in general and set up Mega Menu Builder In Helix Ultimate Framework in particular are:
- You can make an impression on your visitors when they access your site with a clear menu design and easy-to-understand the structure of the pages on your site.
- It will bring a wonderful experience since your visitors needn’t waste time clicking on each submenu to find the information.
- It will help you improve the SEO of your site by building internal links in the mega menu.
Now, it’s time for you to explore the method to set up mega menu builder in Helix Ultimate Framework for your Joomla 4 website. Let’s go!
Let’s start to set up mega menu builder in Helix Ultimate Framework
Step 1: The first step Set Up Mega Menu Builder In Helix Ultimate Framework, you need to access your Cpanel or localhost, then install Helix Ultimate for your Joomla site.
Step 2: It’s necessary for you to switch to Helix Ultimate Frontend Editor. In order to do that, you just need to go to System -> Site Template Styles. After that, simply select shaper_helixultimate – Default -> Template Options.
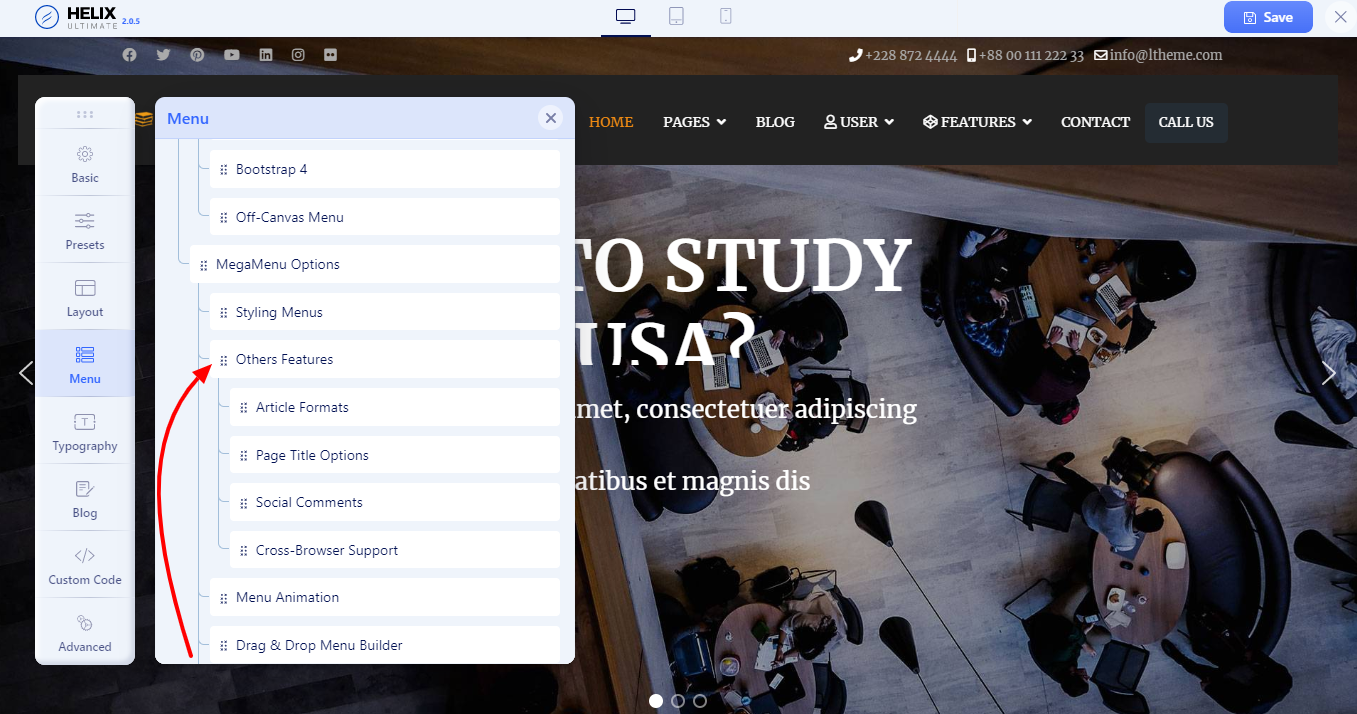
Step 3: Now, all you need to do first is Add New Menu Item. So, let’s click on the Menu box, then scroll down and press the Add new item button
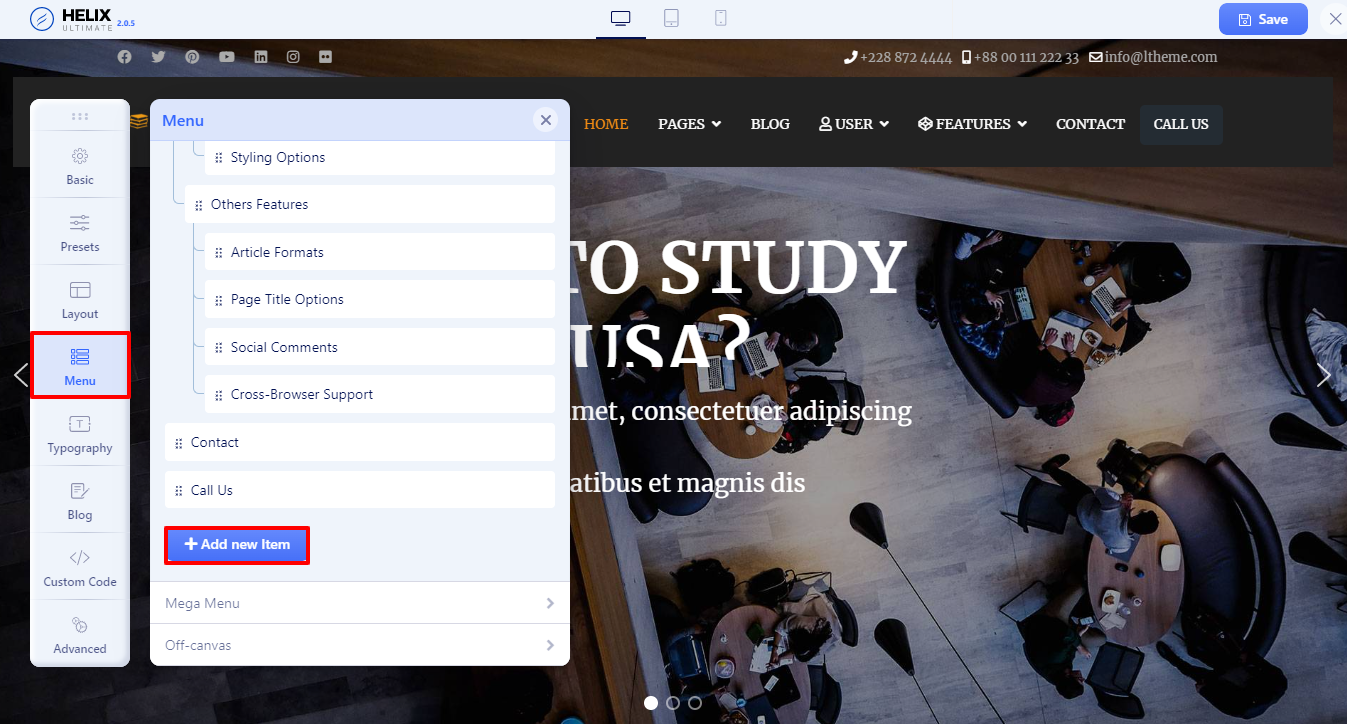
An Add New Item popup will appear for you to fill out the information. Thus, you need to fill out the title, choose the menu item type and link, then select the menu type.
In our example, we will:
- Enter the title
- Menu Item Type: Select System Links -> URL
- Link: #
- Menu: Choose Main Menu
Finally, simply click on the Save button to store all your settings.

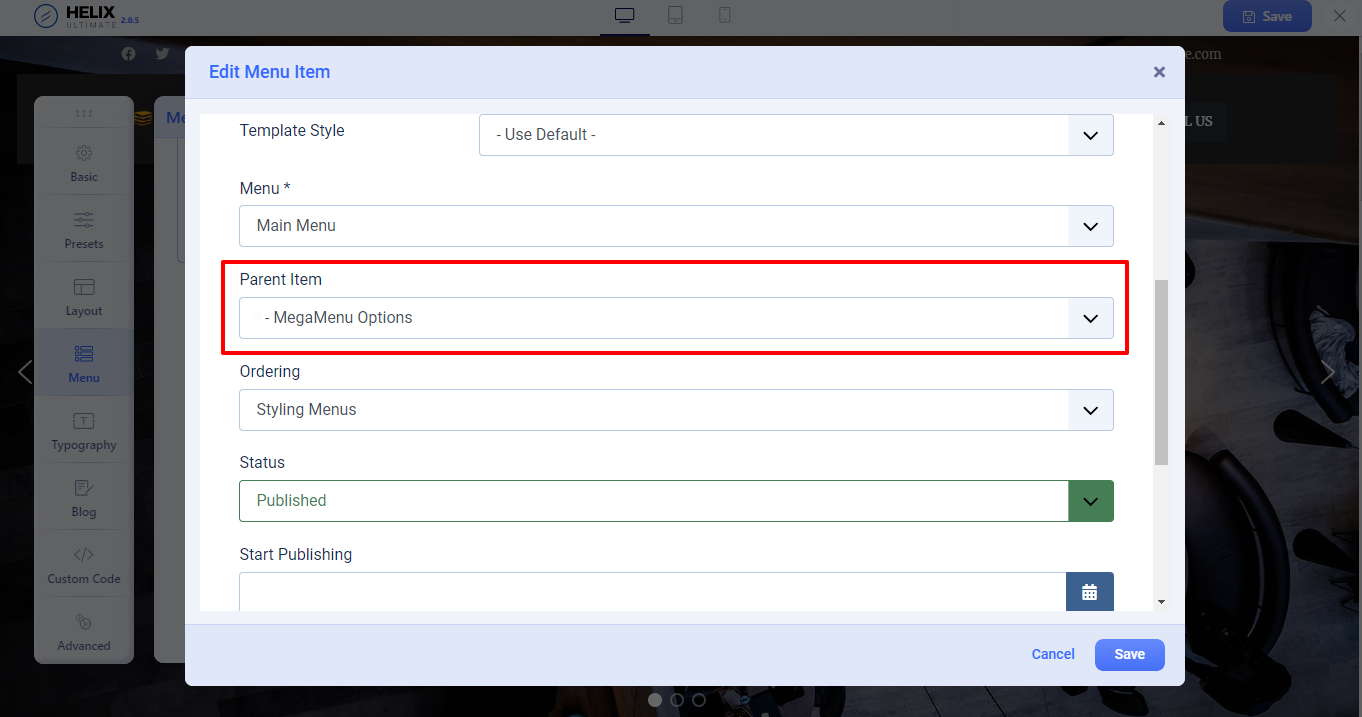
Step 4: The next step to set up Mega Menu Builder In Helix Ultimate Framework that you need to do is assign submenus to the parent menu. Simply generate the submenus which you wish to assign to the mega menu by implementing the same process in step 3.
Once creating submenus, it’s time for you to drag the submenus and drop them on the parent menu.
Besides, you can also assign the submenus to the parent menu by editing the menu item. Then, in the parent item option, simply select the parent menu you want. Don’t forget to save it after finishing.
Repeat the process to add the rest of the menu items.
Step 5: You will assign Layouts as well as Modules for your mega menu. In the sidebar, let’s select the Menu option, then scroll down to the mega menu you have already generated in the previous step and click on the layout icon to edit it.
In the next step, simply enable the mega menu option. After that, you just need to add rows for your submenus. Finally, let’s make sure all your settings are stored by pressing the Save button.

Step 6: The final step to set up Mega Menu Builder In Helix Ultimate Framework successfully is creating and adding custom modules for your mega menu. For instance, you are able to showcase a banner, login module, a search bar, an image, etc on the mega menu.
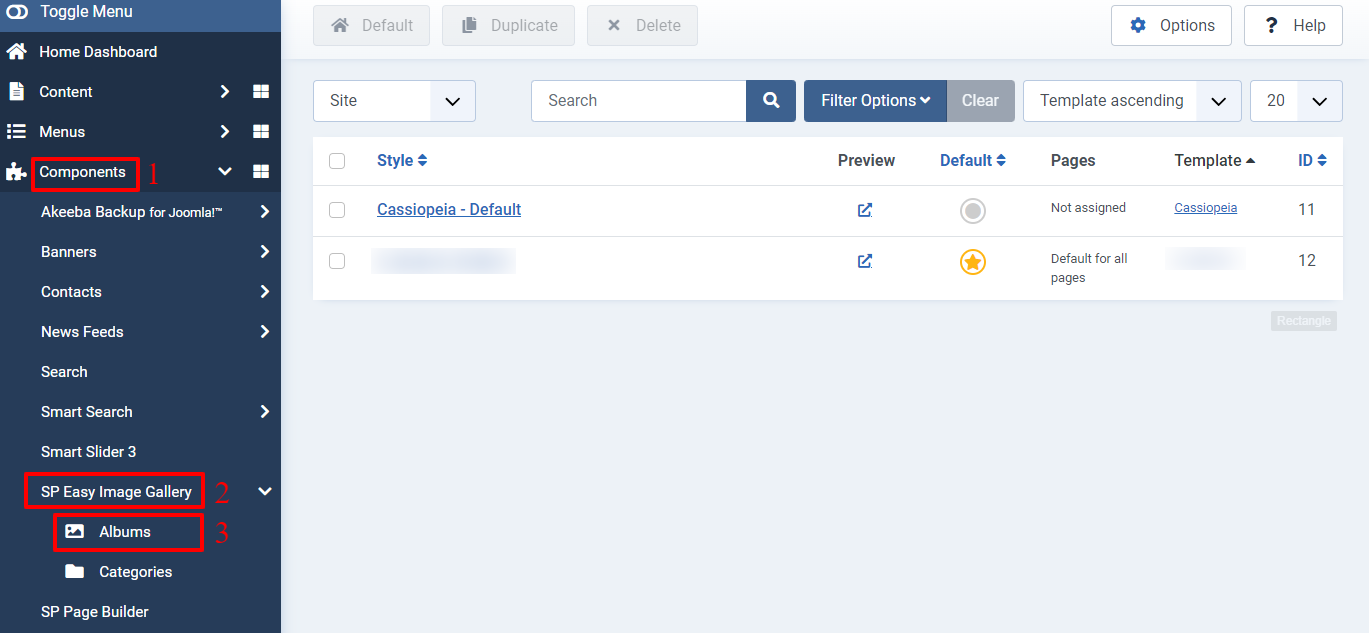
In our example, we would like to display a photo on the mega menu. So, we will implement the following steps.
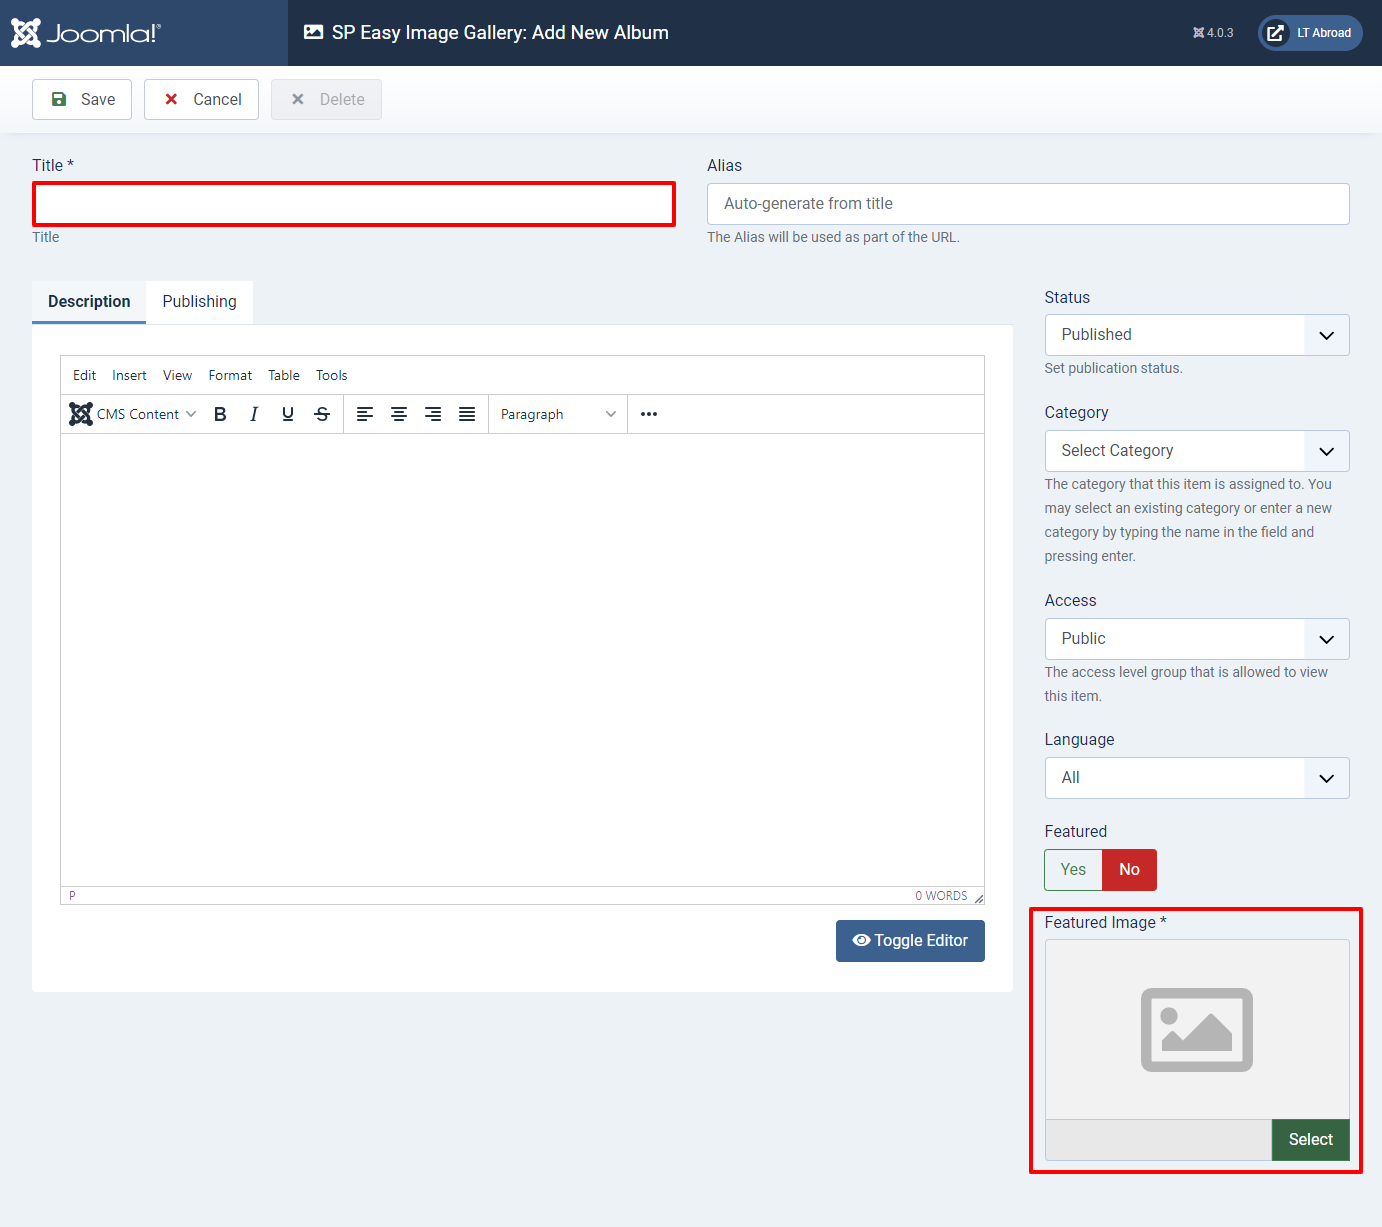
Firstly, let’s go to Components -> SP Easy Image Gallery -> Albums.
After that, simply click on the +New button to generate a new album. All you need to do now is enter the title, then add an image you want in the featured image section. Lastly, don’t forget to save your settings.
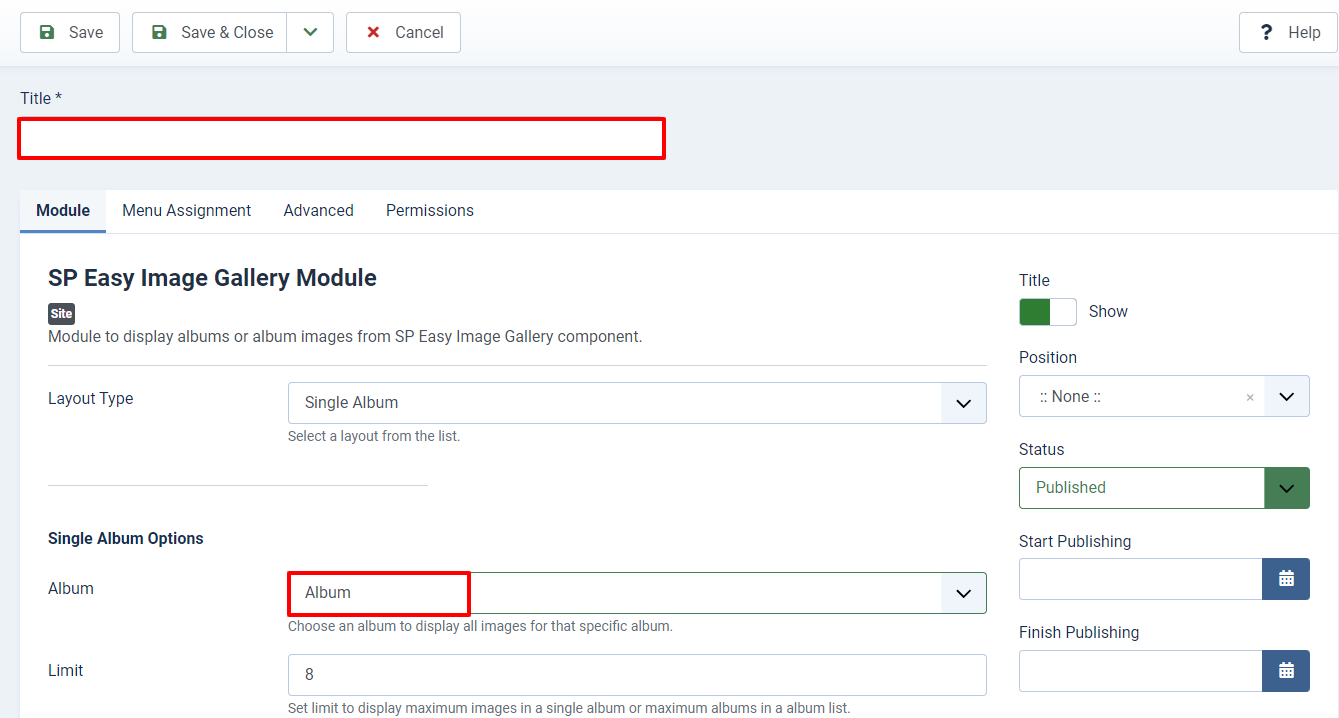
In the next step to set up Mega Menu Builder In Helix Ultimate Framework, we will generate related modules. Thus, let’s access Content -> Site Modules -> +New. There will be a list of available modules, so scroll down and select the SP Easy Image Gallery module.

Now, it’s necessary for you to fill out the title and choose the album you created before. Then, simply hit the save button to create a new module.
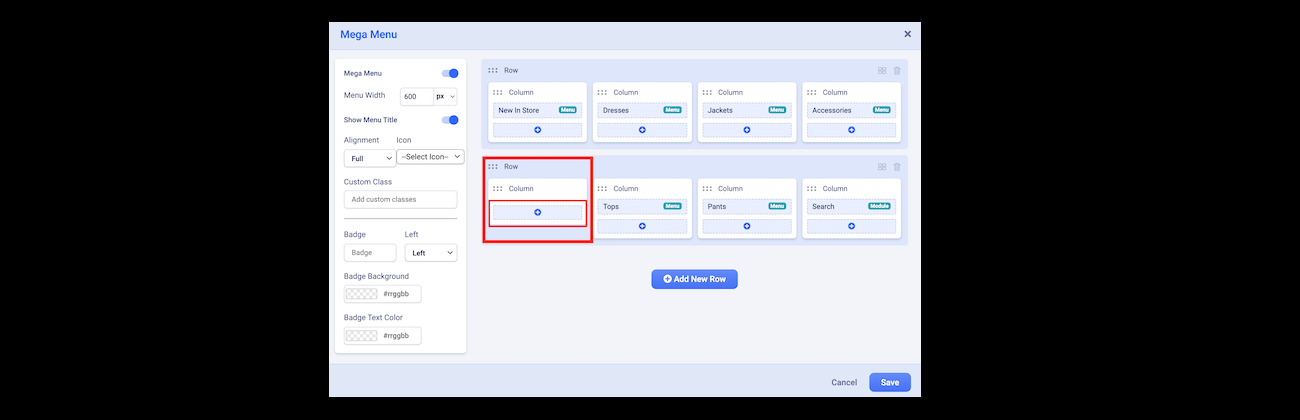
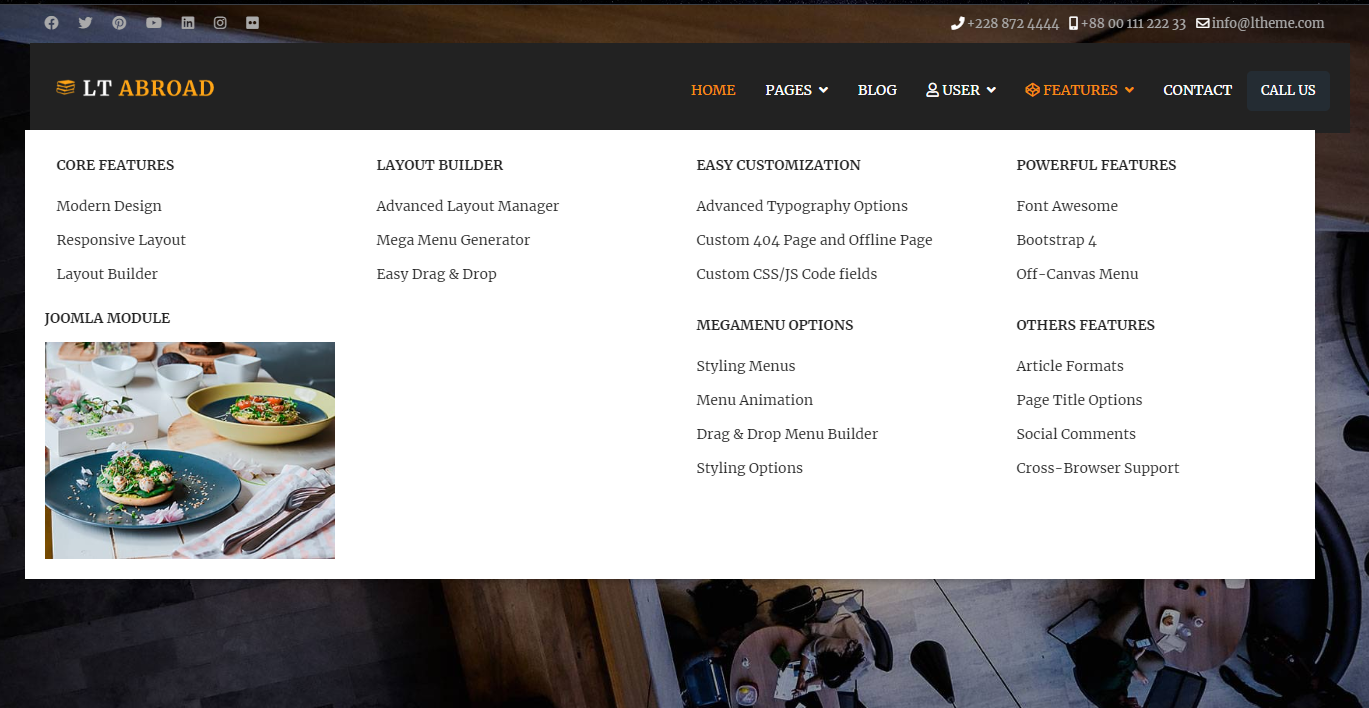
Let’s move on to the Helix Ultimate frontend editor, then find the mega menu you have just generated in the previous steps and click on the Mega Menu option. After that, simply select the add button.
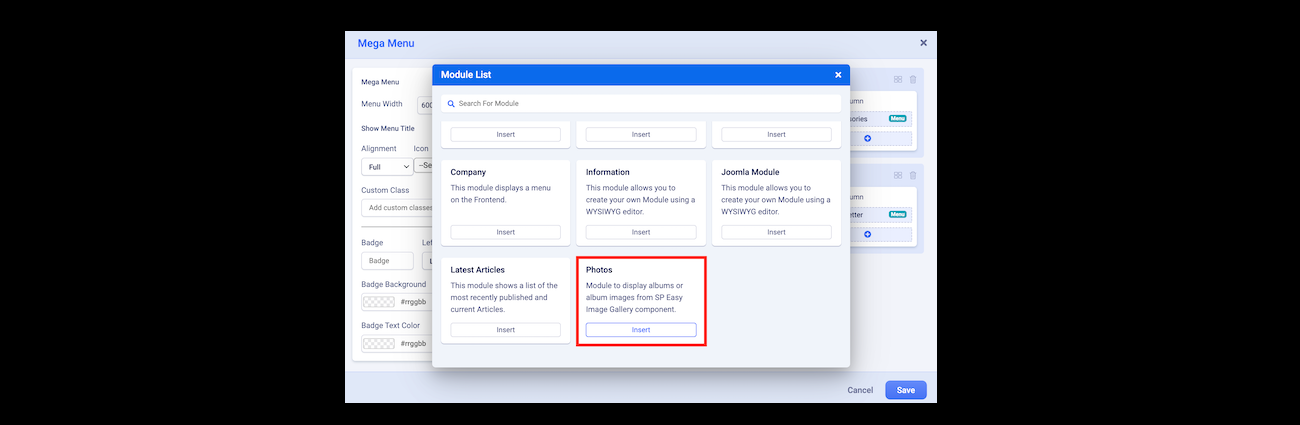
All the modules will appear. Therefore, you just need to choose the photo module you have already generated before and insert it into your mega menu. Remember to save your changes.
Now, everything is done. Congratulations! You set up Mega Menu Builder In Helix Ultimate Framework successfully. Check out the result on your site.
Closing thoughts
All in all, we believe that the way to set up Mega Menu Builder In Helix Ultimate Framework is quite simple. So, we hope that you can smoothly build a mega menu for your site after reading the tutorial blog. It’s time for you to attract more visitors with a professional and detailed mega menu on your site. What are you waiting for?
In case you have any trouble during the setup process, don’t hesitate to leave your comment below so that we can help you as soon as possible. If you think the blog is useful, let’s share it with your friends. Last but not least, we are offering a lot of well-performance, SEO-friendly, and responsive Joomla 4 Templates, don’t miss them if you want to give your site a new and more attractive appearance. Thanks for your visit.

- Resolving the “Class JFactory Not Found” Error in Joomla When Upgrading to J6 - December 19, 2025
- The Utility Of VPNs For Site Authors And Admins - November 24, 2025
- Joomla! 6: What’s New and How to Upgrade from Joomla! 5 - October 23, 2025


Recent Comments