Here is a tutorial on how to use WordPress Reusable Blocks with step-by-step instructions.
As you know, WordPress Gutenberg Block is the new editor of WordPress. When we compare Gutenberg vs Classic Editor, it’s easy to see that the new WordPress editor comes with many outstanding and advanced features. That is the reason why more and more people tend to use the Gutenberg editor instead of the old WordPress editor. So, if you want to find out how to use Gutenberg in general and use WordPress Reusable Blocks in particular, the blog today is for you. Let’s go now!
Introduction
What are WordPress Reusable Blocks?
Simply put, WordPress Reusable Blocks are a collection of editor blocks that you have created and saved in the library so that you can reuse them later.
A reusable block may be simple or complicated. For example, if you want to reuse an image many times, it’s a simple reusable block. Conversely, the WordPress reusable block becomes complex if it is a collection of many elements that you use again and again for an advanced design of your site.
Why do you need to use WordPress Reusable Blocks?
By using WordPress Reusable Blocks for your site, you can get many benefits, including:
- Save time since you don’t need to repeat the process of copying the content to a text editor and then pasting it into your new post/page.
- Work more conveniently, as you only need to design one page. After that, simply duplicate it on other pages of your site or on other WordPress websites.
- Easily add content at the beginning or end of blogs, articles, or pages, such as social media buttons, author bio, and much more.
- Add ads or affiliate banners to all posts/pages without doing it manually.
- Edit reusable blocks related to surveys, quizzes, or forms smoothly and effectively.
So, don’t hesitate to explore how to use WordPress Reusable Blocks step-by-step with the following guide.
How to use WordPress Reusable Blocks
Create a WordPress reusable block
First of all, you just need to create a new post/page or edit an existing post/page of your WordPress site. After that, click on the Add block icon, then choose the type of block you want to turn into a WordPress reusable block.
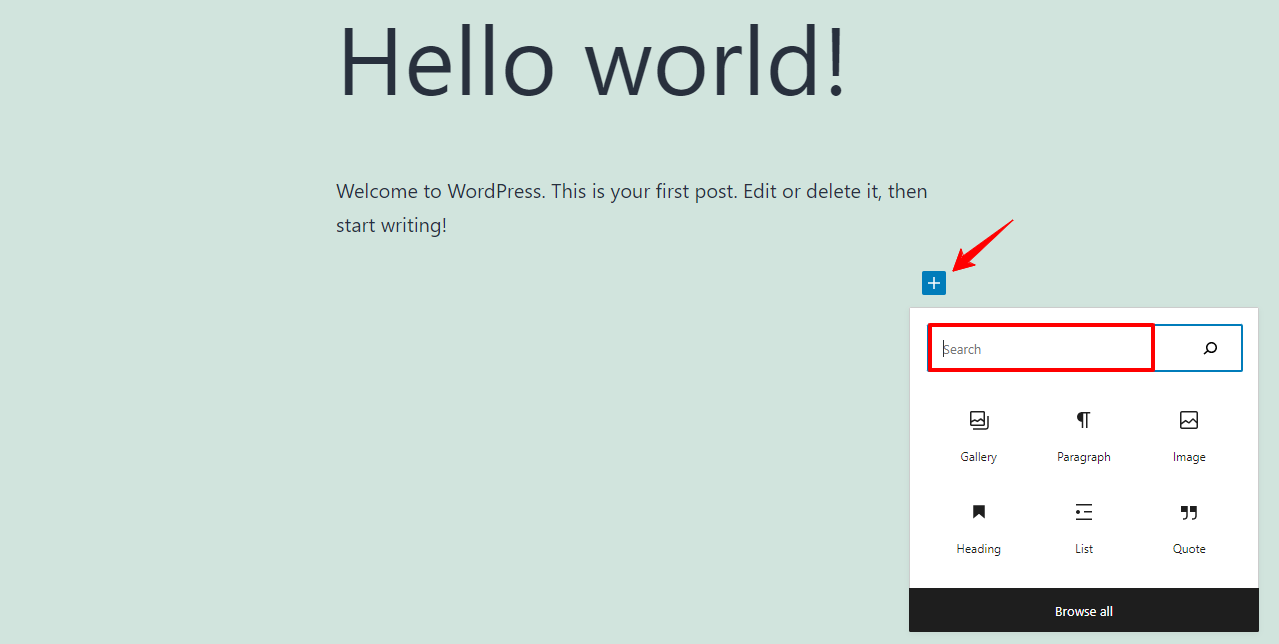
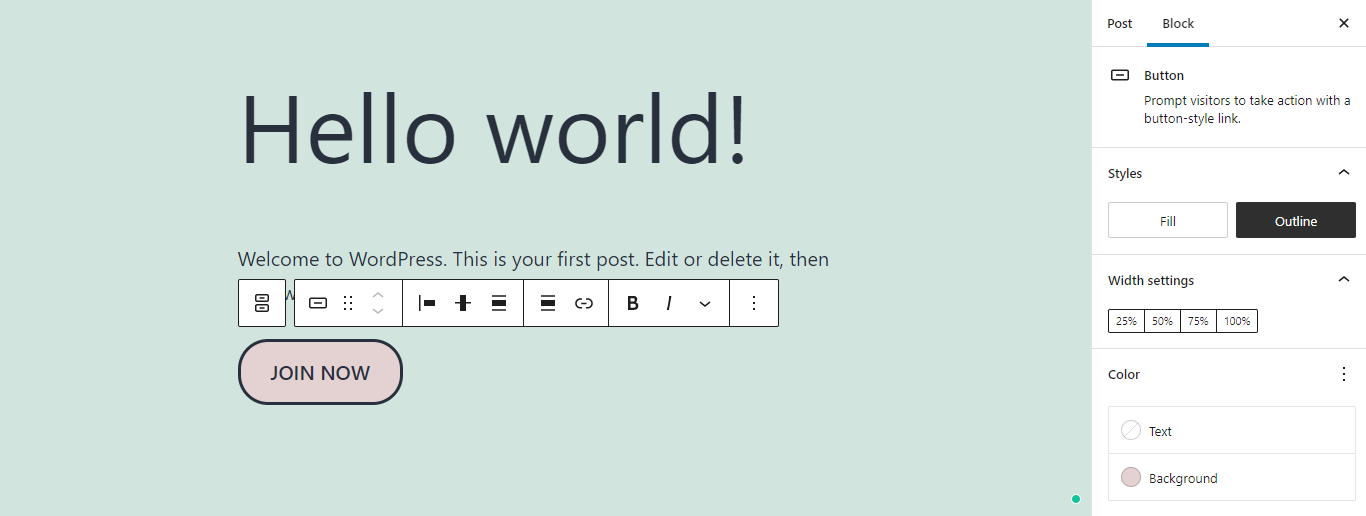
In our example, we will select the button block type, then customize the color and text of the button.
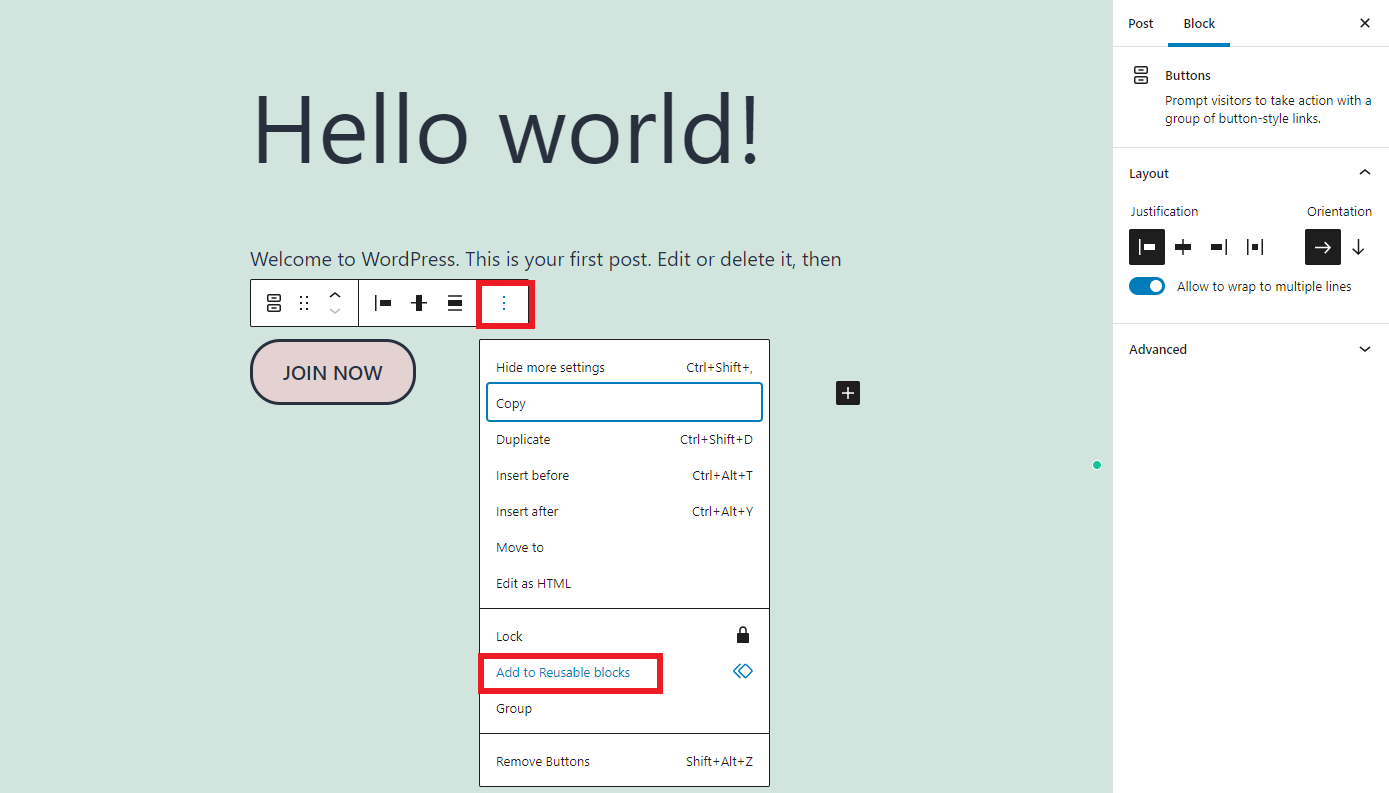
Next, simply press the block -> Select the three dots button. There will be a dropdown menu that contains Add to Reusable Blocks. So, don’t hesitate to click on the Add to Reusable Blocks option.
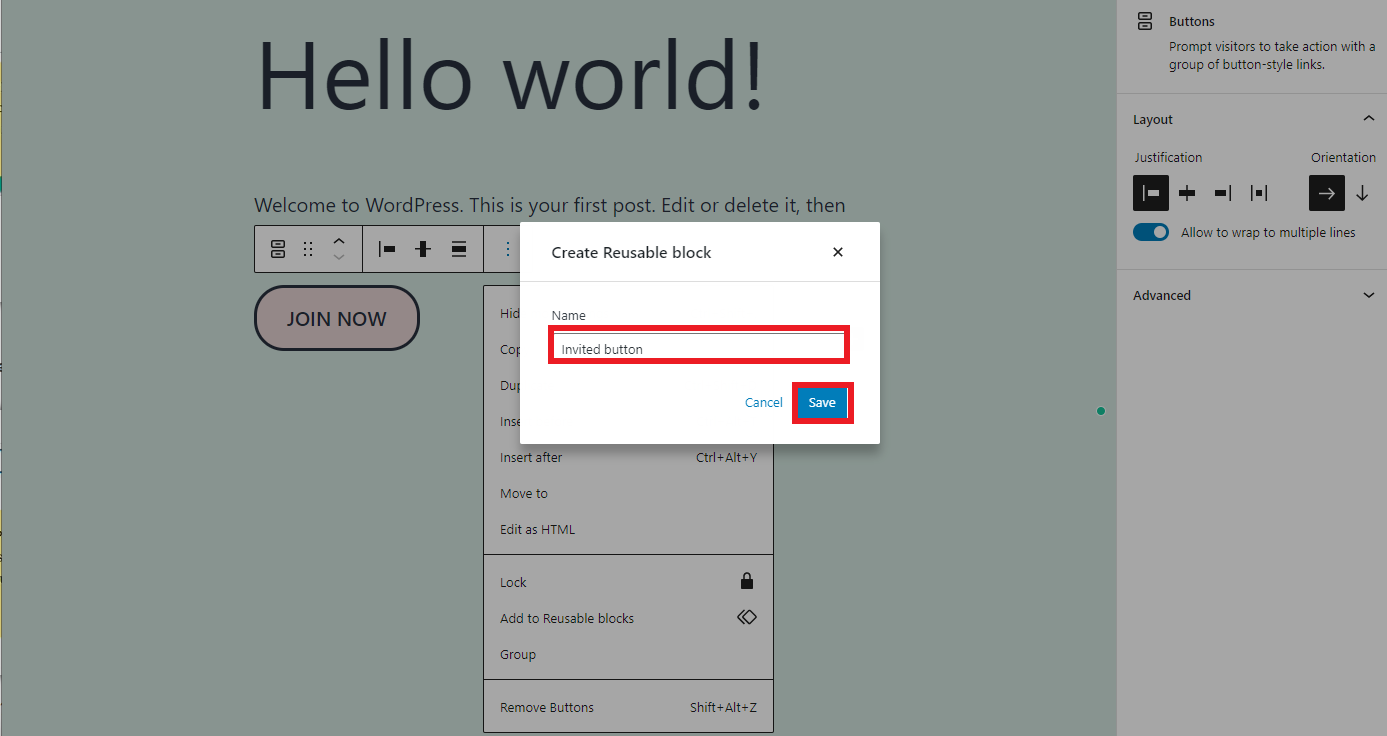
Now, there will be a popup for you to fill out the name of the WordPress reusable block, then don’t forget to save it.
If you want to save multiple blocks together, select all the blocks you want to save by clicking on one block, then holding down the shift key when you click on other blocks. After that, simply press the three dots button -> Add To Reusable Blocks -> Enter block group name -> Save.
Now, you can add WordPress Reusable Blocks to other posts or pages on your site.
Add the WordPress reusable block to new posts/pages
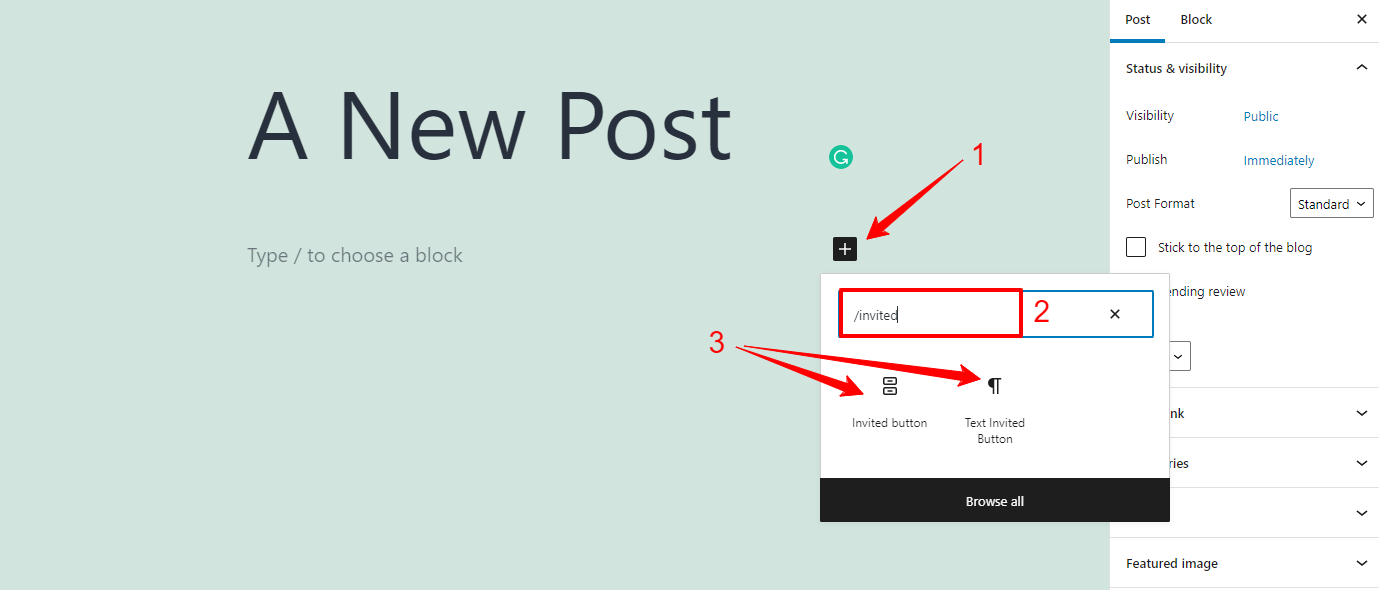
Adding a WordPress Reusable Block is quite simple. You just need to open the posts or pages where you want to use WordPress reusable blocks, then click on the Add Block button -> find the Reusable option.
If you remember the name of the WordPress reusable block, you can find it by entering its name. You can also type /[name-of-reusable-block] to quickly insert the blocks.
Edit content of a WordPress reusable block in a specific post
With a WordPress reusable block, you are not able to edit it directly after adding it. In order to edit the content of the reusable block in a specific post, you just need to change the reusable block into a regular block. It won’t affect other instances of the reusable block.
Let’s convert it by pressing the three dots button -> Convert to Regular Block.
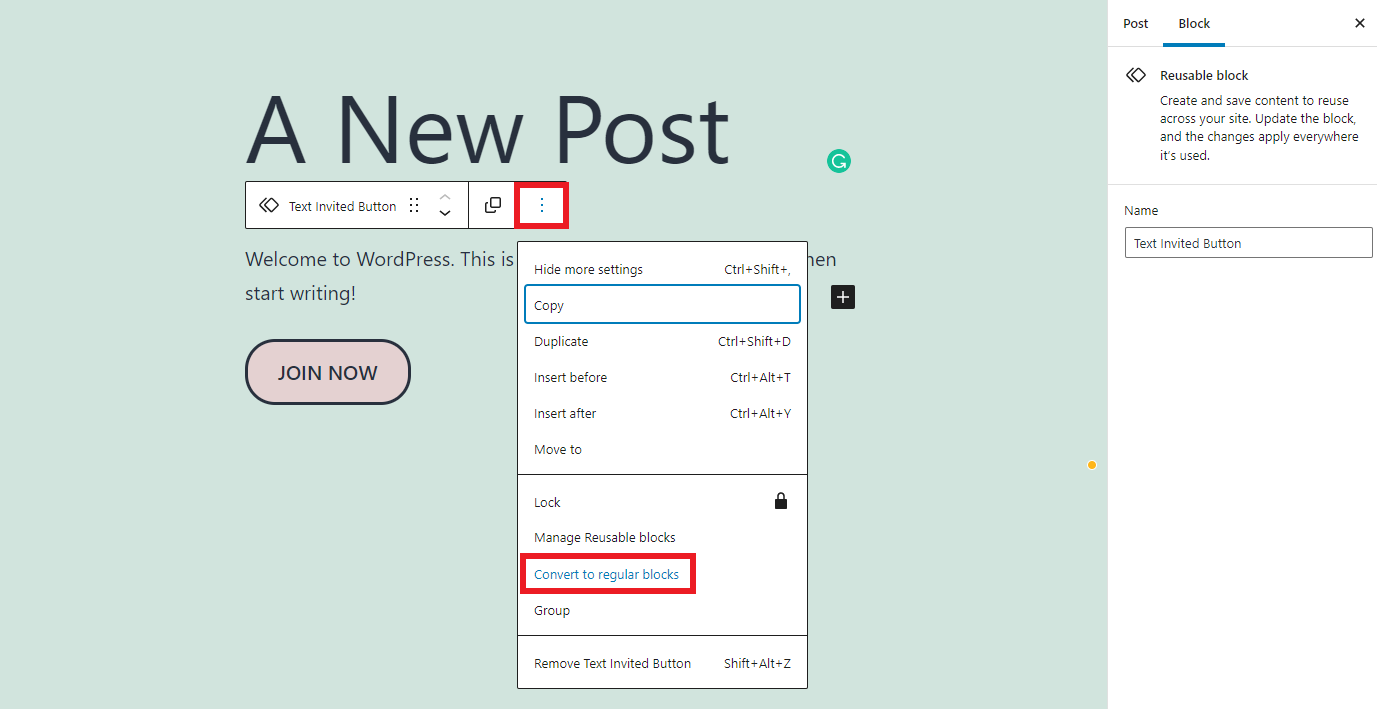
Now, you can freely make any adjustments to the regular blocks without any trouble.
Export or import WordPress reusable blocks
One benefit of WordPress reusable blocks is that you can not only use them on one website but also export them for use on other websites. This will help you save time in building and managing various websites effectively.
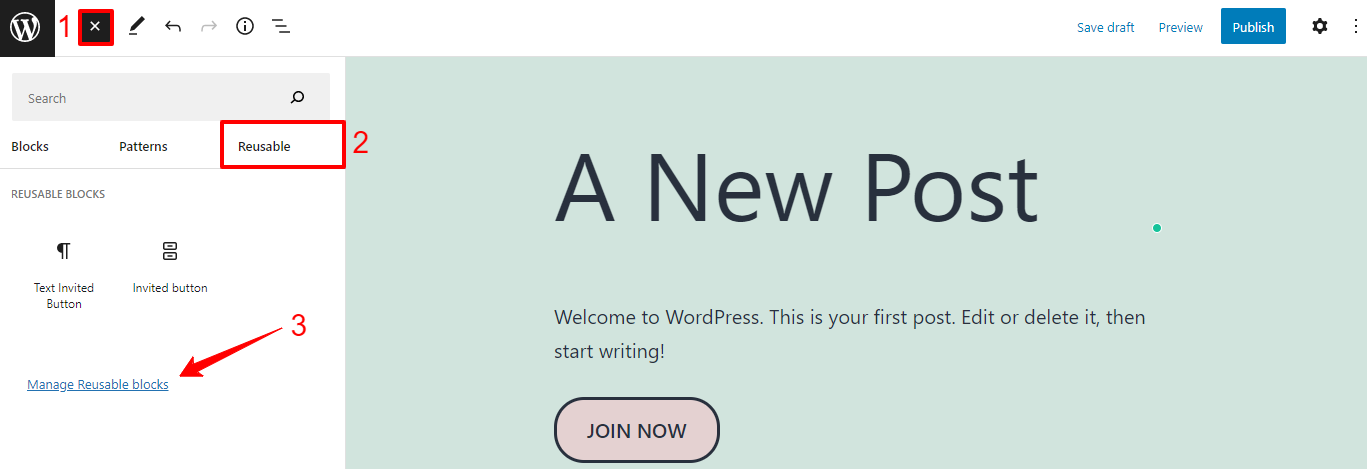
Now, it’s time for you to find the “+” icon on the left side of the screen. After that, simply access Reusable -> Manage Reusable Blocks.
In order to export the WordPress reusable blocks, you need to choose the Export as JSON option, and they will be saved as a JSON file to your computer.
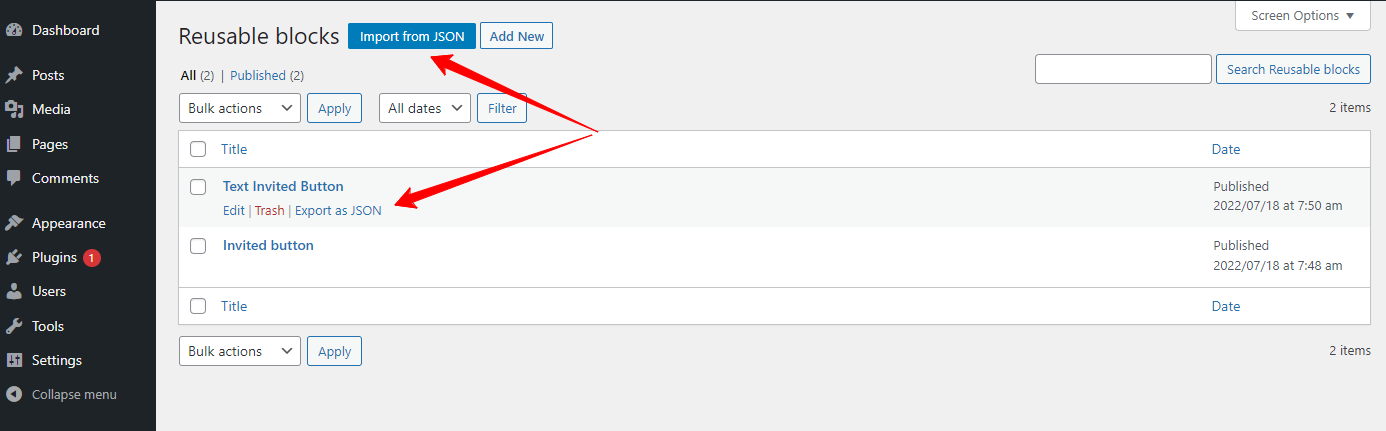
Finally, let’s open another WordPress dashboard -> access the Blocks page with the same steps above. After that, simply click on the Import from JSON -> choose the JSON file from your computer and then upload it to your WordPress site. That’s it.
Wrap up
All things considered, we are sure you can freely and easily use WordPress Reusable Blocks after reading today’s blog. Try this method to save time in building or designing a WordPress website. If you have any questions, don’t hesitate to leave your comment below.
Last but not least, we are offering numerous mobile-friendly and eye-catching free WordPress Themes covering various topics, so visit our site and check out the collection now!