The dark mode is a popular trend in the world of web design, and for good reason. In other words, it provides a clean, eye-friendly interface that is especially helpful in low-light environments. If you are looking for some ways to add dark mode to WordPress website, the blog today is suitable for you.
Why you should add dark mode to WordPress?
There are several benefits when you add dark mode to WordPress website, including:
- Improved User Experience: Dark mode provides a clean and eye-friendly interface, making it easier for users to read and navigate your website, especially in low-light environments.
- Increased Accessibility: Dark mode can help users with visual impairments, as it reduces eye strain and makes it easier for them to see text and other content.
- Better Battery Life: Dark mode uses less battery power on mobile devices, as it requires less power to display a dark background than a light one.
- Increased Brand Awareness: Adding dark mode to your WordPress website can help you stand out and make a lasting impression on your visitors. It’s a modern and trendy design choice that can help your brand stay ahead of the curve.
- Increased Engagement: Dark mode has been shown to increase engagement and user retention, as users are more likely to spend more time on your website when it’s visually appealing and easy on the eyes.
- Increased Customizability: With a dark mode plugin, you can customize the color scheme and font style to match your brand and make your website truly unique.
Methods to add dark mode to WordPress
Use a Dark Mode Plugin
One of the easiest ways to add a dark mode to WordPress website is by using a plugin. There are several free and paid WordPress Dark Mode Plugins available in the WordPress repository that can help you add a dark mode to your website with just a few clicks. Today, we would like to choose the DarkLooks plugin to do that. So, let’s follow the steps below.
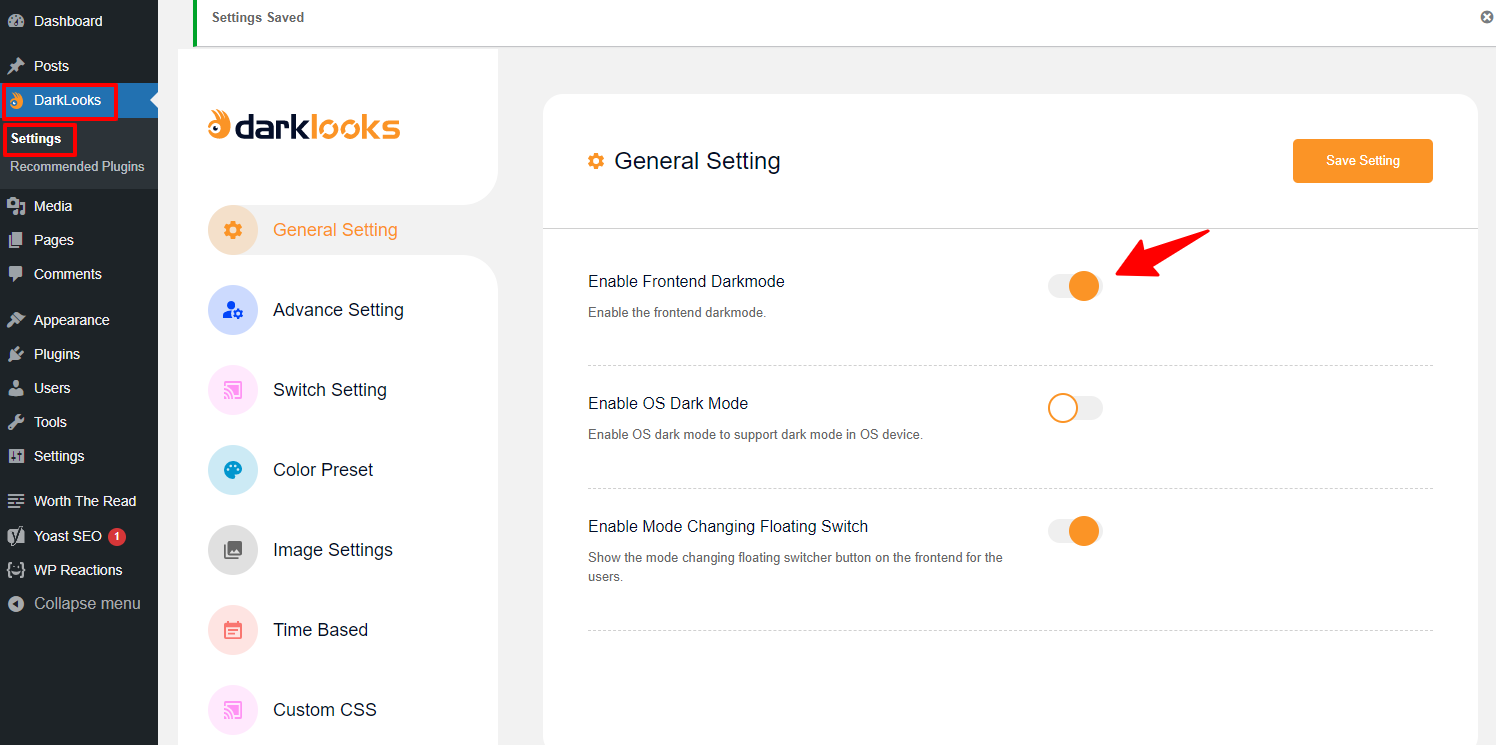
First of all, you need to install and activate the Darklooks plugin to use it. After activating, it’s time for you to explore and set up the plugin by opening DarkLooks -> Settings on the admin dashboard.
There are 7 sections for you to set up and add dark mode to the WordPress website including:
- General Setting: It allows you to enable/disable frontend dark mode, OS dark mode, and Mode Changing Floating Switch.
- Advance Setting: You can easily customize Dark Mode Body Font Size, Switch Lite Text, Switch Dark Text, Include Elements, Exclude Elements and Enable/Disable Mode Changing Switch in Menu.
- Switch Setting: This section will allow you to choose the appearance of the switch style and switcher position for the frontend mode change.
- Color Preset: If you need to set the Color Method Type, Select Front End Color Type and Front End Color Preset, the section is available for you to do that.
- Image Settings: It’s time for you to set the light/dark mode site logo and set the dark mode image opacity.
- Time Based: You can set Start and End Time, and enable/disable Dark Mode Based On Time here
- Custom CSS: Add your custom CSS here.
After setting everything, you can check out the result on your front-end website. The dark mode symbol appears on your site.
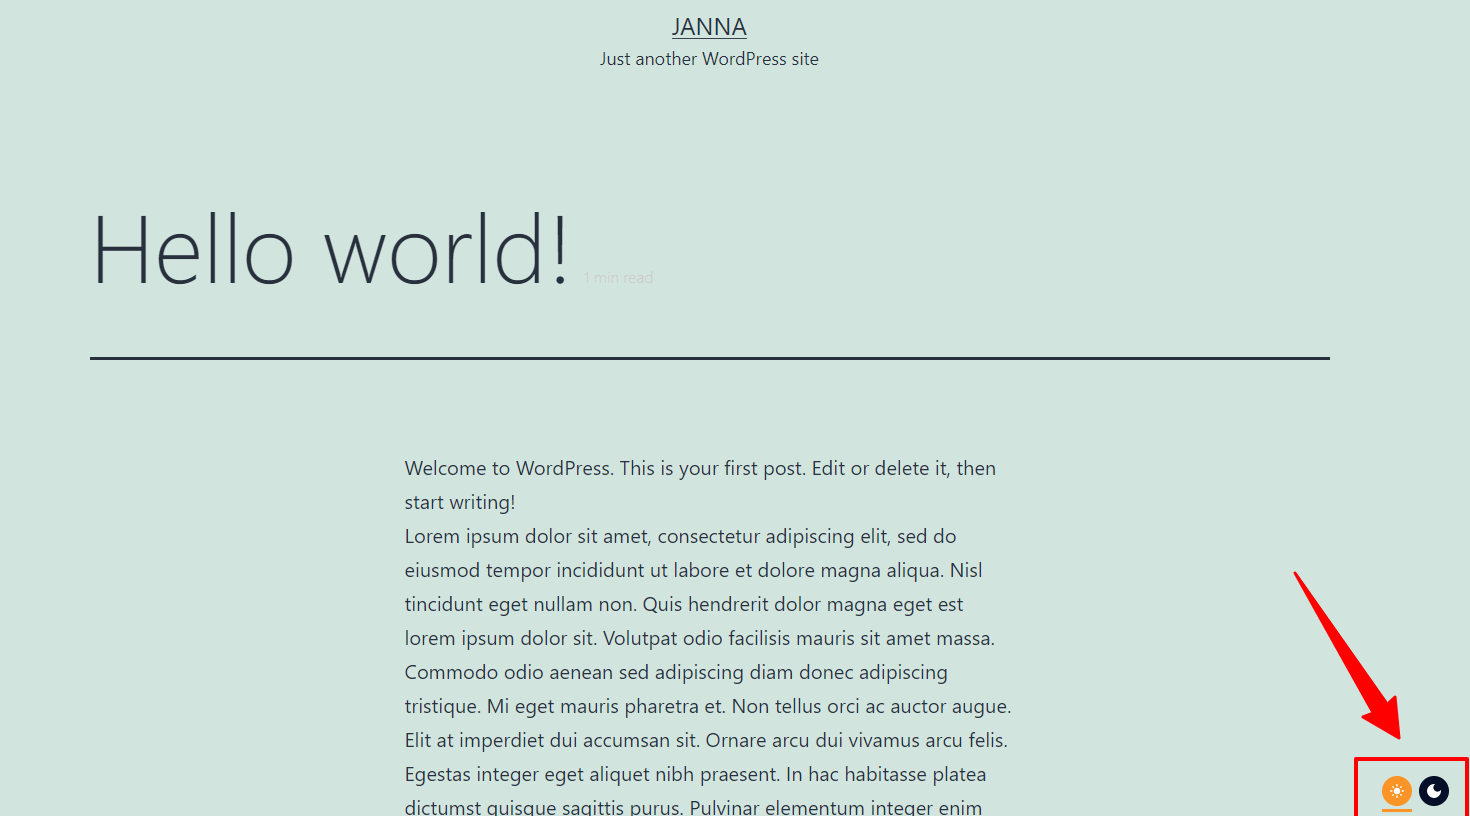
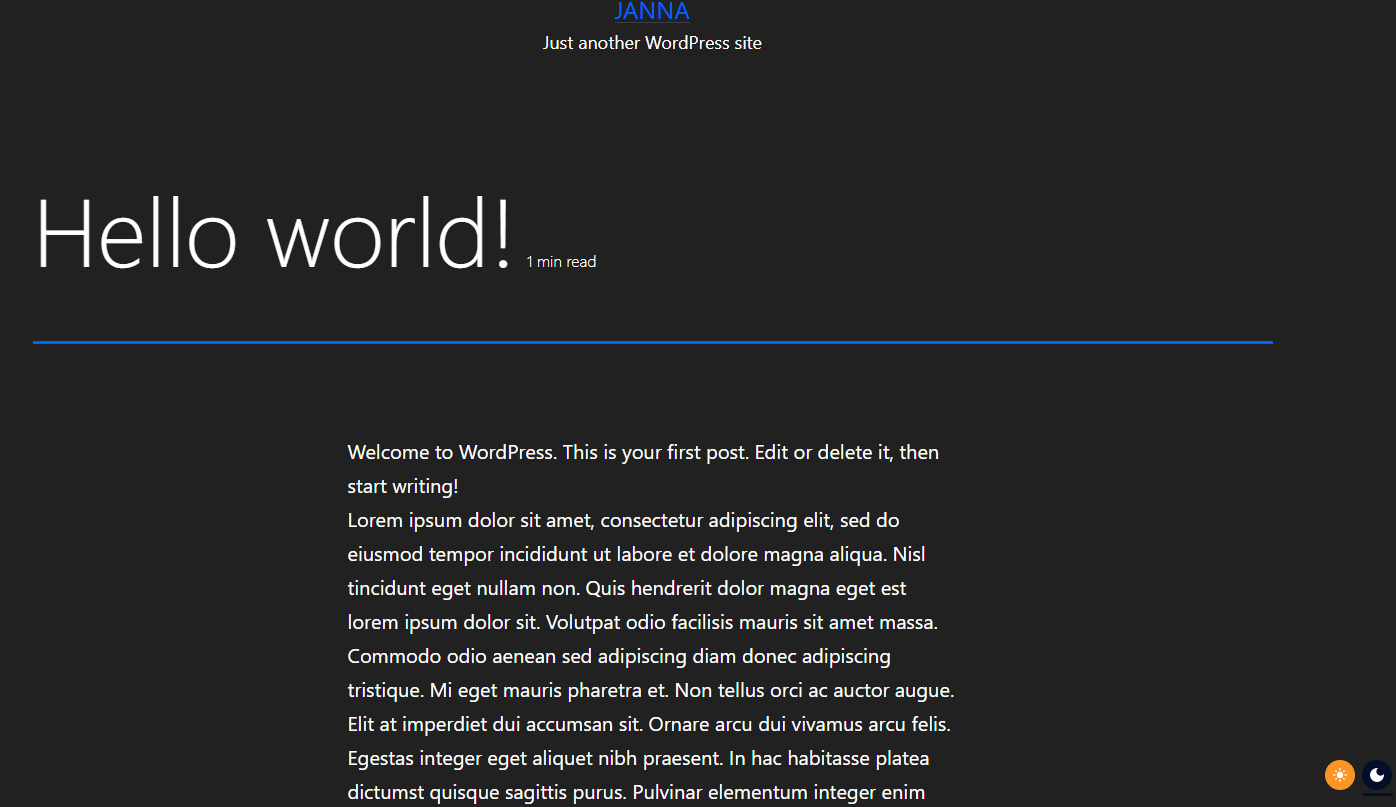
Now, your visitors can turn on the dark mode to give your site the dark look.
Add Dark Mode CSS Manually
Another way to add dark mode to WordPress website is by manually adding CSS code to your stylesheet. This method requires some basic knowledge of CSS, but it’s not too difficult. Here’s an example of how you can add dark mode to your website using CSS:
<style>

body.dark-mode {

background-color: #333;

color: #fff;

}

</style>
<script>

let darkMode = localStorage.getItem('darkMode');
const darkModeToggle = document.querySelector('#dark-mode-toggle');
const enableDarkMode = () => {

document.body.classList.add('dark-mode');

localStorage.setItem('darkMode', 'enabled');

};
const disableDarkMode = () => {

document.body.classList.remove('dark-mode');

localStorage.setItem('darkMode', null);

};
if (darkMode === 'enabled') {

enableDarkMode();

}
darkModeToggle.addEventListener('click', () => {

darkMode = localStorage.getItem('darkMode');

if (darkMode !== 'enabled') {

enableDarkMode();

} else {

disableDarkMode();

}

});

</script>
In this example, you first create a dark-mode class that sets the background color to #333 and the text color to #fff. Then, you create a function that checks if the dark mode is enabled and adds the class to the body.
Customize the Toggle Button
The toggle button allows users to switch between dark mode and light mode. You can customize the button by adding your own HTML and CSS code. Here’s an example of how you can create a toggle button:
<button id="dark-mode-toggle">Toggle Dark Mode</button>
<style>

#dark-mode-toggle {

background-color: #333;

color: #fff;

padding: 10px 15px;

border: none;

cursor: pointer;

}

</style>
In this example, you create a toggle button with an ID of dark-mode-toggle. Then, you add some basic CSS to style the button.
Closing thoughts
In conclusion, it’s not difficult or complicated for you to add dark mode to WordPress website. By following these five steps, you can have a fully functional dark mode option up and running on your website in no time. If you have any questions, please comment below and we will reply to support you as soon as possible.
Furthermore, don’t forget to visit our site and get a lot of attractive and responsive free WordPress themes here.

- Resolving the “Class JFactory Not Found” Error in Joomla When Upgrading to J6 - December 19, 2025
- The Utility Of VPNs For Site Authors And Admins - November 24, 2025
- Joomla! 6: What’s New and How to Upgrade from Joomla! 5 - October 23, 2025


")


Recent Comments