What is the easiest way to add reaction buttons to WordPress posts or pages? If you are not sure how to do it, today’s blog will give you the answer. Now, let’s explore how to add and display reaction buttons on your WordPress site.
Should you add reaction buttons to WordPress posts/pages?
Normally, many website owners will create a comment box under each post or page to interact with their visitors/readers. The comment creation process is quite simple with the support of WordPress Comment Plugins. However, have you ever considered that it is not the only way to increase visitor engagement? For visitors who do not have much time to leave comments, a comment box is not ideal.
It’s time for you to think about another way to give your visitors a chance to show their emotions or reactions after reading your WordPress posts/pages without commenting. We suggest that you add reaction buttons to WordPress via a free and useful plugin. Thanks to it, your visitors can freely express their reactions or emotions to each of your posts in a time-saving way. This will help encourage visitor interaction and increase site traffic more effectively.
Don’t hesitate anymore. Let’s move on to the next section to explore how to add reaction buttons to WordPress now!
How to add reaction buttons to WordPress
First and foremost, you need to install and activate the WP Reactions Lite plugin. A detailed guide on how to install a plugin for beginners is here.
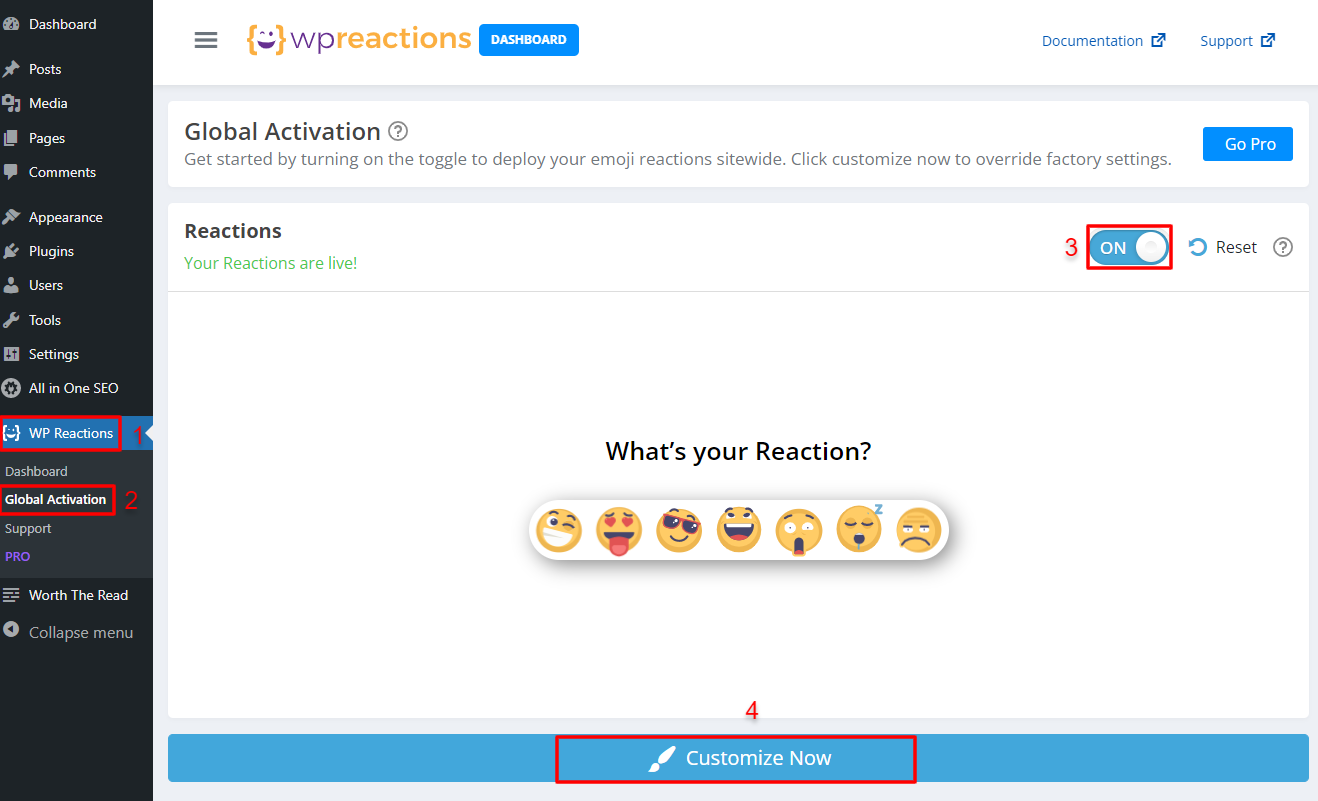
After successful activation, go to WP Reactions -> Global Activation to set up and display the reaction buttons on your site in your own style.
On the right of the screen, turn on the toggle to display the reaction buttons on your site. Next, simply click on the Customize Now button to edit some aspects.
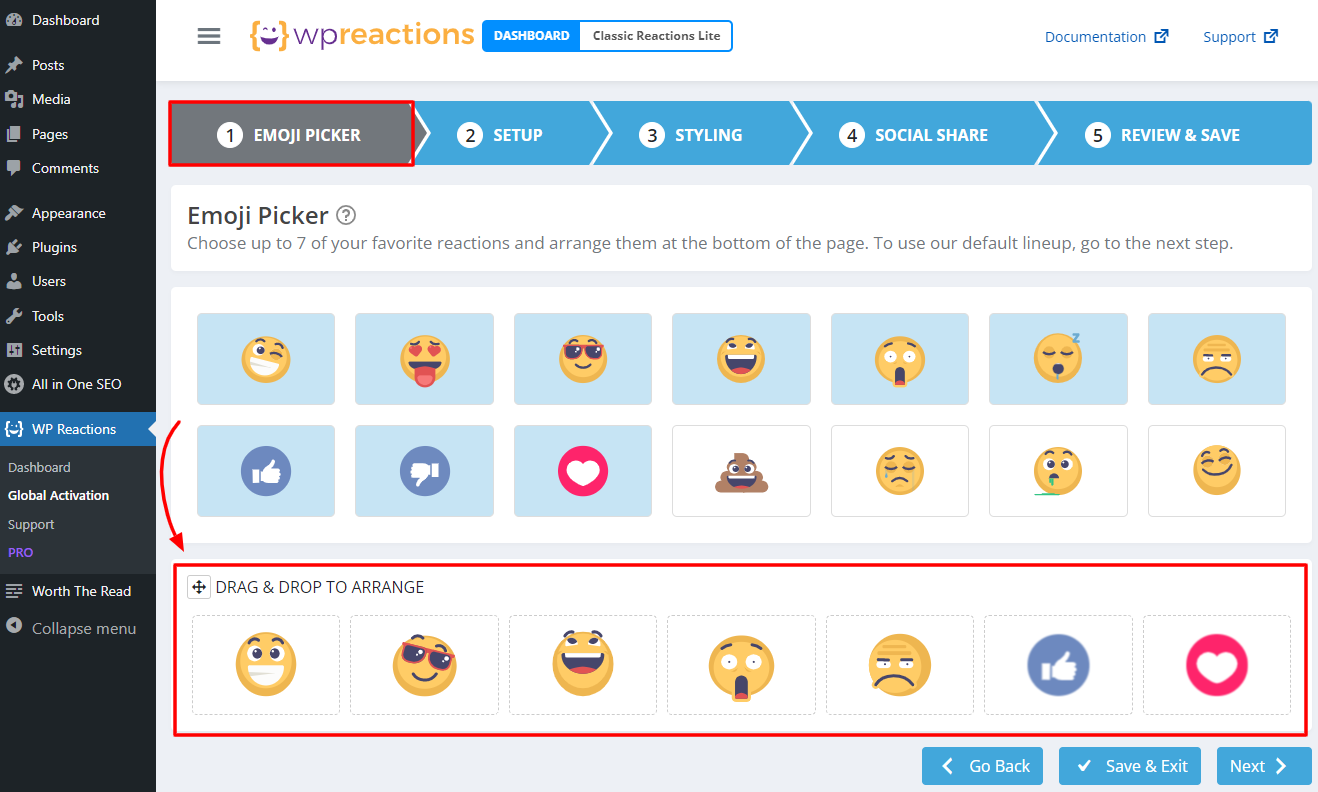
There are 5 customization steps. In the first section – Emoji Picker, this plugin allows you to select and arrange the emojis you want to present on your website. You can add or remove emojis without any trouble.
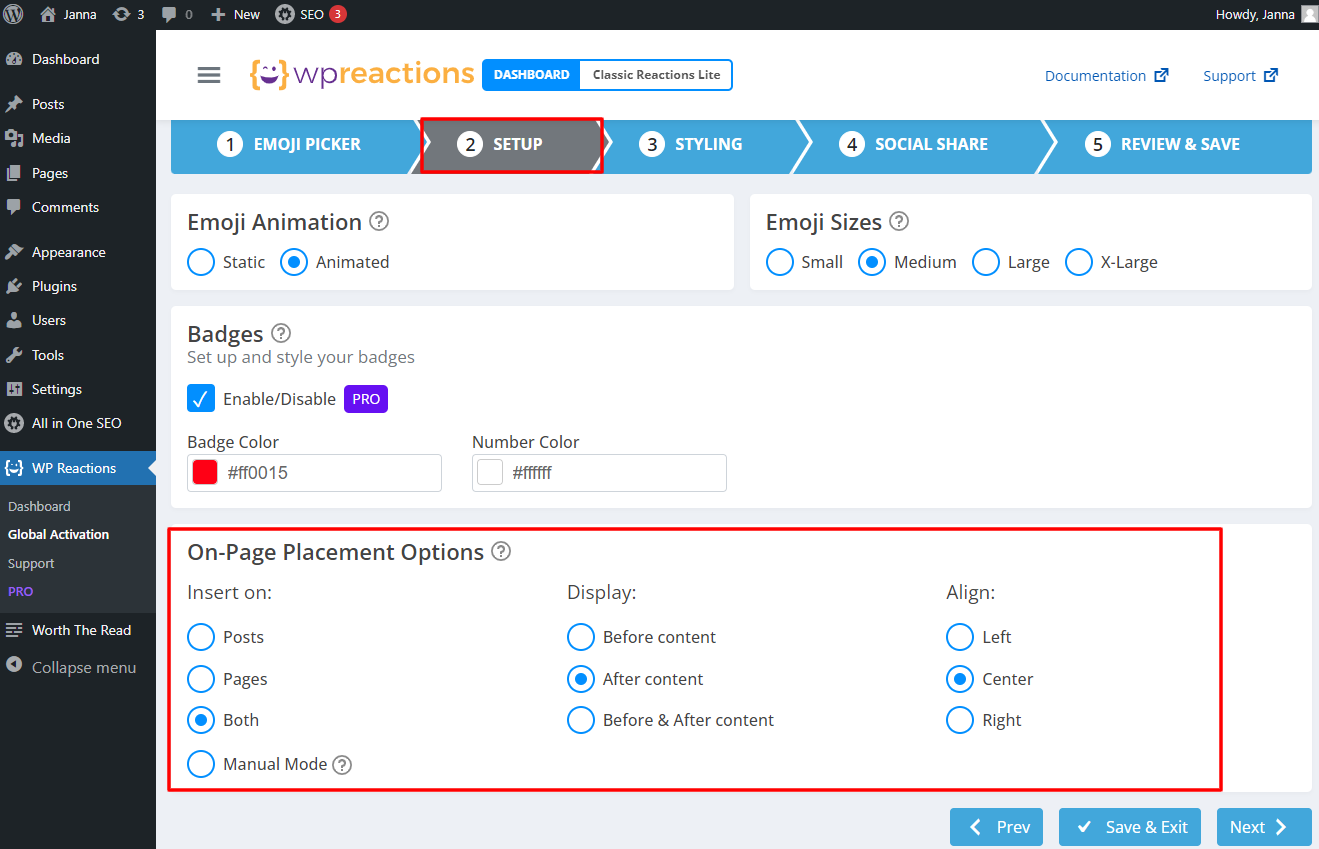
In the Setup section, there are some main options for you to select:
- Emoji Animation: Static or Animated
- Emoji Sizes: Small, Medium, Large or X-Large
- Badges: Badge Color & Number Color
- On-Page Placement Options: It enables you to choose where you want to insert and display reaction buttons.
The next part is Styling where you can show or hide CTA, edit font size, font weight, and color, as well as customize the emoji background styling. The fourth section is Social Share. It has 3 parts to choose from and modify: Button Behavior, Social Share Buttons, and Button Design.
In the last step, you just need to review your setup and then click on the Save & Exit button to store all your settings.
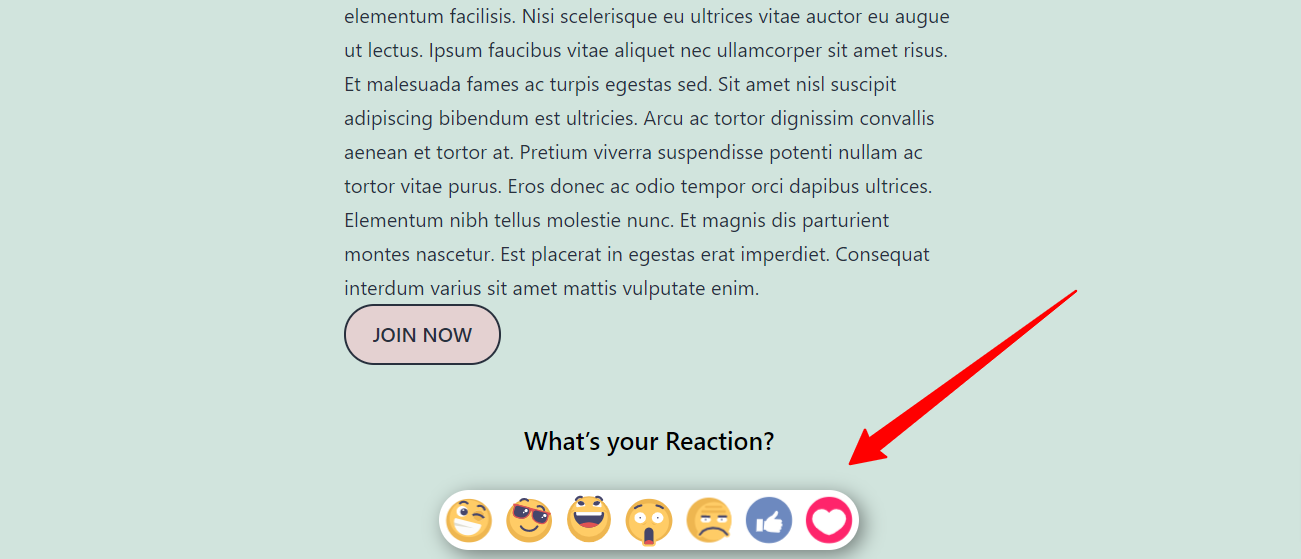
Now, everything is done. Go to the front end of your website, access any post or page, and check the result. The reaction buttons will appear beautifully on your WordPress website.
Final words
To sum up, you can easily and effectively add reaction buttons to WordPress via a free plugin. Therefore, don’t hesitate to do that to boost visitor engagement now. If you find the blog useful and easy to understand, don’t forget to share it with your friends and other WordPress users.
Last but not least, we are providing more than 200 responsive and free WordPress Themes on various topics, so take a look if you need a new theme for your website. Thank you.