Introduction
Submenu or dropdown menu plays an important role for a website. It saves space in the header as well as shows the depth of the content of the page. A well-designed menu will put pages with general content as the main menu (parents), pages with more specific and detailed content will be included in the submenu. With menu layout from general to specific, visitors can easily find the content they want. If you are using Joomla 4 and wish to create a submenu with the Cassiopeia template, the blog today is for you. Thus, let’s check it out!
Let’s start to Create Submenu with Cassiopeia in Joomla 4
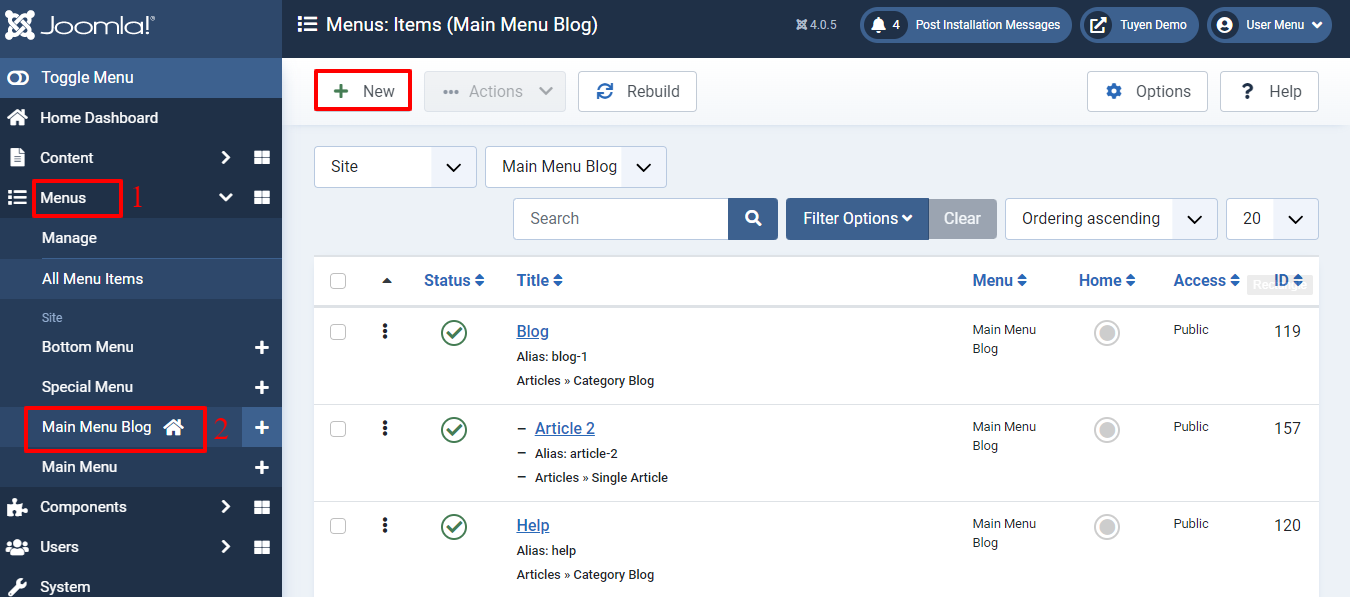
We have already introduced to you the way how to use the Menu with Cassiopeia before. However, we haven’t shown you how to generate a submenu yet. So, now, let’s do that by going to Menus -> Main Menu Blog (the menu that you are using for your website).
After that, you can freely select an available menu item you generated before or create a new one. In the example, we will add a new menu item.
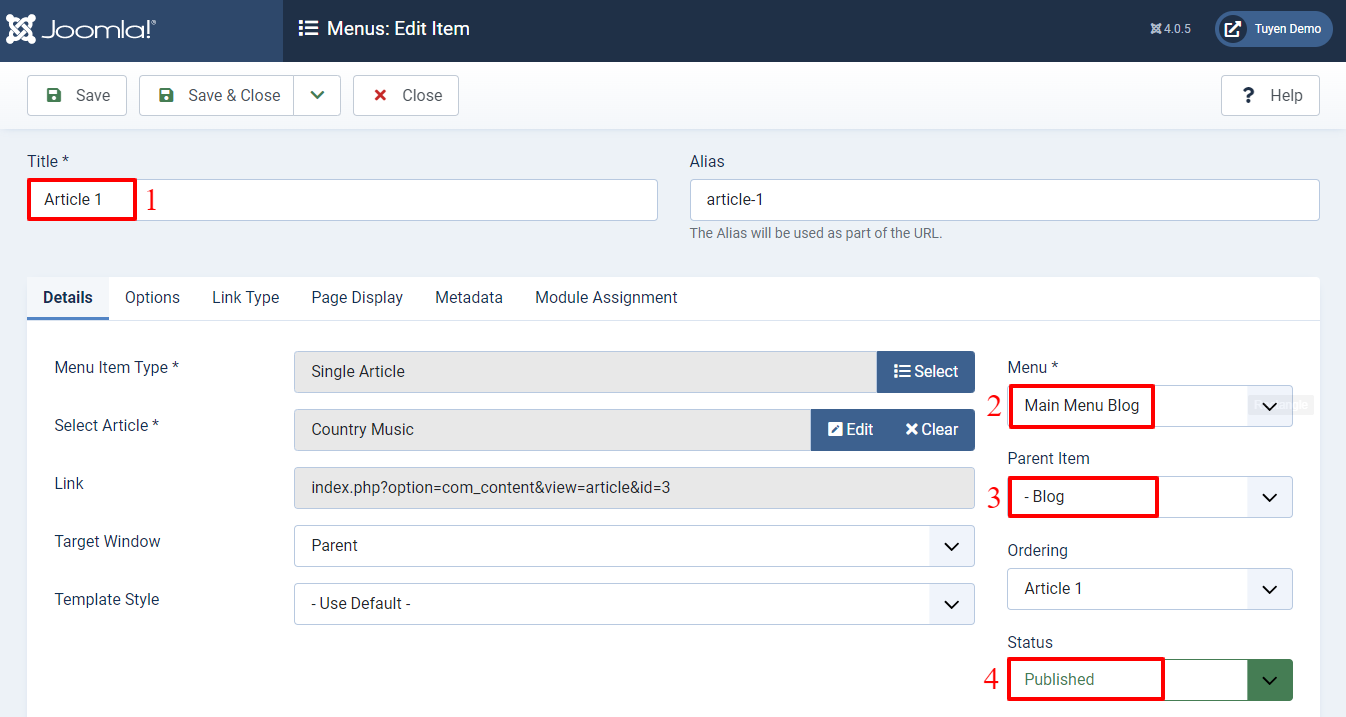
If you choose the available menu item, all you need to do is change the Parent Item from No parent to the menu item you want to become the parent. For instance, we choose the Blog page for parents, and article 1 is a submenu of it.
In case you generate a new menu item, simply fill out the title, then select the Menu and Parent Item. After that, let’s make sure the status of the menu item is Published. Besides that, don’t forget to choose the menu item type and some information below it.
Finally, you just need to save it.
In the next step, let’s open Content -> Site Modules, then enter the name of the main menu you are utilizing. Next, click to edit it.
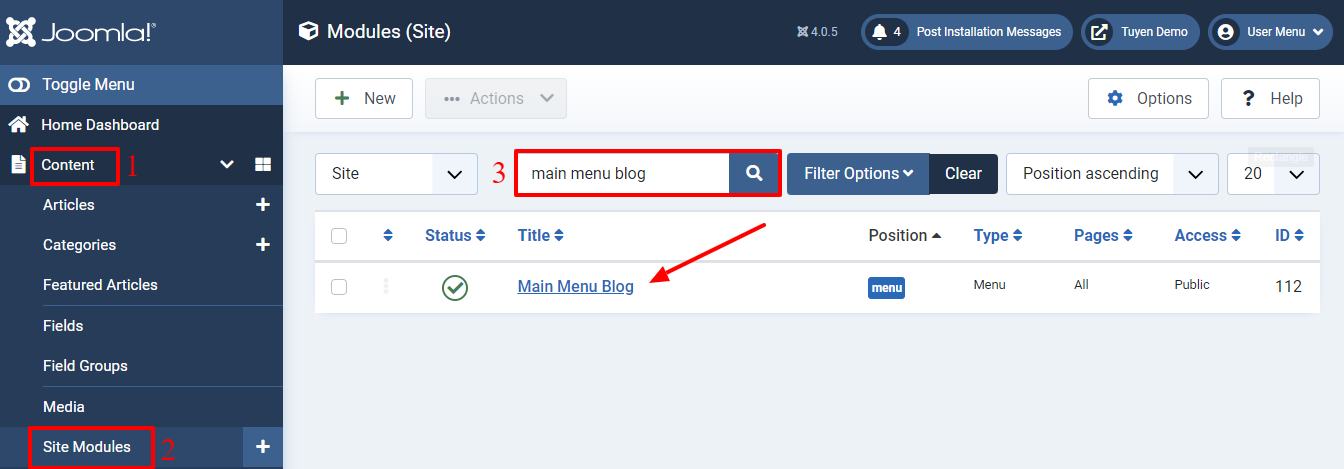
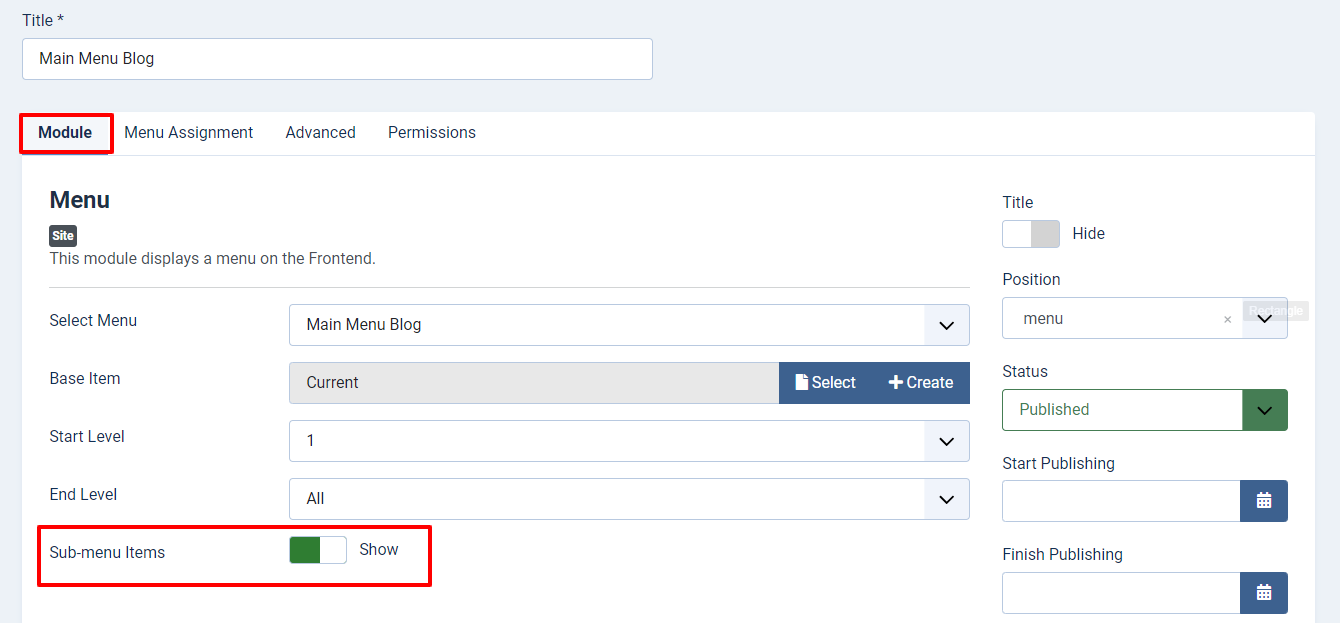
In the Module tab, let’s turn on Sub-menu Items to show the submenu in the main menu of your site.
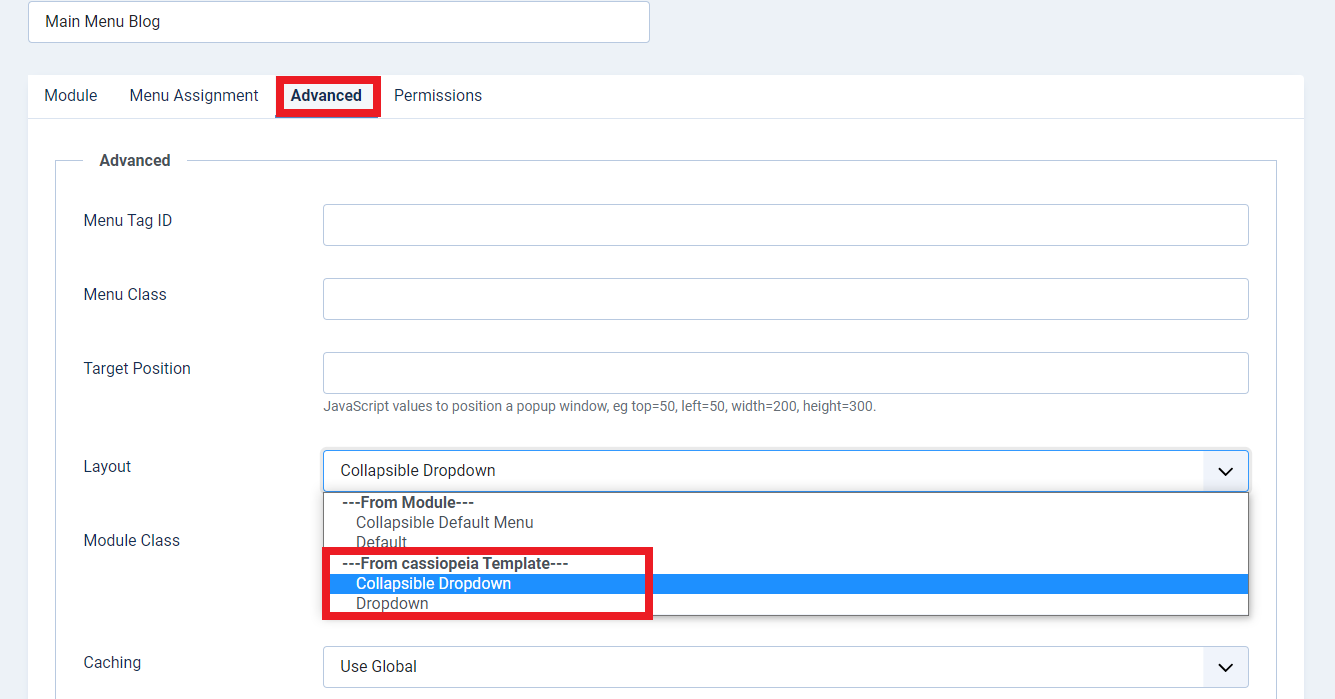
Let’s move on to the Advanced tab. In the Layout section, simply select one of the two options from the Cassiopeia template to showcase the submenu. You can get more information about the 4 options of the Layout here.
Don’t forget to store all your change by pressing the Save button at the top of the screen.
You can implement the steps below again and again to add more submenu items.
What are you waiting for? Check out the result on your site now! So, you can see that Article 1 and Article 2 are submenus of the Blog option.

Furthermore, you can also set Article 1 as a parent item of Article 2. And let’s see the result.

Create Submenu with Cassiopeia – simple or complicated?
In conclusion, with the instruction in the blog today, we hope that you can create a submenu with Cassiopeia in Joomla 4 effectively. If you want to ask for more information about the topic, don’t hesitate to submit your comment below. So, we can answer you as soon as possible. Last but not least, in case you have an intention to renew your site with a new template, let’s visit our site and explore many responsive Joomla 4 Templates. Thanks for your reading. See you in the next blog.

- Resolving the “Class JFactory Not Found” Error in Joomla When Upgrading to J6 - December 19, 2025
- The Utility Of VPNs For Site Authors And Admins - November 24, 2025
- Joomla! 6: What’s New and How to Upgrade from Joomla! 5 - October 23, 2025


Thank you for this information. I found it to help me very much.
You’re welcome!
Ik ben aan het kijken of cassiopeia iets voor mij is. Ik zag dat je het pijltje moet aanklikken als je een sub-menu-item wilt activeren. Als je bijvoorbeeld alleen blog (in het voorbeeld) aanklikt dan zie je de subitems niet verschijnen. Is dat zodanig aan te passen dat je de subitems ook ziet als je het hoofditem aanklikt?
This is just basic template with limited functions. You can take a look for our Joomla! 4 templates list.
Hello,
This is a great tutorial. Is it possible to change the dropdown menu to appear when the parent link is hovered instead of being a click to reveal.
Thanks
Hi,
Unfortunate, it doesn’t support with this base theme.
But you can reach this feature with our J4 templates at http://ltheme.com/joomla-templates/