As you know, the topbar is a horizontal bar located above the header position of a website. It is added to showcase information related to the website owner, such as phone numbers, hotlines, email addresses, or even social media links. If you are using Joomla 4 with the default Cassiopeia template, you can create a topbar for your website. Today, we will bring you 2 ways to add a topbar with Cassiopeia step-by-step. So, let’s discover the blog today now!
How to add Topbar with Cassiopeia in Joomla 4
Create Topbar by using KickstartCassiopeia
The first method we want to show you is using the KickstartCassiopeia module to generate a topbar for your site. With the free version, this module will support you to not only add a topbar but also customize the header, change the footer background, and much more. After downloading the KickstartCassiopeia here, you can install the module to your site.
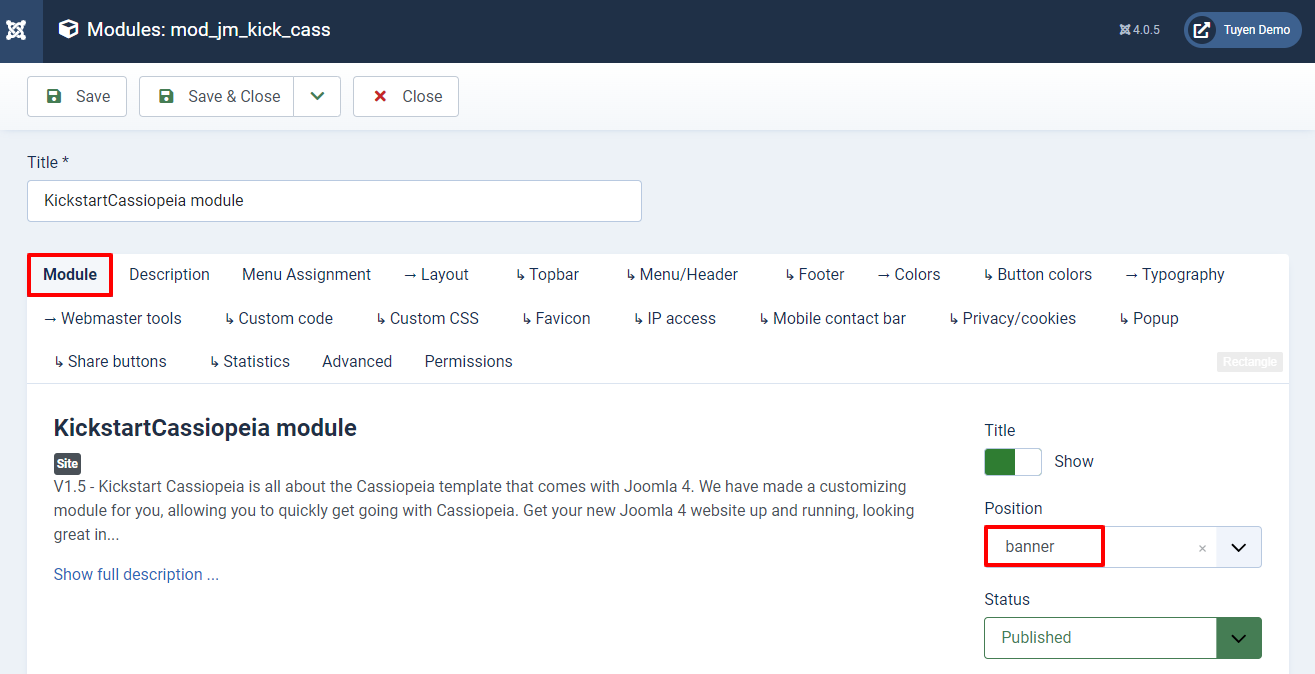
Once installation, let’s go to Content -> Site Modules, then find and open the KickstartCassiopeia module.
Next, in the Module tab, you need to choose the banner position. Moreover, don’t forget to set On all pages for Module Assignment in the Menu Assignment tab.
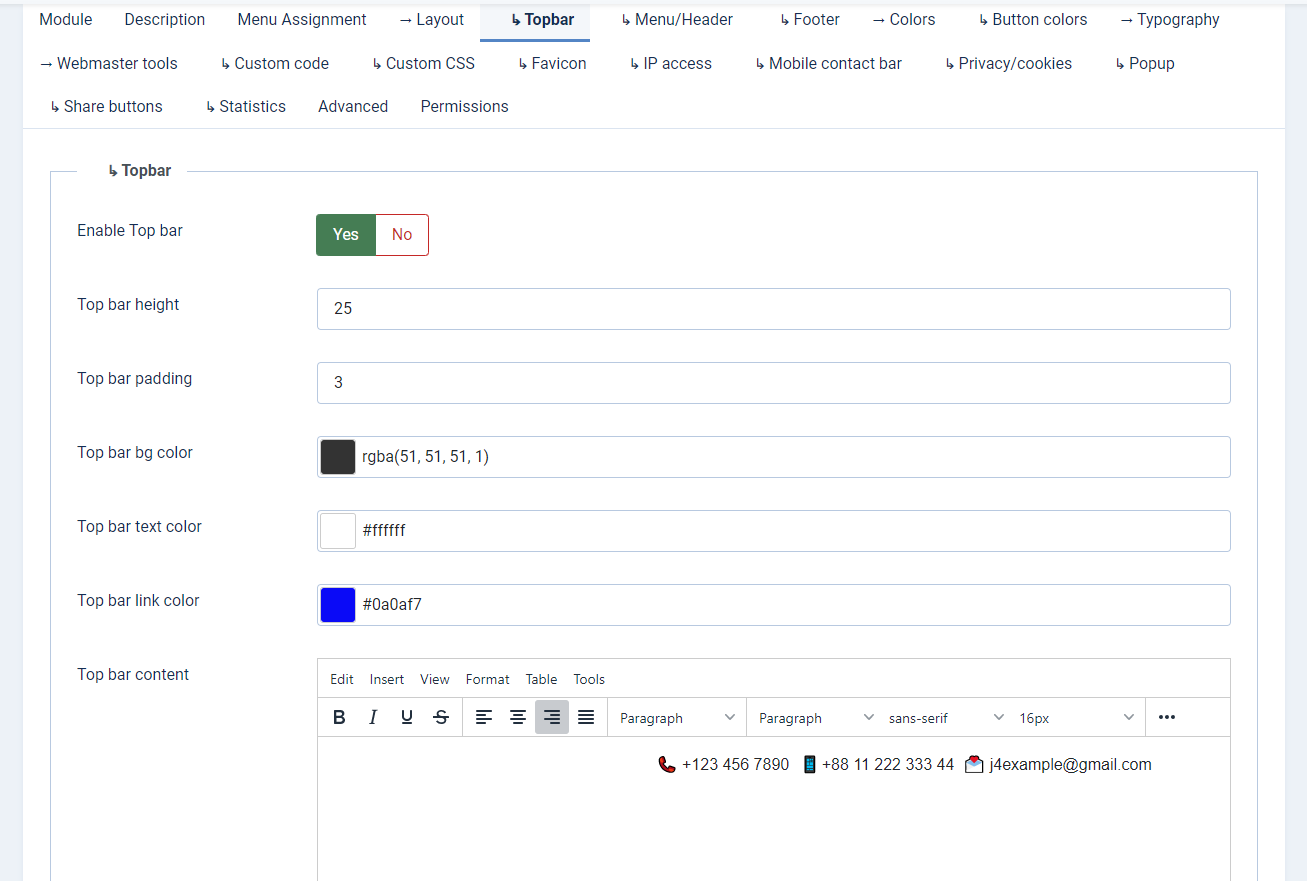
Let’s move on to the Topbar tab, simply click on the Yes option to enable the Tob bar. Now, you are able to customize the height and padding of the top bar. Besides that, it also allows you to edit the background color, text color, and link color of the top bar.
In the text box, you are easily able to add the top bar content you want. Don’t forget to save all your settings after finishing.
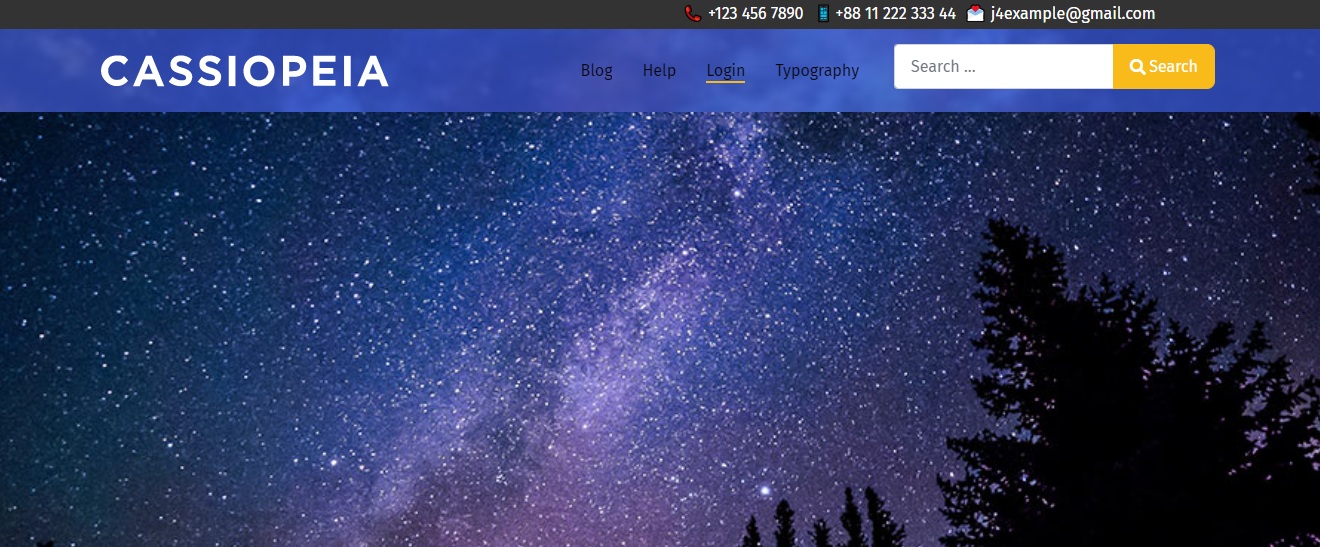
Now, you can check the result by visiting your website. The top bar will appear exactly like the way you build it.
Add Topbar with Cassiopeia manually
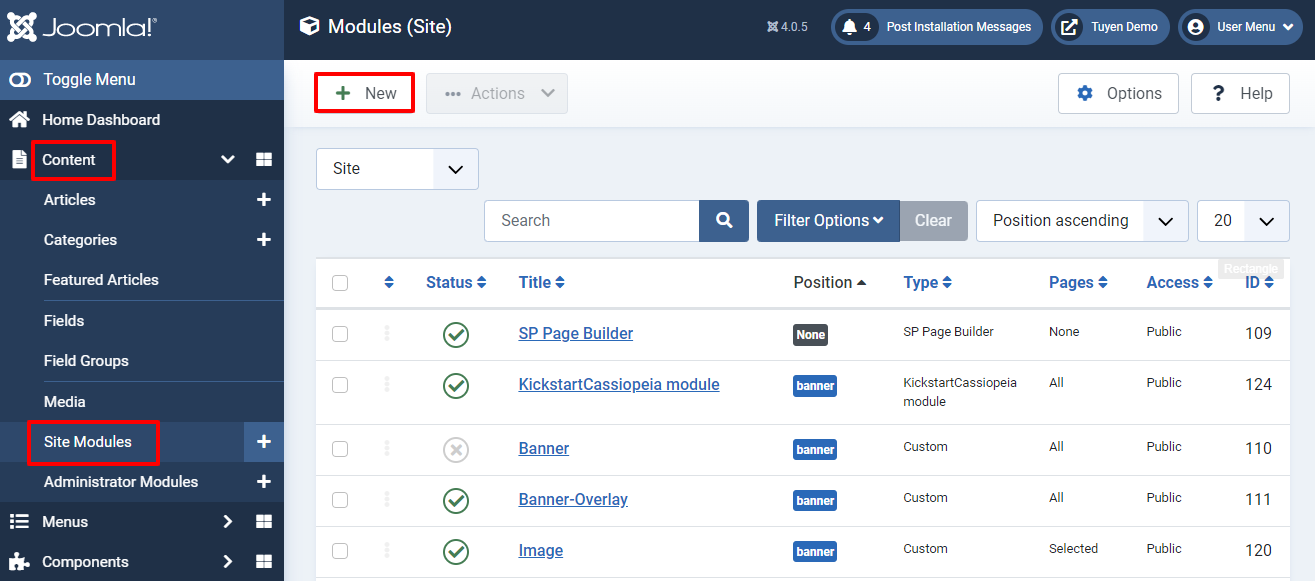
If you don’t want to use the KickstartCassiopeia module to generate a topbar, you can also do it manually. First of all, you just need to access Content -> Site Modules -> New to create a new module.
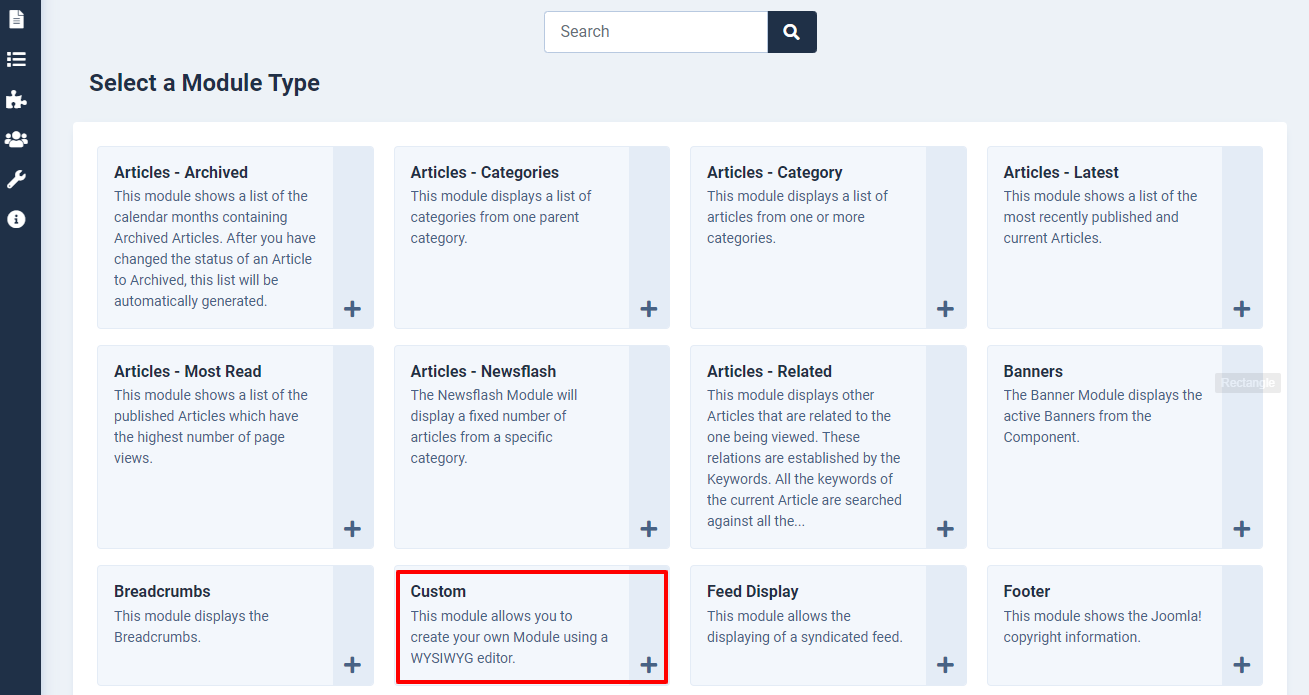
It’s time for you to select a module type, so let’s choose a Custom module.
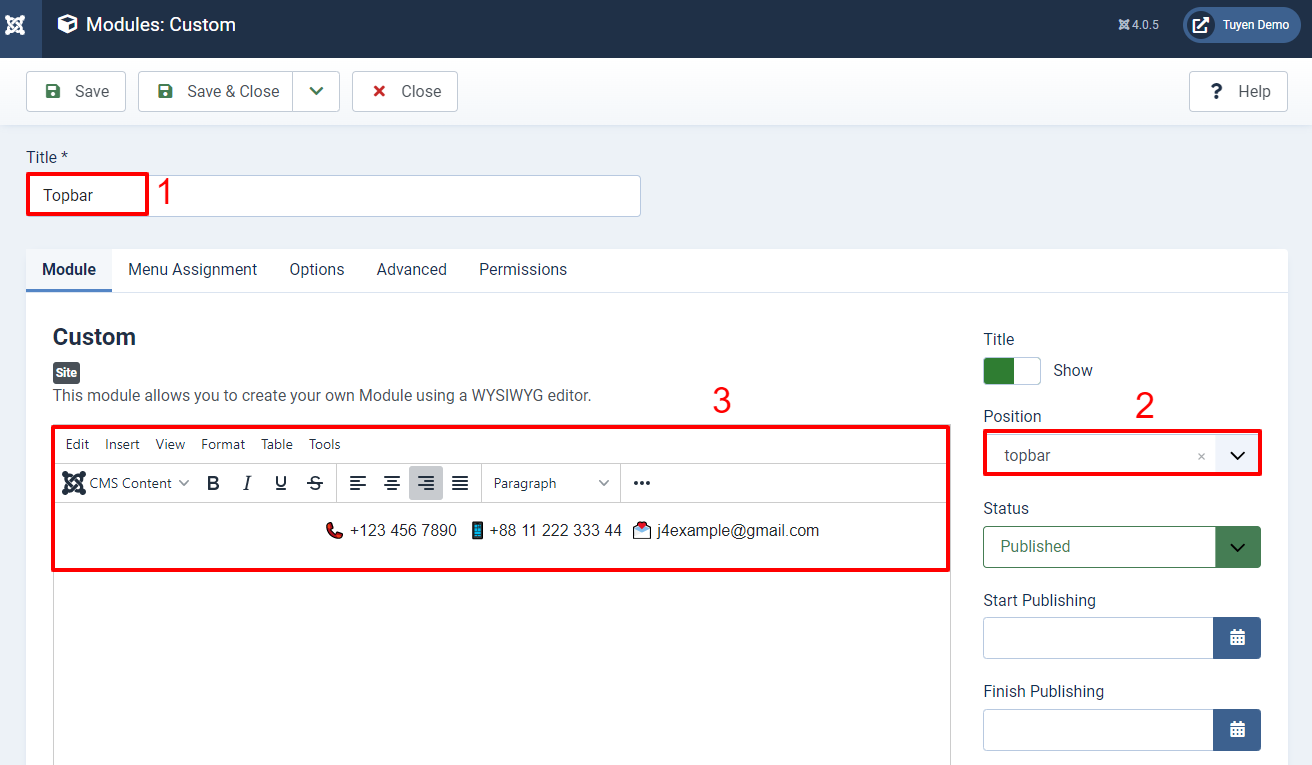
In the next step, simply enter the title, then choose the top bar for the Position section. In addition, remember that you set the module with Published status. After that, in the text box, all you need to do is fill out the content you hope to display on the top bar.
Let’s move on to the Menu Assignment, you just need to set it On all pages. Furthermore, if you desire to add the image background, let’s do it with the Options tab. In the Advanced tab, you can set up the layout, module class, and so on. For more information about that, you can visit here.
After completing all your settings, don’t forget to click on the Save button.
Finally, you can access your site to see the top bar you have already created.
Wrap up
All in all, we hope that after reading the blog today, you can easily add Topbar with Cassiopeia in Joomla 4 without any difficulties. If you think the blog is helpful, why don’t you share it with your friends? Besides, in case you want to ask us anything related to the topic, don’t hesitate to leave your comment below. Last but not least, we are offering many responsive and professional Joomla 4 Templates, if you want to get a new one for your site, let’s take a look.
Welcome to LT Digital Team. We make daily blogs for Joomla! and WordPress CMS, support customers and everyone who has issues with these CMSs and solve any issues with blog instruction posts, trusted by over 1.5 million readers worldwide.
Latest posts by LT Digital Team (Content & Marketing) (see all)
We use cookies to improve your experience on our website. By browsing this website, you agree to our use of cookies.
Functional
Always active
The technical storage or access is strictly necessary for the legitimate purpose of enabling the use of a specific service explicitly requested by the subscriber or user, or for the sole purpose of carrying out the transmission of a communication over an electronic communications network.
Preferences
The technical storage or access is necessary for the legitimate purpose of storing preferences that are not requested by the subscriber or user.
Statistics
The technical storage or access that is used exclusively for statistical purposes.The technical storage or access that is used exclusively for anonymous statistical purposes. Without a subpoena, voluntary compliance on the part of your Internet Service Provider, or additional records from a third party, information stored or retrieved for this purpose alone cannot usually be used to identify you.
Marketing
The technical storage or access is required to create user profiles to send advertising, or to track the user on a website or across several websites for similar marketing purposes.


Recent Comments