Custom post type is extra functionality that WordPress allows the user to create a wide array of content other than the default posts and pages. However, not everyone has a rich knowledge of this functionality, so recently many users have asked “how to create custom post types in WordPress?”. In today’s blog, we will give you an insight into what does it mean. In addition, we will give the easiest way to create these post types in WordPress. Now, let’s explore.
What is Custom Post Type in WordPress?
Custom Post Type is defined as content types. It is also similar to Posts or Pages on your WordPress site. You can also edit and add anything to your preference. However, the biggest difference between regular posts and custom post types is that custom post types display a different value for post_type inside the database. It means that it is different from the default values such as page, attachment, and post.
By default, WordPress offers various post types including:
Post
Page
Attachment
Revision
Nav Menu
How to create a custom post type in WordPress?
There are several ways to assist you to create custom post types in WordPress. However, in today’s blog, we are going to share with you an easy method by using a free plugin.
The amazing plugin that we would like to introduce is the Custom Post Type UI plugin. This is one of the great WordPress custom post type plugins that can support you to address the problem of creating custom post types as well as managing taxonomies in your Website.
To use this method, you simply follow the steps below.
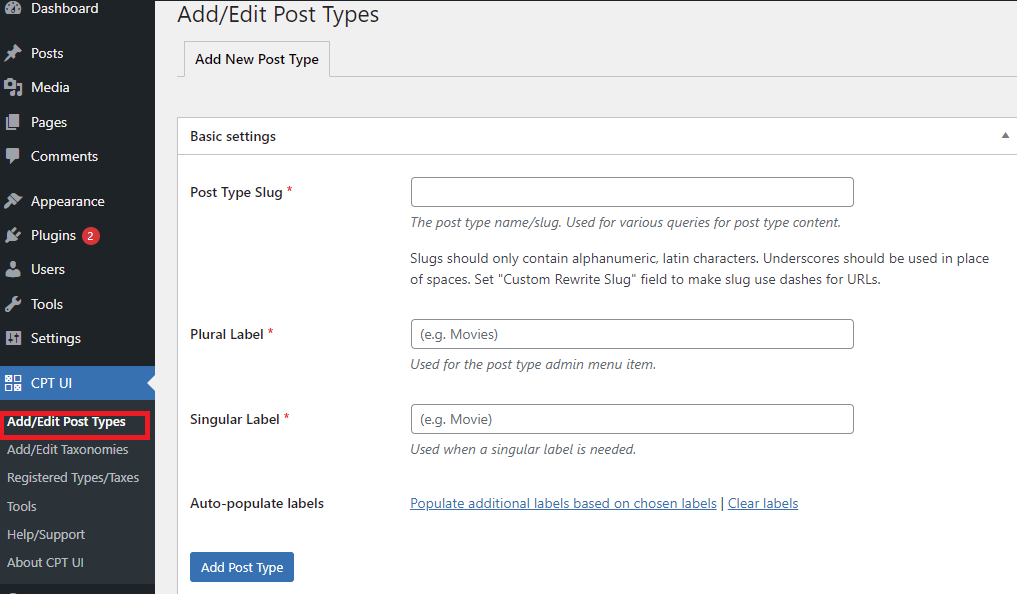
After activating the plugin, let’s navigate to your WordPress dashboard and click on the new items in your WordPress menu titled CPT UI.
Simply go to CPT UI > Add/Edit Post Typespage to create a new custom post type.
Under the Basic Settings section, you need to enter a slug for your custom post type. The slug will be displayed in the URL, hence it only includes letters and numbers. When you provide the slug, it will automatically convert to lowercase letters.
Secondly, you need to give your custom post type a Plural label that will be displayed in your dashboard and any position on your website. And in the Singular label field, you need to enter the singular form of your label.
Next, when you click on the option displaying “Populate additional labels based on chosen labels“. Immediately, the plugin will automatically fill in the rest of the label fields in the following section.
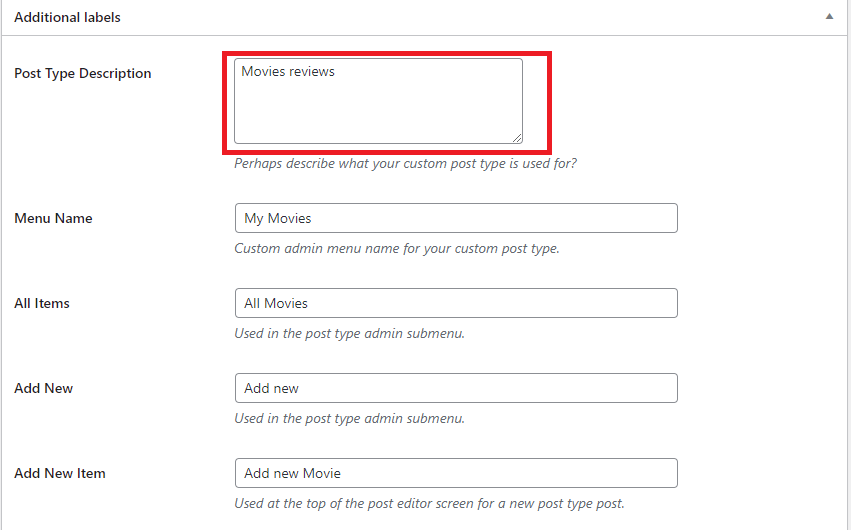
Under the “Additional Labels” section, you can give a description for your post type as well as change labels by yourself.
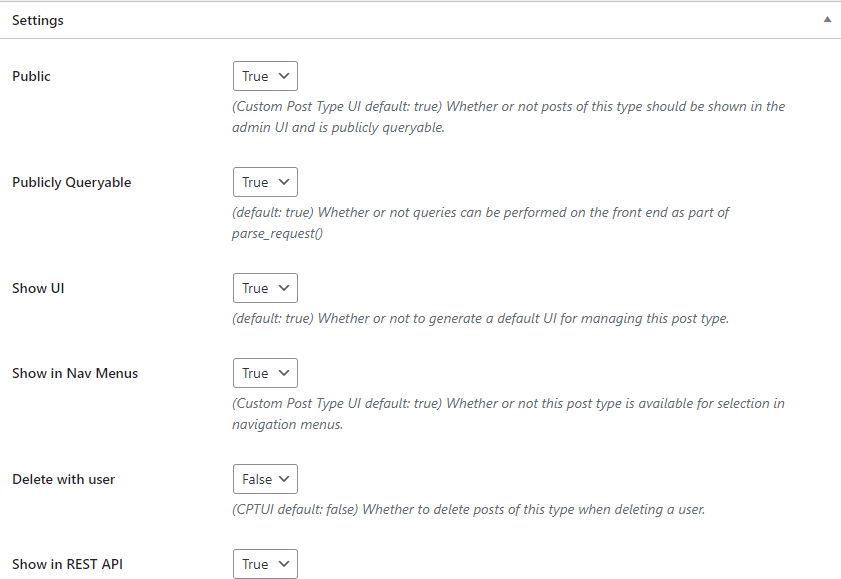
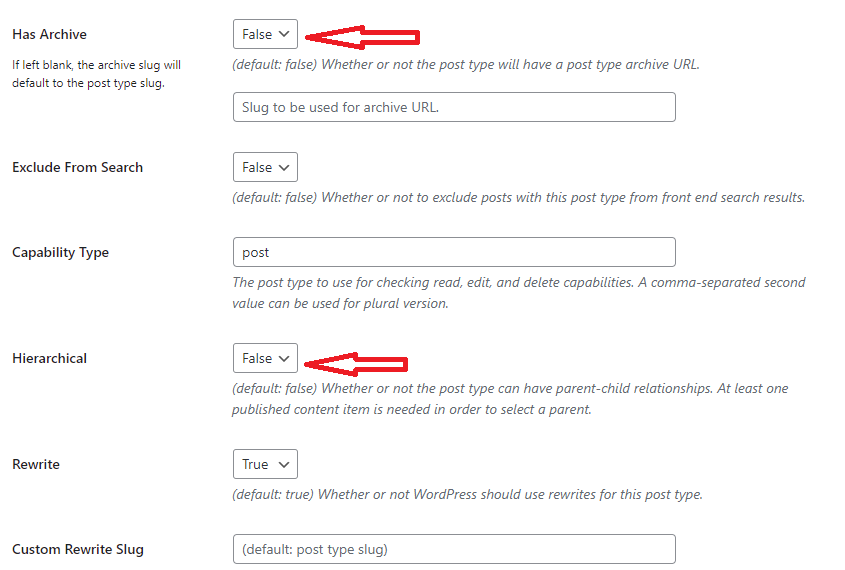
Now, let’s keep scrolling down the screen to the Settings section. From here, you can configure your custom post type’s properties. In addition, each option will display a brief description explaining how it appears in your WordPress admin dashboard and on your website.
For example, you have the option to show your custom post type in the navigation menus as in the screenshot above.
Further down the list, there is an option that allows you to enable archives for your custom post type. Let’s set this option to “True” if you want to create a delicate listing page for your custom post type such as a category page.
You can also enable parent-child posts for your post type by setting the Hierarchical option to “True“.
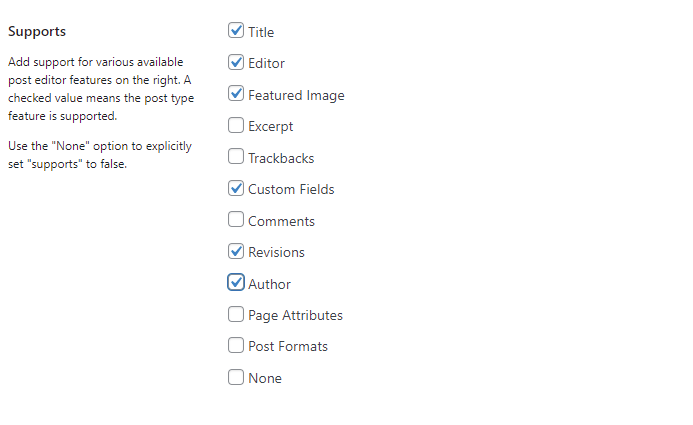
At the bottom of the Settings section, you will see a lot of options to select which editing features your post type would support. Let’s place a tick on the options that you want to be included.
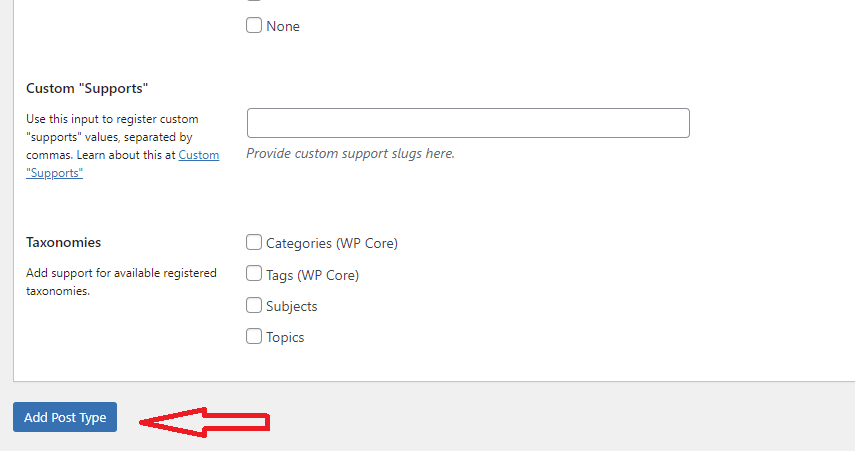
And finally, you have the option to choose any existing taxonomies for your custom post type.
Once you have completed all options, let’s click on the “Add Post Type” option.
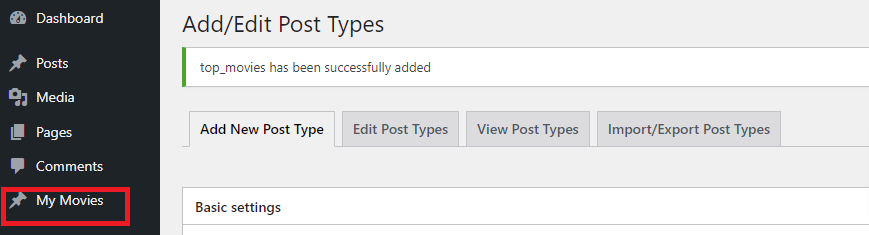
Now, your new custom post type is visible in your WP dashboard.
How to display custom post types in WordPress?
Method 1:Display custom post types in the Front Page
The biggest advantage of using custom post types is that they help you separate your custom content types from your regular posts. Nevertheless, if you still want to show them among your regular post, you can do that by adding the following code into your theme’s functions.php file or a site-specific plugin.
Don’t forget to replace “movies” in our example code with your custom post type.
Method 2: Display custom post types in widgets
Usually, a default widget in WordPress only allows you to display recent posts, but it doesn’t permit you to display a custom post type.
Don’t worry, there is a simple way to help you handle this task.
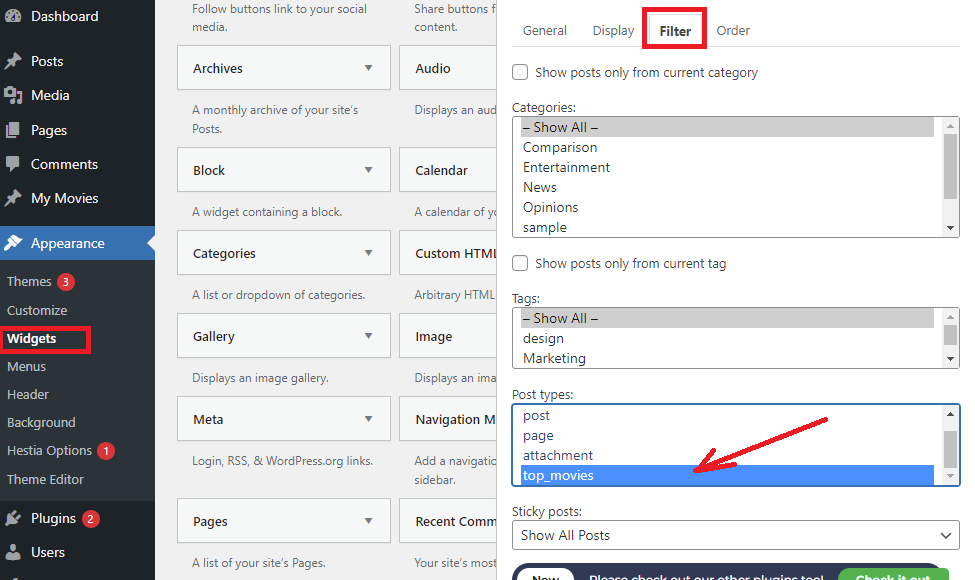
First of all, you need to install and active the Ultimate Posts Widget plugin. After installing the plugin, let’s visit Appearance > Widgets and simply drag and drop the Ultimate Posts widget to a sidebar.
This useful widget enables you to easily display recent post types from any post type. You can customize the settings of the widget by choosing the options according to your preference.
Once you are done, don’t forget to click on the “Save” button. Then visit your website and see your custom post types displayed in the sidebar.
Method 3: Display custom post types using default archive template
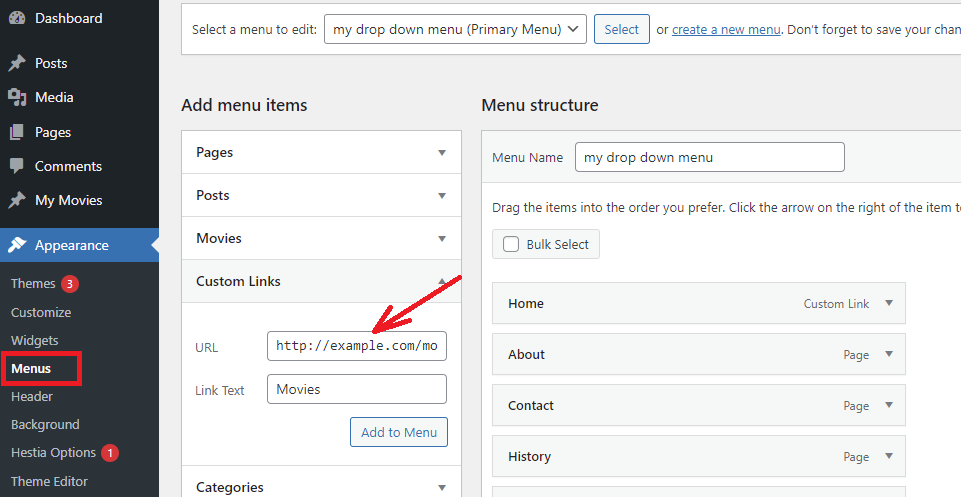
This method allows you to display your custom post types in your navigation menu.
To start off, first of all, you need to go to Appearance > Menus and then add a custom link to your menu. This custom link will link your custom post type.
In that case, your website is utilizing SEO-friendly permalinks, then your URL’s will look similar to the following link:
https://ltheme.com/movies
In contrast, if the permalinks of your website are not SEO friendly, then your URL’s will look like this:
https://ltheme.com/?post_type=movies
You can go ahead and paste the URL that matches your website type. And don’t forget to replace the ltheme.com with your domain name and the “movies” with your custom post type name.
Finally, don’t forget to click on the “Save Menu” before visiting the front end of your website. Now, there is a new menu added in your navigation menu for your custom post-type archive page.
Conclusion
We have just demonstrated a detailed guide on how to create custom post types in WOrdPress. Hopefully, the provided information above has answered all your queries as well as your problems. If you encounter any issues or need our assistance, please let us know in the comment below.
By the way, you can visit our Free WordPress Themes where we provide plenty of nice, SEO-friendly, responsive designs for your successful website.
Welcome to LT Digital Team. We make daily blogs for Joomla! and WordPress CMS, support customers and everyone who has issues with these CMSs and solve any issues with blog instruction posts, trusted by over 1.5 million readers worldwide.
Latest posts by LT Digital Team (Content & Marketing) (see all)
We use cookies to improve your experience on our website. By browsing this website, you agree to our use of cookies.
Functional
Always active
The technical storage or access is strictly necessary for the legitimate purpose of enabling the use of a specific service explicitly requested by the subscriber or user, or for the sole purpose of carrying out the transmission of a communication over an electronic communications network.
Preferences
The technical storage or access is necessary for the legitimate purpose of storing preferences that are not requested by the subscriber or user.
Statistics
The technical storage or access that is used exclusively for statistical purposes.The technical storage or access that is used exclusively for anonymous statistical purposes. Without a subpoena, voluntary compliance on the part of your Internet Service Provider, or additional records from a third party, information stored or retrieved for this purpose alone cannot usually be used to identify you.
Marketing
The technical storage or access is required to create user profiles to send advertising, or to track the user on a website or across several websites for similar marketing purposes.


Recent Comments