
Are you looking for the easiest ways to embed videos in WordPress? Look no further: this article is the right place for you.
Why should you embed videos in WordPress instead of uploading them directly?
There is no denying that inserting a video into your WordPress blog post brings a wide range of valuable benefits. It not only makes your website more impressive but also increases visitor engagement on your website. In addition, most readers seem to prefer watching videos to reading long text. Importantly, embedding a video also has a remarkable impact on SEO.
However, note that you should embed videos in WordPress instead of uploading them directly, for the following reasons:
- Firstly, uploading a huge video to your WordPress Media Library will slow down your website. As a result, it will have a negative impact on your website performance and affect your SEO.
- Secondly, most servers have a maximum upload file size, which is normally 50MB. However, a high-quality video can range from 1-2 GB in size. You can tackle this problem by contacting your hosting service provider to increase the maximum upload size. However, large videos will take up a huge amount of space on your cloud hosting server and quickly fill up your website’s storage.
- Uploaded videos are not completely compatible with all web browsers and all devices. For example, they can perform well on a desktop or laptop, but on mobile they are not fully responsive.
How to embed videos in WordPress?
There are numerous ways to include videos in your WordPress pages and posts, including:
- Using the Classic editor
- Adding videos with the default block editor
- Using third-party plugins
In today’s blog, we will share all three methods in a step-by-step guide. Let’s dive into the following solutions.
Solutions
Method 1: Use the Classic Editor to embed videos in WordPress
The first solution is suitable for those who are using the Classic Editor, the old editor in WordPress.
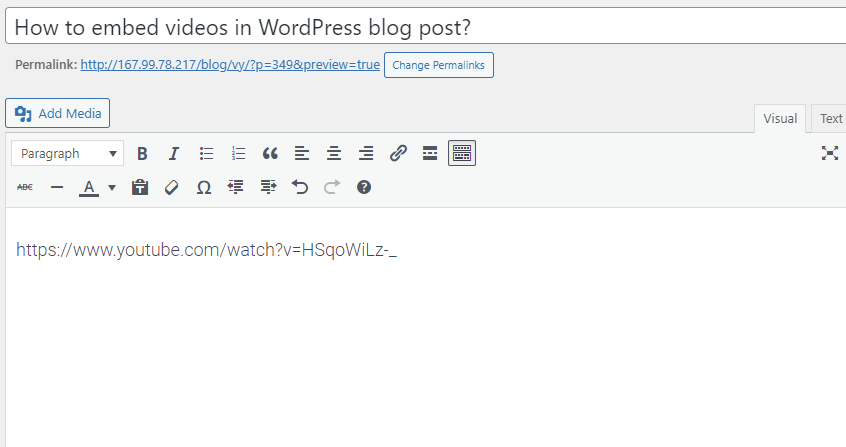
This method is extremely easy to do. Just copy the URL of the video from any video hosting platform such as YouTube, Vimeo, Facebook, and much more. Then paste it directly into the editor.
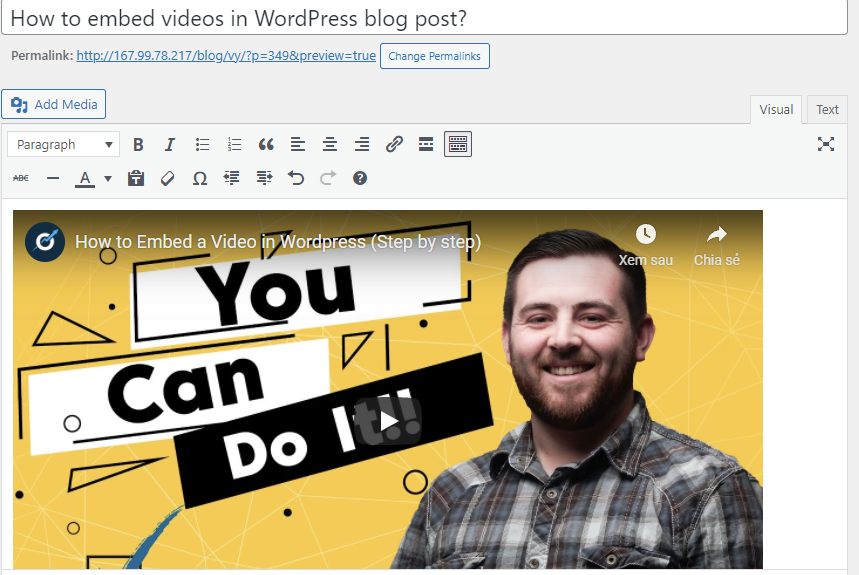
You will see the preview of the video immediately after that. That was so easy, wasn’t it? However, you cannot adjust the width or set other options, which you can do in the new default WordPress editor.
Method 2: Embed videos in the Gutenberg editor
Gutenberg is the new default editor in WordPress. It allows you to create rich content through blocks. In particular, the new editor supports a wide range of video services that let you auto-embed videos in your content, including:
- Amazon Kindle
- Animoto
- Cloudup
- DailyMotion
- Flickr
- TED
- TikTok
- Tumblr
- VideoPress
- Vimeo
- YouTube
- and much more.
Option 1: Paste directly into the page editor
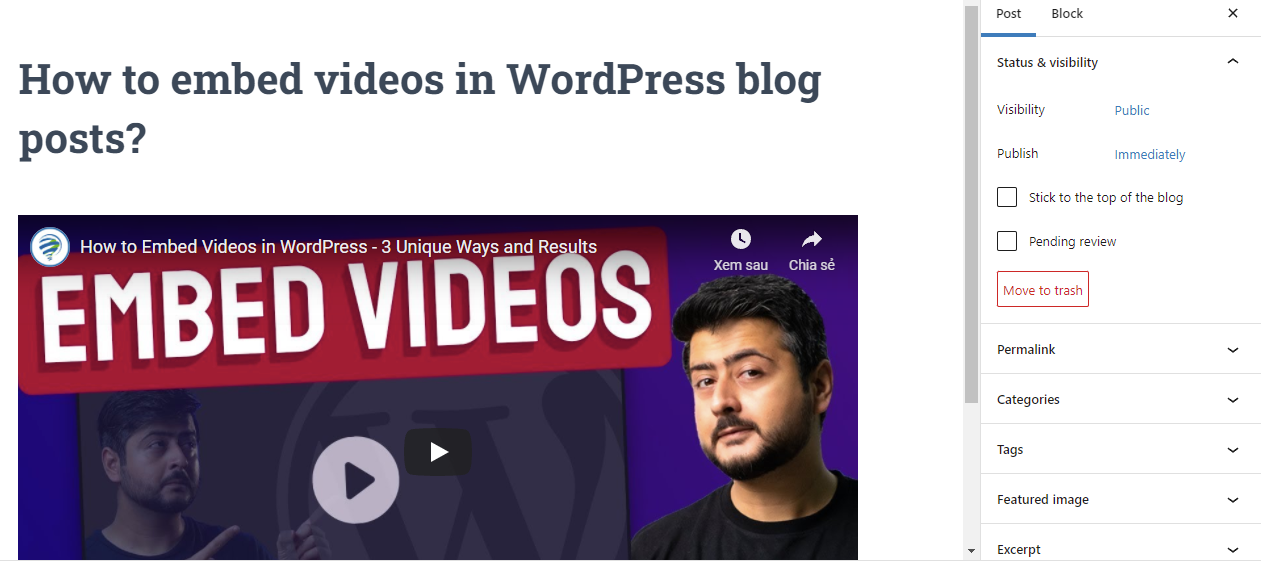
After copying the URL, go to the blog post where you want to embed the video and simply paste the link at the relevant position in your content. This video will be displayed immediately in the visual editor. If you are happy with the result, you can click on Publish or Update the changes.
Option 2: Use WordPress blocks
If you have tried the direct paste method, but the video is not automatically embedded, you can utilize WordPress blocks.
For example, in our case, we are going to use the YouTube block and the Video block.
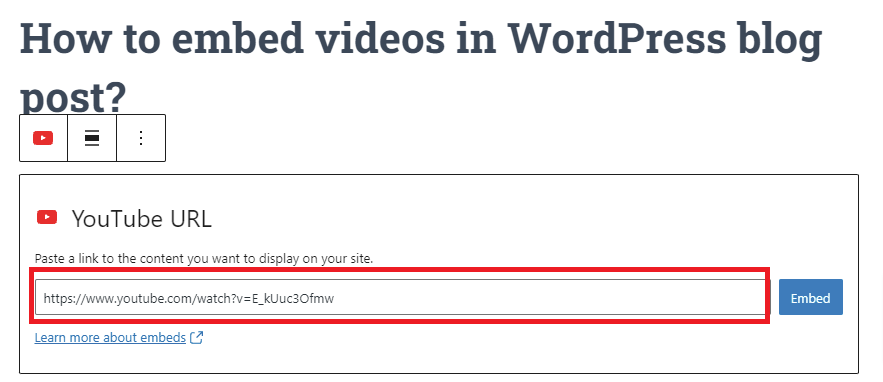
Firstly, you need to click on the “+” symbol to find the YouTube block in the search bar and add it.
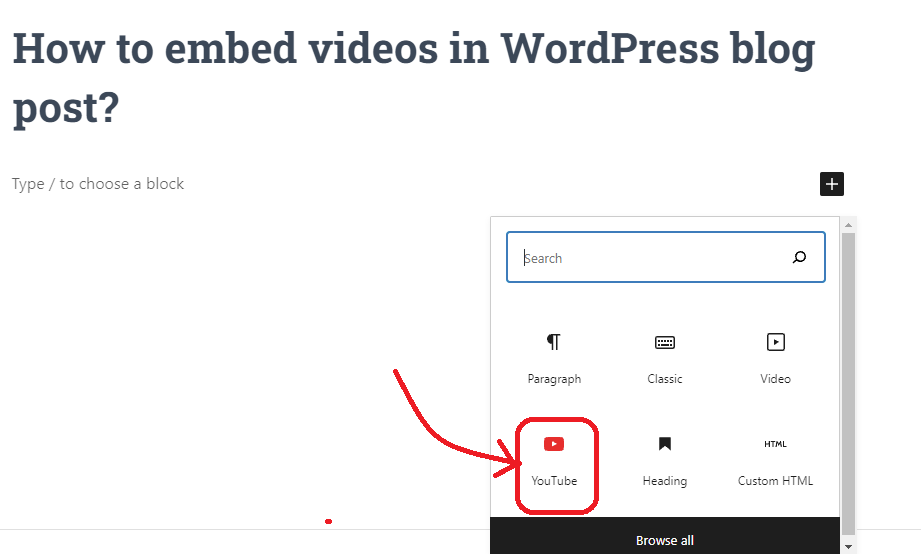
This action will open the YouTube block. Here, it offers a field to paste the link. Once the link has been pasted, click on the “Embed” button. The video will appear in the visual editor after that.
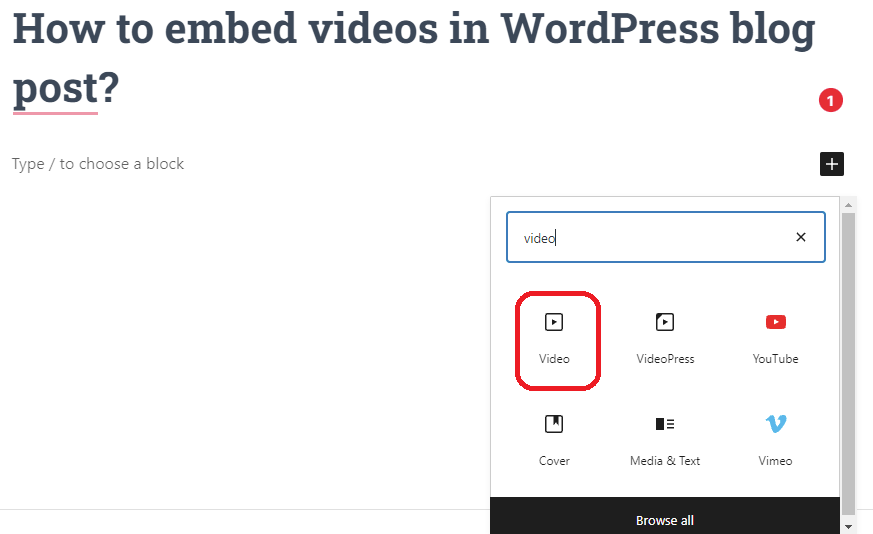
As with other blocks, you first need to find and add a Video block.
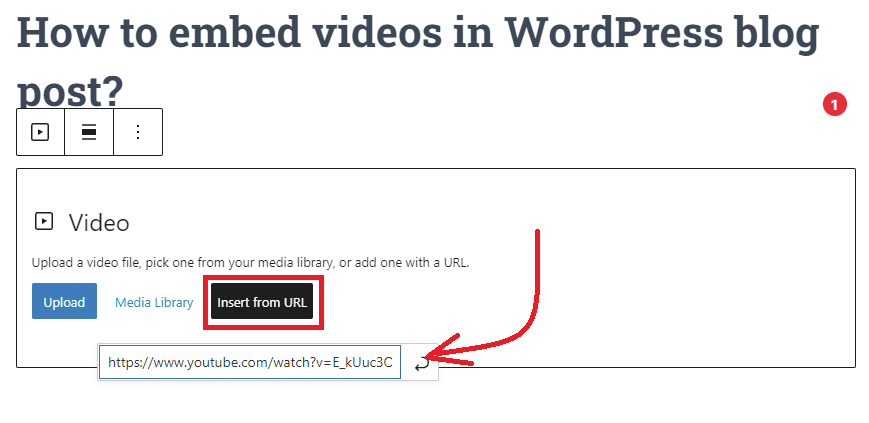
Here, there are 3 options; click on the “Insert from URL” option to paste the URL. Paste the URL of the video and hit the Return symbol to embed it in the post/page.
Method 3: Use a WordPress video plugin
On the internet, there are several excellent WordPress Video Plugins that enable you to embed videos in WordPress automatically, add a video gallery, add autoplay video on page load, and much more. In today’s tutorial, we are going to use Video Gallery as an example.
Step 1: First, install and activate this plugin: simply go to Plugins> Add New, type the plugin’s name in the search bar. Click on “Install Now” and activate it.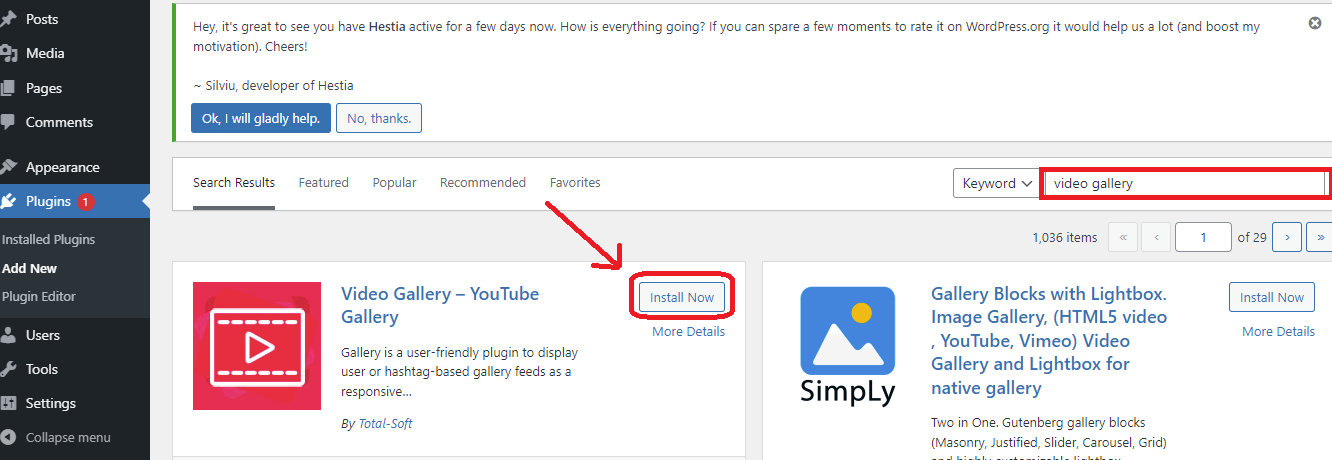
Step 2: Create a video gallery
Navigate to Video gallery > Video Manager on your dashboard, click on the “New Gallery Video” button.
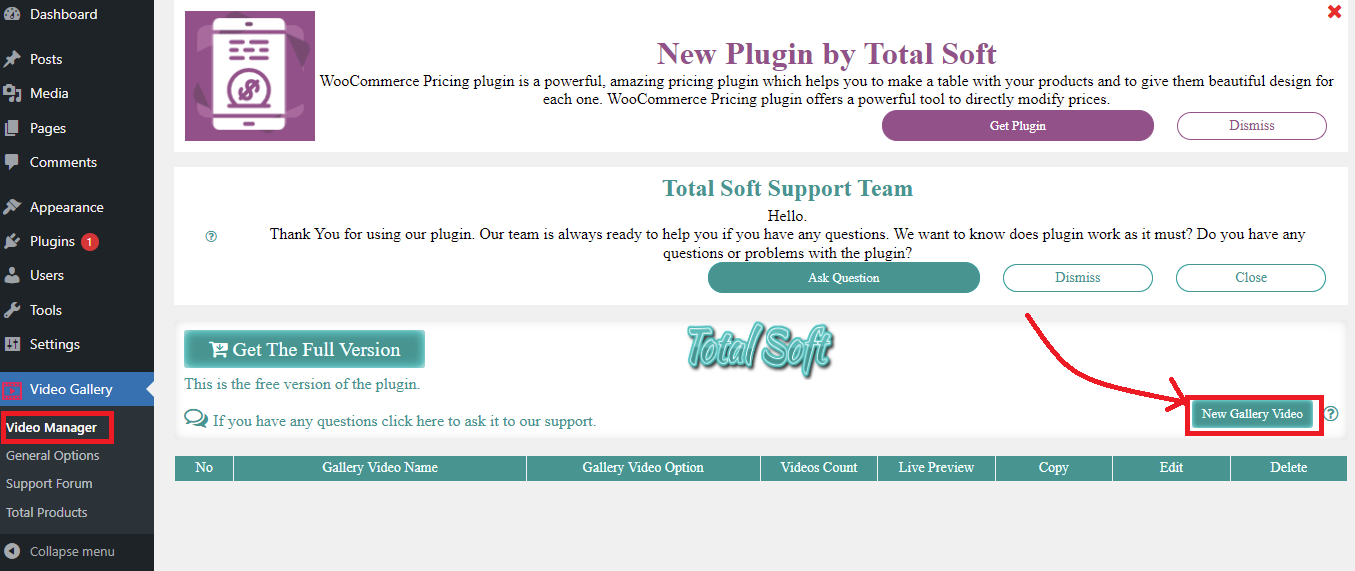
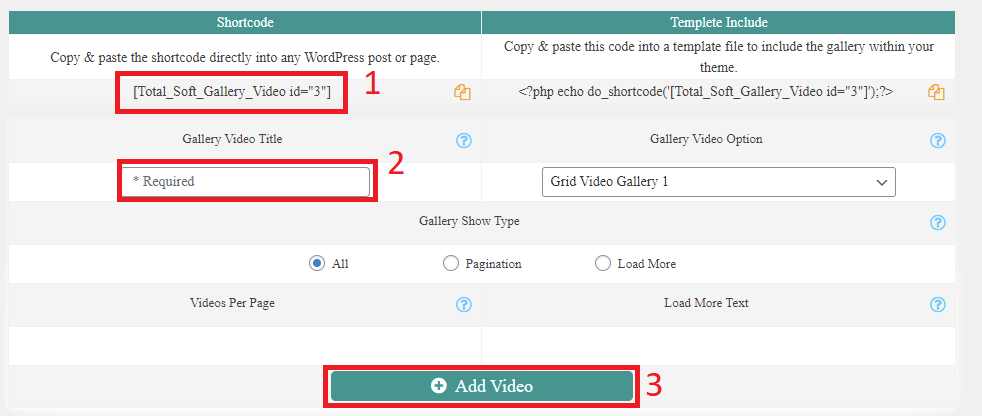
Here, you need to consider three positions:
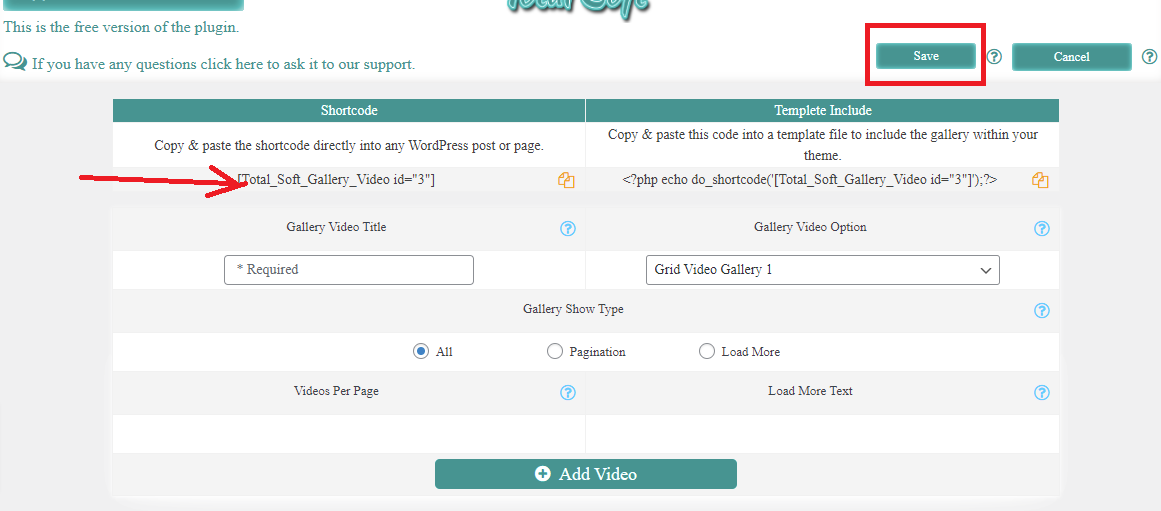
- This plugin offers you a shortcode; copy it and paste it where you want to display the gallery in your post.
- You can set the gallery name in the second position
- Click on the “Add Video” button to open the popup where you can add videos.
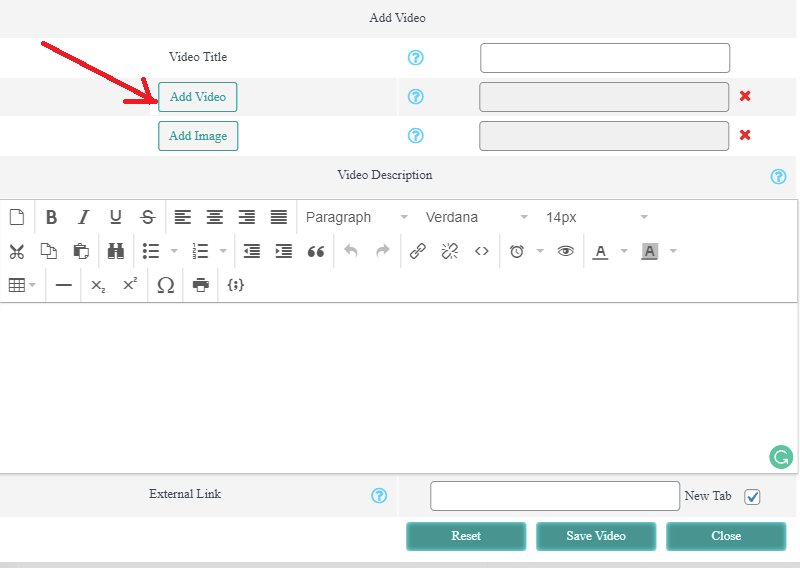
Now, click on Add Video to add a video from its URL. You can also add a video title and description.
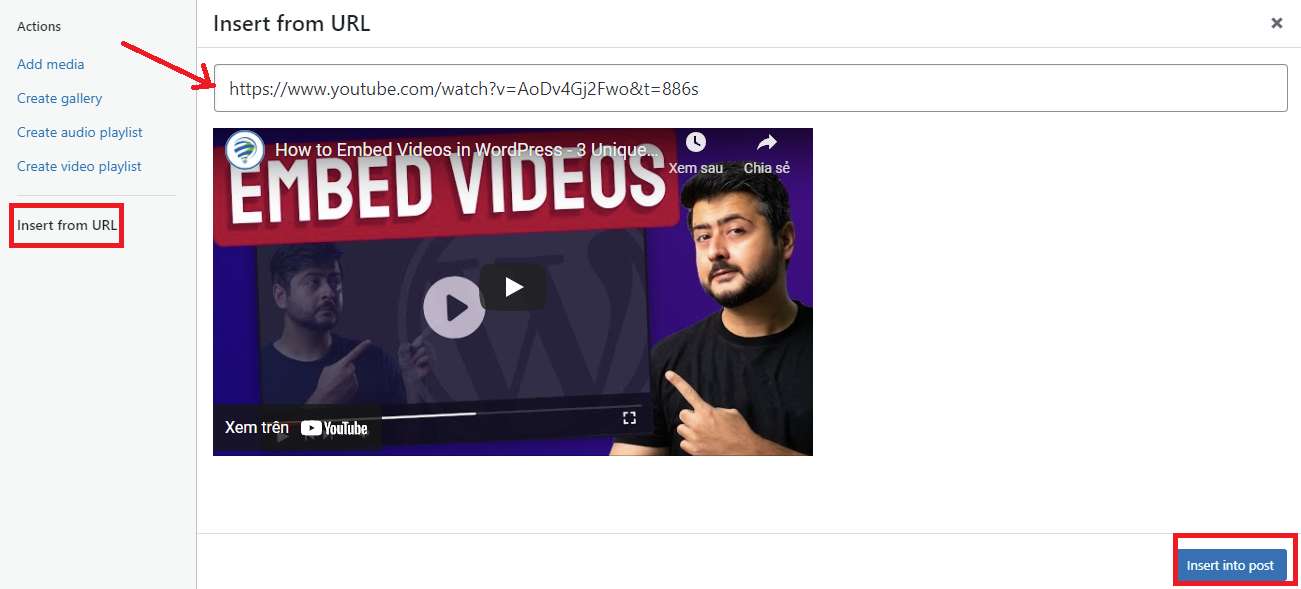
Next, choose the Insert from URL option at the left-hand sidebar. Paste the URL of the video you want to include in your video gallery. Finally, click on “Insert in to post”.
After adding the URL, video title, and description, click on the “Save Video” button.
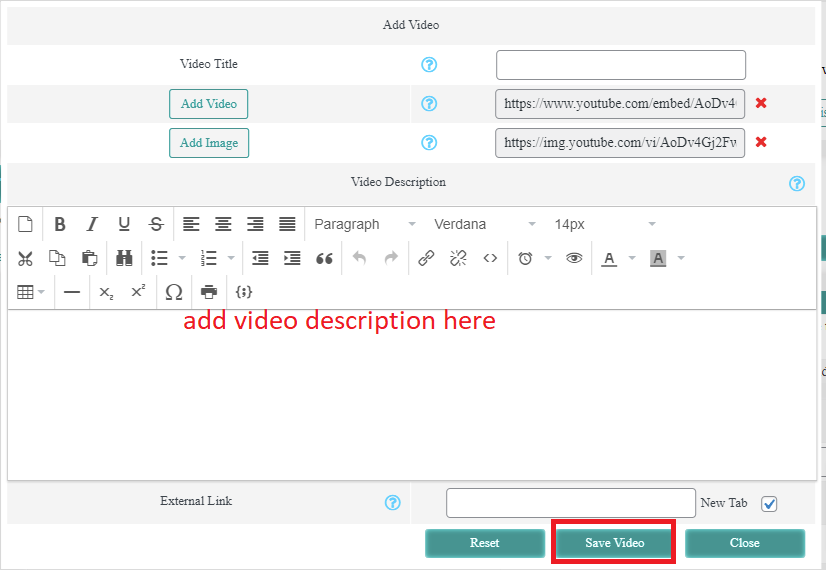
Notably, this plugin allows you to add unlimited video URLs to create a video gallery. Therefore, you can add as many videos as you want. Finally, click on the ” Save ” button to complete your video gallery. You can copy the shortcode and paste it into any position on your pages/ posts.
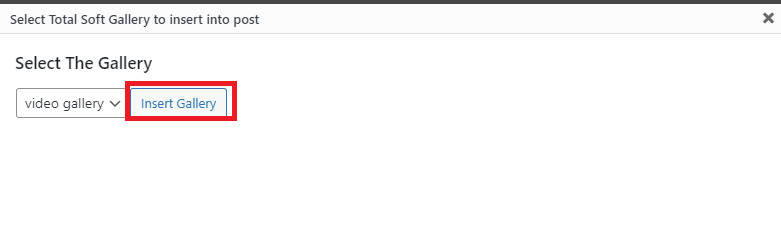
Alternatively, you can open the post where you want to add a video gallery. Click on the “TS Video Gallery” option above the edit area. Select the “Insert Gallery” option to add your created video gallery. Finally, click on Update/ Publish to view the result.
And this is how it looks on your website.
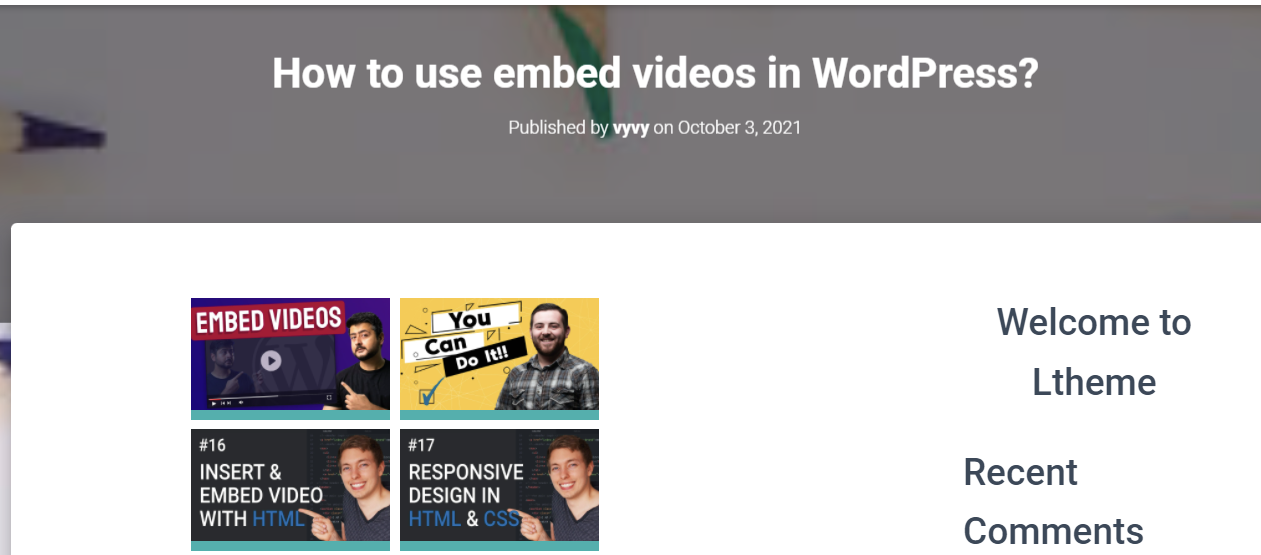
Note: One of the advantages of this plugin is that it allows you to create unlimited video galleries by embedding YouTube videos on the WordPress site. Moreover, there are 16 different layouts for you to choose from. You can also add hover and lightbox effects to make your video gallery more attractive. However, this plugin is only suitable when you want to display a lot of videos with different layouts. If you only want to add a single video, you should paste it directly into your content.
How to embed video in the sidebar or footer
This method allows you to embed video in the sidebar or the footer area. Thanks to that, you can highlight an important video on your page to catch visitors’ attention at first sight. There are three ways to insert videos as widgets anywhere on your site: using a video widget, a text widget, and a custom HTML widget. In this section, we are going to demonstrate the easiest way by using a video widget.
Let’s follow the steps below.
- Go to Appearance>Widgets.
- Choose the YouTube widget and drag it to your desired location.
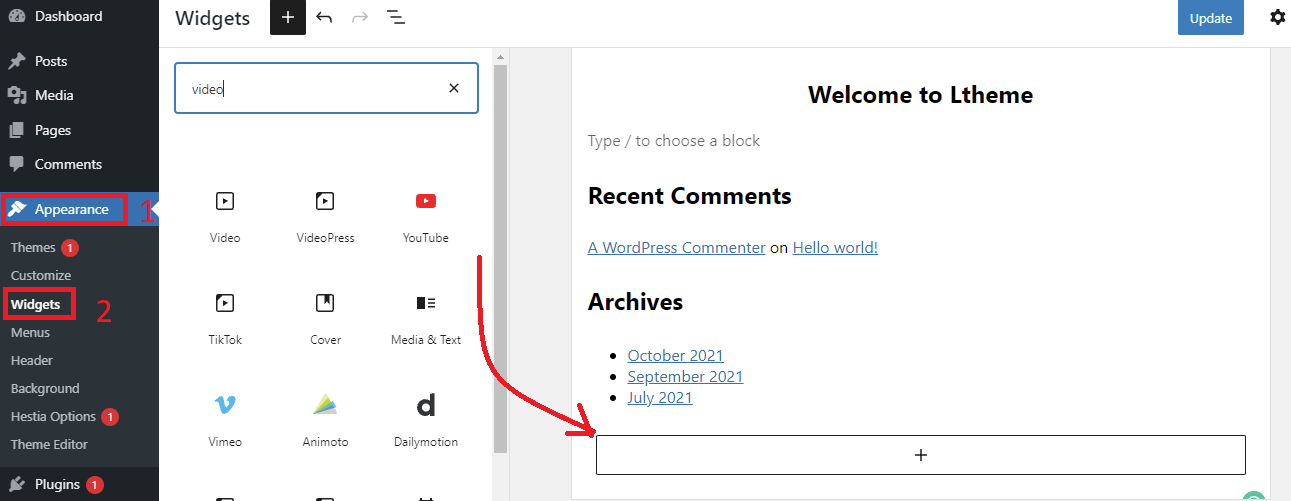
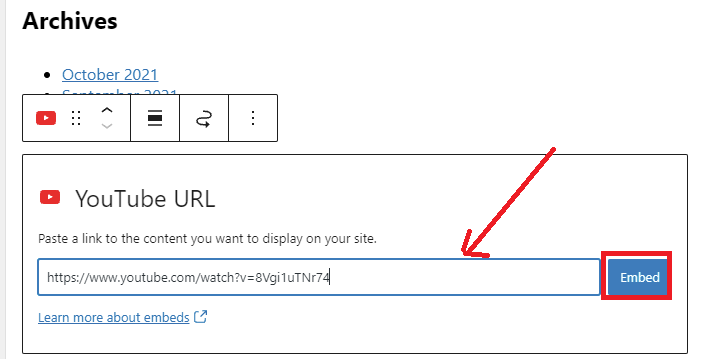
- Paste the video URL in the given area.
- Click on the “Embed” button to add a video to the sidebar.
- And finally, click on the “Update” button.
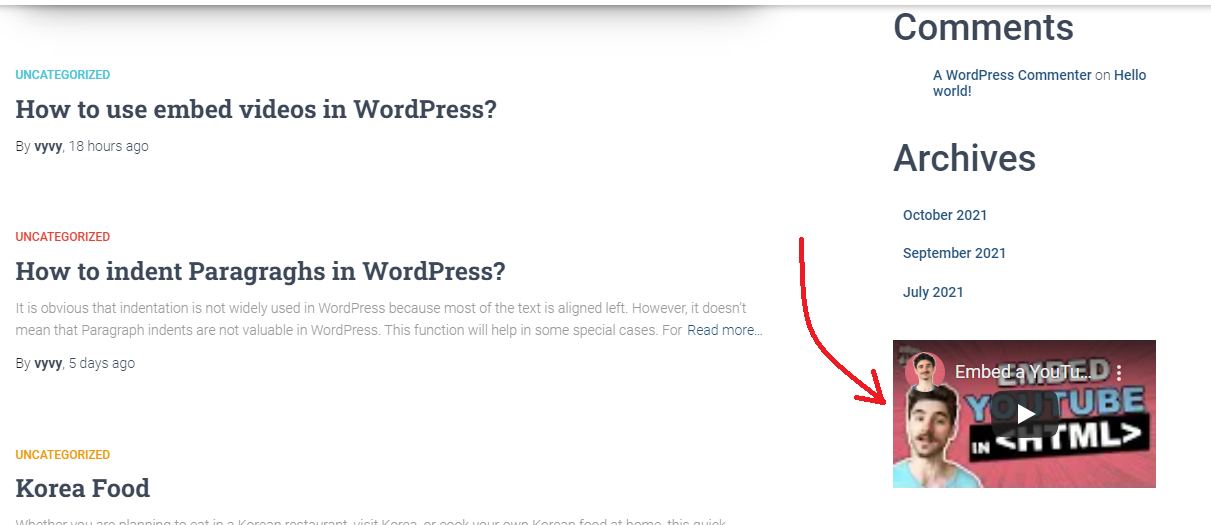
Now, let’s go to your website and enjoy the result.
Conclusion
We have just covered the simplest methods to help you embed videos in WordPress. Hopefully, through this tutorial, you are able to add your video to posts, pages, sidebar, or any location on your site by yourself.
If you have any queries or encounter any difficulties while using these methods, don’t hesitate to mention them in the comment section below. We will support you as soon as possible.
Last but not least, our free WordPress Themes has tons of appealing, responsive, and modern themes that are suitable for various fields. With our designs, you can create a beautiful website effortlessly. Let’s visit and get one.