Introduction
When creating content that will be featured on the front-end of your Joomla! website, you first have to understand a little bit about the way content is saved and organized in the back-end of the Joomla! Content Management System (CMS). And now, with the release of Joomla! 4 with a series of major changes, new features and improvements, a new article interface has been added along with a completely new dashboard UI. So today, in this guide, I’ll be illustrating how to create, save and manage articles in a Joomla! 4 website. Furthermore, by organizing your Joomla! articles into categories, you’re also making your site more user-friendly and professional, and thus positively impact your website’s traffic.
Now, let’s get right to it!
Step by step to create and manage articles in the backend of Joomla! 4 CMS
Access the Articles Page
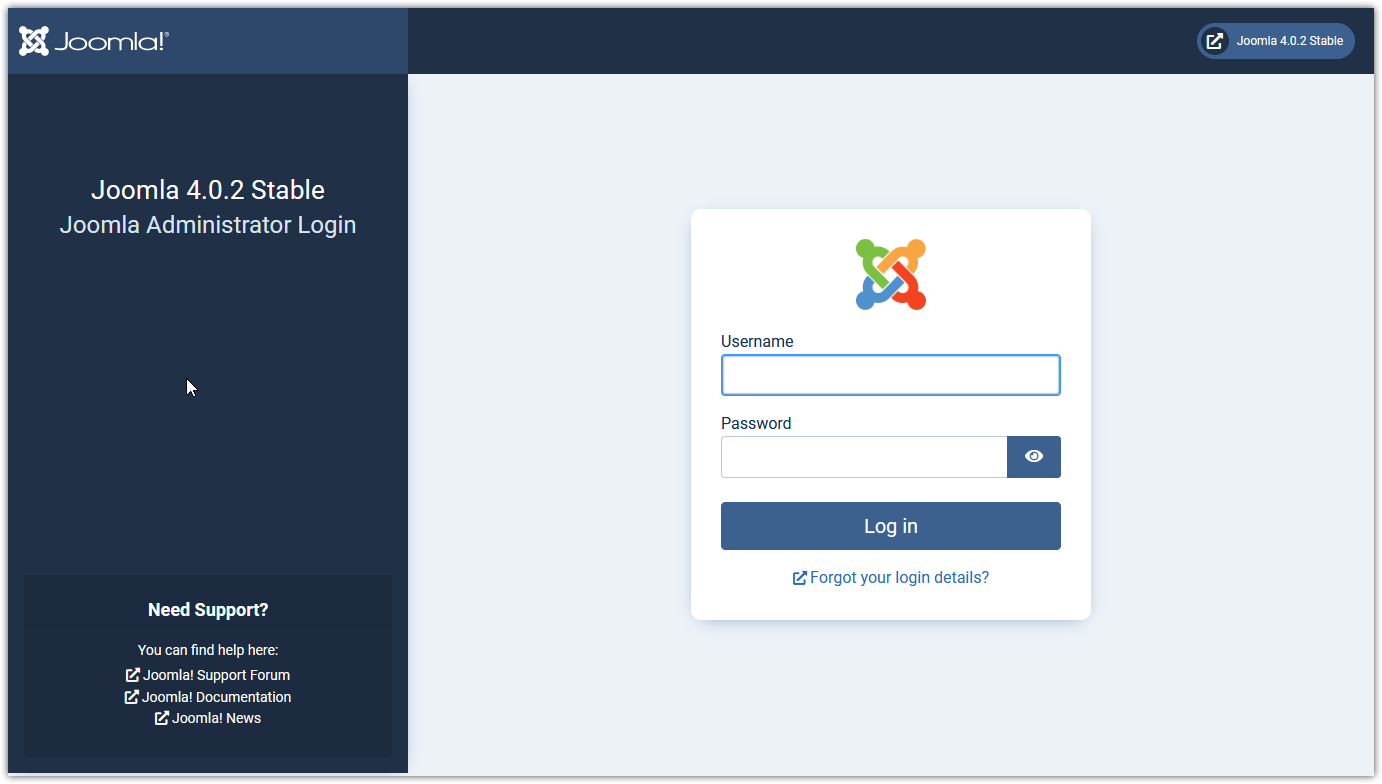
To access the Articles Page, you need to log in to the Administrator back-end first to visit the Home Dashboard. In case you forget or don’t know how to do this, simply append the word administrator to the URL of your site. For example, if your website address is: http://www.example.com/
→ then go to: http://www.example.com/administrator to access the admin panel, or the Home Dashboard.
 Log in to the admin panel in the back-end
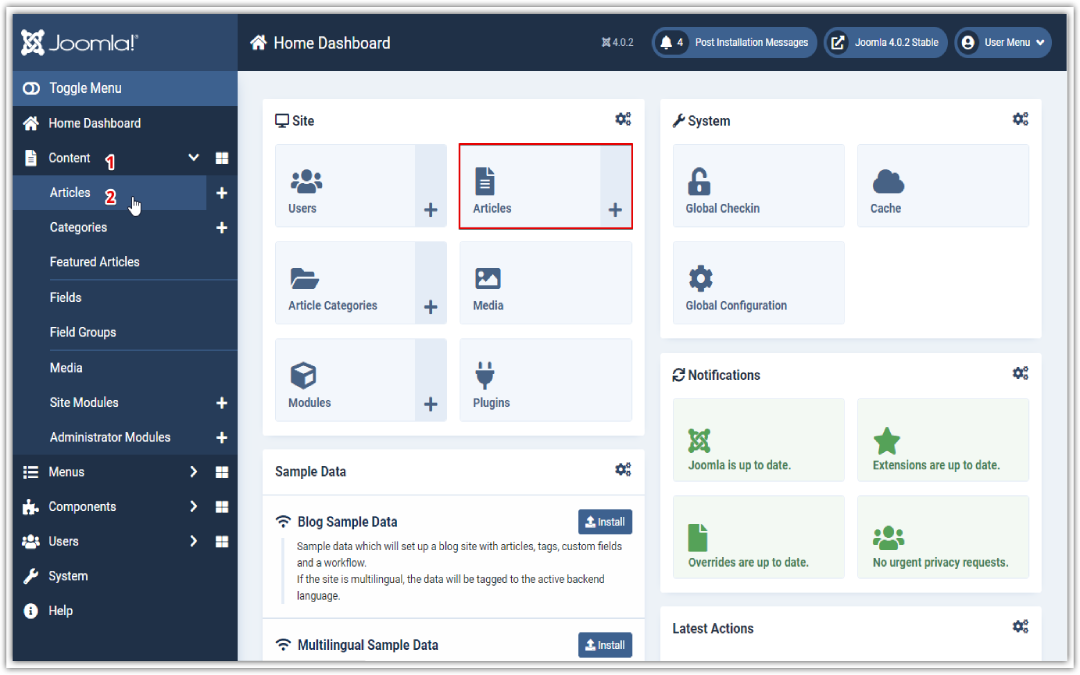
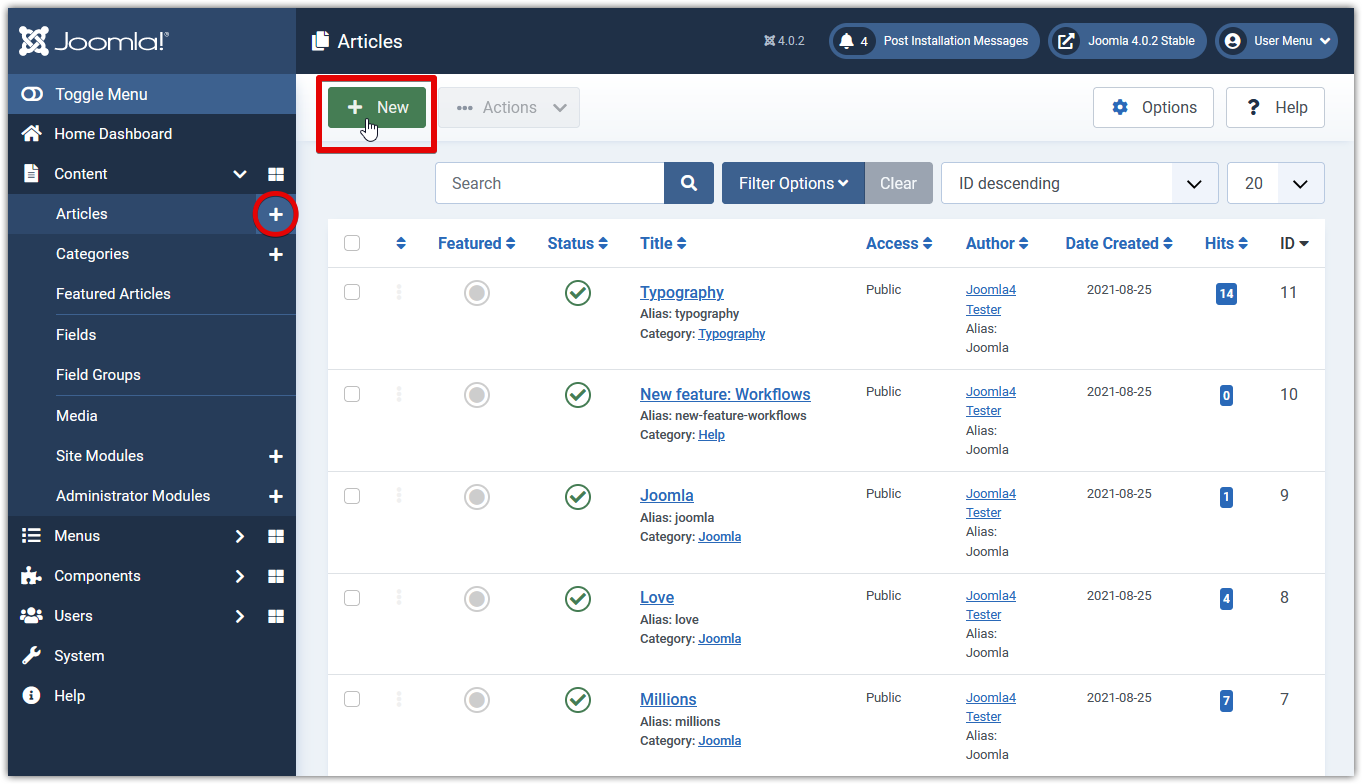
Now, click Articles under the Site area or navigate to Content and then Articles from the side panel on the left to access the Articles Page.
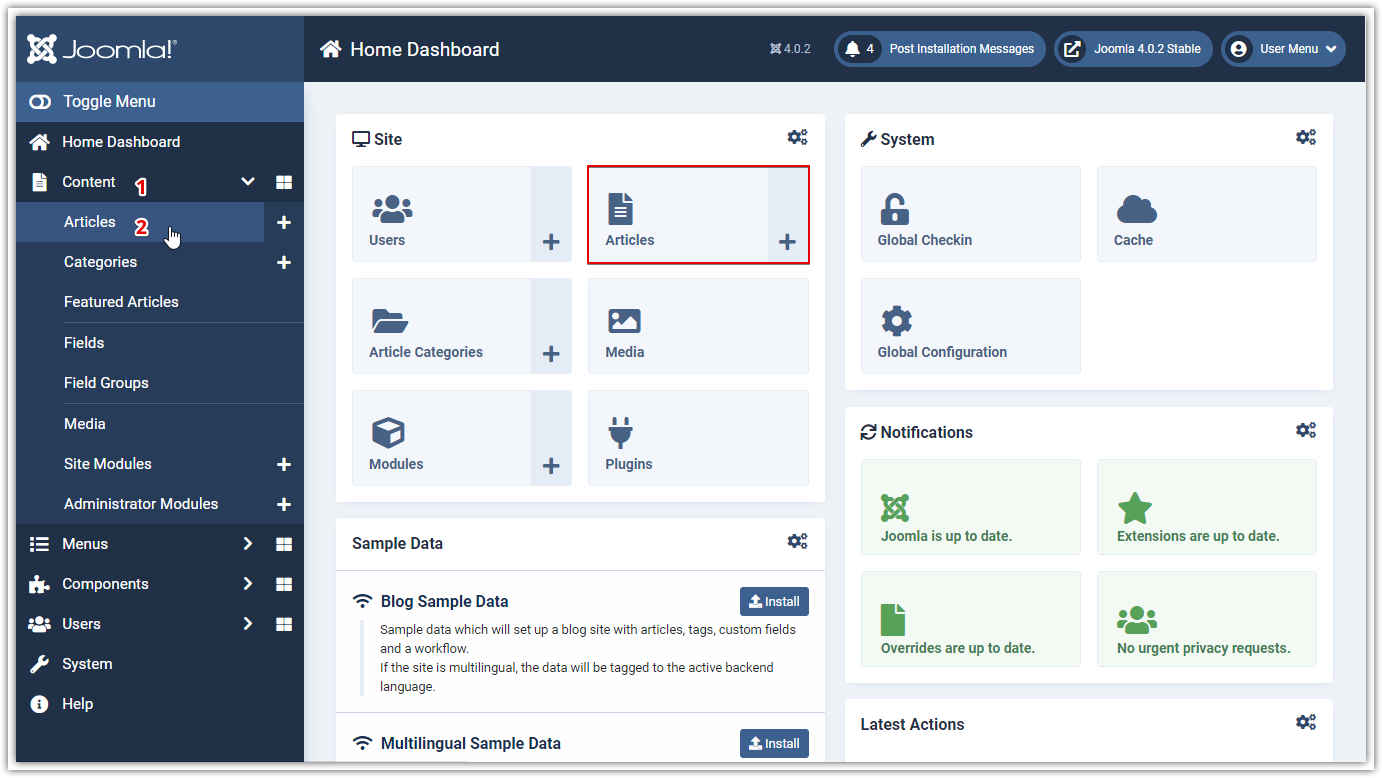 Access Articles from the Dashboard in Joomla! 4.0.2 Stable
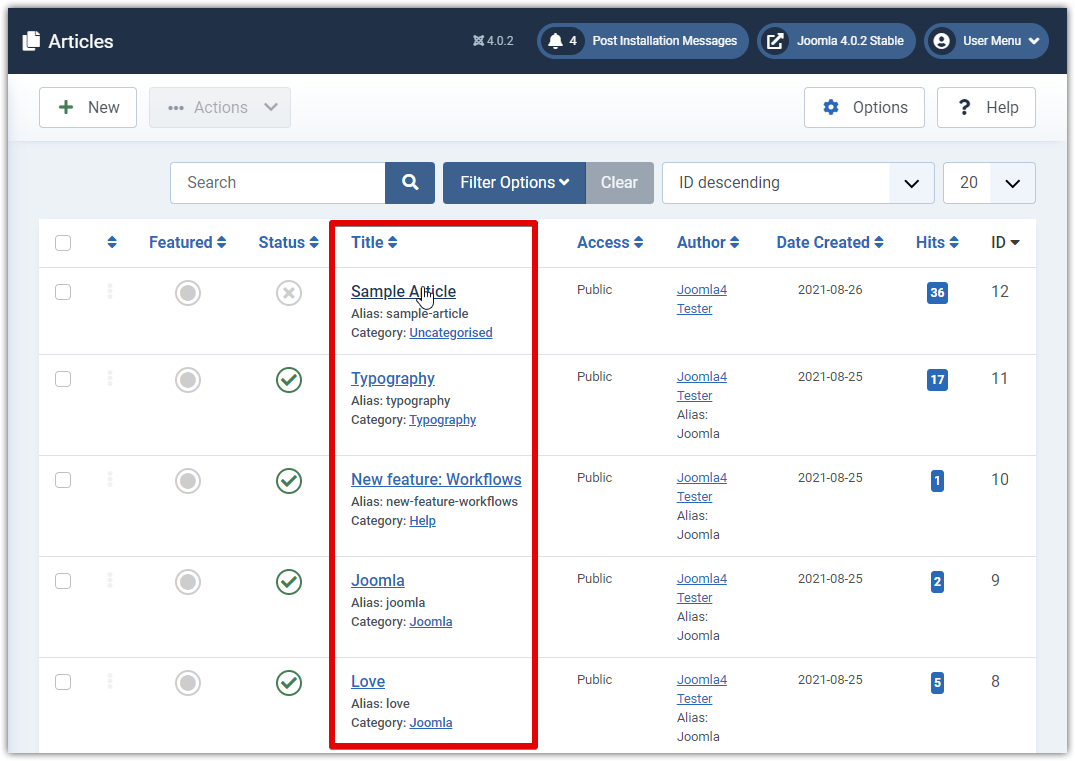
And this is the Articles Page in Joomla! 4. Yours may more or less look like this.
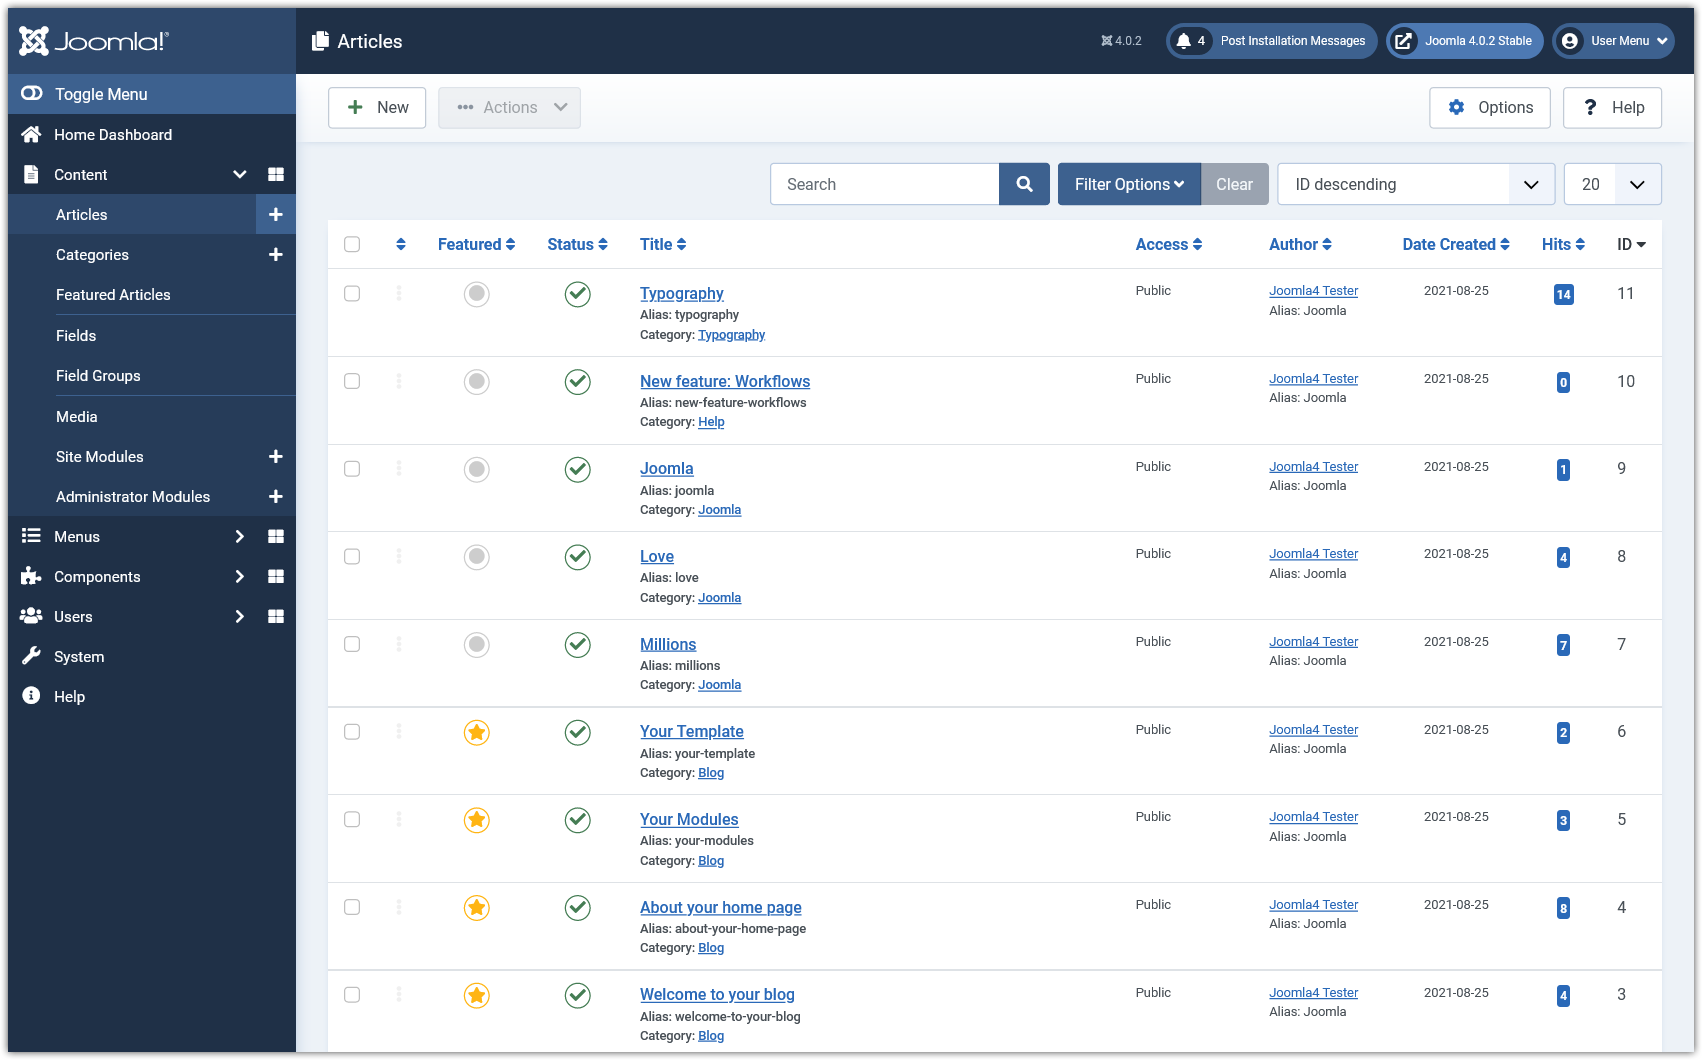 Articles Page in Joomla! 4.0.2 Stable
Add a New Article
Now that you have access to the Article Manager, or Articles Page, you can edit all the articles on your website however you like. But first you’ll need to learn how to create and save your articles.
Let’s start adding a new article by either:
- Clicking on the New button at the top-left corner of the screen or,
- Clicking the + icon right next to the Articles menu item from the left panel.
 Add a new article
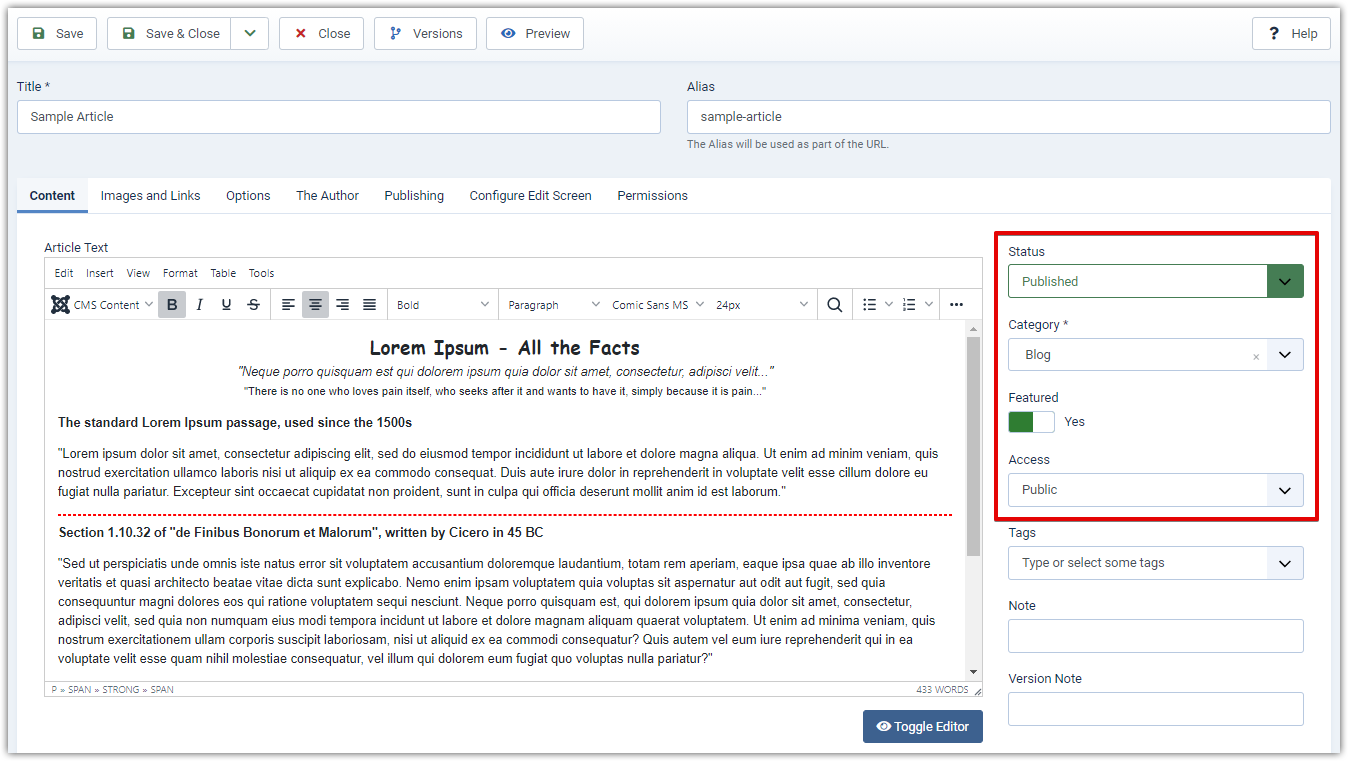
The New Article screen (as shown below) contains options for categorizing and naming the article, editing content and selecting parameters.
* Notice: Whenever you create anything, an article, a category, a module or a menu item in Joomla!, pay attention to the asterisks. These asterisks indicate required information that you should prioritize over any others.
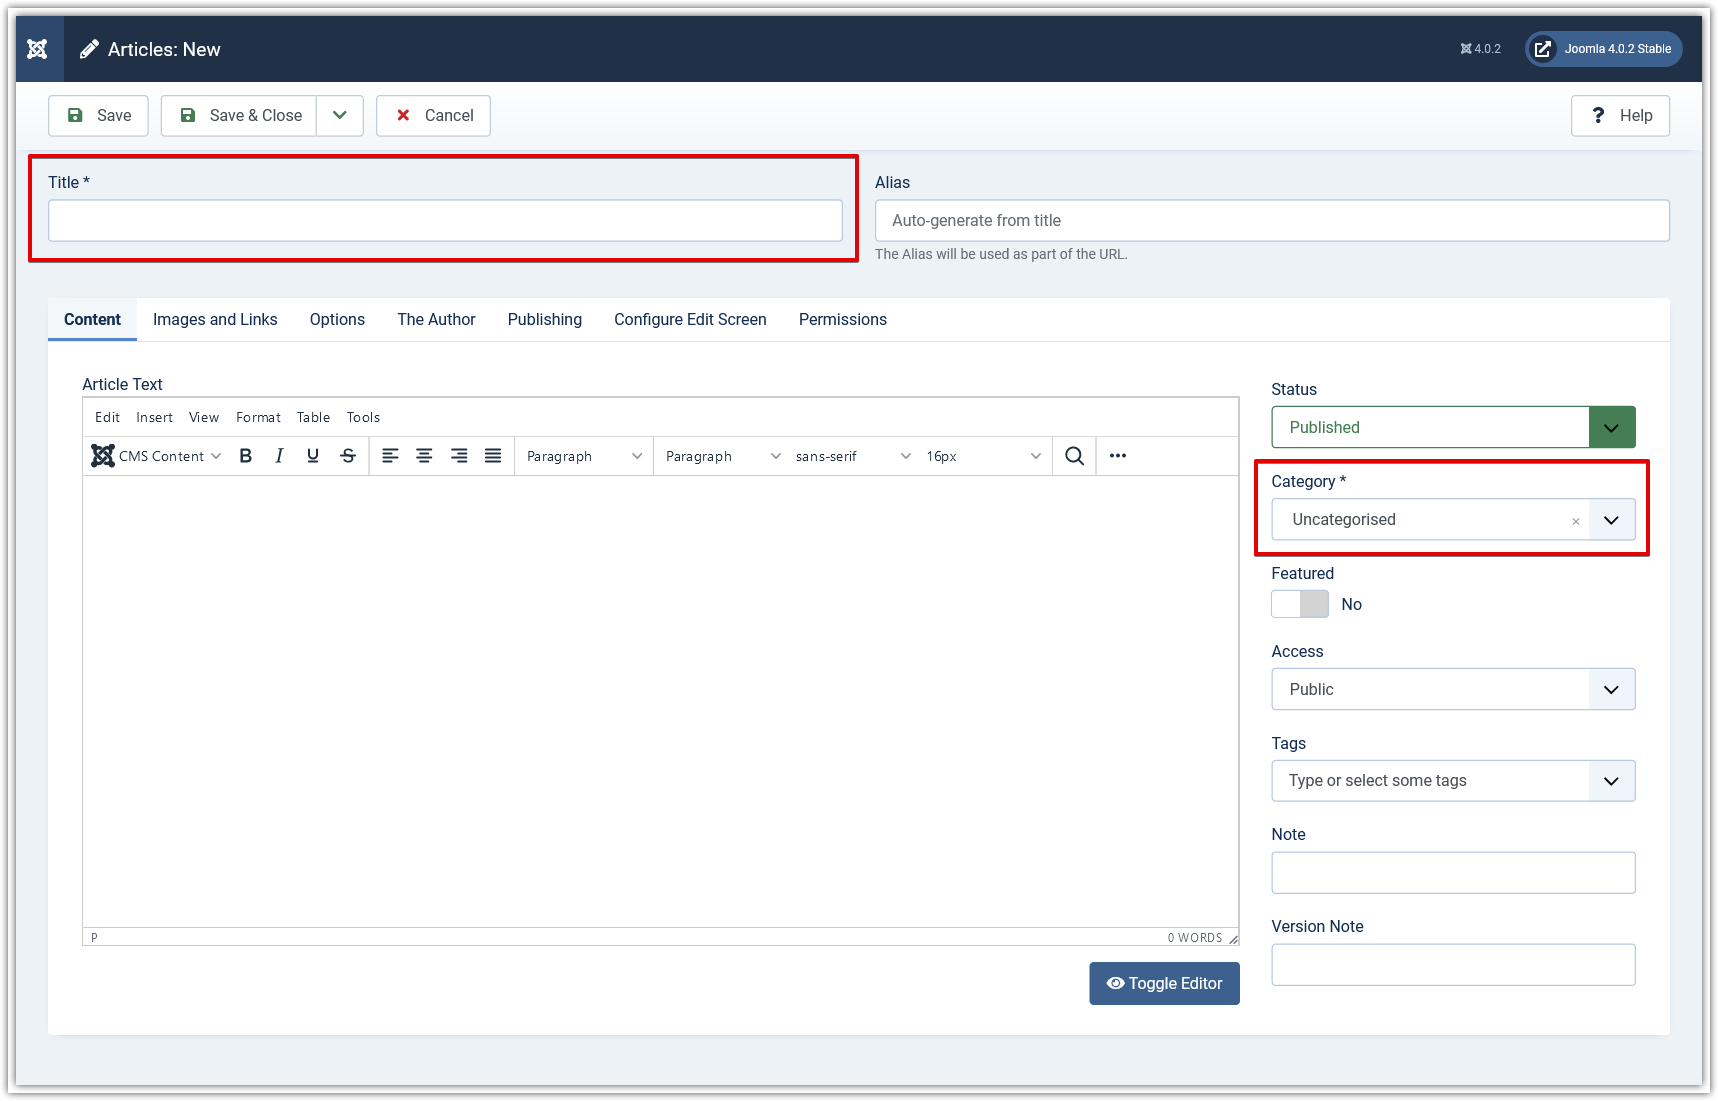 Enter the required information
Edit the following options:
- Title – Enter a title for your new article. This is used when the article title is displayed. (Required)
- Alias – Alias are used to refer to the title and are important for the Search Engine Friendly Address features. You can leave it blank, Joomla! will automatically generate it for you based on your new article title.
- Article Text – Compose your article content using the editor. It’s almost like creating content in a word processor like Microsoft Word.
- Category – Select a Category you want to put your article in. (Required)
If you do not specify a category, the default Uncategorized is selected. - Status – Select a Status for your article: Published, Unpublished, Archived, or Trashed.
- Featured – Choose whether or not to display the article on the home page. By default, this option is set to No.
- Access – Choose an Access restriction: Public, Registered, Super Users, etc.
- Tags – Assign tags to your article. You may select several tags from the pre-defined list or create new tags by typing each keyword in the field and pressing enter. This is optional.
- Note – You can add an optional note to display in the article list.
- Version Note – You can also add a Version Note to your article. (Optional)
In addition to the Content tab, the other tabs include several options or parameters for the article. Click on each tab to view the parameters and change the settings to suit your requirements.
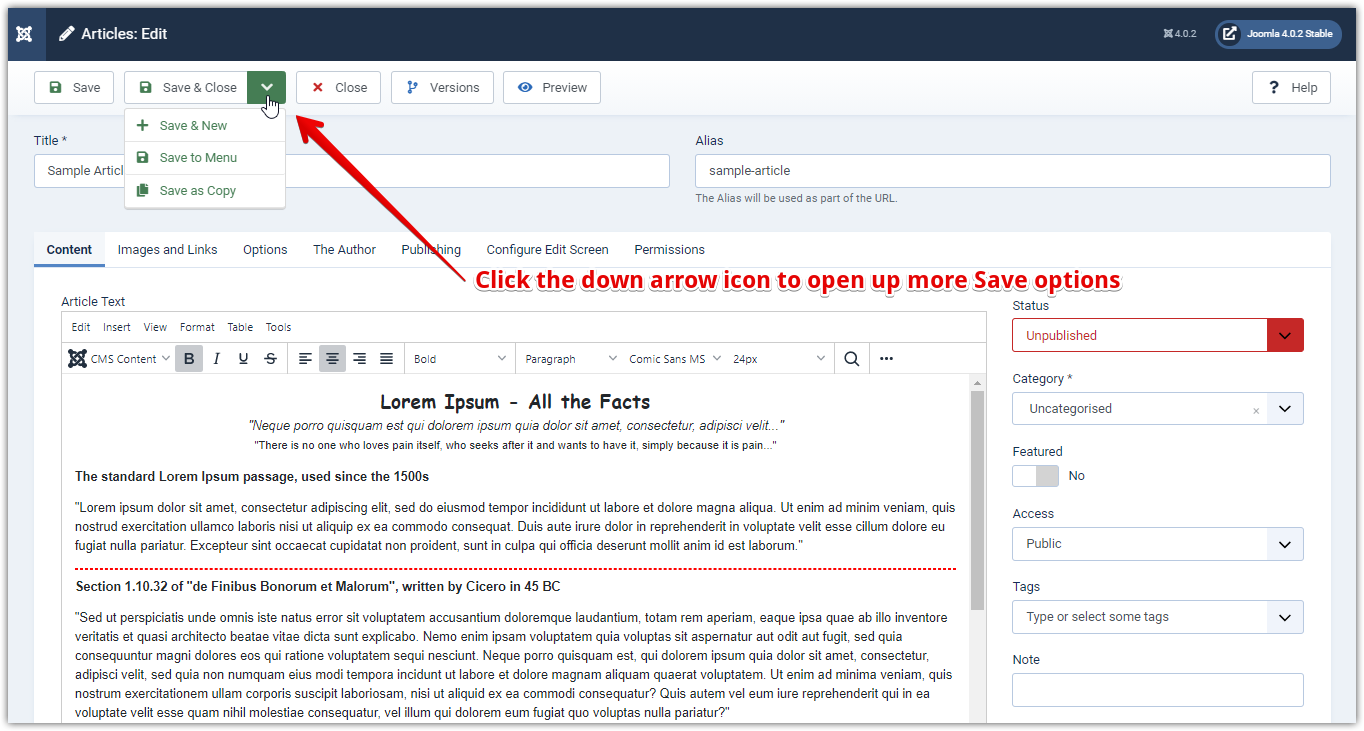
Save the Article
To save your article, either:
- Click the Save toolbar button to save your changes, but remain on the Articles: Edit screen or,
- Click the Save & Close toolbar button to save your changes and return to the Articles Page screen.
Alternatively, click the down arrow icon next to the Save & Close button to open up more Save options, like Save & New, Save to Menu and Save as Copy.
 Simply click on the Save & Close button to create your new article
After this step, a green message will indicate that the article has been successfully saved.
Edit and Publish the Article
Every time you save a new article, it will be at the top of the Articles Page by default (sorted by ID descending). You can open it and edit it at any time. You can also edit already existing articles on your website.
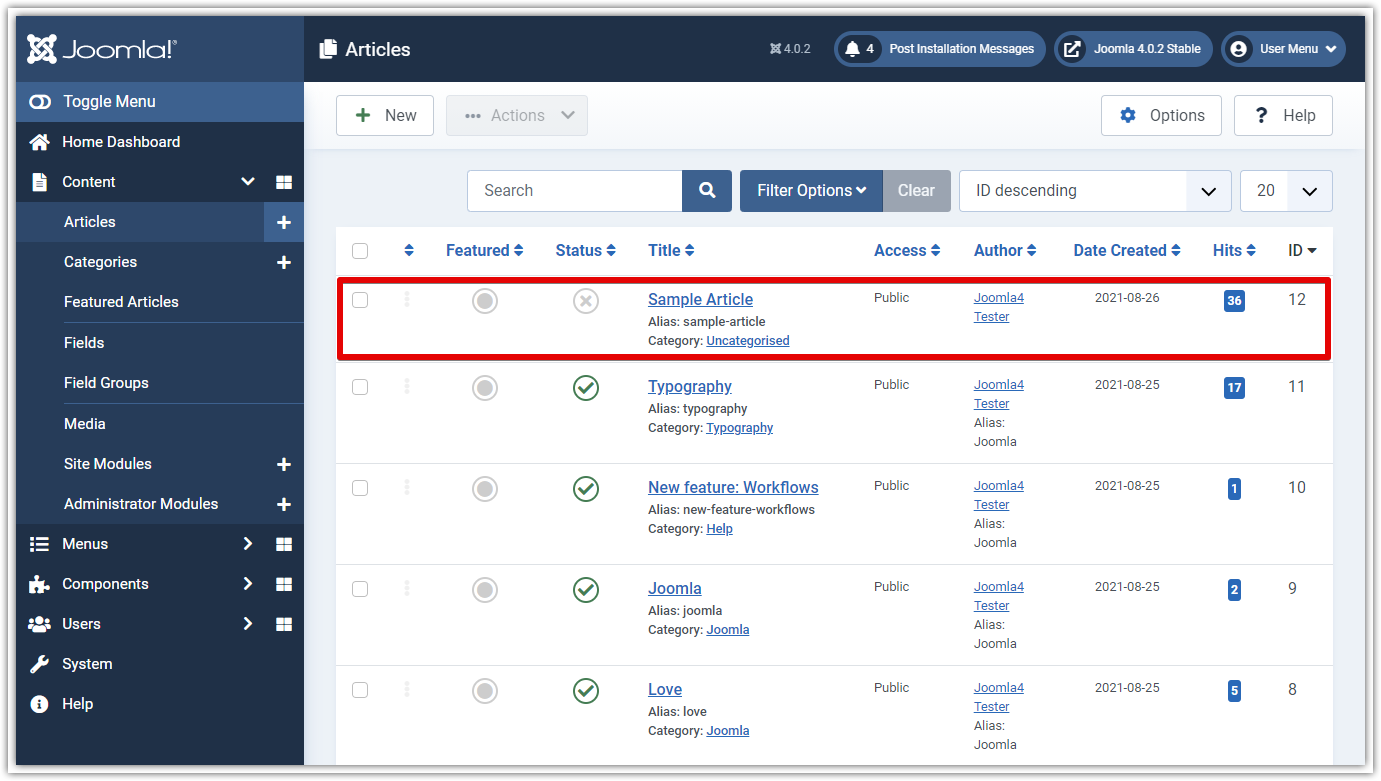 By default, newly created posts will appear at the top
To do so, click on the article title you want to modify in the Title column to access the Articles: Edit screen.
 Click on an article title to open its edit screen page
From the article editing page, you will be able to edit all options for the article the same way as when you are first creating it.
 Review your article and make necessary changes before making it public
When you are happy with your article and want to share it with the world, you can choose to publish it by changing the article status to Published. Besides, you can also select a new category to put your article in, and/or feature it on your home page so people can easily see it.
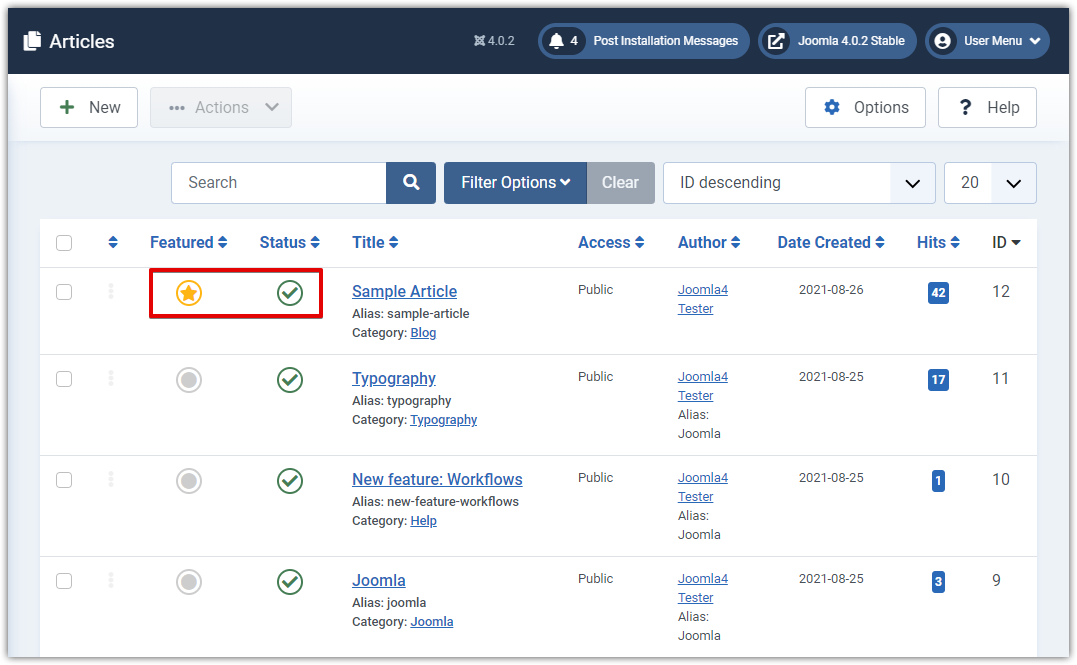 The article status after it was published and featured
Inserting Intro Image & Full Article Image into Joomla! Article
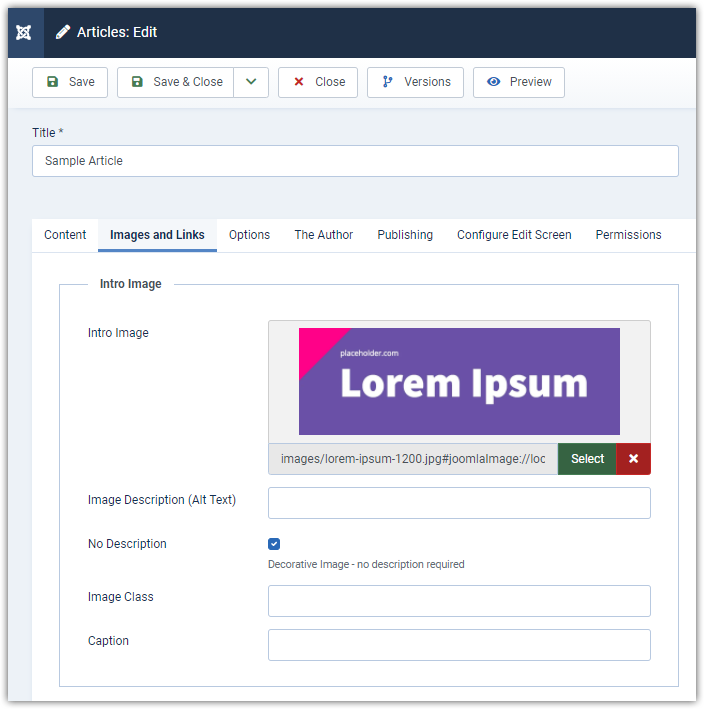
If you’d like to specify an intro image and a full article image for your article to display in your Joomla! blog, use the Images and Links tab to do that.
 Add an intro image to your article to display on your blog page
 Add a full article image to display inside the article
Select the image – and do not forget about Alt Text – it’s important to your site’s search engine optimization (SEO) since an effective image alt tag helps robots to understand the image you inserted on your site.
Once you’re ready with your settings, click the Save & Close button on the toolbar to save your changes and make your article publicly available.
Add a New Category
Categories in Joomla! provide an optional method for organizing your articles. They are like folders that exist primarily in the backend of your Joomla! website and help you stay organized. So by organizing your Joomla! articles into categories, you’re also making your site more user-friendly and professional, and thus positively impact your website’s traffic.
To access the Categories page, click Article Categories under the Site area or navigate to Content and then Categories from the side panel on the left.
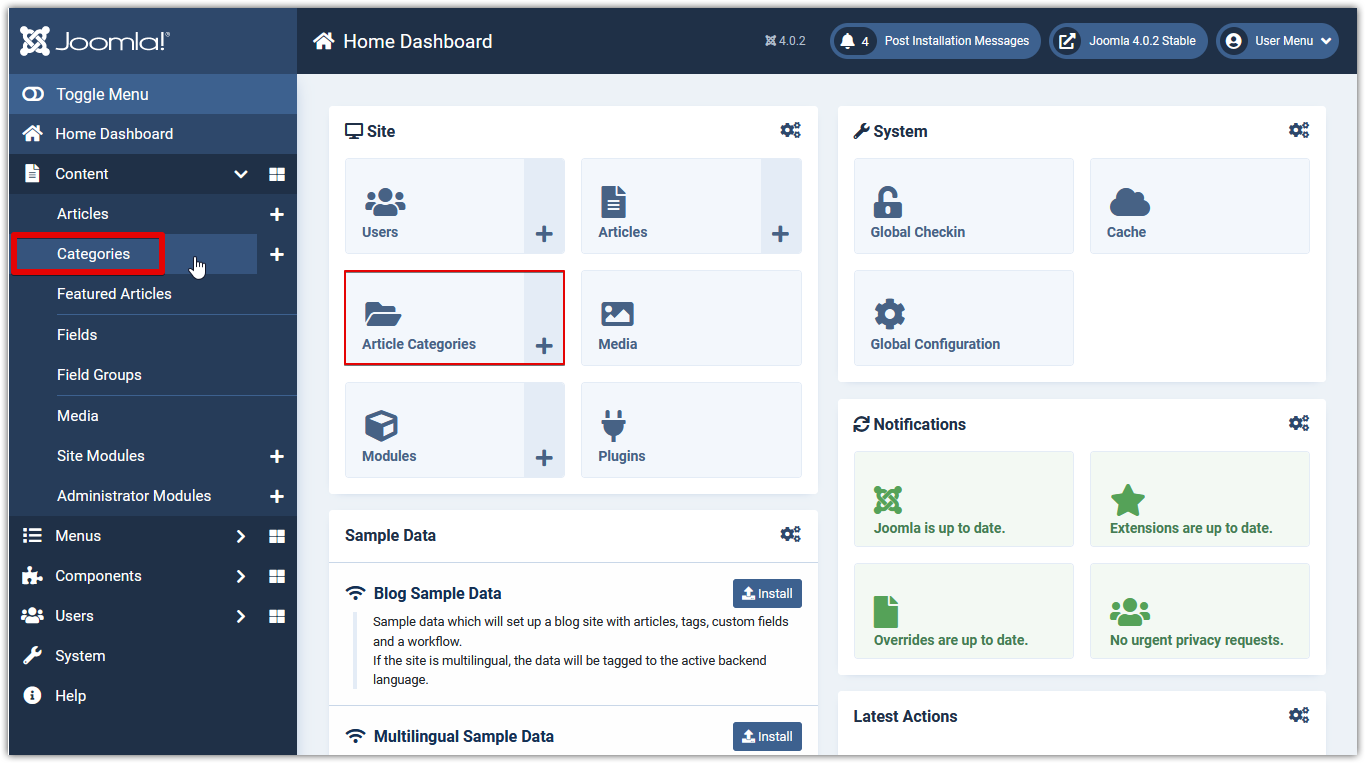 Access Article Categories from the Dashboard in Joomla! 4.0.2 Stable
To add a new category, click the New button in the toolbar, or click on the + icon next to the Categories menu item from the left panel.
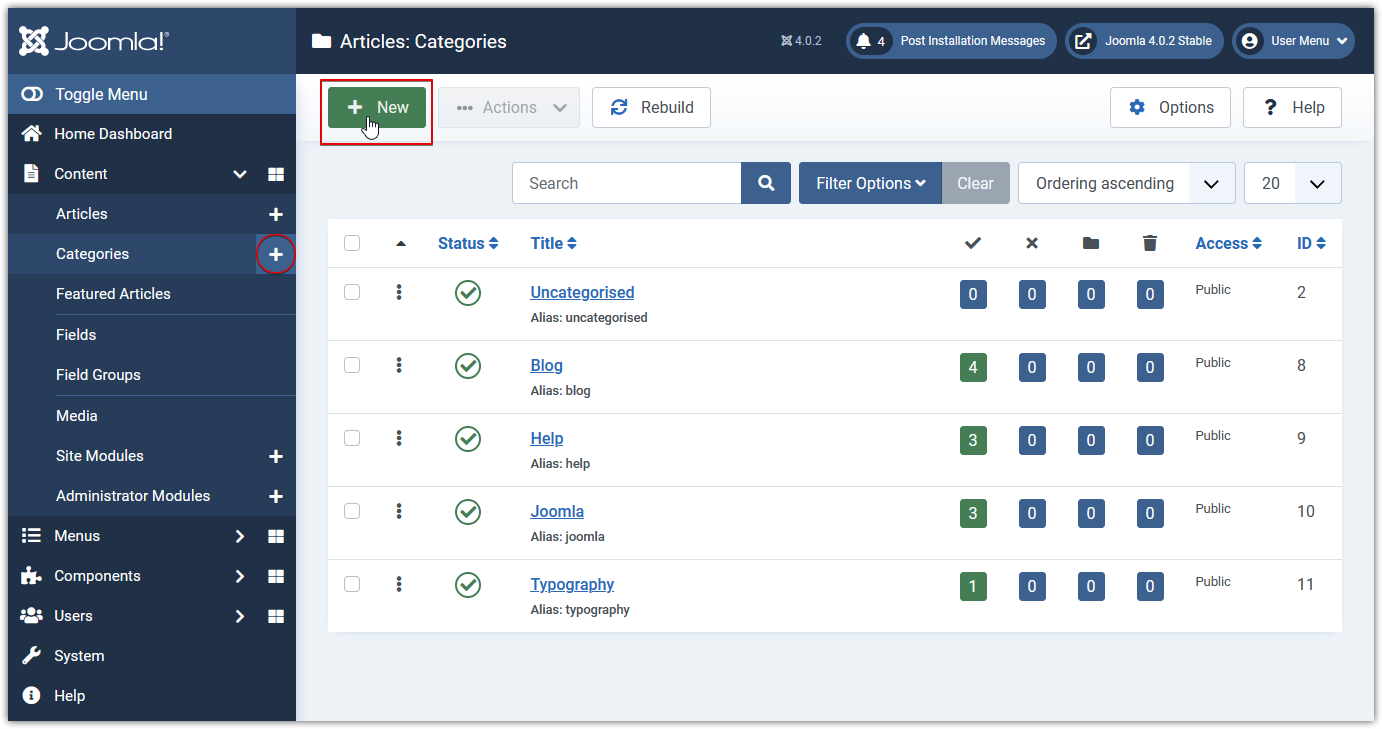 Add a new category
Again, pay attention to the asterisk. You have to provide a title as it’s the only field required here to create a new category. However, entering additional details is helpful, especially if you plan to have several categories or subcategories.
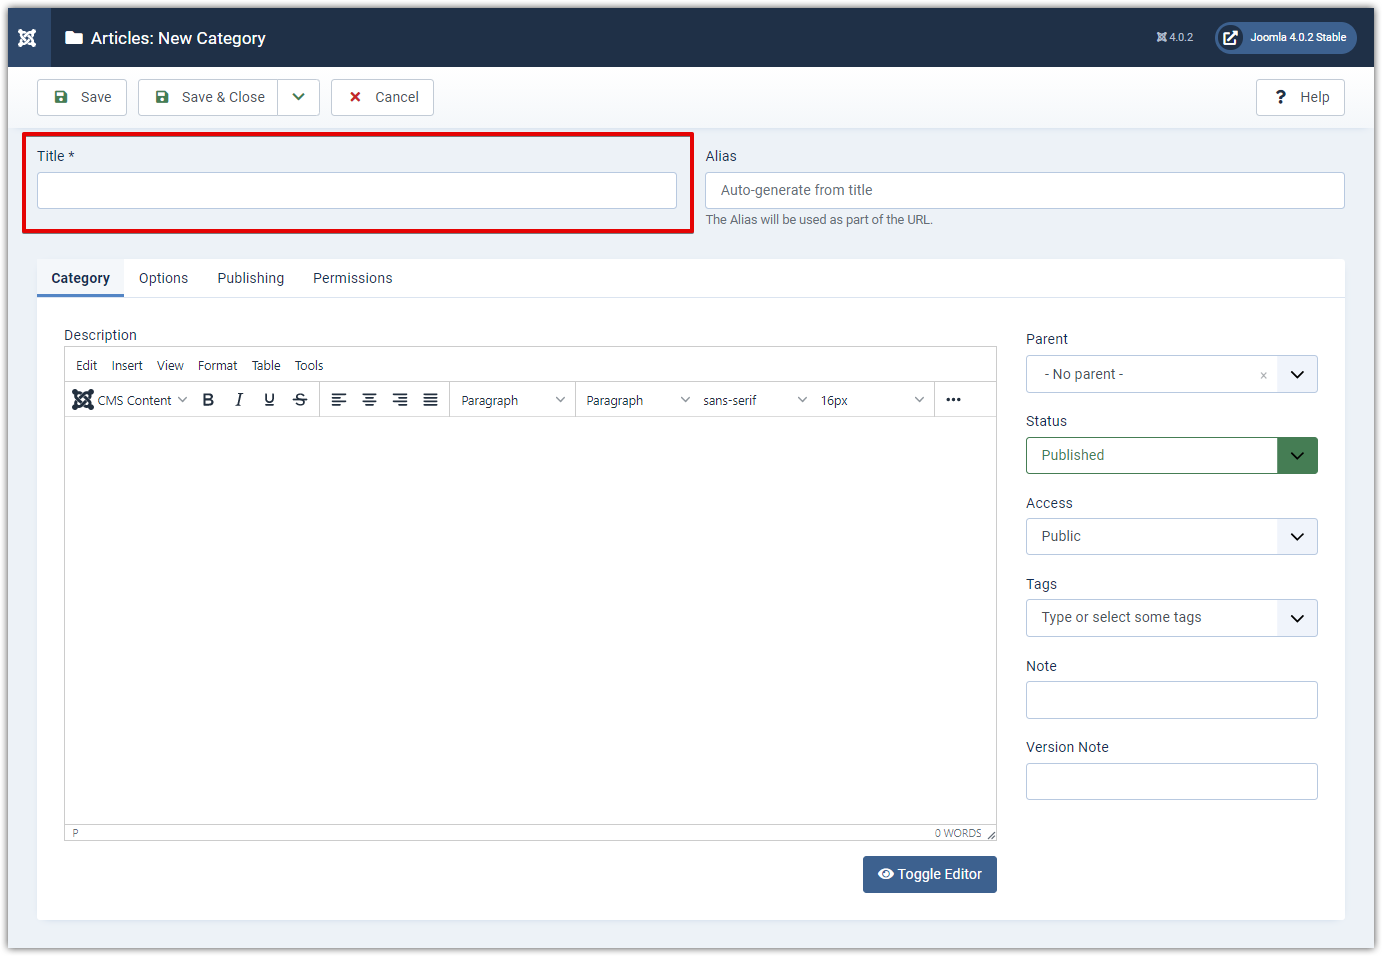 Enter the required information
The following editable details are available on the Category tab:
- Parent – the parent category. If this is a parent level category, select – No parent –. If this is a subcategory, select a parent category.
- Status – The published status of the category.
- Access – Who can view the category:
- Public – Everyone can view.
- Guest – Everyone can view.
- Registered – Only registered users can view.
- Special – Only users with author status or higher can view.
- Super Users – Only super users can view.
- Tags – Tags related to the category.
- Note – Internal note about the category.
- Version Note – add a Version Note to your article category. (Optional)
Also, the other tabs (Options, Publishing, Permissions) include several options or parameters. Click on each tab to view the parameters and change the settings to suit your requirements.
When you are ready with your new article category, simply click on the Save & Close button to create it.
Organize an Article into a New Article Category
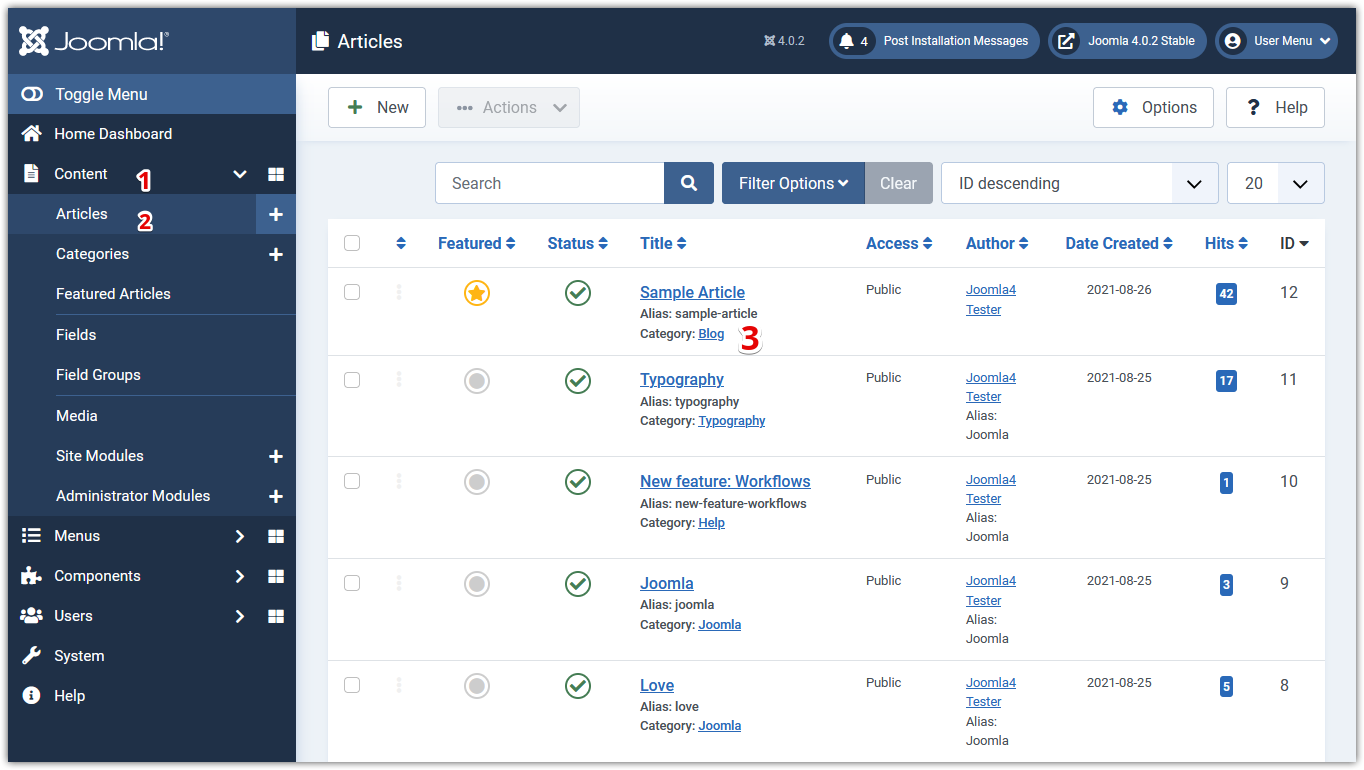
Now that you’ve just created a new article category. In order for your article to be assigned to the new category, you need to go to the Articles page, open the article and then select a new category.
Navigate to Content > Articles, then click on an article title to open the edit page.
 Open the article you need to change the category for
On the Content tab, under Category *, select a new category for the article.
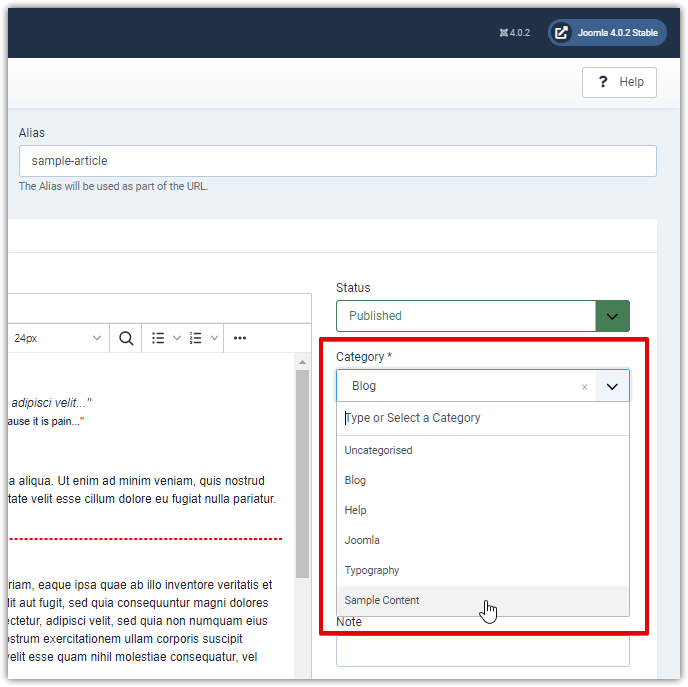 Choose a new category from the drop-down menu
Click on the Save & Close button to apply the changes.
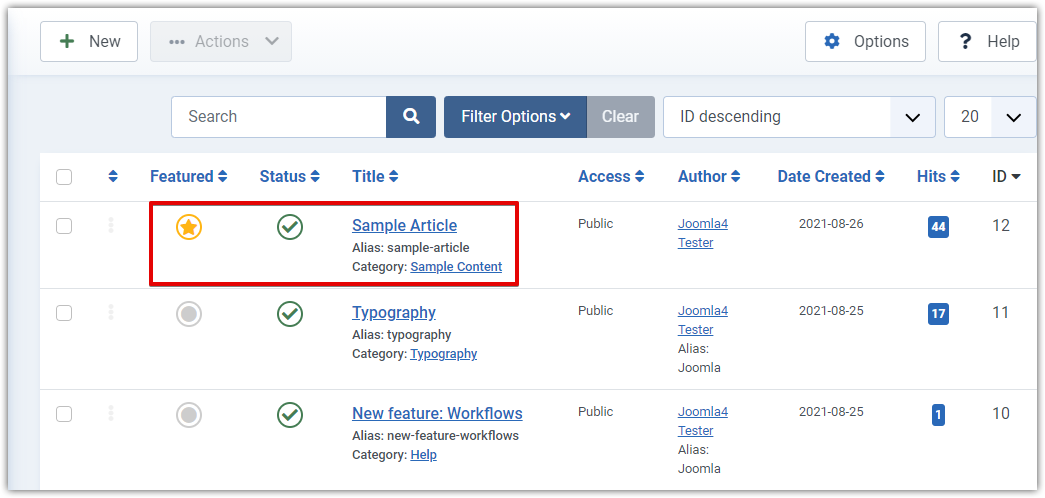 Do the same with other articles and categories to keep them all organized
Now, it’s time to check the results on the front-end.
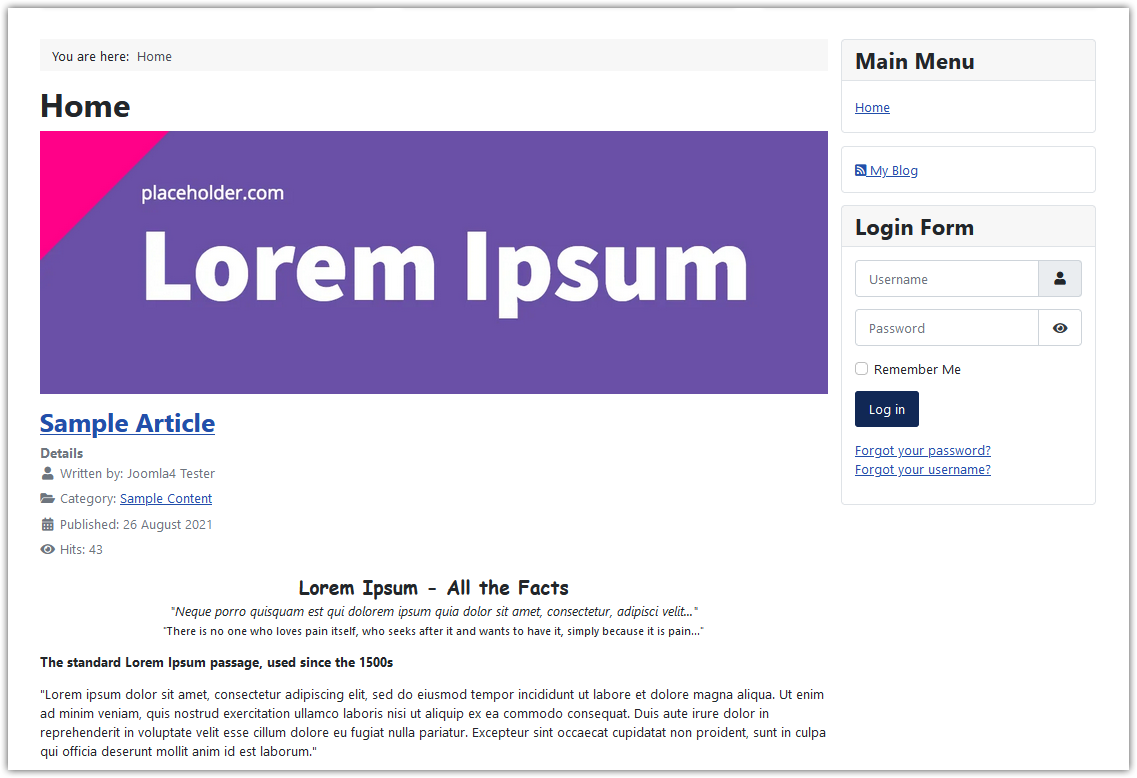 Review the article on the front-end
Unpublish and Delete Articles/Categories
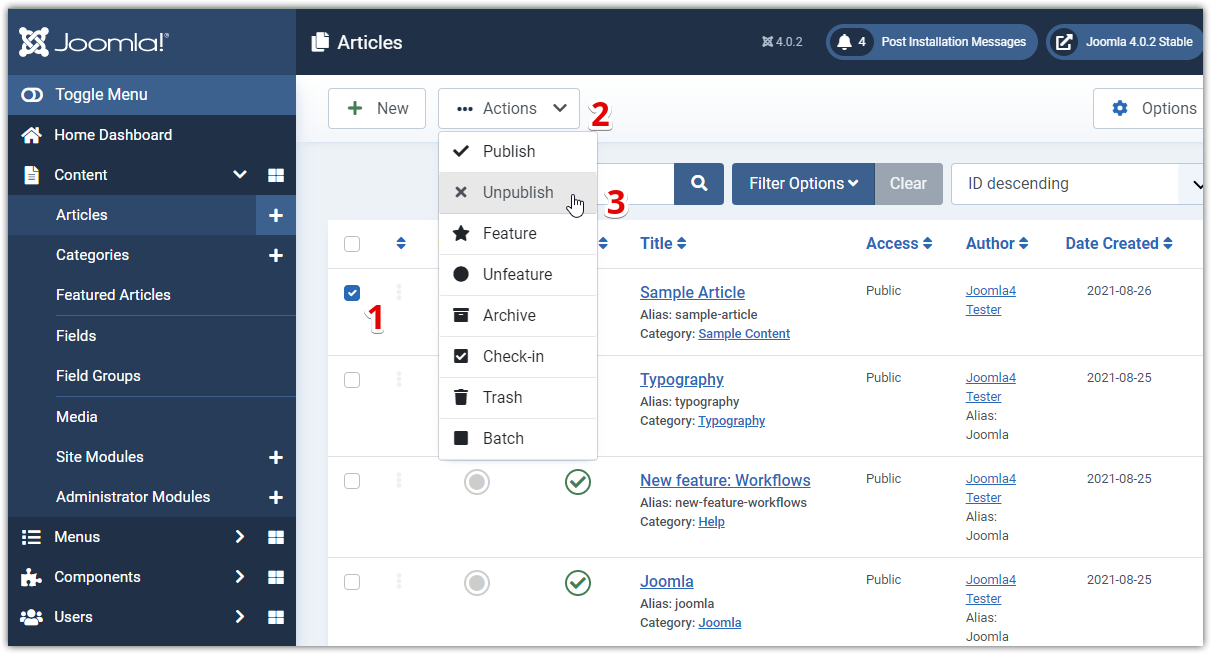
In order to unpublish an article, or make it invisible on the front-end of your website, just access the Articles page, select the checkbox next to the article that you wish to unpublish and click Actions > Unpublish from the button at the top.
 Unpublish an article from the Articles page
If you want to also remove/delete an article from your website, you’d better unpublish it first. Then, if it’s no longer needed, you can proceed further by deleting it. To do so, from the Articles page, select the checkbox next to your article and click Actions > Trash from the button at the top.
* Notice: After performing the above removal action, your content will still be available for re-use in your Trash and you can restore it at a later point and re-edit or publish it. On the other hand, if you want to permanently delete an article, just empty the Trash.
Do the same to unpublish/remove article categories!
Watch Video Tutorial
Conclusion
So, through this tutorial, you learned how to create and manage articles in Joomla! 4. If you have any questions, please don’t hesitate to leave us your comment in the Comments section below this article. We will respond to you as soon as possible. Going to work with Joomla 4 on new project, don’t miss our Joomla 4 templates collection, that’s performance, SEO optimized, build with mobile-first designed.
Now, enjoy and stay tuned for more tutorials!

- Resolving the “Class JFactory Not Found” Error in Joomla When Upgrading to J6 - December 19, 2025
- The Utility Of VPNs For Site Authors And Admins - November 24, 2025
- Joomla! 6: What’s New and How to Upgrade from Joomla! 5 - October 23, 2025


Recent Comments