Introduction
There is no denying that creating a new post in WordPress is extremely an easy task. However, for many beginners, you have to spend a lot of time learning all features and options to create a good post. At present, some people are using the Classic editor. Whereas, other people are using the Gutenberg editor- the new default editor in WordPress. Therefore, in today’s tutorial, we will guide you in adding a new post in WordPress and use all the features in both of these editors. You can get more information and the differences between these two editors by accessing Gutenberg editor vs Classic editor comparison.
How to Add a New Post in WordPress and utilize all the features?
Creating a new post in WordPress using the Classic Editor
Title and permalink
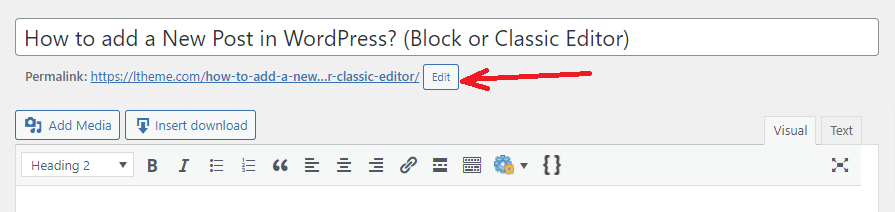
In the Classic Editor, WordPress will give you the area to write the title of your article. The title is a brief sentence to introduce your blog. From a user point of view, we advise that you should write a good title that includes a keyword and an attractive word. Because the success of your post absolutely depends on coming up with an excellent title.
Once you typed the title, switch the cursor to the content box, Permalink Settings will display below the title field. This Permalink will show the exact URL of your new post. You can copy this URL to send it to your friends, or past it on social media.
Whether you want to custom the permalink structure, let’s click on the Edit button that enables you o change the last part of the permalink according to your purpose.
Content area
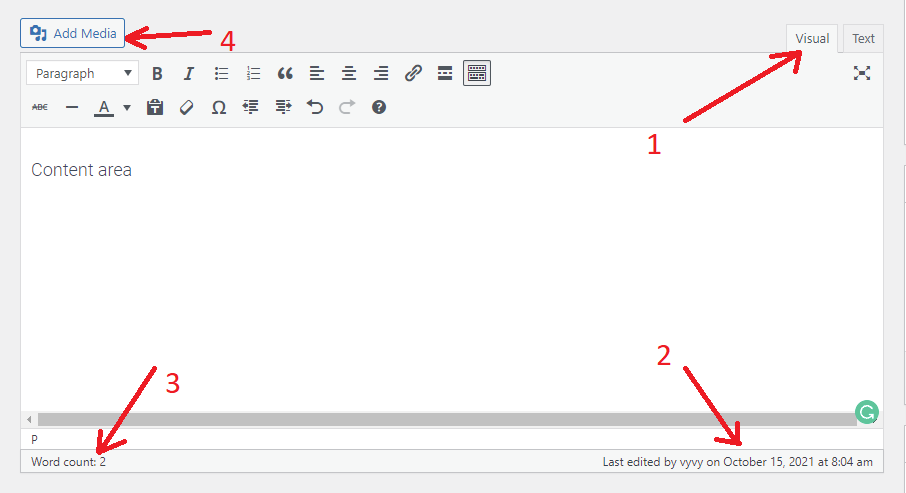
Below the title field, WordPress offers you a large content box where you can write your first WordPress post. In addition, there are some available elements on the page including:
- Visual and text editor: You can switch between visual and text editor while writing a post. The visual editor will display the way your content appears after it is published. You can format your content by using a lot of options on the toolbar. In other words, the visual editor of WordPress is similar to Microsoft Word. Whereas, the text editor is a plain text editor where you can view the HTML.
- Autosave status: this feature helps you automatically save your changes to a post, page, or custom post type. In addition, it assists you to save changes even if a user loses internet connectivity.
- Word count: this feature allows you to check the number of words in your post/page.
- Add media: by clicking on this button, this will open the popup window where you can upload an image or other media that you want to insert into your WordPress post. Simply select your favorite image and click on the Insert into post button to insert. Moreover, it also allows you to create beautiful image galleries.

Publish options
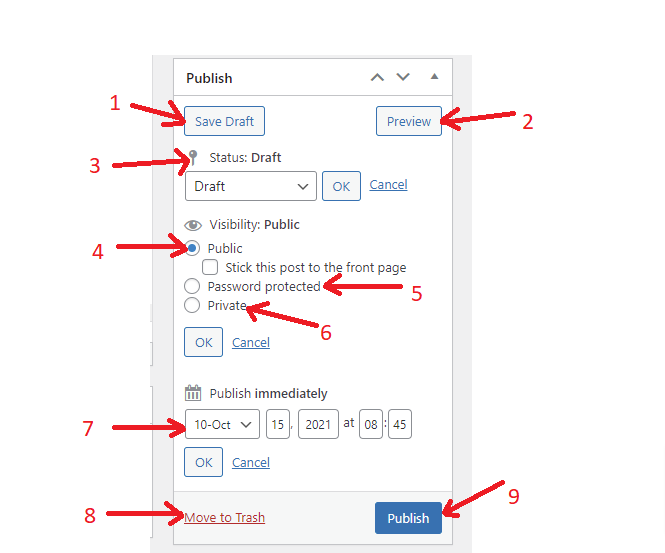
- Save Draft: As its name suggests, when clicking on this button, you can store your draft of the post or page manually.
- Preview: This button allows you to view how your post/page looks after publishing.
- Status: This option enables you to set a status for your post/page. WordPress will set the status for drafts or published posts automatically. If you are not using a plugin to add custom statuses, you can leave this option.
- Visibility: by default, this option will display in public mode. However, when you click on the Edit link next to this option to open the other three options. The first option allows you to make sticky posts in WordPress. It means that this post will be pinned to the top of your blog page.
- Password Protected: When clicking on this option, you will need to provide a password to protect your post. And only people who have this password can access this post.
- Private: This option is usually used when you want to make your site private. For example when they only want to share this blog with particular family members or friends.
- Publish: your post will publish immediately after you have clicked on the Publish button. However, when you click on the edit link, WordPress will showcase the time and date options. You can utilize this option to make a schedule for your post or create a backdated post in WordPress.
- Move to the trash: this option allows you to delete this post and then deleted posts will be displayed under trash. You can restore all deleted posts within 30 days from the date of deletion.
- Publish button: Once clicking on this button, your post will release to the public. Nevertheless, when you scheduled a post, then it will appear on your site on the scheduled date and time.
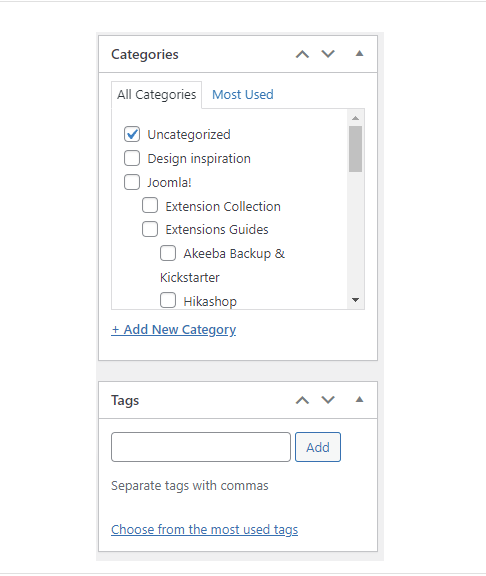
Add categories and tags
Have look at the right-hand column, you will see the categories and tags meta boxes here. You can group your posts into categories and tags. This feature only helps the users easily to find locate types of content that they are looking for but also it is optimized SEO for your website.
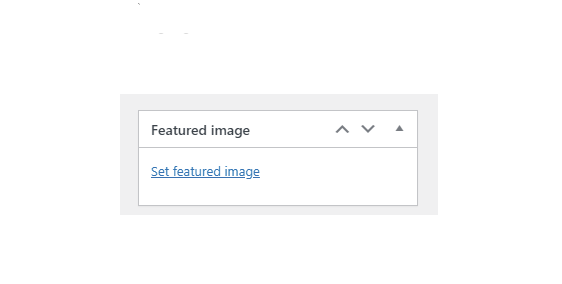
Add featured image
The featured image is a special image that represents your posts or custom posts. It is usually displayed at the top of your blog to attract visitors’ attention. Let’s on the set featured image link, this will open the popup window where you can upload a new image from your computer or choose from available images in the library.
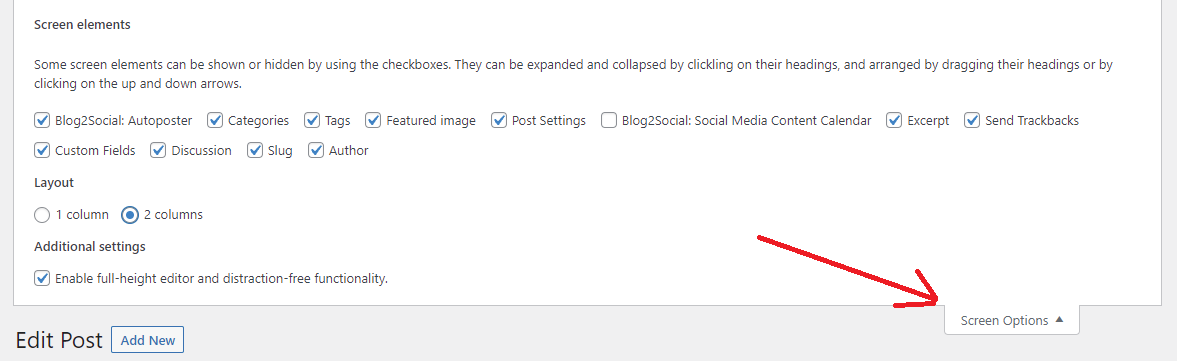
Screen options
Let’s take a look at the Screen Options button on the top right corner of the page. Click on this button to expand it. There are a lot of options displayed. You can optionally choose which elements to show on the right columns or by tick on them. In addition, you can rearrange them by dragging their headings or clicking on the up and down arrows.
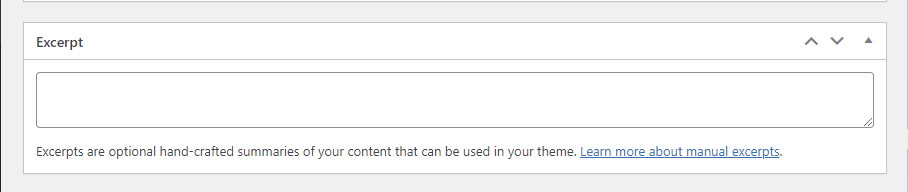
Excerpts
Check an Excerpt box below the editing area where you can add a short summary or excerpt for your post. This feature can be used to attract the visitors’ attention to your content.
WordPress will automatically use the first 55 words of the blog post or article to generate the excerpt. However, if you want to customize it, you can create one of your own.
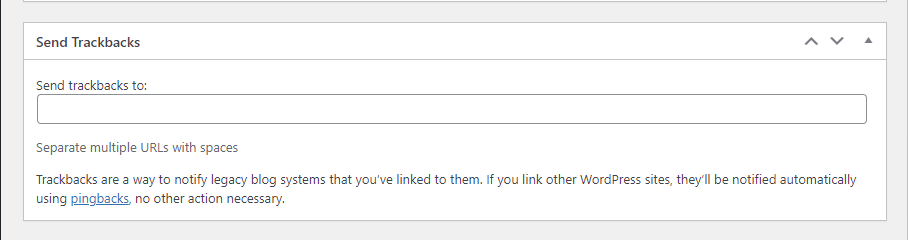
Send Trackbacks
Send Trackbacks feature enables you to notify legacy blog systems that you have linked to them. Whether the other blog owner is using WordPress, then you don’t have to send them trackbacks.
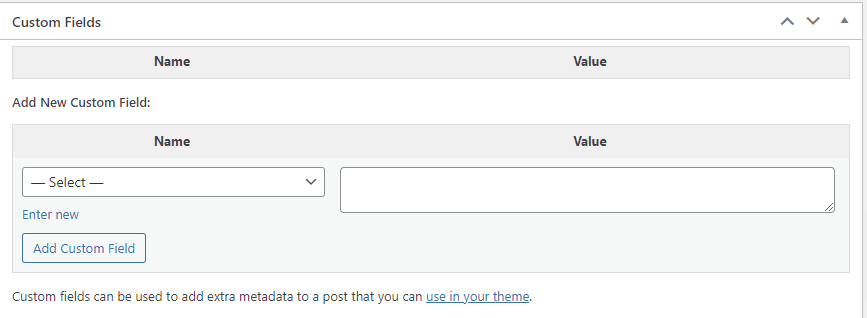
Custom fields
This option is displayed below the Excepts option. You can utilize it to enter custom information in your posts manually.
Discussion
This option allows you to turn on or turn off comments to your post. You can enable this feature to engage your audience as well as increase interactivity. Sometimes, your website will receive some comment spam, you can use some extra plugins to help you resolve this problem instead of disabling the comments feature.

Author
By default, WordPress will automatically assign you as the post author when you generate a new post. Nevertheless, you can enable the author checkbox to show another user as the author of your blog.

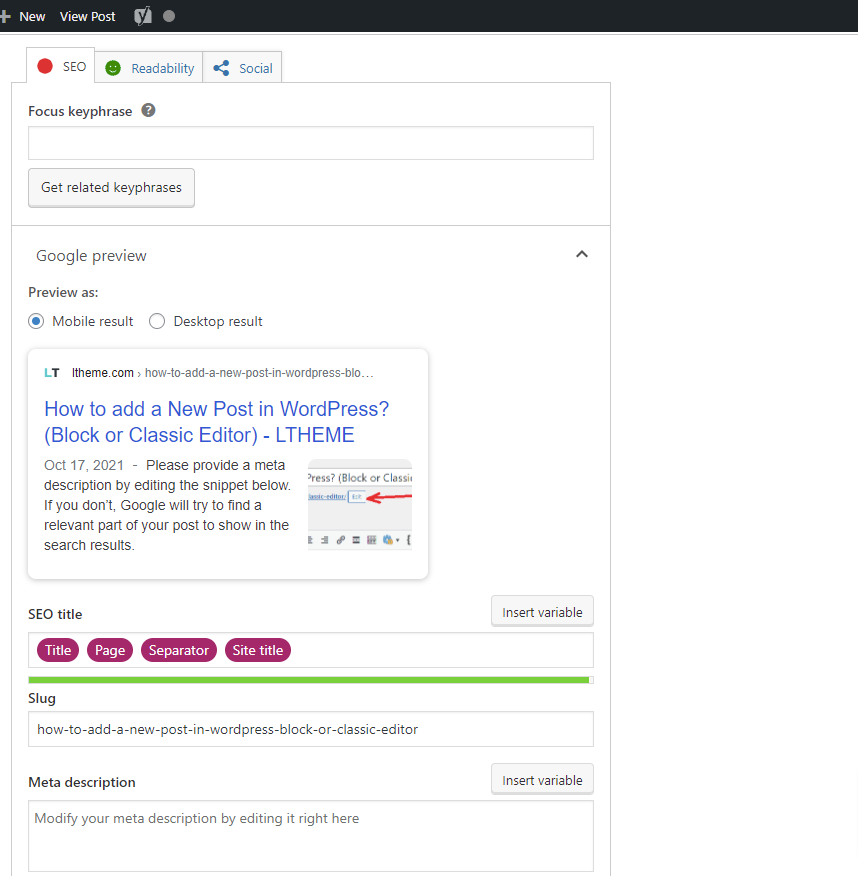
Options added by WordPress plugins
Furthermore, you can install more WordPress Plugins to enhance the functionality of your posts. We recommend using Yoast SEO that allows you to add keywords and meta descriptions. This tool will assist you to optimize SEO for your post.
Creating a new post in WordPress using the Block editor
Add title and content blocks
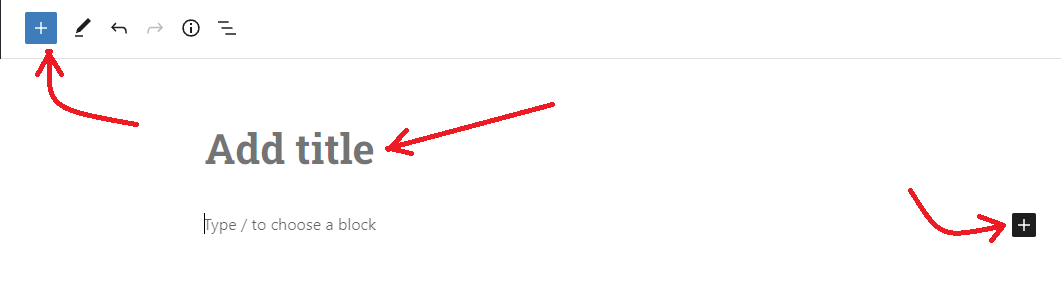
Visit All posts > Add New, this brings you to the editing area of the Gutenberg editor. There is a given area where you can write the title of your blog post.
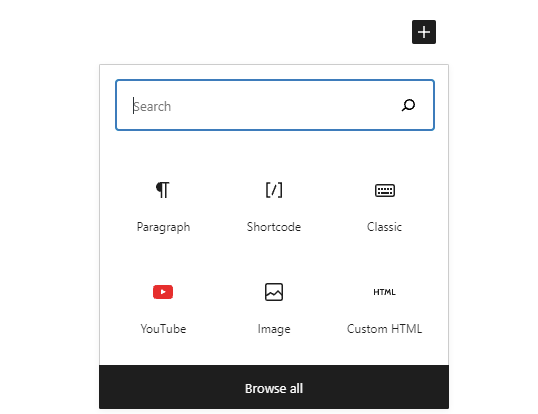
One of the biggest differences between Classic editor and block editor is that the Block editor allows you to create rich content via a lot of blocks. In order to add blocks, you can click on one of the two “+ ” symbols as the screenshot image below.
There is a wide range of blocks for you to choose from. You can find any blocks by searching them on the search bar. In addition, you can also add some extra WordPress plugins to enhance features such as contact forms, SEO, and much more.
Add images, video, and other media
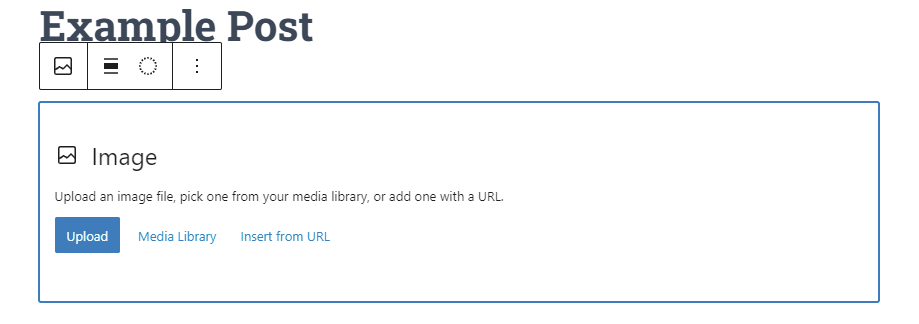
If you want to add images, just select the image block and then upload your favorite media from your computer.
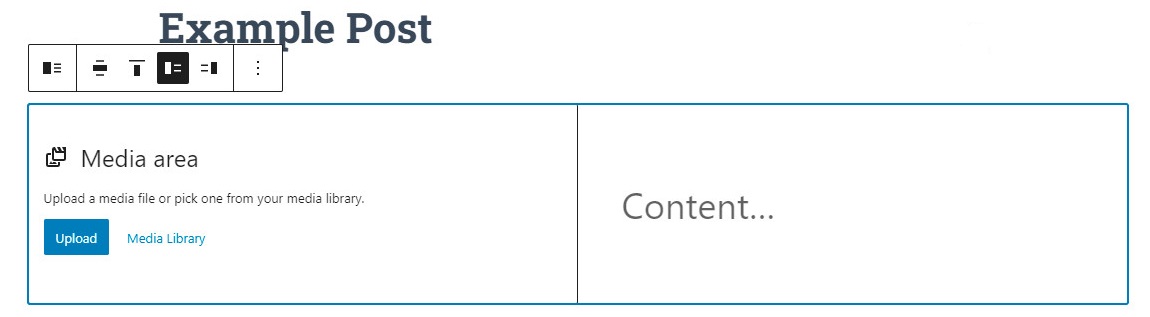
In addition, if you want to display both image and text in a single block, you can choose media & text block. This block helps you wrap text around the image.
In addition, you can also create a beautiful gallery in various grid layouts by using the gallery block. However, this block also has some limitations. You can use WordPress Gutenberg Gallery Plugins to get more features and customization options such as album, image shorting, and much more.
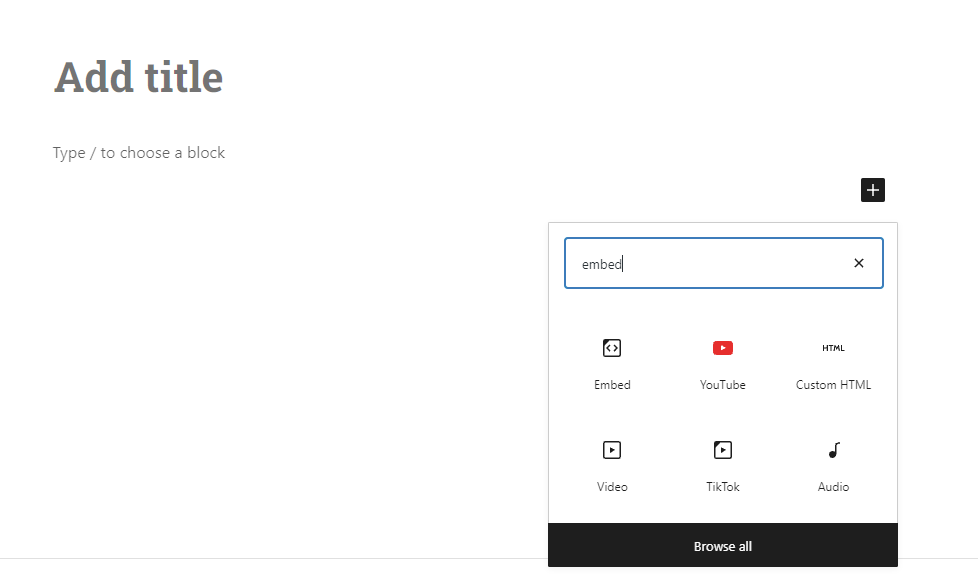
Moreover, Gutenberg editor also provides a lot of embed blocks that allow you to embed video directly in WordPress posts from plenty of social media platforms such as youtube, Facebook, Instagram, Twitter, and much more.
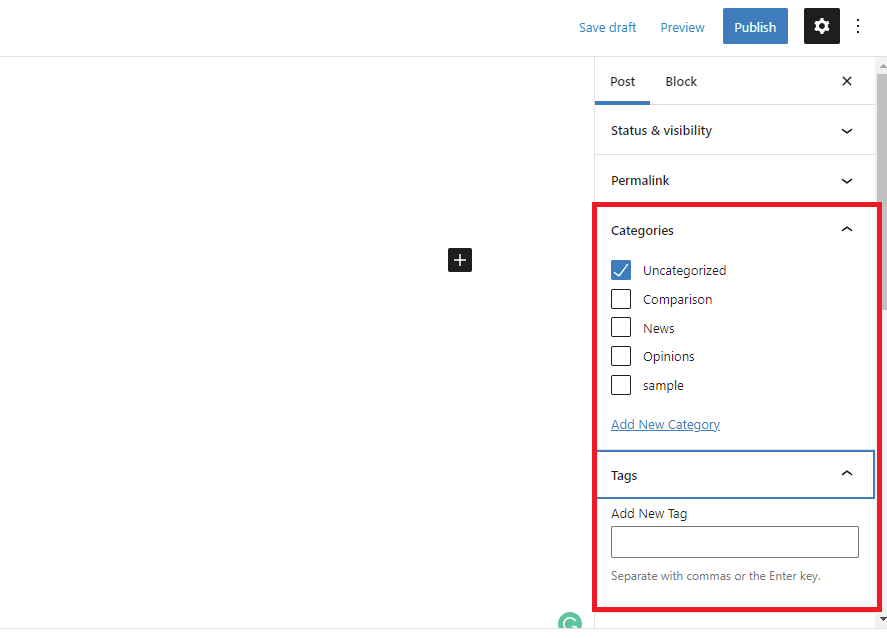
Add categories and tags
The Gutenberg editor allows you to add categories and tags. However, it is only displayed in a different interface. The categories and tags meta boxes are showcased in the right-hand column. These taxonomies assist you to organize your content better.
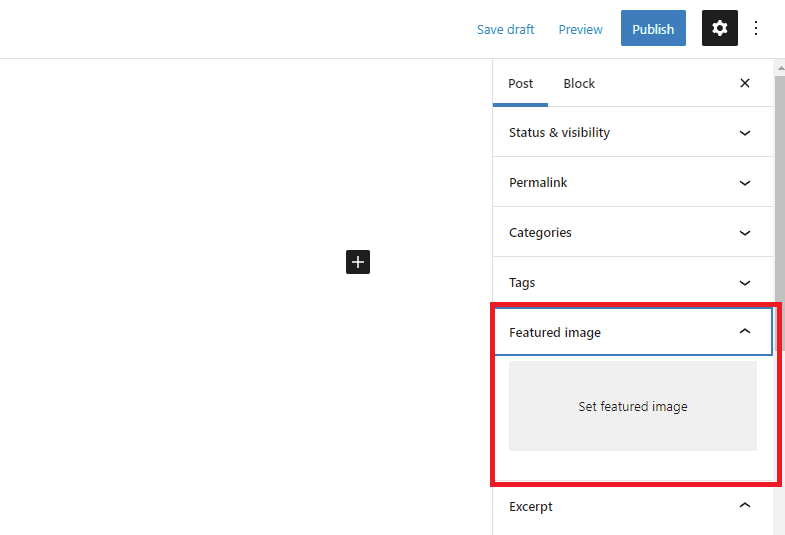
Add featured image
The featured image option is displayed in the right-hand column below the post settings. You should set a featured image as a representative image for your posts, pages, custom posts,…In addition, it is easy for you to style them, choose thumbnail sizes, and much more.
Change URL Slug or Permalink
The permalink is located in the second tab below the post settings. WordPress will automatically use your post title as the permalink. You can easily click on this tab and change the permalink as you want.
Publish options
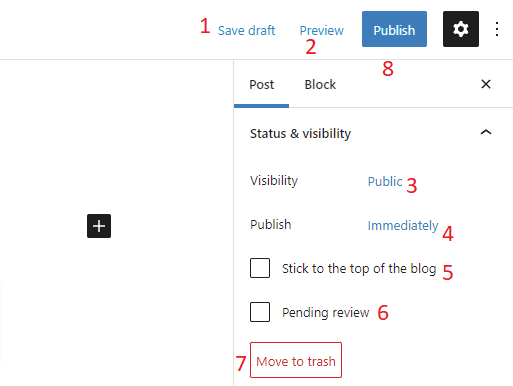
- Save draft: this option helps you automatically save your changes. You can click on this button to save changes manually.
- Preview: By clicking on this button, you can view how your posts look after publishing.
- Visibility: by default, the visibility of your post is displayed public option. However, when clicking on this button, it will open a popup window where you can choose other options such as make your site private or protect your site with a password.
- Publish Similarity, if you click on the Immediately option, it will open a popup, you can set a schedule for your post to publish later.
- Stick to the top of the blog: This option allows you to pin this post to the top of the blog
- Pending review: This feature helps you to temporarily save your posts and not publish your post.
- Move to trash: By clicking on this button, your post will be deleted immediately. You can restore this post within 30days in the trash folder.
- Publish button: Let’s click on this button when you have finished your post.
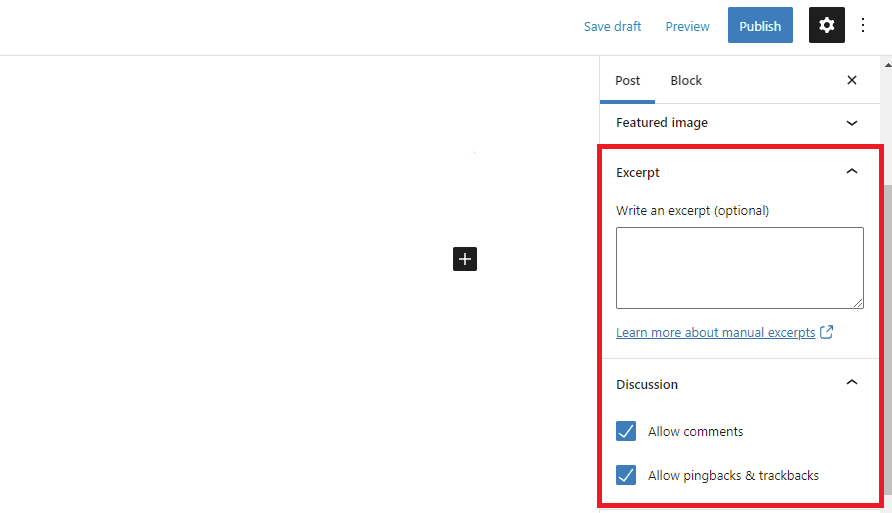
Add excerpt and enable comments
Both Excerpt and discussion tabs are located in the Post settings. Therefore, you can easily generate the summary of a blog post by typing a meaningful or catchy sentence.
In the discussion tab, you can click on the Allows comments option to allows everybody to leave a comment on your post. In addition, you will see the Allow pingbacks and trackbacks option below. This option enables you and other blogs to inform each other when they link to an article.
Other post edit screen options
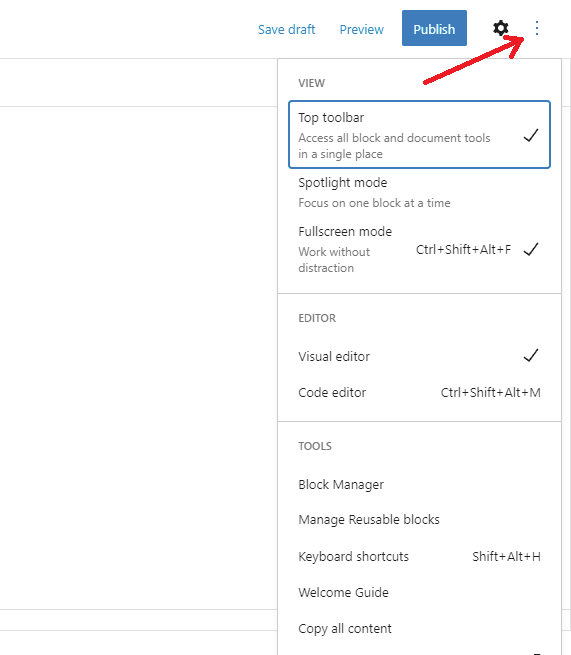
There are several options on the post-edit screen. You can click on the three-dot menu at the top right corner of the screen and then enable or disable a lot of available options according to your preference.
In addition, you will see options to move the block toolbar to the top, spotlight mode, fullscreen mode. You can also switch between visual editor or code editor, manage reusable blocks and see all keyboard shortcuts.
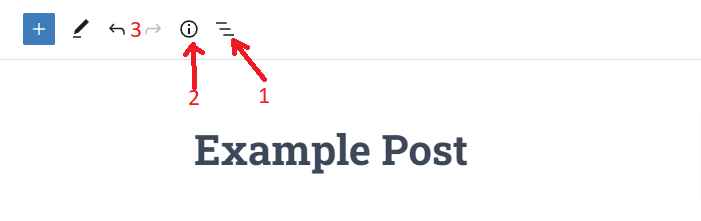
Now, have a look at the top left corner of the screen, you can see other options.
- The first option allows all blocks that you are using and you can quickly jump to any block you want.
- The second option allows you to view all numbers of characters, words, blocks, headings, and paragraphs in your post.
- The undo and redo buttons allow you to undo changes that you made to your post.
Wrap up
In nutshell, we have just shared how to use all features and customization options in WordPress. We expect that you can create a successful post without effort. If you have any queries, feel free to leave a comment below. We will support you as soon as possible.
Furthermore, are you planning to build an eye-catching website? Don’t ignore our Free WordPress themes where we provide a wide range of stunning themes and templates for various topics.

- Resolving the “Class JFactory Not Found” Error in Joomla When Upgrading to J6 - December 19, 2025
- The Utility Of VPNs For Site Authors And Admins - November 24, 2025
- Joomla! 6: What’s New and How to Upgrade from Joomla! 5 - October 23, 2025
")
?")


")


Recent Comments