Are you looking for a simple method to create custom image sizes in WordPress? Luckily, you have landed in the right place. In this tutorial, we will demonstrate how to add custom image sizes in WordPress to help you easily use them. Now, give it a look!
Why do you need to add custom image sizes in WordPress?
By default, WordPress offers three image sizes that include thumbnail, medium, large, and full sizes. Whenever you upload an image, WordPress will automatically create additional files for these default sizes.
Nevertheless, sometimes these image sizes are not suitable for your own purposes. In this situation, you need to use additional image sizes in WordPress. This will help you save much time using photoshop tools to edit your photos.
How to add custom image sizes in WordPress?
Now, we will provide you with a detailed guide to help you easily add custom image sizes in WordPress. Now, let’s go over the following steps.
Step 1: Registering additional image sizes for your theme
This method only requires you to write a few lines of code in your functions.php file. However, in order to avoid the risk of losing changes on your parent theme, you need to create a child theme or generate a backup of your website by using the WordPress backup plugin.
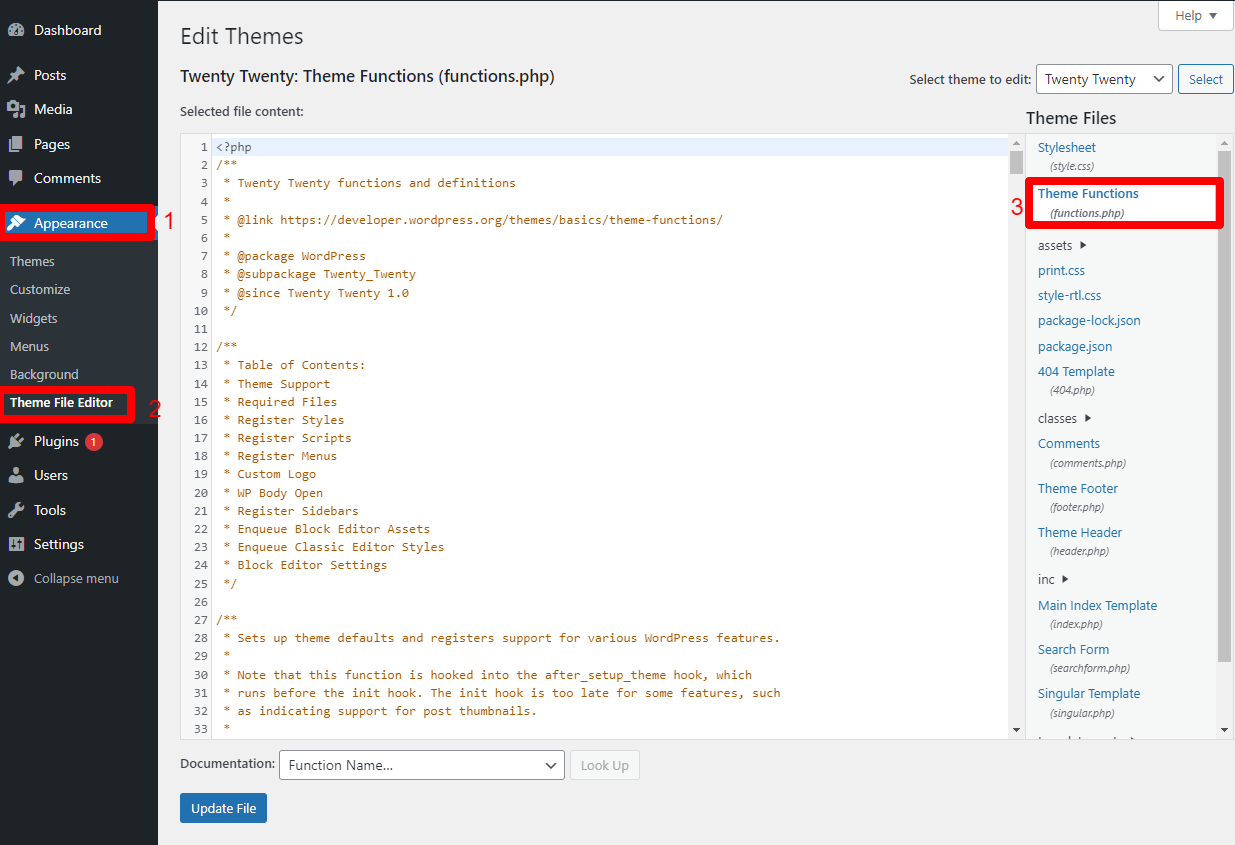
First of all, you need to add support for post thumbnails for your custom WordPress themes. To do that, you simply navigate to Appearance > Theme Editor from your WordPress dashboard.
Then, you need to select the functions.php of your child theme.
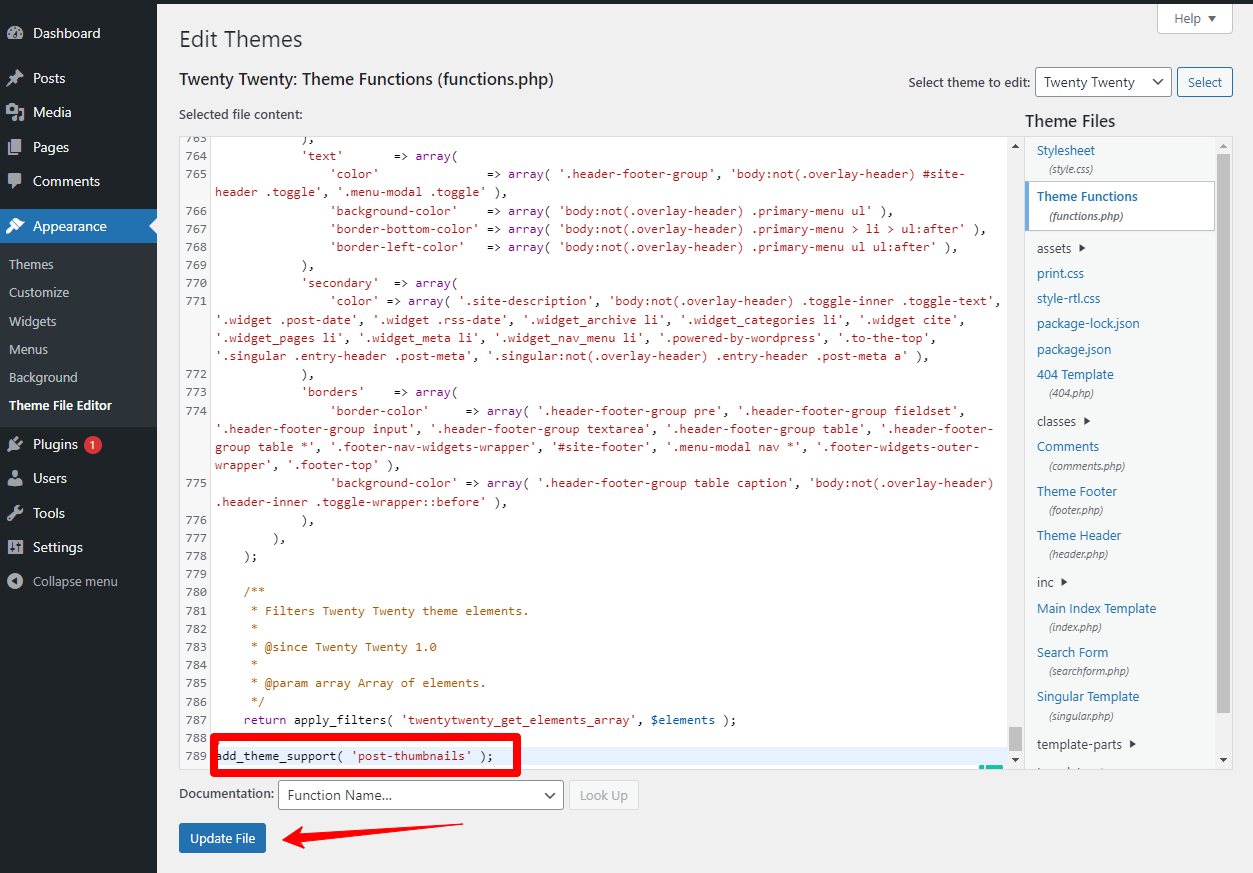
Now, simply copy the following code and add it to your functions.php file.
add_theme_support( 'post-thumbnails' );
This code snippet will help you enable the add_image_size() function on your website. After pasting the code, don’t forget to click on the “Update File” button to save your changes.
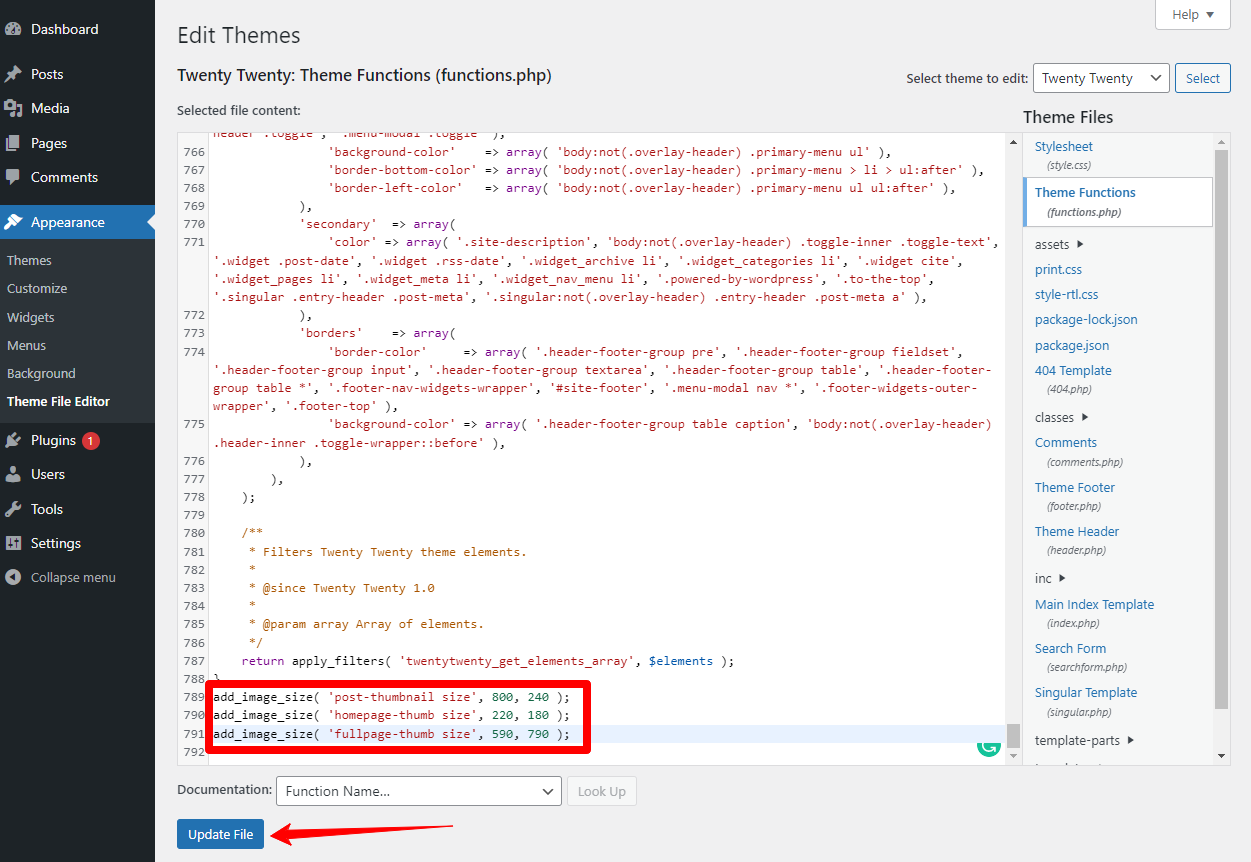
Next, you need to add your favorite custom dimensions. For example, we will use the following code to add custom image sizes.
In addition, you can change the name and size of each custom size according to your requirements. After you are pleased with your custom code, let’s paste it into your functions.php file.
Similarly, remember to press the Update File button to save your changes.
Congratulation! You have completely added your desired image sizes. The next thing you need to do is display them in your WordPress themes.
Step 2: Displaying additional custom image sizes in your WordPress Theme
In order to display your custom sizes in your WordPress theme, you need to copy the following code and paste it to the theme file where you want to showcase the image.
You should notice that that bit code must be pasted inside the post loop. In addition, you can change ‘your-specified-image-size‘ with the image name that you have set before. For example, you can change it into ‘post-thumbnail-size‘
Step 3: Regenerating thumbnails for previously uploaded images
Unluckily, the add_image-size() function only creates the sizes for images that you upload after this function has been added to the theme. Therefore, in this step, you need to regenerate thumbnails in WordPress so that all your previously uploaded images will be updated to the new sizes.
To resolve this issue, we highly recommend using the Regenerate thumbnails plugin. This tool will help you regenerate all thumbnail sizes for one or more images that have been uploaded to your media library.
Step 4: Enabling additional image sizes for your WordPress posts
Although you have added image sizes to your theme, this function is only used for your theme. Why should you take advantage of all generated image sizes to use in your post content?
To do that, you simply copy the following code and paste it into your theme’s functions file.
Remember to click on “Update File” to finalize the process.
Now, you are able to upload an image to your WordPress post or page. You will see that your custom image sizes will be displayed under the “Image size” option. You can optionally select your desired sizes for the images that you uploaded to posts/pages.
The bottom line
We have just provided you with a step-by-step tutorial to add custom image sizes in WordPress. Is this method useful for your website? Let’s share with us your opinion by leaving a comment below. Or if you need our assistance, don’t hesitate to contact us. We are always willing to support you.
Additionally, do you want to own a stunning website to draw the attention of your site’s visitors? If yes, don’t miss a list of charming, responsive, free WordPress Themes on our website.
Welcome to LT Digital Team. We make daily blogs for Joomla! and WordPress CMS, support customers and everyone who has issues with these CMSs and solve any issues with blog instruction posts, trusted by over 1.5 million readers worldwide.
Latest posts by LT Digital Team (Content & Marketing) (see all)
We use cookies to improve your experience on our website. By browsing this website, you agree to our use of cookies.
Functional
Always active
The technical storage or access is strictly necessary for the legitimate purpose of enabling the use of a specific service explicitly requested by the subscriber or user, or for the sole purpose of carrying out the transmission of a communication over an electronic communications network.
Preferences
The technical storage or access is necessary for the legitimate purpose of storing preferences that are not requested by the subscriber or user.
Statistics
The technical storage or access that is used exclusively for statistical purposes.The technical storage or access that is used exclusively for anonymous statistical purposes. Without a subpoena, voluntary compliance on the part of your Internet Service Provider, or additional records from a third party, information stored or retrieved for this purpose alone cannot usually be used to identify you.
Marketing
The technical storage or access is required to create user profiles to send advertising, or to track the user on a website or across several websites for similar marketing purposes.

")
")


Recent Comments