Introduction
Footer is known as the bottom part of a website. Sometimes, visitors do not notice or ignore this section. However, website owners can customize the footer in WordPress to be able to present the main or important content. This will help website owners attract visitors and promote some content for businesses easily.
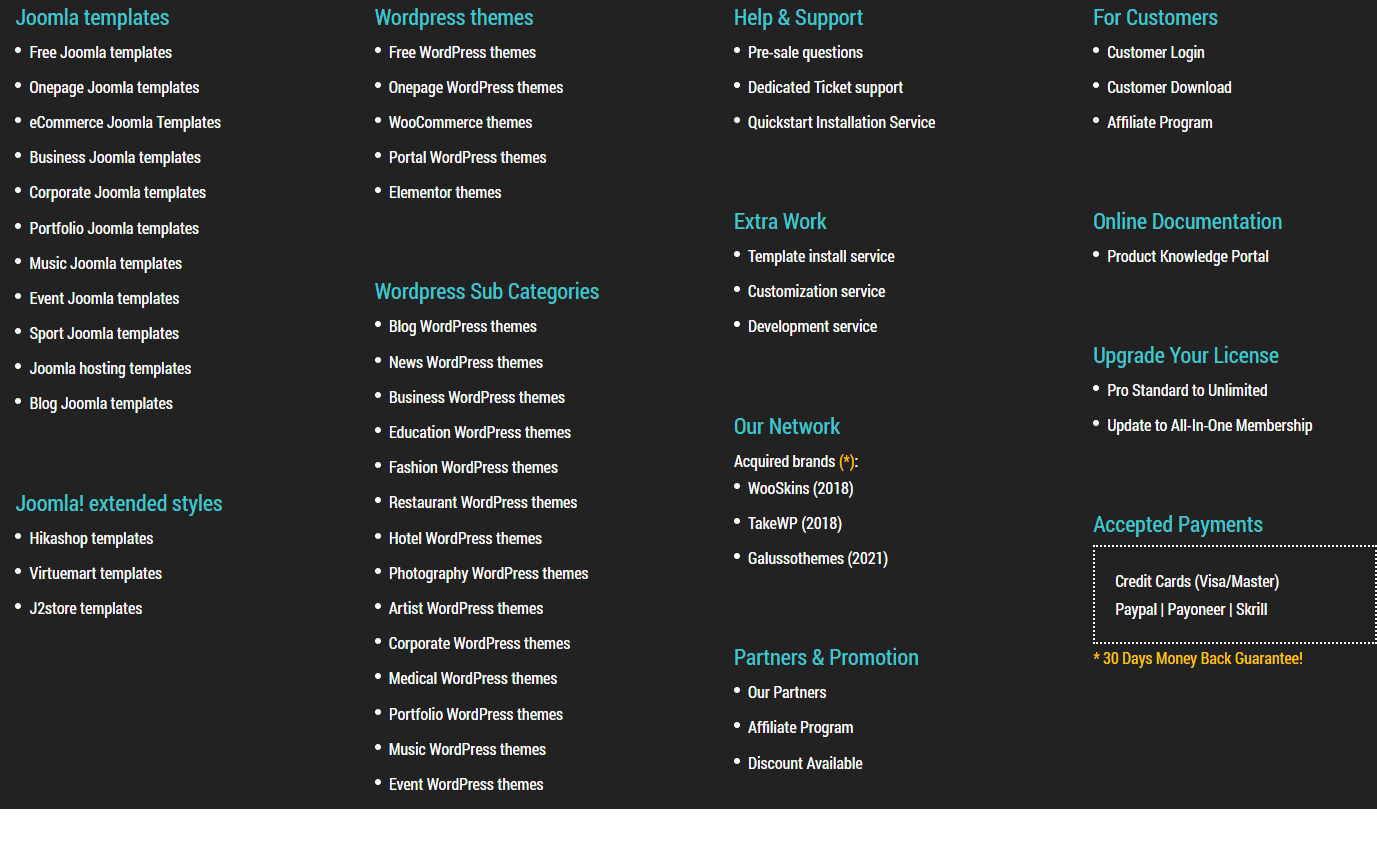
For example, the following image showcases the footer of our website.
So, if you are looking for some methods to edit the footer for your site, we would like to bring you the blogs today. Now, don’t hesitate to explore the ways one by one to choose the most suitable one that meets your requirements.
The methods to Customize the Footer in WordPress
Adding widgets in the WordPress footer
By using this way, you are easily able to add images, texts, or links to the privacy policy to your site footer area.
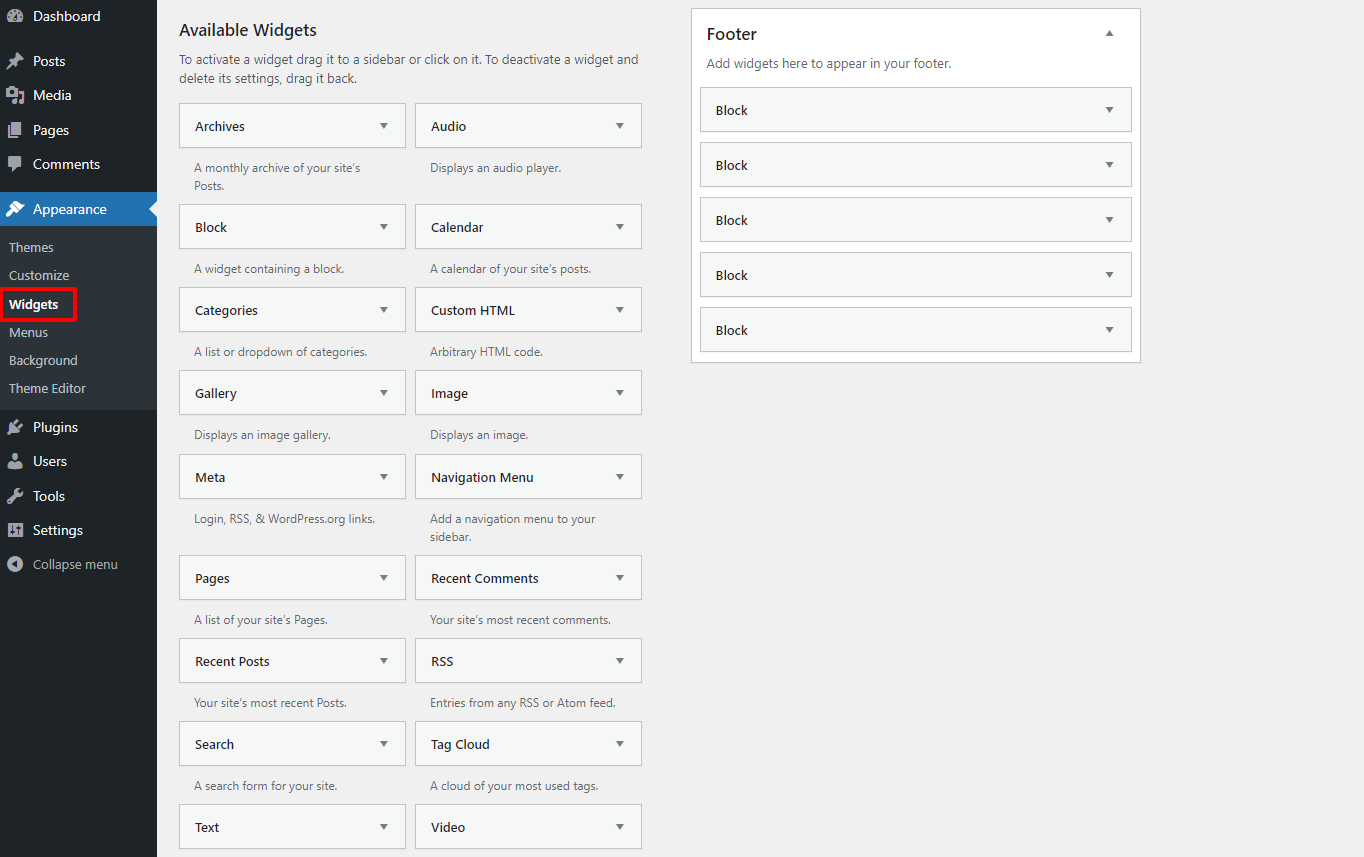
All you need to do is go to Appearance -> Widgets, then add anything you want to showcase in the footer area.
In order to add a widget, you just need to drag and drop it into the footer section on the right side of the screen.
Besides adding text or images, you can also add links to different pages or categories of your site to the site footer.
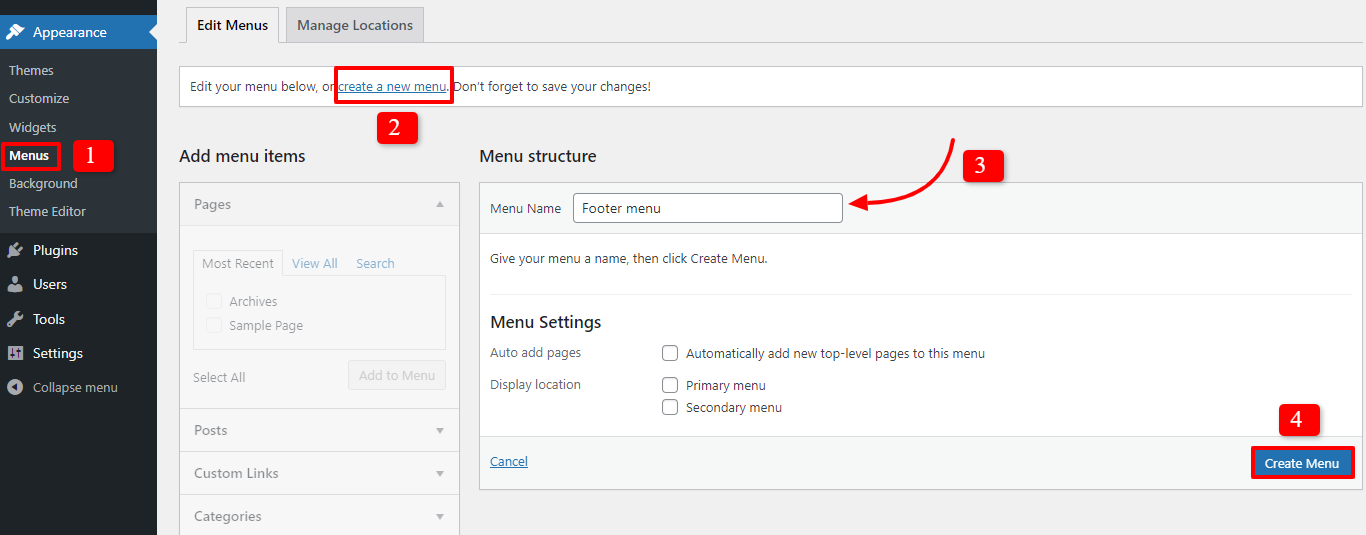
If you wish to do that, let’s go to Appearance -> Menus to utilize the navigation menus. Then, simply click on Create a new menu button.
Now, you need to enter the name of your new menu. After that, you just press on Create Menu button.
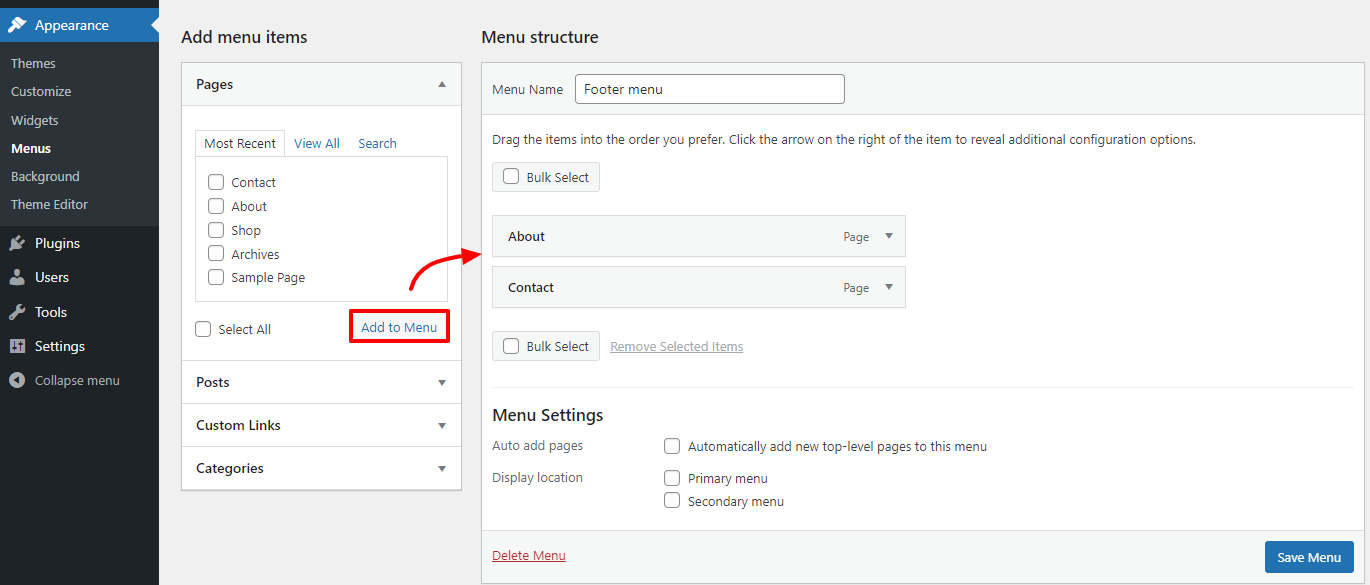
Your new menu is available for you to add any links to it. Now, you can freely choose any pages, posts, or categories on the left side of the screen and click Add to menu to insert them.
Don’t forget to click on the Save menu button after selecting everything you need.
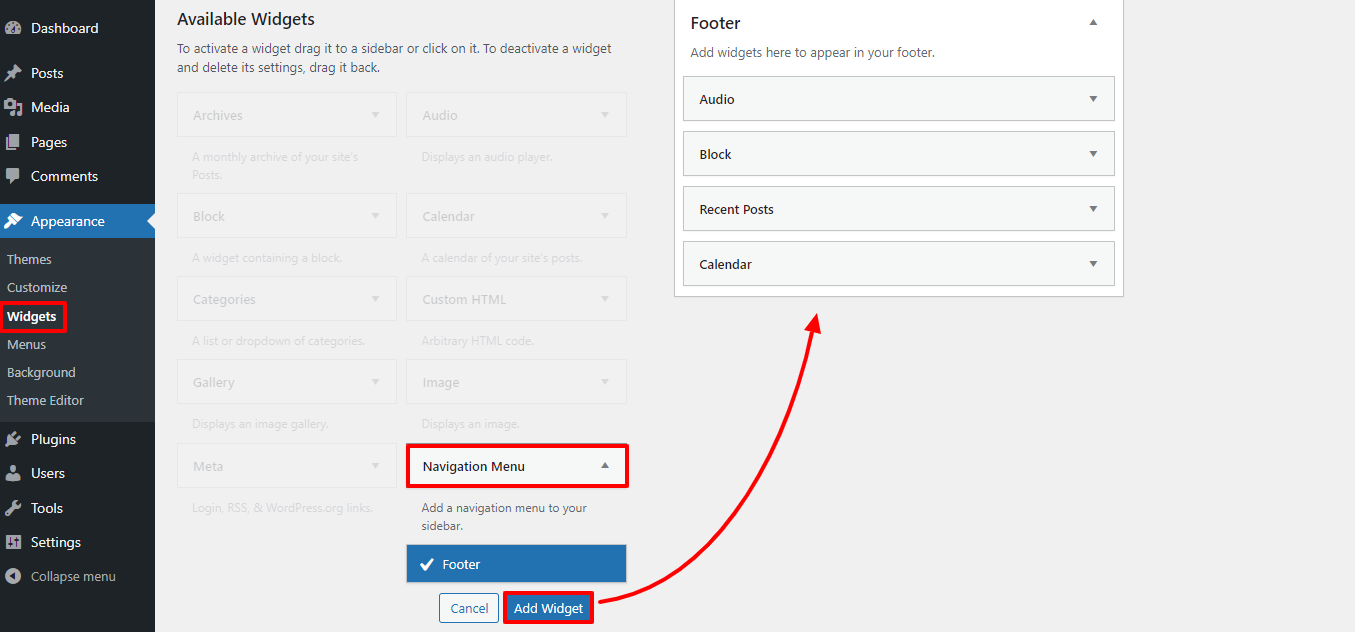
Now, you are able to add the new menu you have already created to the footer widget area. On the admin dashboard, let’s access Appearance -> Widgets, then choose Navigation Menu, and press on Add Widget button.
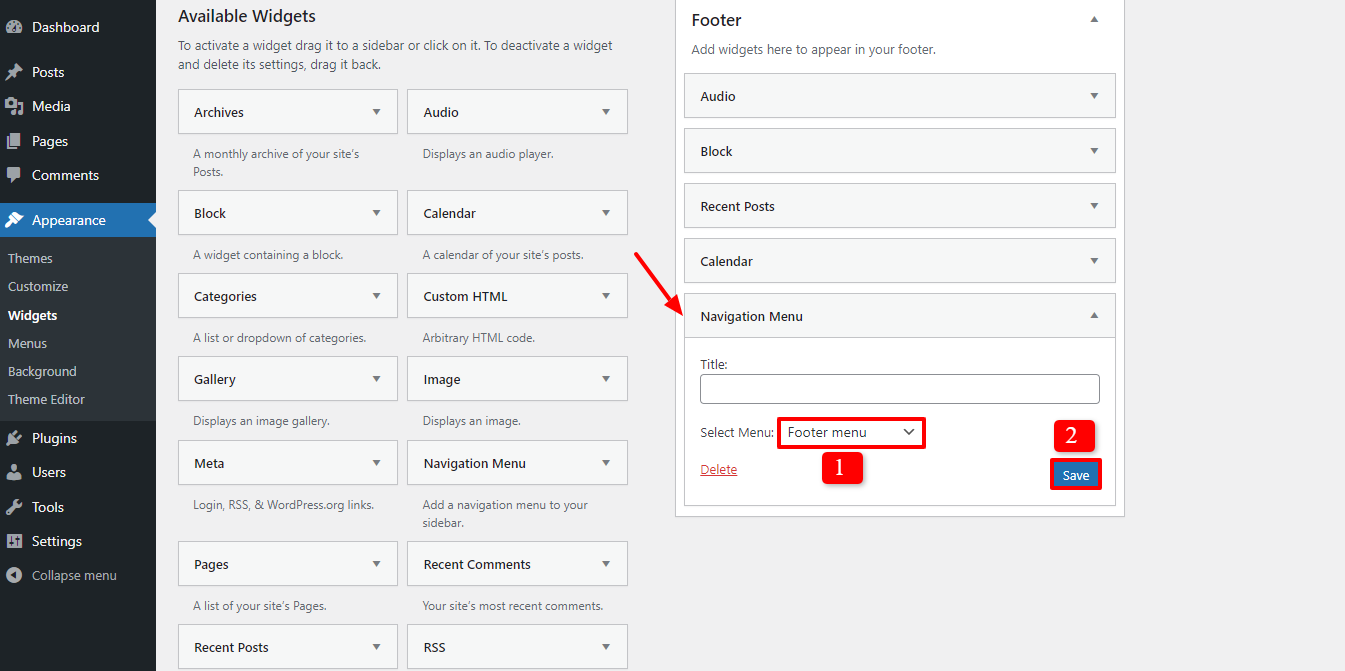
Next, in the Footer section, there will be a Navigation Menu part, don’t forget to select the menu that you have already generated and save your settings.
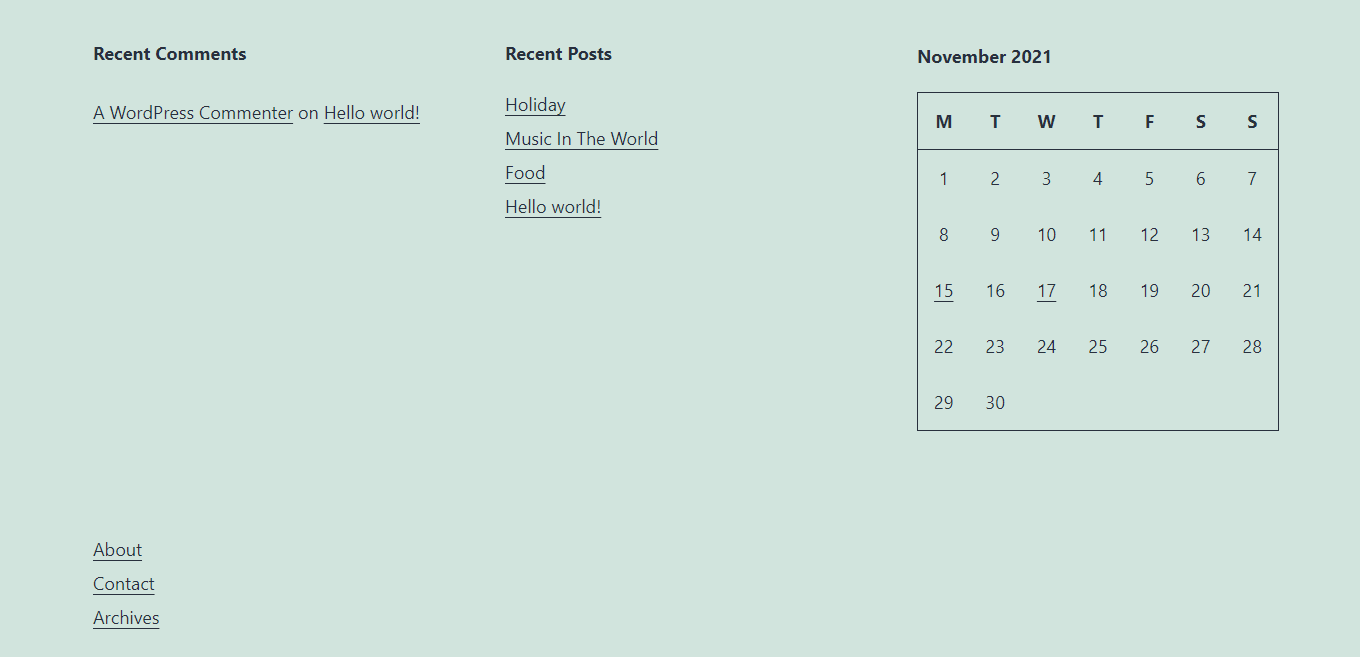
Now, let’s visit the site and see the footer.
Deleting the Power by WordPress text in the Footer
Sometimes, your site may have the ‘Power by WordPress’ in the footer bar. It isn’t a widget, so if you want to remove it, let’s follow the following instruction.
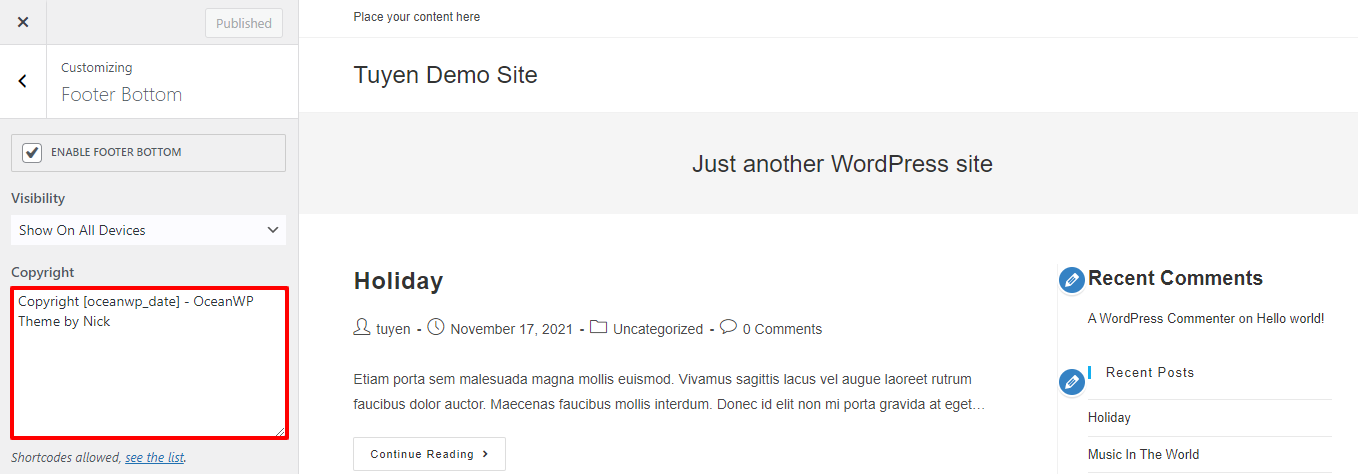
First of all, you need to access Themes -> Customizer to edit the site footer.
Some themes will have the footer section for you to edit, others will not. For example, we are using the OceanWP theme that contains the Footer Bottom option. Now, there will be a Copyright box for you to change the text of the footer bar.
Don’t forget to press on Published button after finishing the changes.
In case the theme you are utilizing doesn’t provide the option to customize the footer in WordPress, you can edit it manually.
In order to edit the footer text manually, you need to customize the footer.php file.
Now, let’s use FTP Client to connect to the WordPress hosting. Firstly, you need to download the /wp-content/themes/yourtheme/footer.php file. After that, simply edit it in a text editor.
Next, you have to find the line containing the ‘Powered by WordPress’ text. For instance, when using the Twenty Twenty theme, you will see the following code:
<div class="footer-credits">
<p class="footer-copyright">©
<?php
echo date_i18n(
/* translators: Copyright date format, see https://www.php.net/date */
_x( 'Y', 'copyright date format', 'twentytwenty' )
);
?>
<a href="<?php echo esc_url( home_url( '/' ) ); ?>"><?php bloginfo( 'name' ); ?></a>
</p><!-- .footer-copyright -->
<p class="powered-by-wordpress">

<a href="<?php echo esc_url( __( 'https://wordpress.org/', 'twentytwenty' ) ); ?>">

<?php _e( 'Powered by WordPress', 'twentytwenty' ); ?>

</a>

</p><!-- .powered-by-wordpress -->
</div><!-- .footer-credits -->
You simply need to remove or alter the text and reupload it.
Adding code to the Footer of your WordPress site
If you desire to insert the code snippets to your footer to link your site with any external app, let’s follow the steps below.
First of all, you have to add the script of the external app to your footer. Next, you need to install and activate the Insert Headers and Footers plugin – one of the most useful WordPress Header plugins. After that, let’s open Settings -> Insert Headers and Footers. Then, into the Scripts in the Footer box, you just need to copy and paste the footer code.
Finally, let’s click on the Save button to store all your settings. Now, everything is done.
Wrap Up
To sum up, we are pleased to provide you with some easy and useful ways to customize the footer in WordPress. If you think this blog is great and want to share it with your friends, don’t hesitate to do that. Last but not least, don’t forget that there are many attractive Free WordPress Themes for you to get. So, don’t miss it!

- Resolving the “Class JFactory Not Found” Error in Joomla When Upgrading to J6 - December 19, 2025
- The Utility Of VPNs For Site Authors And Admins - November 24, 2025
- Joomla! 6: What’s New and How to Upgrade from Joomla! 5 - October 23, 2025


")


Recent Comments