Learning How To Create A WordPress Multilingual Site
Currently, demand for multi-lingual design for websites increasingly popular, especially with those websites change towards international cooperation, or educational sites, even the news sites. We can’t make the user feel comfortable if they do not understand what they’re doing, they also don’t know what to do, the language barrier is a very difficult problem. Therefore the multilingual website created to localize content, appropriate for most users in any region in the world. In this article, we will show you how to easily create a WordPress Multilingual site in 2 ways.
1.Creating a WordPress Multilingual Site (Human Translation)
Firstly, let’s install and activate the Polylang plugin. Then you go to “Setting” and choose “Languages” tab
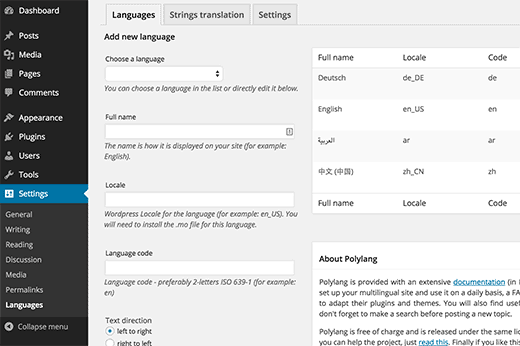
At Languages tab, you add the languages you want to use on your website and add the default language, as well as select all other languages that users can choose on your website.
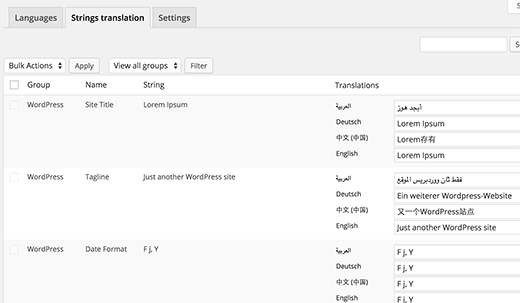
The next thing you need to do is to switch to the “Strings Translations” tab. At this tab, you need to translate website title, description, and choose the date and time format.
And finally, you can choose a default language for your WordPress site and other technical settings at the “Settings” tab.
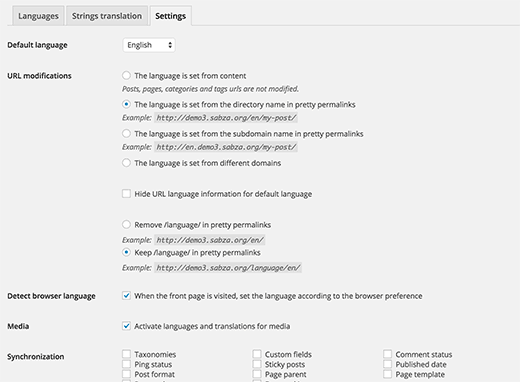
For beginners, we recommend not changing the URL, you should select the first option because if you ever turn off this plugin, all those links will be broken.
If you’re looking to take full advantage of multi language SEO, you can select the second option for permalinks like in screenshot above.
Ticking the option for detecting browser’s preferred language and automatically show them the content in their preferred language. Click on the “Save changes” button to save you settings.
Adding Multilingual Content in WordPress
You can easily add content in different languages thanks to Polylang. Just create a new post or edit an existing one. You will notice the languages meta box on the post edit screen.
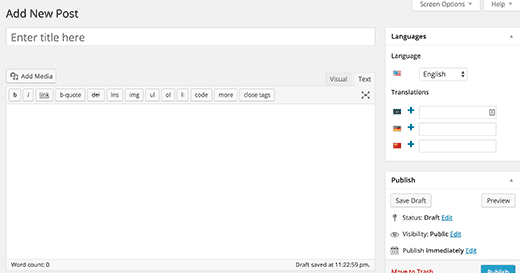
Step 1: You just add content in your default language
Step 2: Click on the “+” button next to the language and add content for language that you want to translate to. For other languages, you also do the same. Once you are done, you can publish your posts and pages.
Translating Categories, Tags, and Custom Taxonomies
If you want to translate categories, then you go to Posts and select Categories.
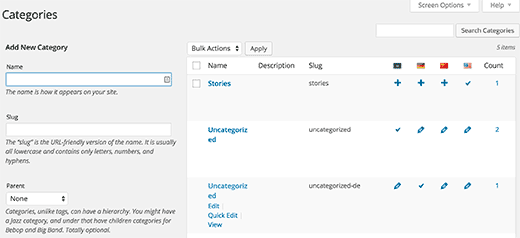
Here, you can add a category in your default language and then click on the plus icon for languges you wanna translate.
Displaying Multi Language Switcher On Your Website
Why do we need display Multi Language Switcher On Your Website? Adding a language switcher allows users to select a language when viewing your site.
To add language switcher, just go to Appearance -> select Widgets, then add the language switcher widget to your sidebar or another widget-ready area.
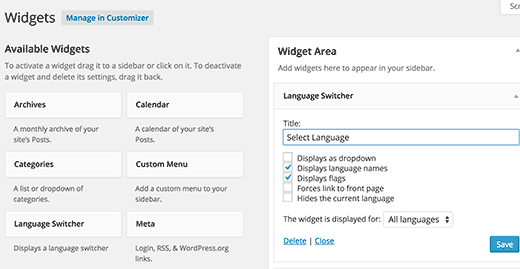
You can choose a drop down, or use language names with flags. After choosing, just click the “save” button to store your widget settings.
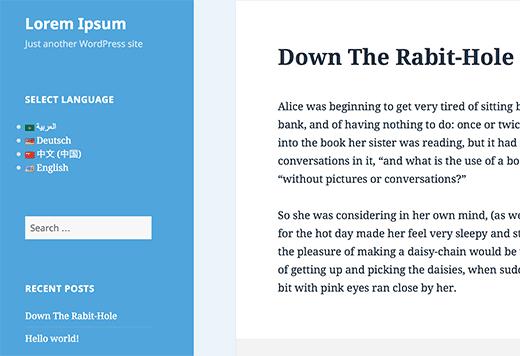
And now, let’s preview your site to see the language switcher.
2. Using Google Translate to Create a Multilingual Site in WordPress
If you don’t have the resources or time to add human translations, then you can using Google Translate to automatically translate content on your WordPress website.
Just follow two steps below:
Step 1: Installing and activating the Google Language Translator plugin.
Step 2: Visit Settings and go to Google Language Translator to configure the plugin.
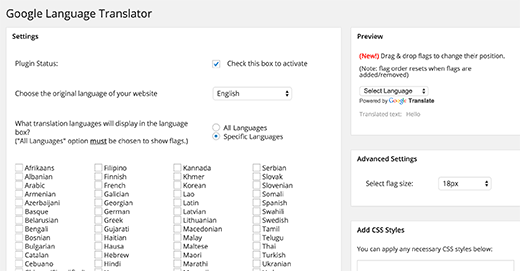
The plugin allows you to select the languages available with Google Translate. You can even remove Google’s branding from translation. This is a highly customizable plugin, so you need to go through the settings and configure it to your liking.
Thanks for reading, and if you have any questions with this blog, please don’t hesitate to let me know by leaving a comment.
Hope this post help you learn how to create a WordPress Multilingual Site. If you liked this article and felt it useful!, share it with your friends! 😀

- Resolving the “Class JFactory Not Found” Error in Joomla When Upgrading to J6 - December 19, 2025
- The Utility Of VPNs For Site Authors And Admins - November 24, 2025
- Joomla! 6: What’s New and How to Upgrade from Joomla! 5 - October 23, 2025


?")


Recent Comments