
Are you looking for the best method to organize your WordPress Media Library neatly and effectively? Don’t miss this article, we gave you a detailed guide to help you handle this problem.
Why should you organize your WordPress media library with folders?
By default, WordPress allows you to upload image files or other files, and then they will be stored in the WordPress media library. The media library of WordPress also enables you to find any files by sorting by date or using the search bar. However, it is really difficult to go back and find old files. In addition, it wastes you a lot of time. In order to tackle this issue, you need to use the support of WordPress Library plugins to easily organize your files professionally.
Moreover, organizing your WordPress media library better can help you easily browse media files. Furthermore, it improves image SEO because you can add keywords to your image file URLs.
How to organize your WordPress media library with folders?
In today’s tutorial, we will guide you to organize your WordPress folders in the media library effectively with Media Library Folders plugin. This is one of the best WordPress Library Plugins performing and providing great media management features and functionality.
Keep in mind that the free version of this plugin only allows you to create a maximum of 10 folders. If you want to extend the number of folders, you have to upgrade to the pro version.
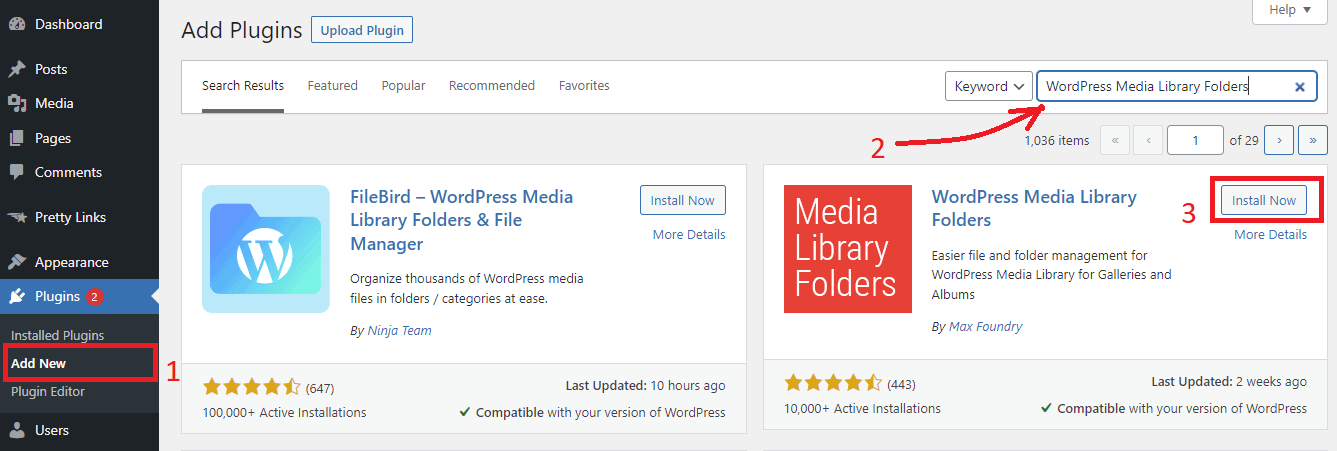
In order to use this plugin, first of all, you need to go to Plugins > Add New. Then let’s use the search bar to look for the Media Library Folders. After that, click on the Install Now button and Activate it.
Creating main folders and sub-folders
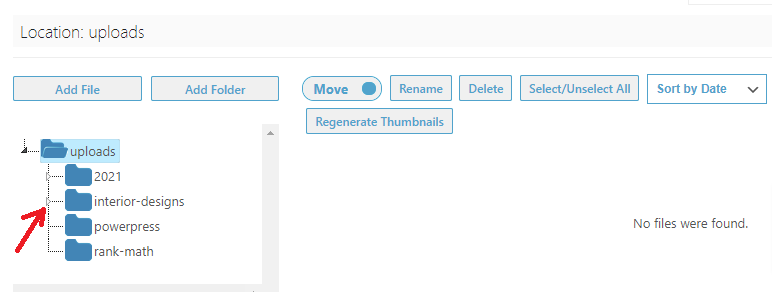
After the plugin has been installed, go to your WordPress dashboard menu, you will see a new item labeled ” Media Library Folders“. Let’s click on this section to open the plugin’s folder where you can see all the folders inside your WordPress upload directory.
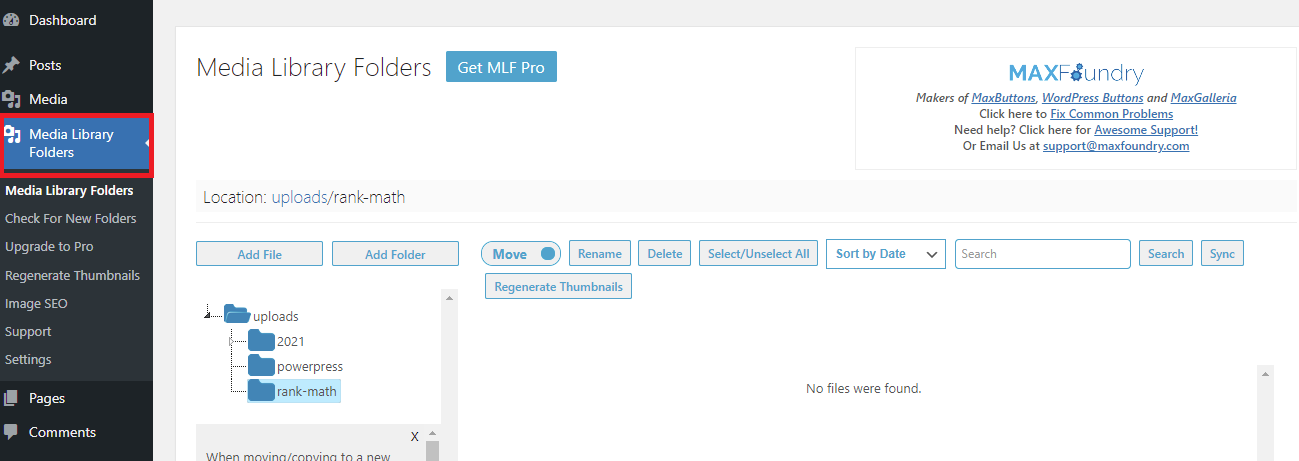
At here, you are able to generate new folders and add files to them. In addition, you can also move, copy, rename or even delete your files.
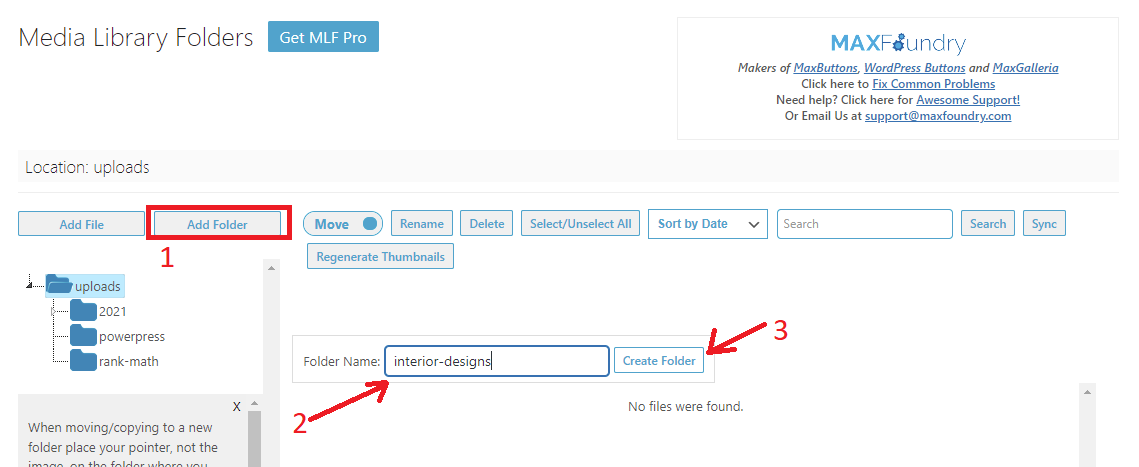
To create a new folder, simply click on the “Add Folder” button and give your new folder a name. Then click on the “Create Folder” button.
You should note that the folder names have to not contain spaces. To separate words in your folder names, you can use a hyphen or underscore instead.
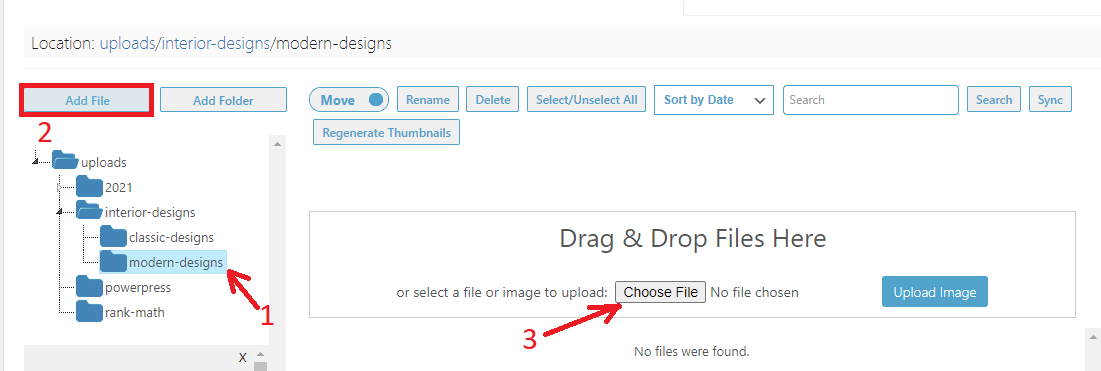
If you want to create subfolders, simply click on the parent folder that you want to make subfolders. And then click on the “Add Folder” button.
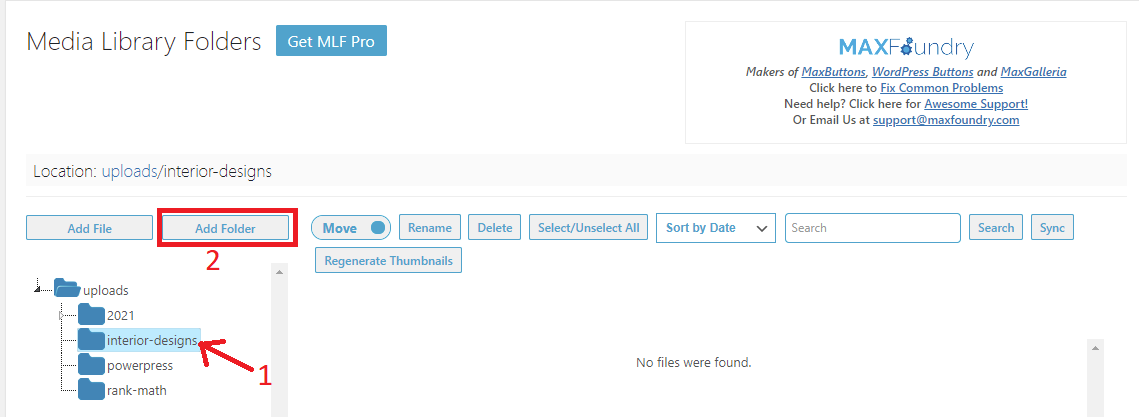
For example, we added two subfolders for the interior-designs folders including “modern-designs” and “classic-designs“. To view subfolders, you need to click on the small arrow to the left of the parent folder.
Adding files to your folders
If you want to add files to your folders, simply click on the folder and then click on the ” Add File” button. This will open a box where you click on the “Choose file” button to upload files from your computer and after that click on the “Upload image“.
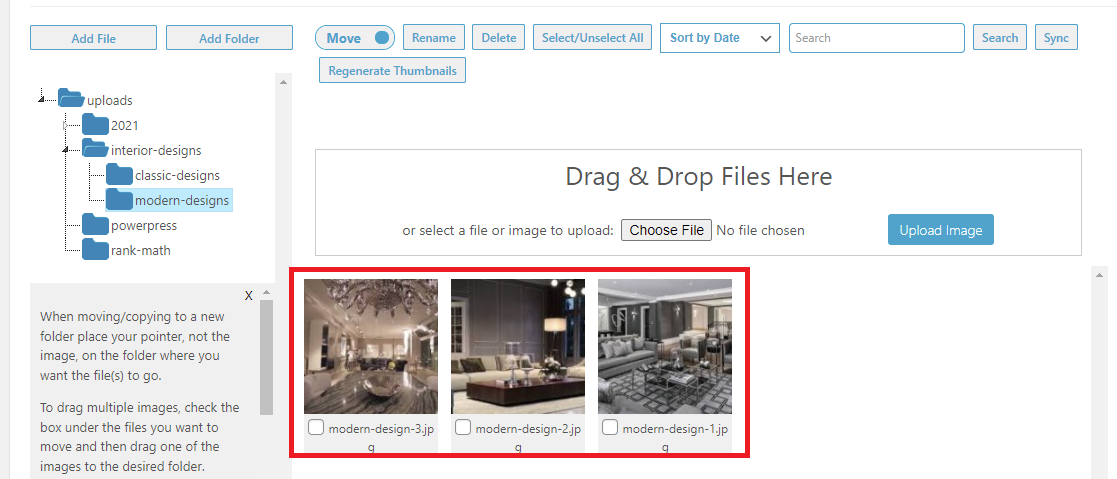
When you have uploaded all files yet, you will all your uploaded images displayed on the screen as thumbnails.
It’s easy to add your uploaded files to your posts or pages. You can add them just like any other files that you’ve uploaded to the media library.
Moving an Image to a New Folder
If you want to move an image or a file, simply check that the Move/Copy toggle is set to ” Move‘. Then drag the image to another folder. For example, we are going to move a classic design image from the “modern-designs” folder to the ” classic-designs” folder. Because it was incorrectly placed in the modern-designs folder.

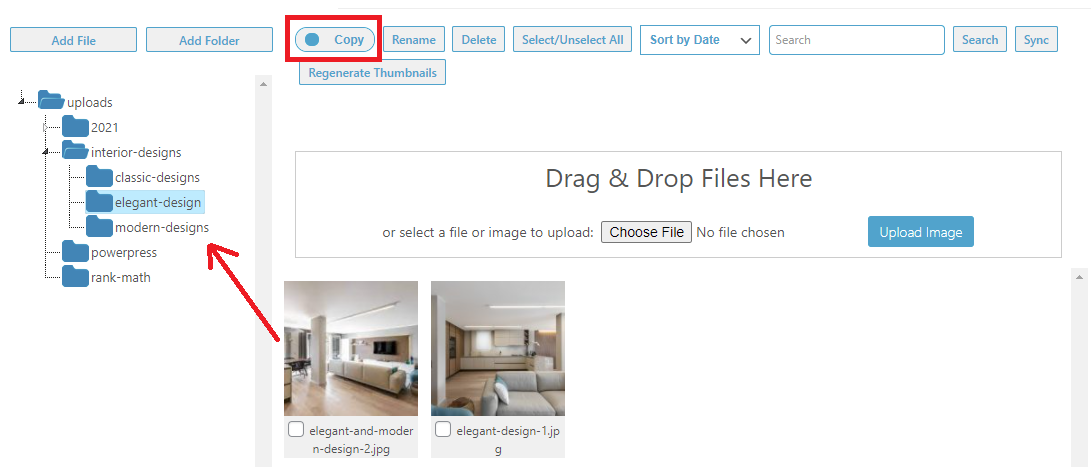
Copying an Image to a Different Folder
Similarly, if you want to copy an image, simply set the “move/copy” toggle to “Copy” mode. Then drag the image that you want to copy. In our example, we want to copy an image that has an elegant and modern style so that it is available in both the “elegant-designs” folder and the “modern-designs” folder.
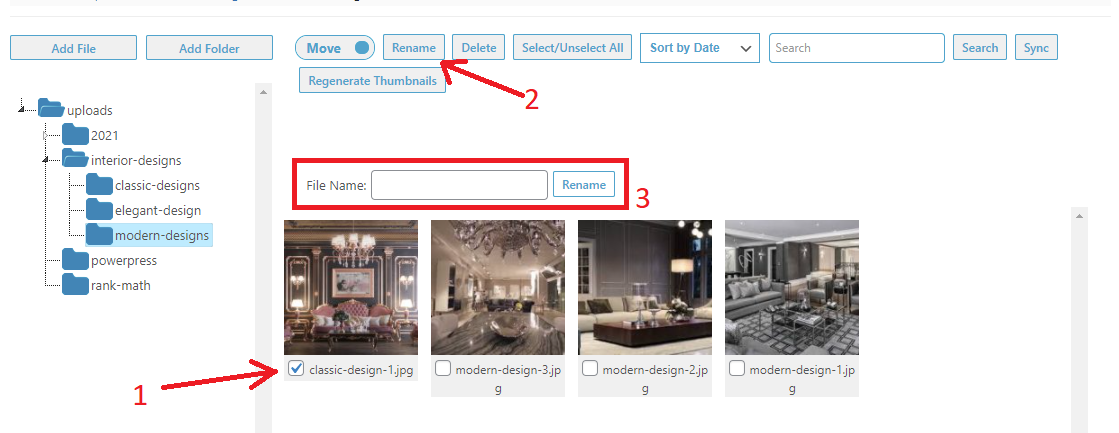
Renaming Files and Folders
It is easy for you to change the filename of files with the Media Library folders plugin. Initially, you need to find the file that you can change its name and check the box below this image.
Next, click on the “Rename” button at the top of the screen.
Then, give your file a new name you want to change. Quickly click on the “Rename” next to the file name box to finish.
However, you can not rename or move a folder in Media Library Folders plugin. There is still a method. You can create a new folder and move all the images in the old folder into the new folder. Then delete the old folder.
Deleting Files and Folders
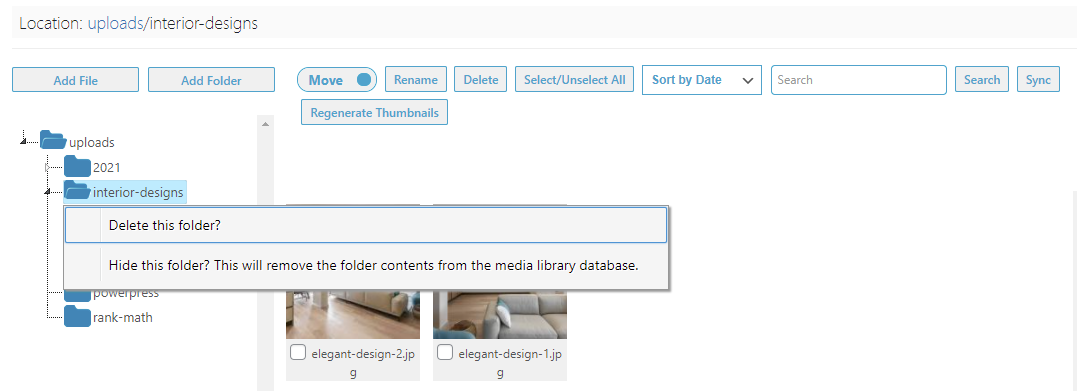
In order to delete a folder, simply right-click on this folder and then click on the “Delete this folder” option.
After that, the system will display a message prompting on the top to confirm your selection before deleting this folder permanently. Continue to click on the “Ok” and the folder will be deleted immediately.
The bottom line
We have just given you the best way to help you organize your WordPress Media Library with Folder efficiently. Hopefully, this article is useful for your website. We are always welcome if you have any questions or need our assistance.
Moreover, you can access our Free WordPress theme to explore plenty of excellent, SEO-friendly themes and templates. They are completely suitable for various topics. Let’s visit and try one.

- Resolving the “Class JFactory Not Found” Error in Joomla When Upgrading to J6 - December 19, 2025
- The Utility Of VPNs For Site Authors And Admins - November 24, 2025
- Joomla! 6: What’s New and How to Upgrade from Joomla! 5 - October 23, 2025


")


Recent Comments