If you are wondering how to easily create a WordPress Footer and which things you need to add to it, luckily you have come to the right place. In today’s tutorial, we will demonstrate a detailed guide to help you create a useful WordPress footer without effort and share the necessary thing that you should add to the footer of your WordPress site. Now, let’s dive into the following sections.
What is a WordPress Footer?
Generally, the footer is the position that is displayed at the bottom part of a website. In most websites, this area is used to showcase some crucial information such as the About Us page, privacy policy, FAQ, links to support, Social media link, location, and much more. You can visit any website, simply scroll down the screen at the bottom of the page, and then you will see that site’s footer.

How to create a WordPress Footer?
To create a WordPress footer, you can track the following steps.
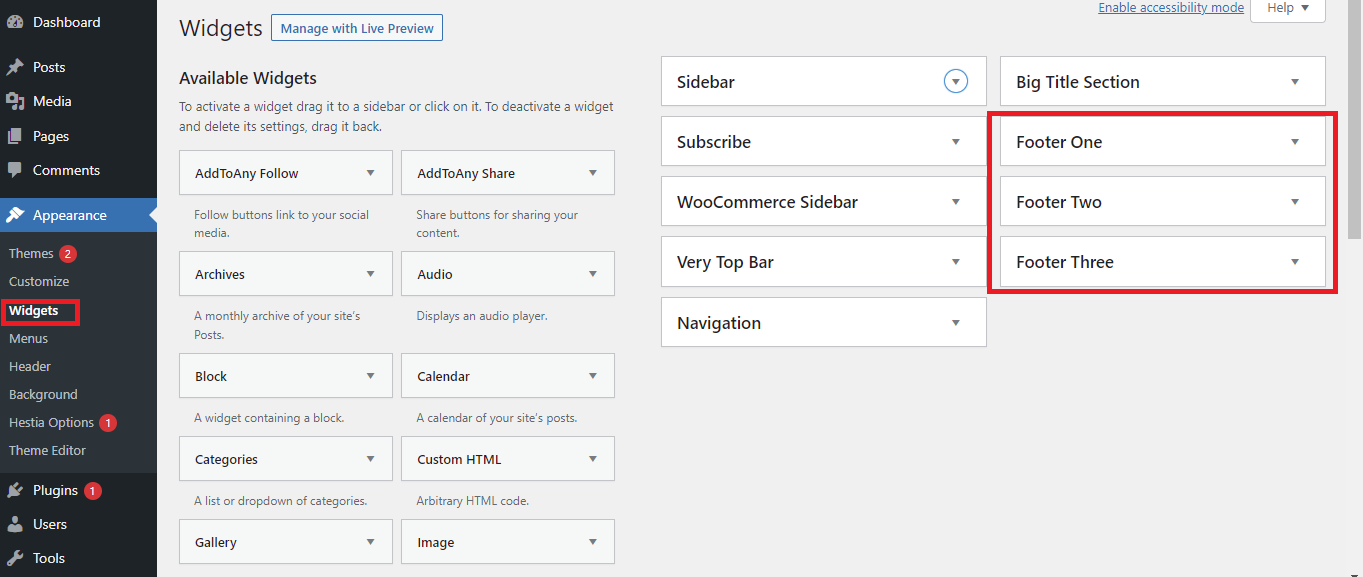
Step 1: First of all, you need to log into your WordPress dashboard menu and go to the Appearance > Widgets page.
After that, you will see a list of widgets that are available for your theme on the left side of the screen. While the available footer positions will be displayed on the right side.
The number of footer areas will depend on the theme you are using. In our case, the footer areas include Footer one, Footer two, Footer three.
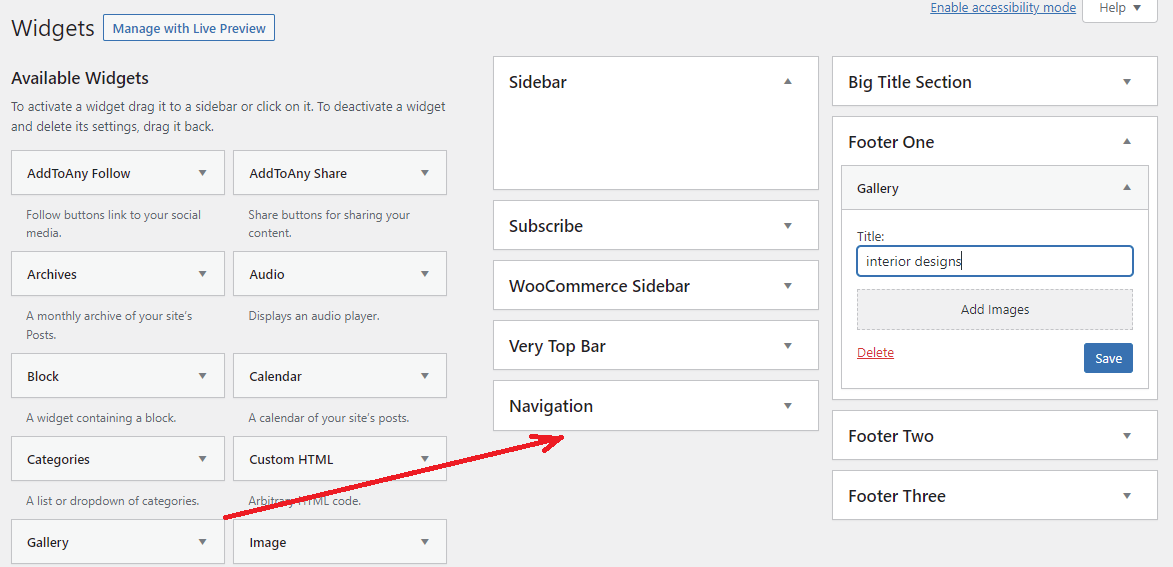
Step 2: To add a widget to your footer, you can drag and drop it over. You can also reorder widgets within a footer by dragging and dropping them.
Once you have modified the settings for each widget and then click on the “Save” button. In contrast, if you want to get rid of any widget, simply click on the “Delete” option displayed under the widget.
Alternatively, you can add widgets to the footer of your WordPress site, you can go to the Appearance > Customize page. From there, click on the “Widgets” option from a list of the options menu.
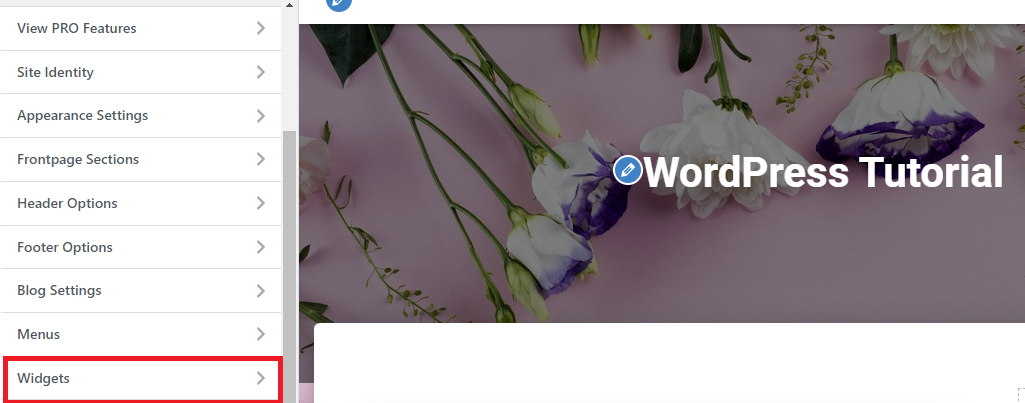
Then choose the footer area that you would like to add widgets into it. Next, you need to click on the “Add a widget” button, this will open a widgets panel next to this button. You can add a lot of widgets according to your purposes and similarly you can rearrange widgets by dragging and dropping them.
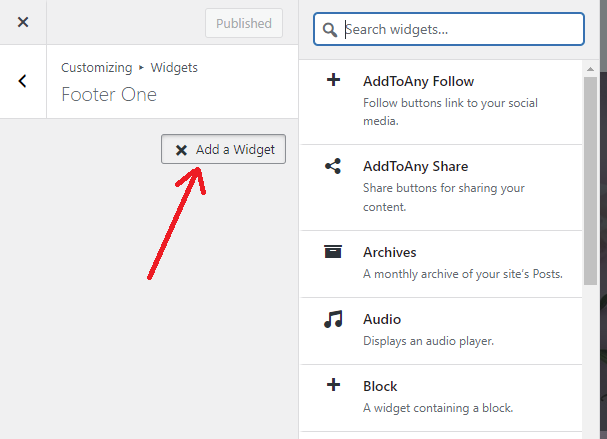
When you are done, click on the “Publish” button.
What to add to your WordPress footer?
Add links to the WordPress footer
To create a WordPress footer with a lot of useful information. This is also an important thing that you need to add to the footer area. Generally, most websites display links to their about, contact, team members, press, and other pages.
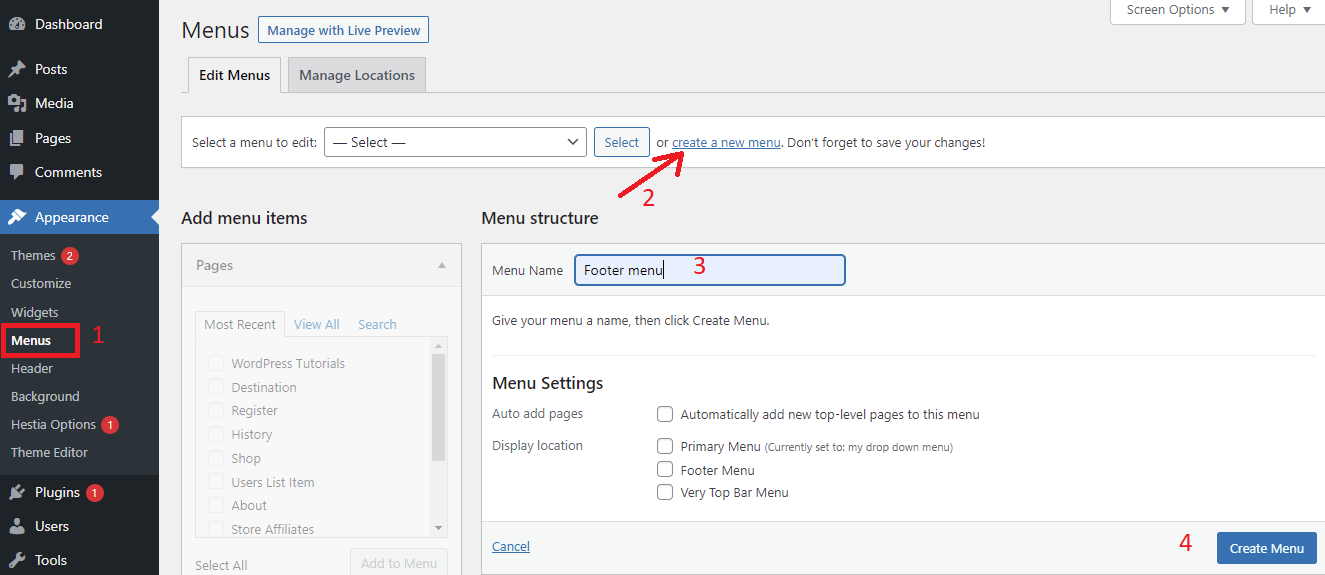
To add a list of links to your footer widget, you need to visit the Appearance > Menus page and click on the “create new menu” link.
Then, give your new menu a name and click on the “Create Menu” button.
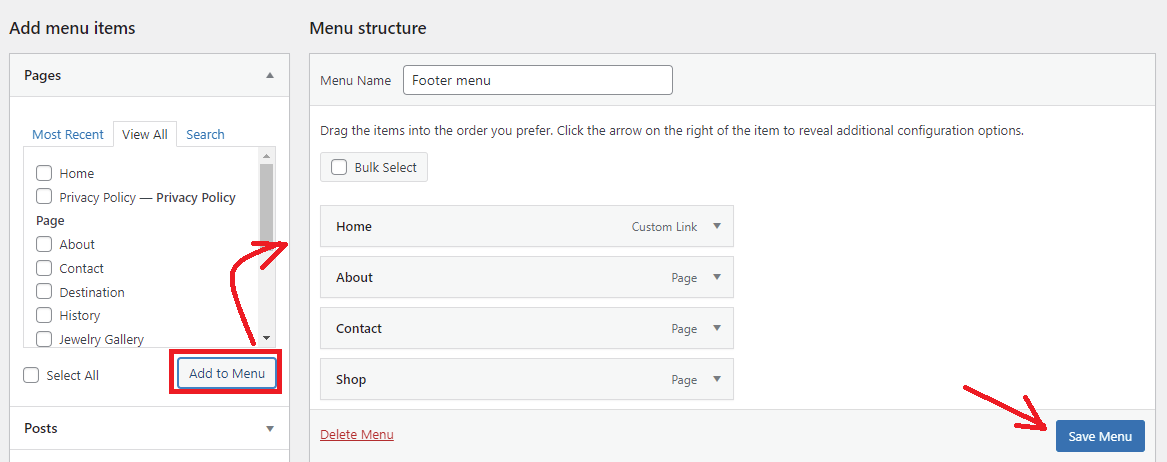
Next, select the items that you would like to add to the menu from all items in the left column and click on the “Add to Menu” button. Once you are done, don’t forget to click on the “Save Menu” button. For more instruction, you can access our tutorial on how to add a navigation menu in WordPress.
After creating the menu, now it’s time to display it in the footer area of your website. You need to navigate to the Appearance >Widgets page and add the “Navigation Menu” widget to your footer area.
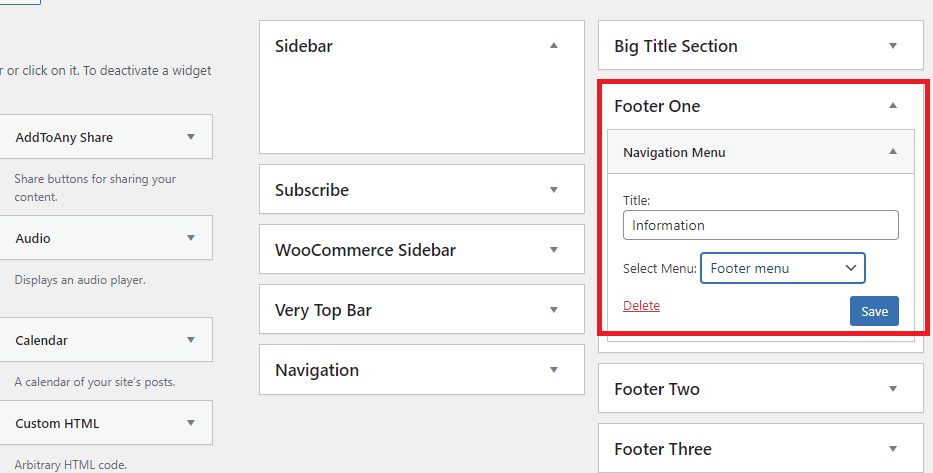
After that, you can choose the footer menu from your created menus by clicking on the drop-down menu. Then click on the “Save” button.
Now you can visit our website to see how it looks.

Add privacy policy page in WordPress footer
WordPress allows you to display a privacy policy page on your site in order to comply with the GDPR and privacy-related laws in various countries.
First of all, you need to go to Settings > Privacy page. From here, you will see that there is a Privacy Policy page draft created by WordPress.
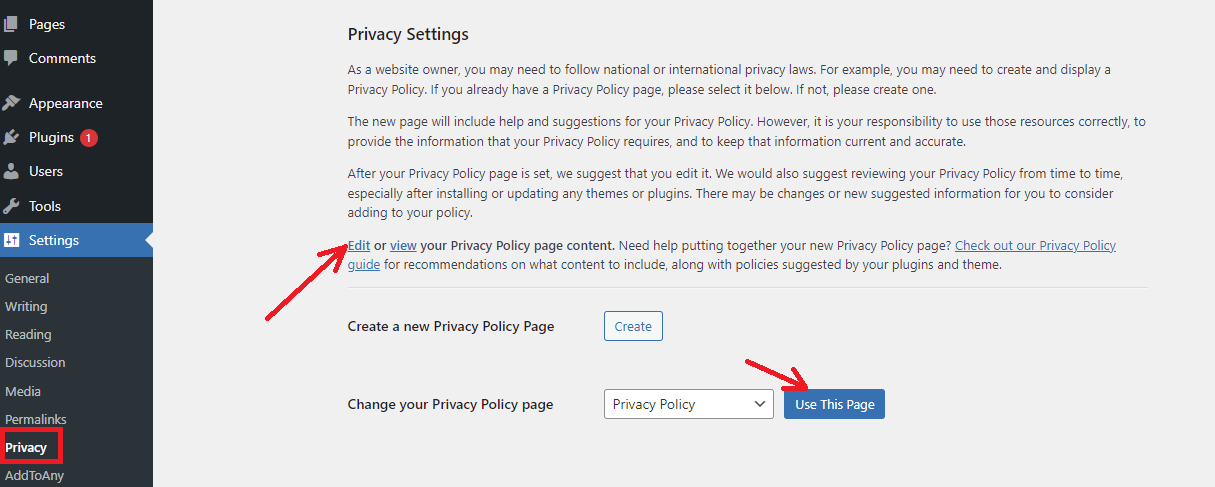
You can click on the “Use this page” button to use the default Privacy Policy or click on the “Create” to create a new one.
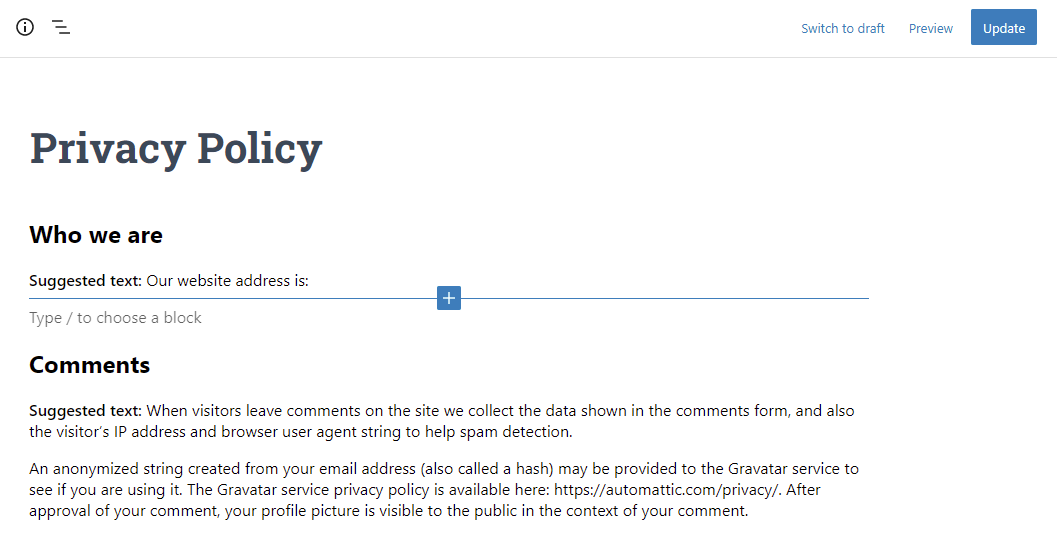
If you want to edit that page to add more information about your privacy policy, simply click on the “Edit” link.
Once you are completed, you can add the privacy policy page to your footer navigation menu. This process will be similar to the process of adding links to the footer(see above).
In addition, you can visit our detailed guide on how to create a privacy policy in WordPress
Add Copyright Date in WordPress footer
WordPress enables you to add a copyright date by adding the text in your theme settings.
To do that, you need to visit the Appearance > Customize page and select the “Footer option” in the left panel.
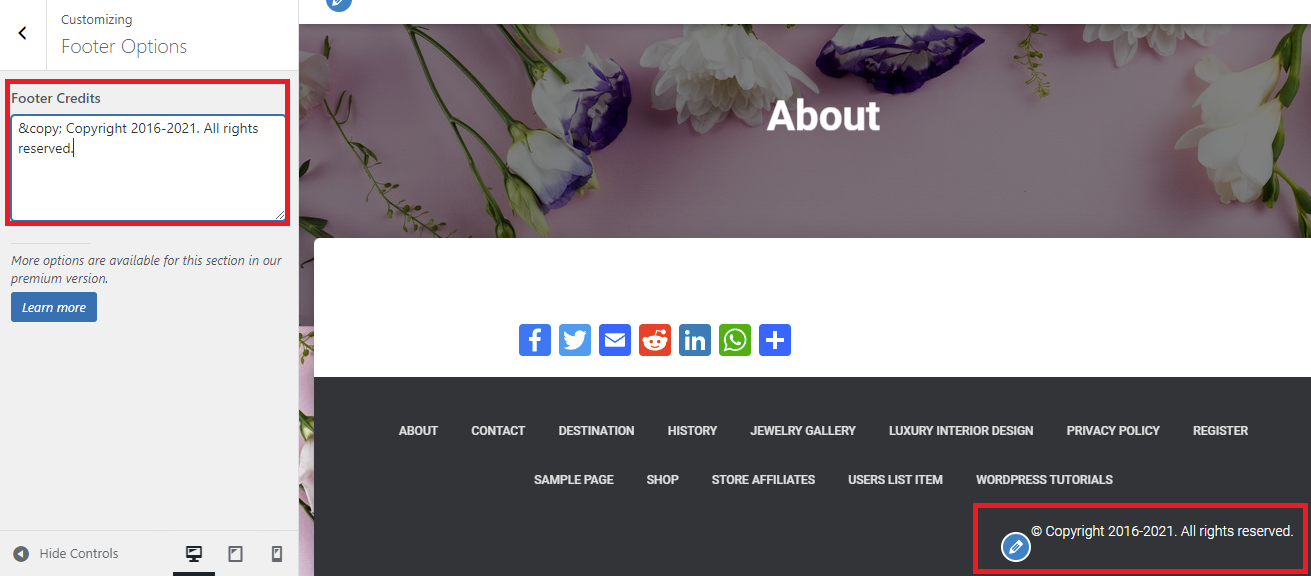
You can display the copyright symbol by adding your text to the given space. For example:
© Copyright 2016-2021. All rights reserved.
Remember to click on the Publish button to update your theme changes.
For more help, visit our detailed instructions on how to add a dynamic copyright date.
Remove “Proudly powered by WordPress” links
After installing any WordPress theme, you usually see the “Proudly powered by WordPress” link other similar links in the footer area of your website. And these links may bother a lot of people because it makes their website look less professional. Luckily, you can remove these links easily.
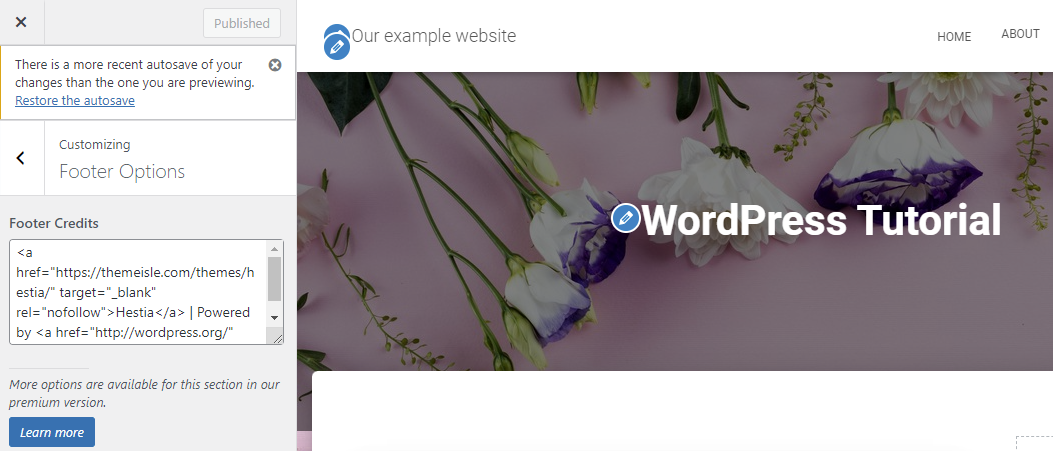
Firstly, you need to go to the Appearance > Customize page. Then choose “Footer Options” from the menu panel. From here, you can remove those links in the Footer credits box.
Nevertheless, some themes may select to hard-code the links in the theme and don’t have any option to remove it manually. In that case, you can edit the footer.php file in your theme to remove those links.
Add Instagram Feed in WordPress Footer
If you want to attract more customers to visit your Instagram content, it is necessary to display recent Instagram feeds in your wordpress footer.
To do that, you need to install and activate the “Smash Balloon Social Photo Feed” plugin. This is one of the prevalent and effective WordPress Instagram Plugins.
After the plugin has been installed, let’s navigate Instagram Feed > Settings page and click on the “Connect an Instagram account button”
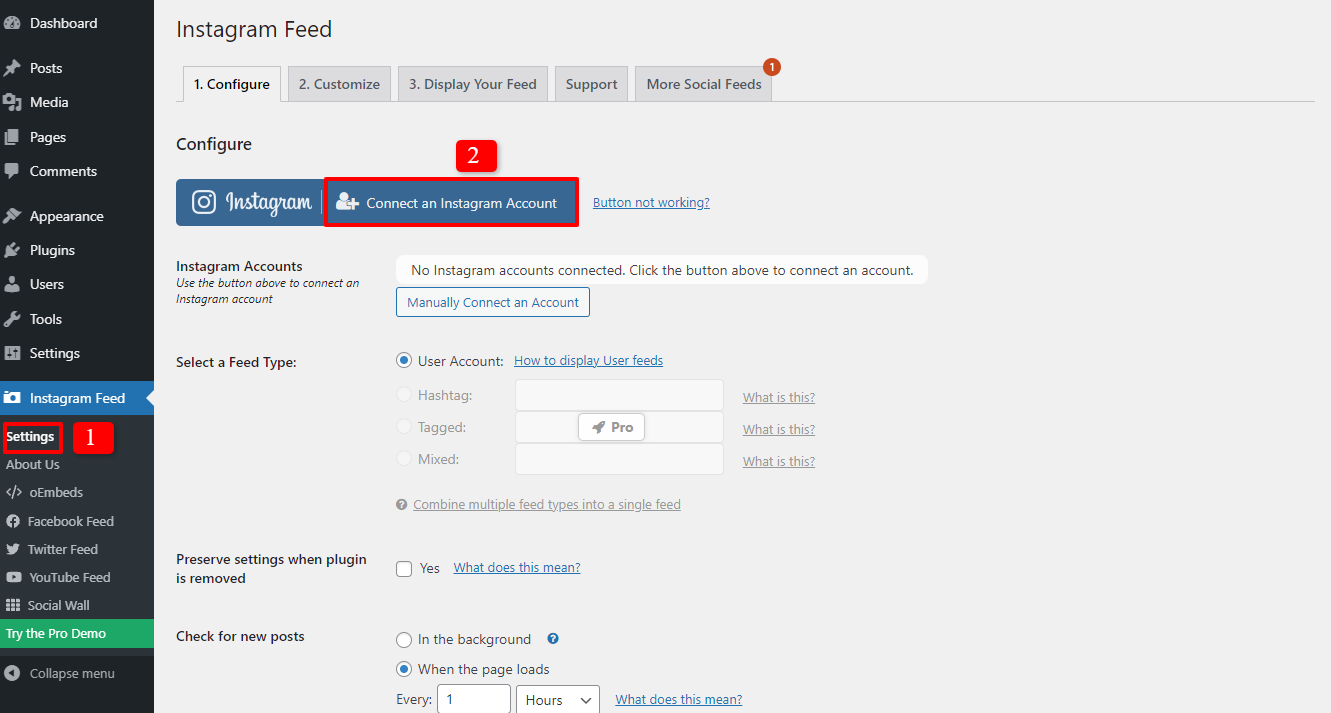
Then, you can move to the next steps by following the on-screen instructions to connect your Instagram account to your WordPress site.
Once you are done, you can go to the Appearance > Widgets page and easily add the Instagram feed widget to your footer sidebar. Don’t forget to click on the “Save” button.
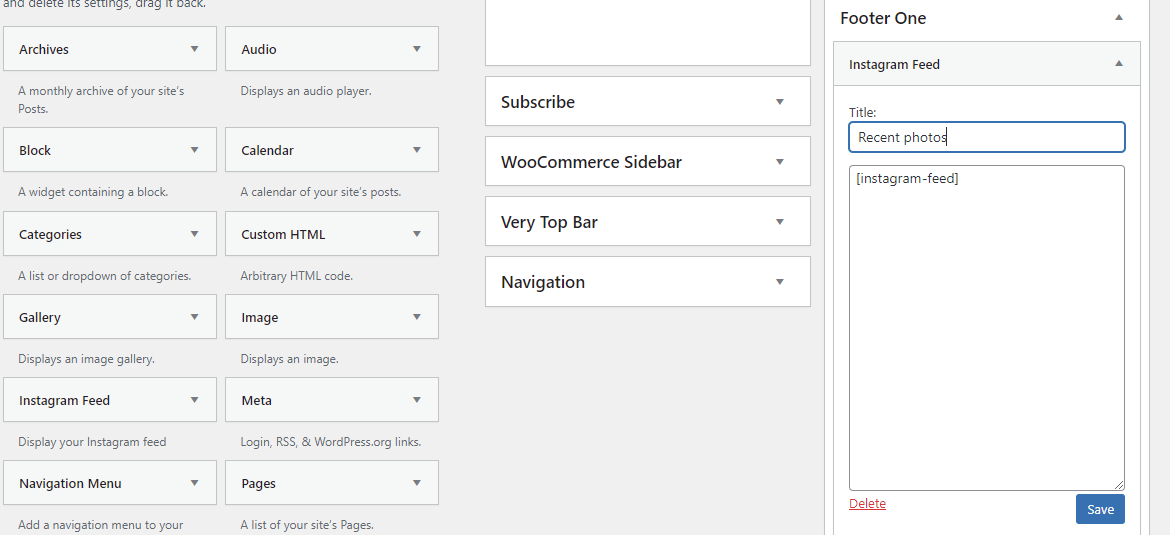
Now, you can visit your website to view your Instagram feed in the footer.

Do you want to view our detailed guide, let’s access our article on How to embed Instagram in the WordPress site.
Add Social Buttons in WordPress footer
Displaying social buttons on your footer is one of the most effective ways to boost your site’s traffic as well as increase backlinks to your website.
To add social buttons in the WordPress footer, you need to install and activate the “Social Icons Widget & Block by WPZOOM” Plugin.
After installing the plugin, simply go to the Appearance > Widgets page. Then, find and add the Social Icons widget to your footer widget area.
The plugin comes with a wide range of useful options such as icon styles, button types, and more. So now you can customize the widget’s settings to suit your preference.
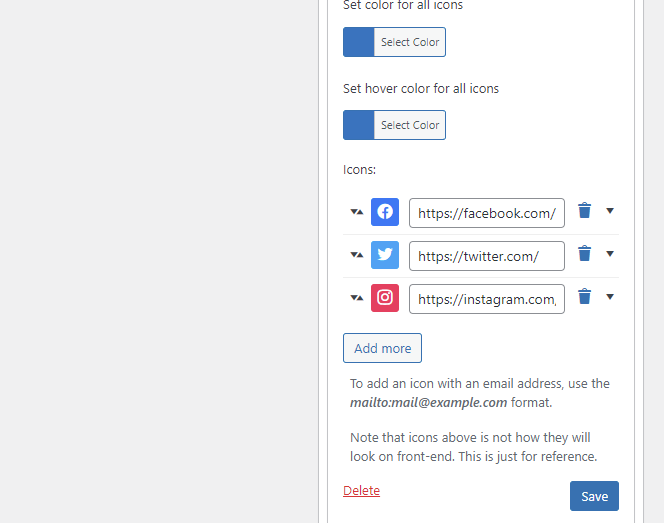
Once you are finished, don’t forget to click on the “Save” button.

Add a phone number in WordPress Footer
Providing a phone number in your WordPress footer can help your customers quickly contact you in some important situations. In addition, it is also an effective way to communicate with potential customers.
There are several ways to add your phone number to WordPress. We highly recommend using WP Call Button plugin for your website. Because it is a free and easy-to-use tool that allows you to create a call button with a few clicks.
Once the plugin has been installed yet, let’s go to the Settings > WP Call Button page to configure the plugin’s settings.
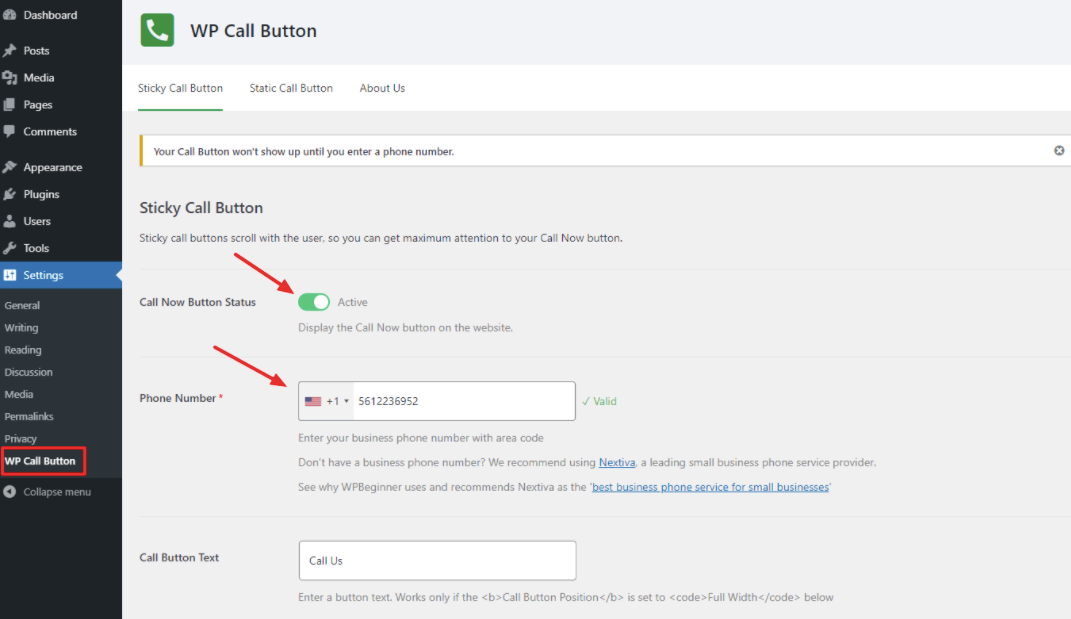
First of all, you need to turn on the “Call Now Button Status” to active. After that, let’s add your phone number and select the position where you would like to display the button. Then, don’t forget to click on the “Save Changes” button.

Do you want to see our full tutorial to add a call button? Please access our guide on how to add a click-to-call button in WordPress to get more methods.
Add contact form in WordPress footer
This is also another convenient way that allows your customers to communicate with you easily by filling out a contact form.
You can use the Ninja Form plugin. This is one of the best WordPress contact form plugins that enables you to add a contact form in any area on your website.
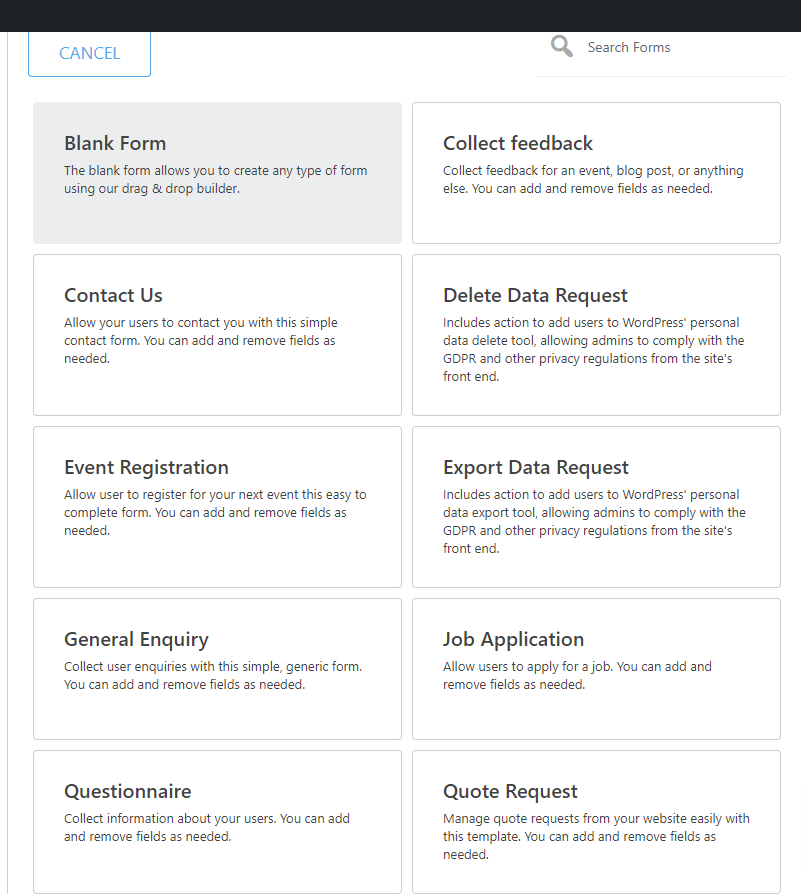
Similarly, after installing and activating this plugin. You just go to Ninja Forms > Dashboard > Add New to choose the types of form which you want to create.
You can start with a blank form or choose from pre-created templates and then modify it to suit your demands.
Next, the Ninja form will load the form builder with a list of contact form fields displayed in the right column. From here, you can add new fields from the right column. In addition, you can hover over an individual field to edit or delete it.
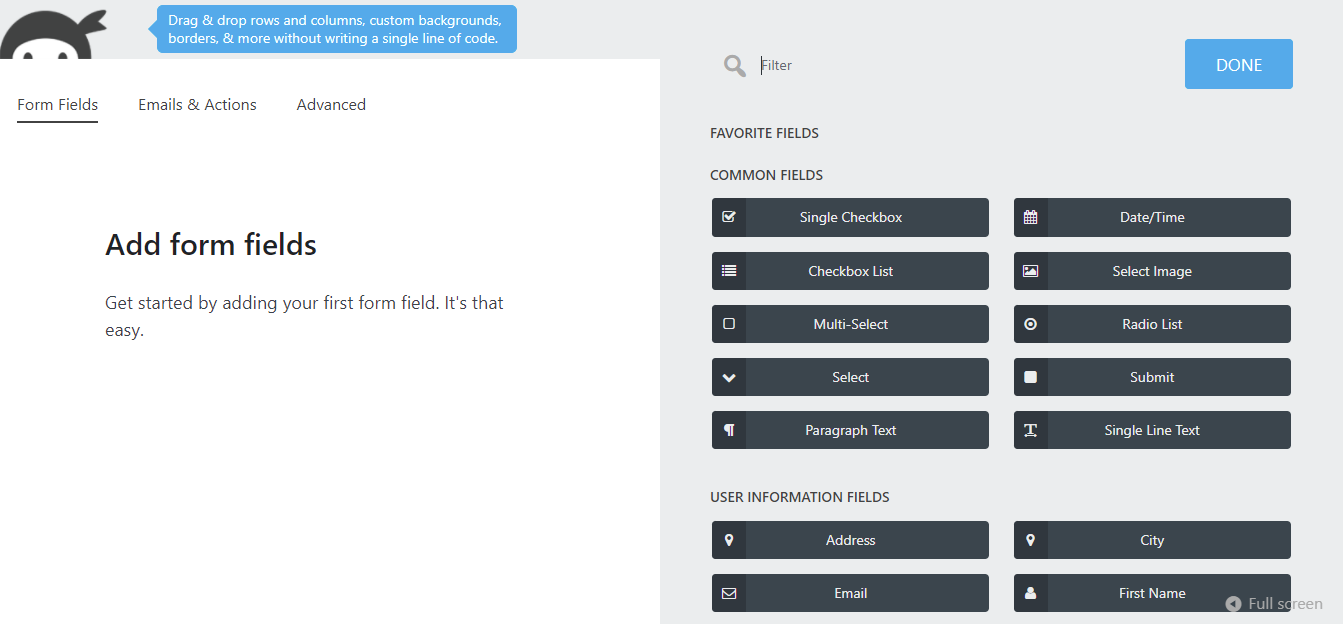
Once you are finished editing, click on the Publish button to save your form and then click on the “Close” button to exit the form builder.
After that, you need to navigate to the Appearance >Widgets page and add the Ninja Form widget to your footer position to create a WordPress footer with excellent support. Next, choose the contact form from the drop-down menu and click on the “Save” button.
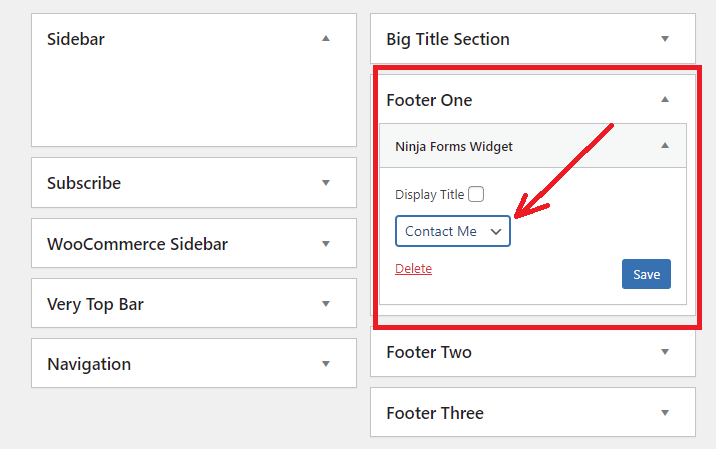
Now, you can visit your site and scroll down to the footer to view the result.

If you want to get a full guide, see our detailed tutorial on how to create a contact form in WordPress with various methods.
Add a sticky footer bar in WordPress
Footer is a good area to display special offers or notifications. You can add a sticky floating footer bar to show impressive offers that will remain on your footer when users scroll your website.
To do it, you can use a free WordPress plugin called WPFront Notification Bar. This is a simple and easy-to-use plugin that allows you to display a notification about a promotion or news without spending any cost.
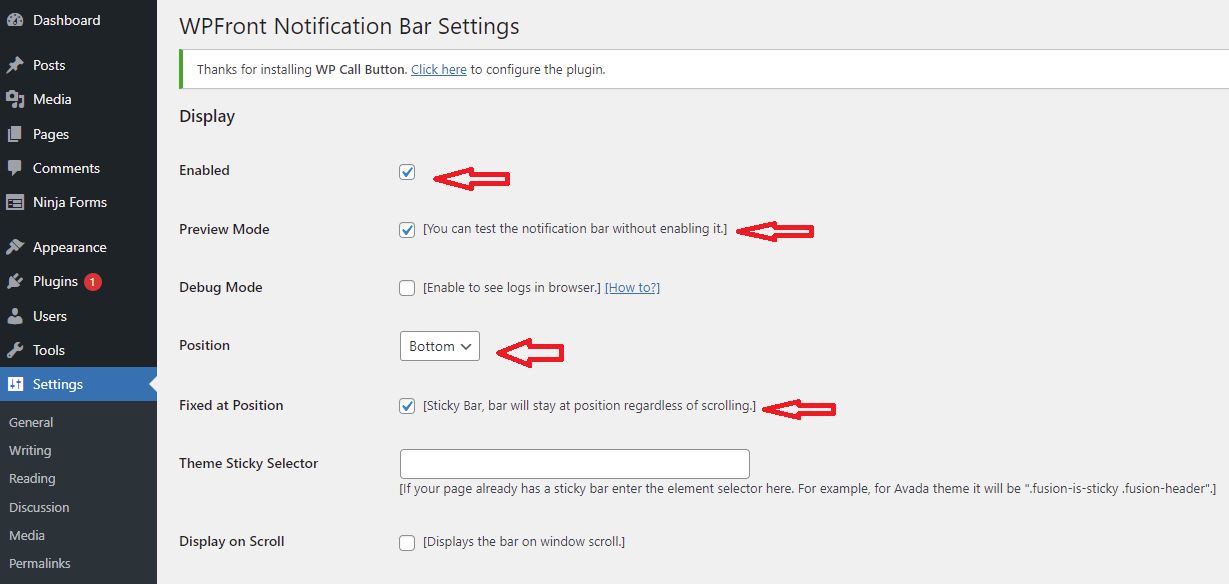
After activation, you need to go to the Settings > Notification Bar page to customize the plugin’s settings.
On the Settings page, you need to check mark Enabled, Preview mode, and Fixed at Position option. In addition, select Bottom as a position for your sticky footer bar.
Moreover, scroll down the screen, you will have more options such as display close button, display reopen button, add message text, and much more. Additionally, it allows you to customize color options to match your theme as well as make your notifications more outstanding.
Once you are pleased with your selection, don’t forget to click on the “Save Changes” button at the bottom of the settings page.
Now, it’s time to visit your site to view your sticky floating footer bar in action.
Add code in WordPress footer
Sometimes, you want to add some code snippets to your WordPress website’s footer area. Although you can add them by editing your theme file directly and pasting the code in the footer.php template, they can disappear if you change the theme or update it.
Therefore, using the support of the Insert Headers and Footers WordPress plugin is the best way to create a WordPress footer in this case.
Upon activation, you need to go to the Setting > Insert Headers and Footers page. At here, you can paste your code snippet in the “Scripts in Footer” box.
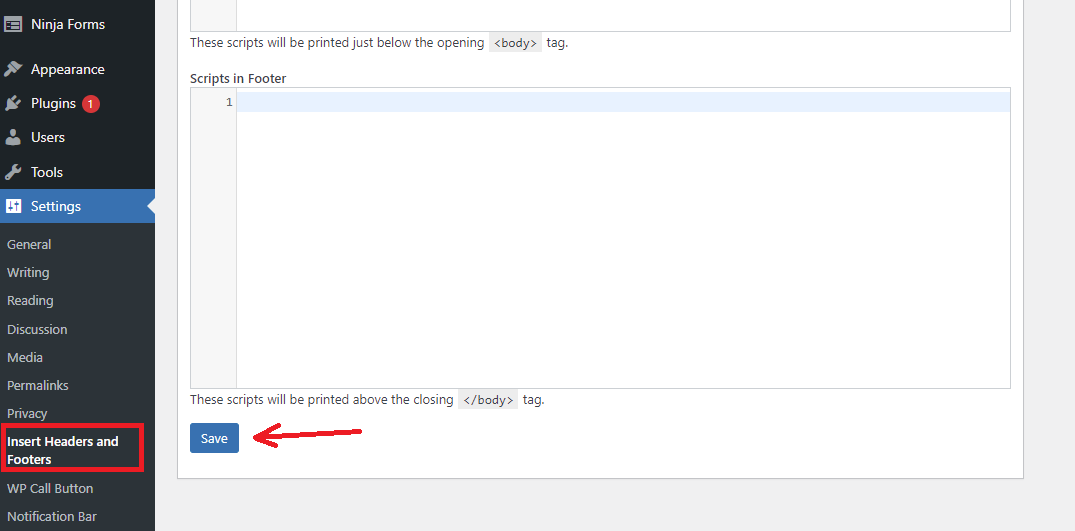
Remember to click on the “Save” button in advance of exiting the Insert Headers and Footers page.
The bottom lines
Congratulations, if you’ve read this far, you’ve mastered all steps to create a WordPress footer. Hopefully, through this post, you learned which things that you need to add to your WordPress footer. If you have any questions or queries about provided methods, please let us know by leaving a comment below.
Last but not least, you can drop by our Free WordPress themes to explore a massive of beautiful, responsive themes and templates. They are completely suitable for multiple topics.

- Resolving the “Class JFactory Not Found” Error in Joomla When Upgrading to J6 - December 19, 2025
- The Utility Of VPNs For Site Authors And Admins - November 24, 2025
- Joomla! 6: What’s New and How to Upgrade from Joomla! 5 - October 23, 2025


Recent Comments